Docs
Author:
Fluent Commerce
Changed on:
5 Sept 2025
`fc.mystique.manifest.oms` setting`fc.mystique.manifest.oms.fragment.ordermanagement` with `fc.mystique.manifest.oms.fragment.ordermanagement.mixedbasket`.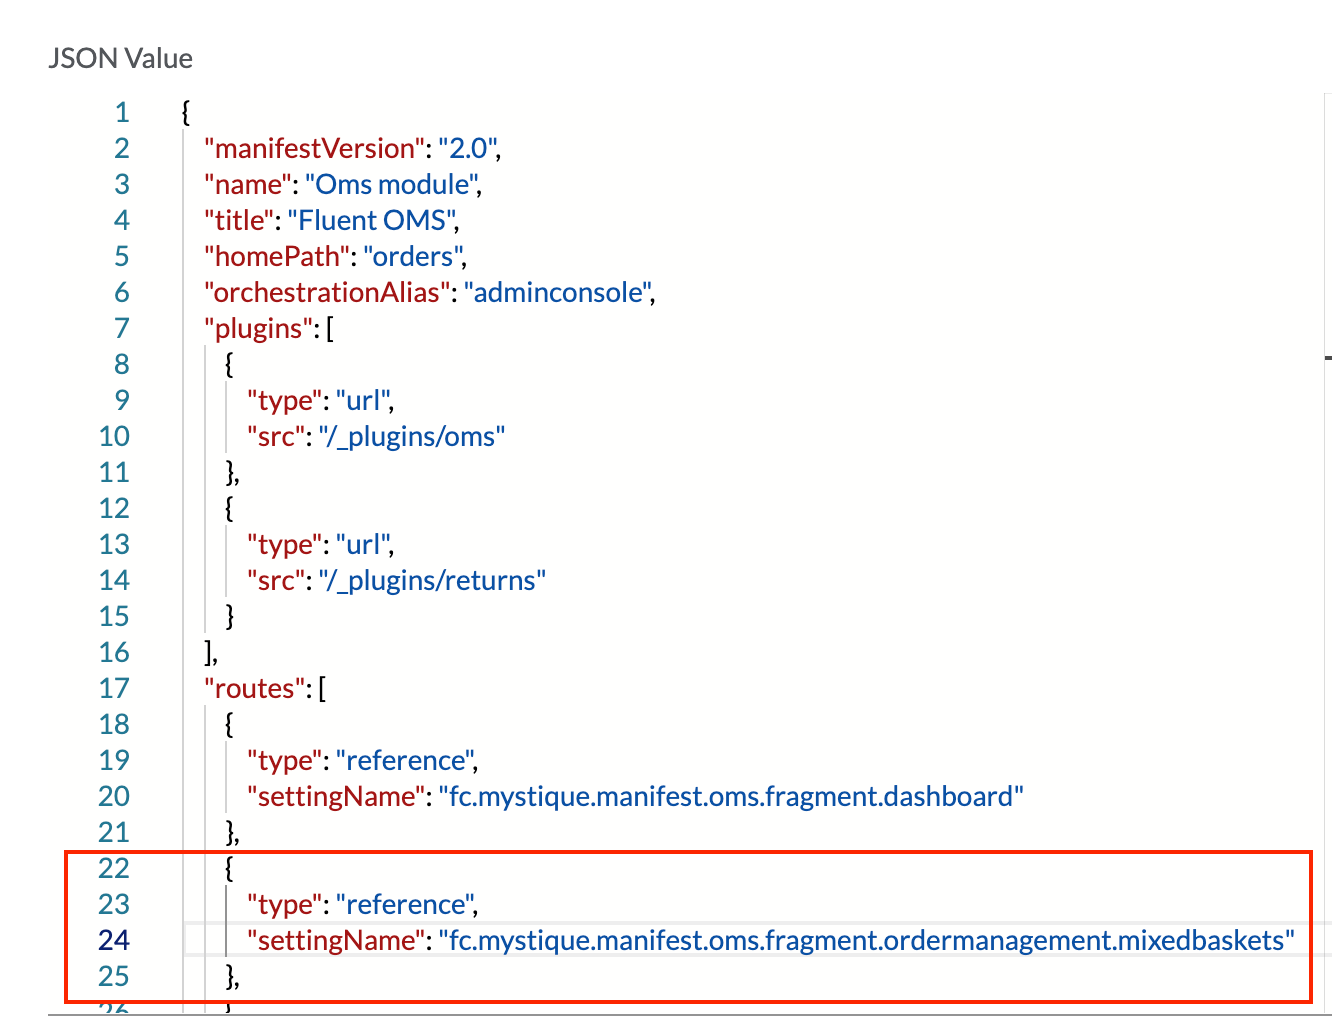
`fc.mystique.manifest.oms.fragment.ordermanagement.mixedbasket` on ACCOUNT level using Mixed Baskets baseline manifest and customise it according to your needs.A detailed guide on how to configure Fluent OMS is available here.`fc.mystique.order.itemDetails.shipment`.Copyright © 2024-2026 Fluent Retail Pty Ltd (trading as Fluent Commerce). Unless otherwise expressly stated in a current written agreement with Fluent Commerce or any of its affiliates or on any single page of the docs.fluentcommerce.com site, use of the materials on this site is strictly limited to viewing by individuals over 18 years old for legitimate commercially appropriate reasons; and any downloading, copying or other actions or uses of any kind or by any means of the materials on this site, including by artificial intelligence tools, is strictly prohibited. All other rights reserved.