Enable Store Associates to select Fulfilments to add to Waves
How-to Guide
Author:
Esma Tuzovic
Changed on:
5 Sept 2025
Key Points
- This guide explains how to enable Store Associates to select Fulfillments to add to a Wave in Fluent Store.
- Once this capability is enabled in Fluent Store, Store Associates can filter and select Fulfilments (including by custom attributes) to be added to a new Wave.
- This guide will require knowledge of how to configure your manifest and workflow. If you wish to extend this functionality even further, you'll need to be able to compose rules.
Prerequisites
Steps
 Video guide for Custom Wave
Who is this guide for?
This guide is designed for Implementers who are enabling Store Associates to select Fulfilments to add to Waves.
Install the latest Fulfilment Module
You need to make sure you have the latest Fulfilment Module installed, you will then have access to the
`CreateWaveByFulfillmentIds` rule.Adding the CreateWaveByFulfillmentIds rule to the Location workflow
There are two ways to add the CreateWaveByFulfillmentIds rule to the Location workflow:Option 1: Update to version 2.0.2 or above of the Location workflow contained in the Fulfilment ModuleThe following how-to guide Adding a Workflow to your Retailer via API provides instructions on updating a workflow. You can find the locations workflow to upload within the Fulfilment Module zip file.Option 2: Add the rule to a new ruleset in your existing Locations workflowAn example of how to configure the ruleset can be found on the CreateWaveByFulfilmentIds page under the Configuration Example section. Otherwise, you can manually construct a ruleset:
- Add the
`CreateWaveByFulfillmentIds`rule into a new ruleset in the Location workflow. - Add a new user action within the ruleset to enable the Store Associate to navigate to the page where they can select the Fulfilments to add to the Wave
- Add the mandatory attribute
`FULFILMENT_IDS`to ensure the FulfilmentList component renders on the page.
Add a button to navigate to a new page
In the desired location you would like the Store Associate to launch the Wave Creation process from add an action extension of
This step causes a ‘Create Custom Wave' button to now appear on the Waves page of Fluent Store: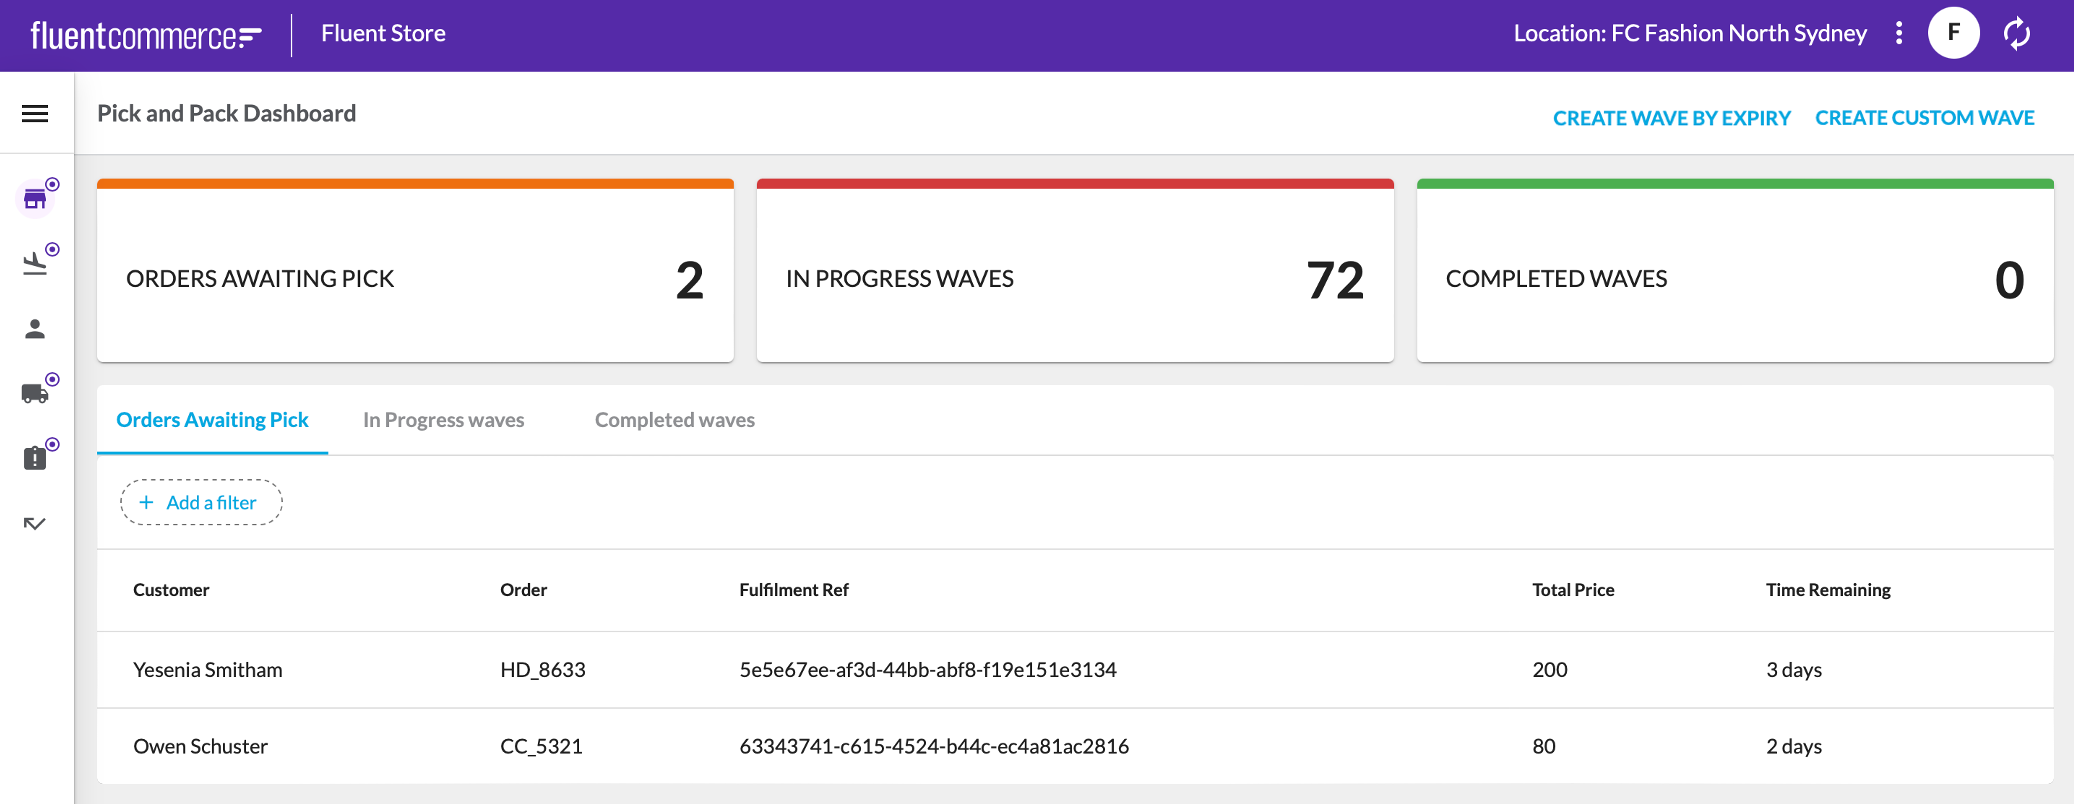 At this stage, when clicking onto the page action, the following screen will not work yet as it has not been configured.
`type` `navigation`. This will cause the create wave button to navigate to the link you specify In the below example, an action extension has been added to the 'CreateWaveByUserSelection' action in the waves manifest that will enable a Store Associate to launch the Wave creation functionality from the dashboard in Fluent Store. In this example, '/waves/create' is specified as the URL suffix that the user will land on.This step causes a ‘Create Custom Wave' button to now appear on the Waves page of Fluent Store:
At this stage, when clicking onto the page action, the following screen will not work yet as it has not been configured.Displaying the Create Wave form
To display the Wave creation form, add a new page in your manifest fragment with the URL you specified earlier. By default, this will be 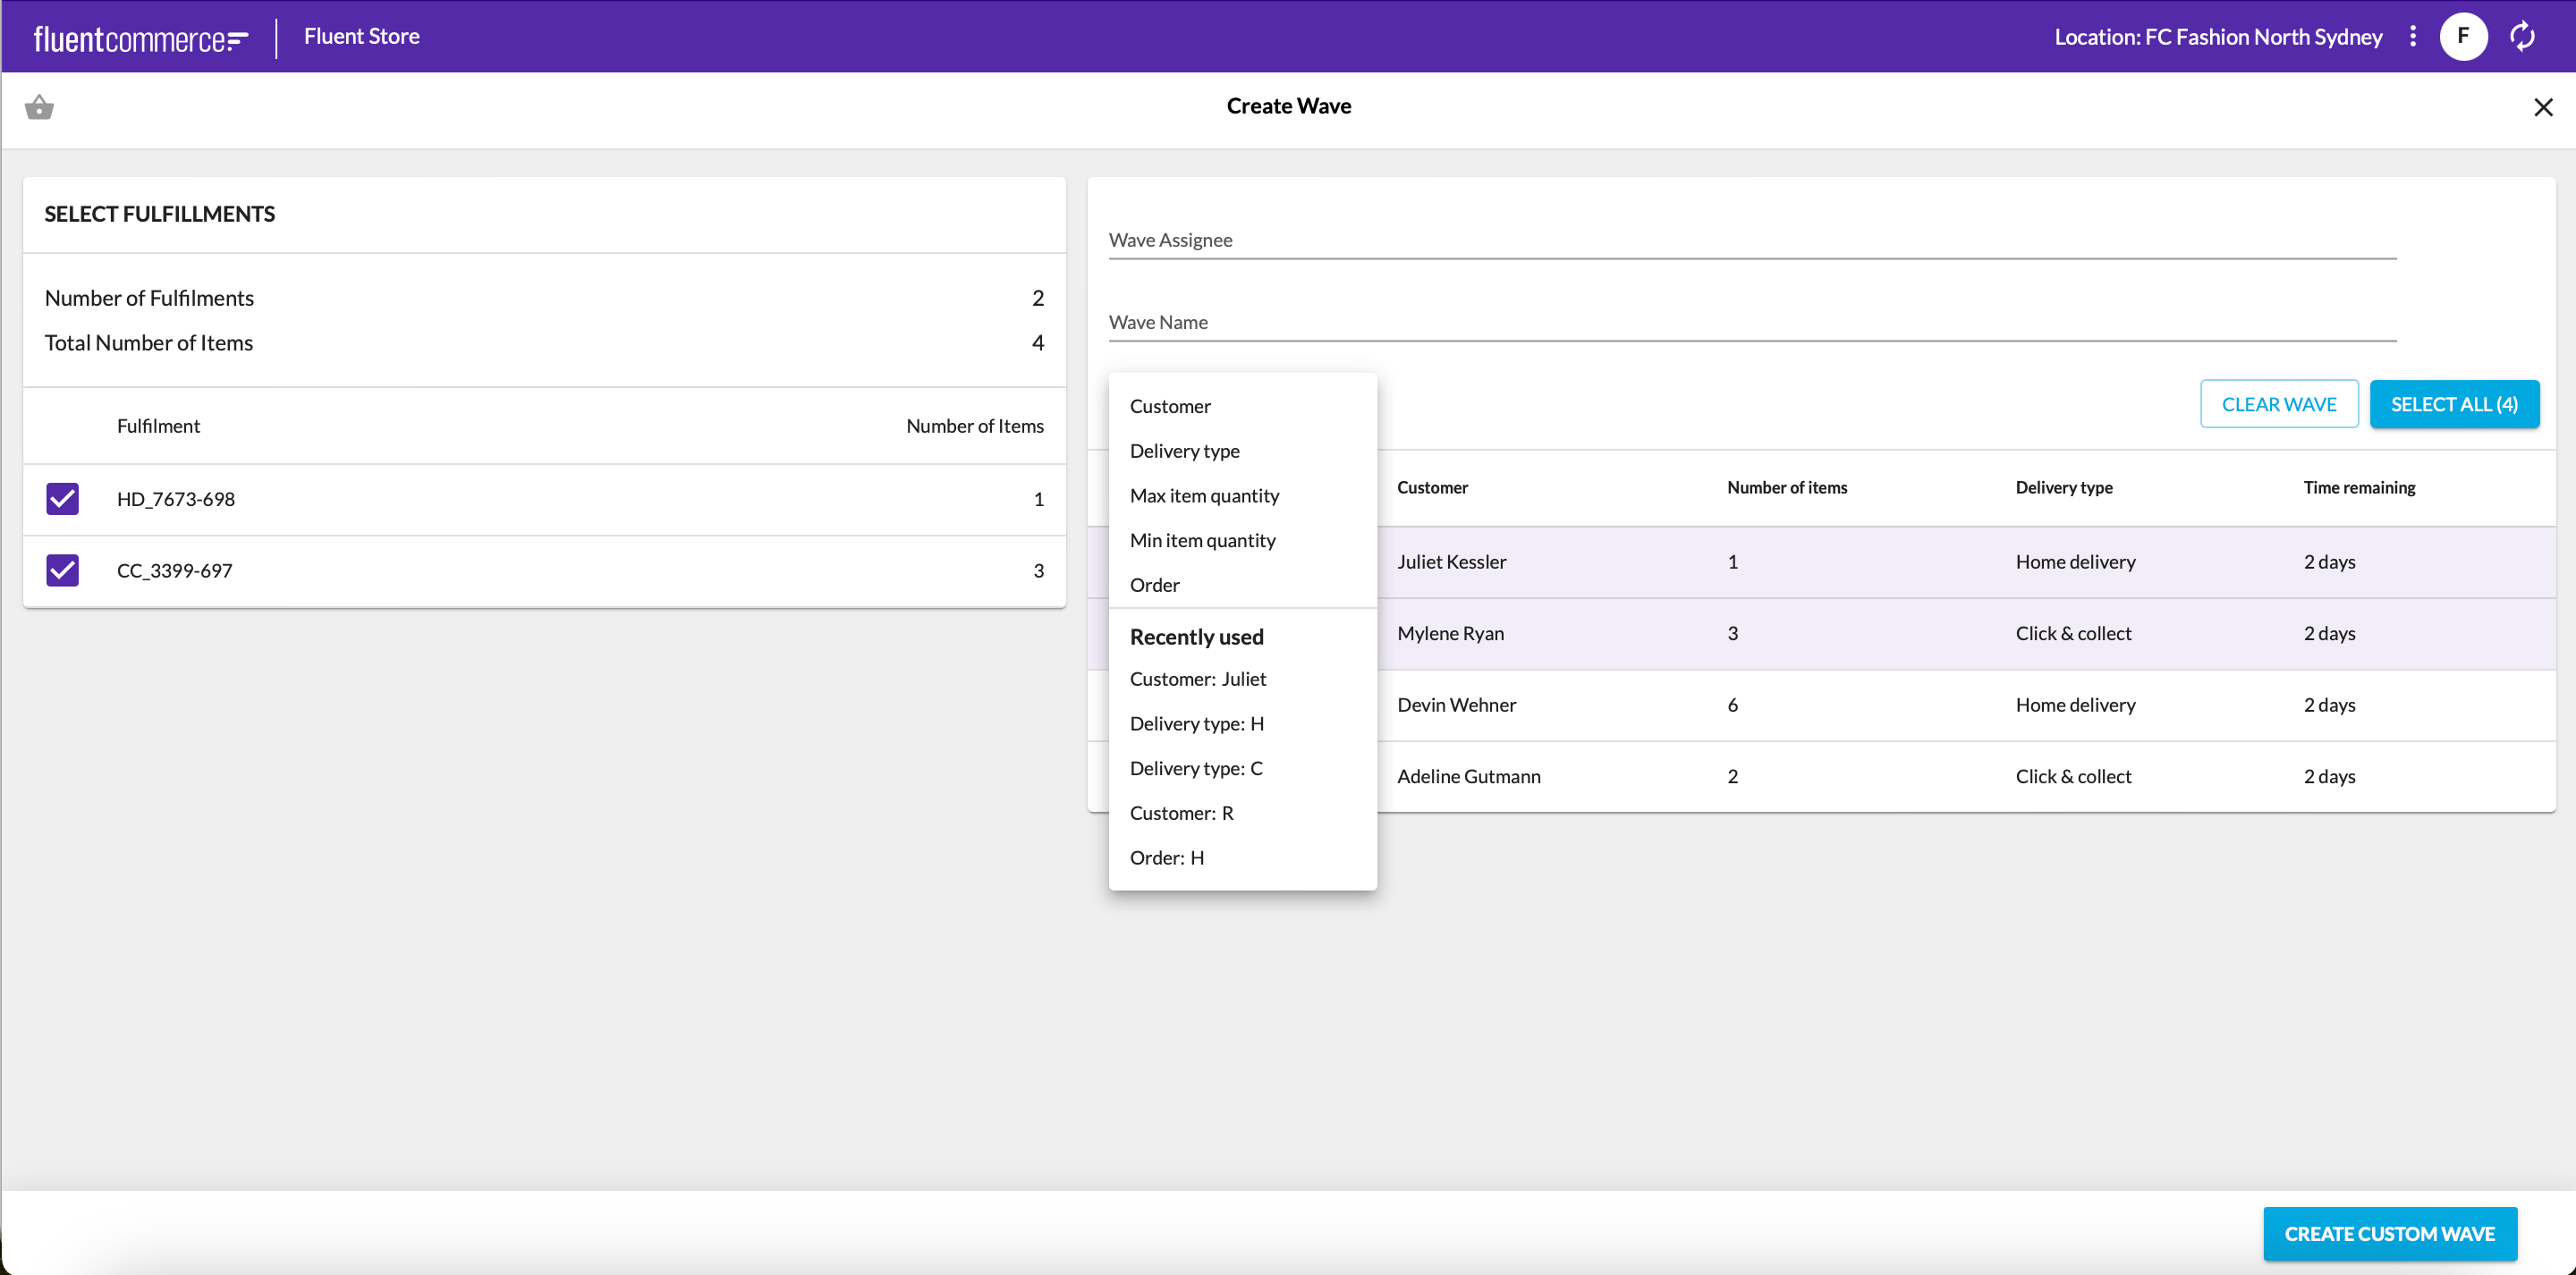

`/waves/create.`In the example below a snippet is provided defining a new page for the Waves manifest fragment. This is a 1-step wizard page that is associated with the URL path '`/waves/create`' - the URL specified in the previous step. In the `actions` prop for this wizard page, an action is specified called '`CreateWaveByUserSelection`' which is the ruleset name defined earlier. This links this Wizard page to the ruleset defined in that step and allows the page to load the relevant fields required by that ruleset.As the Fulfiment List Field Component has a summary, the Wizard page is configured to show a summary alongside the Wizard form field.You can also configure all the properties available in the Wizard Component here. For example, you can update the width of the Summary.After adding this snippet to the waves manifest fragment, clicking on “Create Custom Wave” will navigate the user to this page:Configuring the setting
For any additional properties, you can extend fc.mystique.fields.fulfilmentlist with more customizable keys. Please refer to this article for detailed information: Fulfilment List Field Component.