Lab 1: Creating Retailers
 Introduction
Starting the Collection Runner
To Open the Collection Runner, select the Collection on the left, and click on the Run button as highlighted below: The Runner window is now also integrated within the main Postman window, and looks like this:
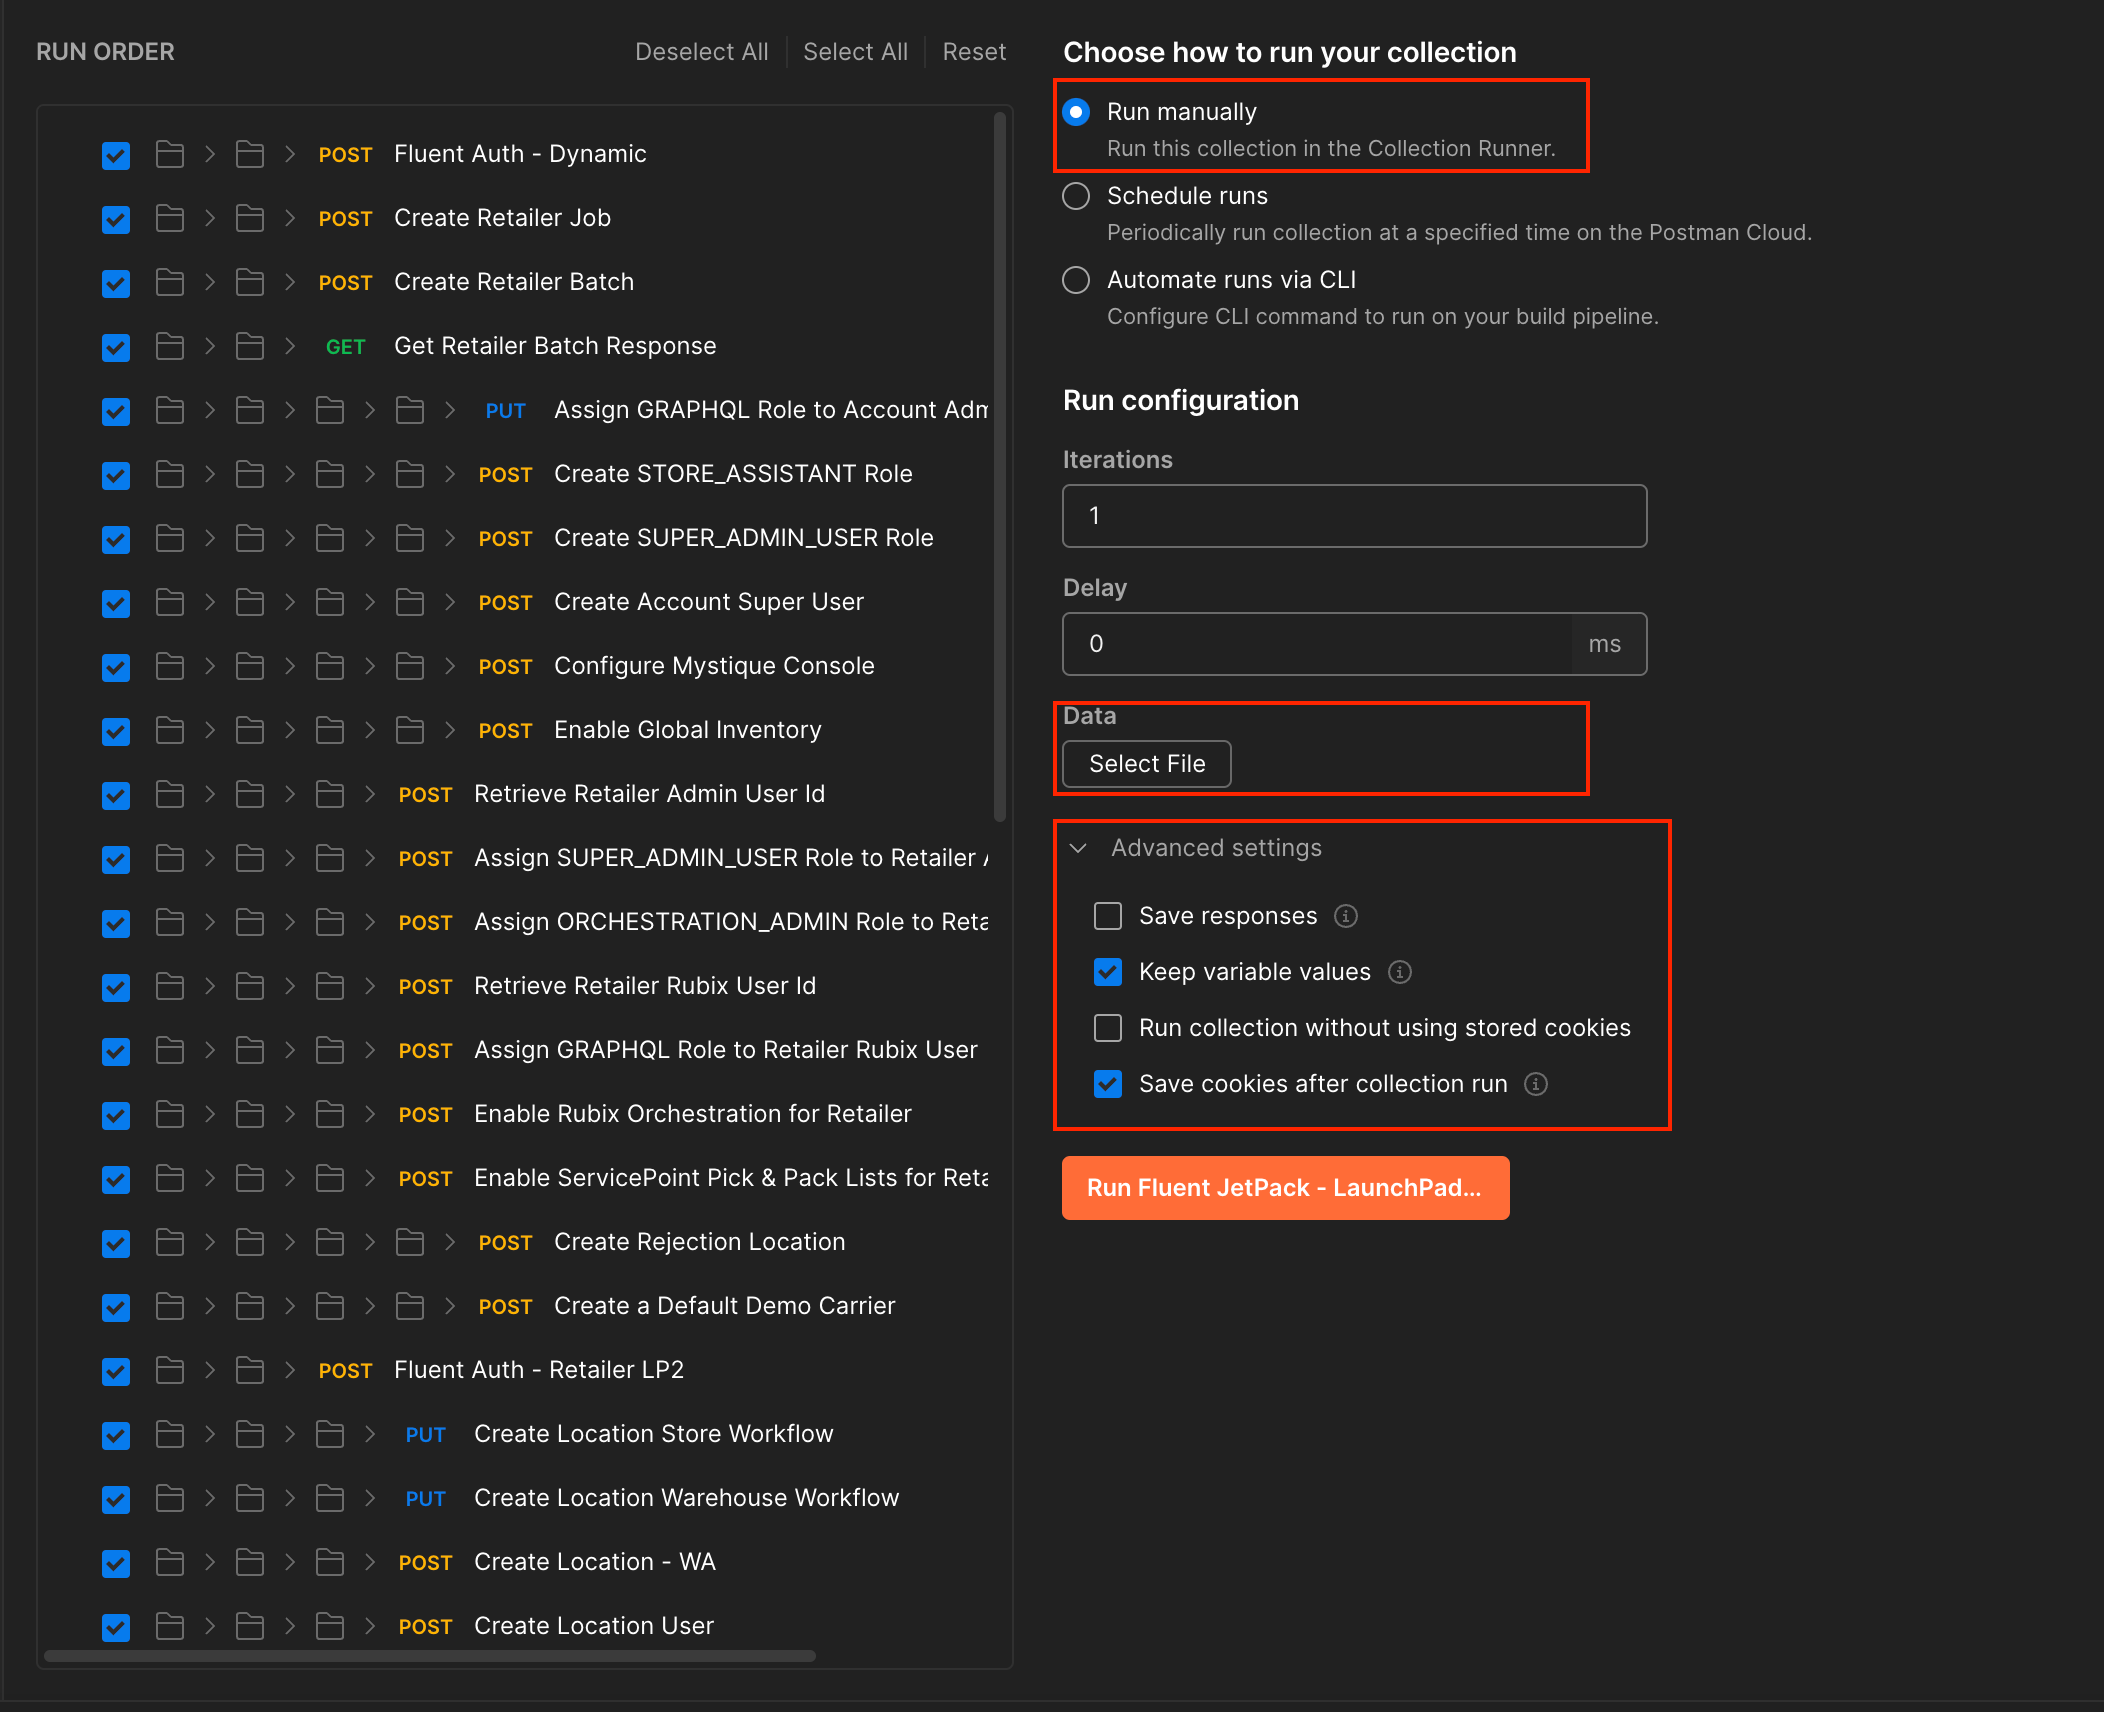
Setting up the Runner
In the right hand panel, click on 'Advanced Settings' if it has not yet been expanded. Ensure that 'Keep variable values' is kept. 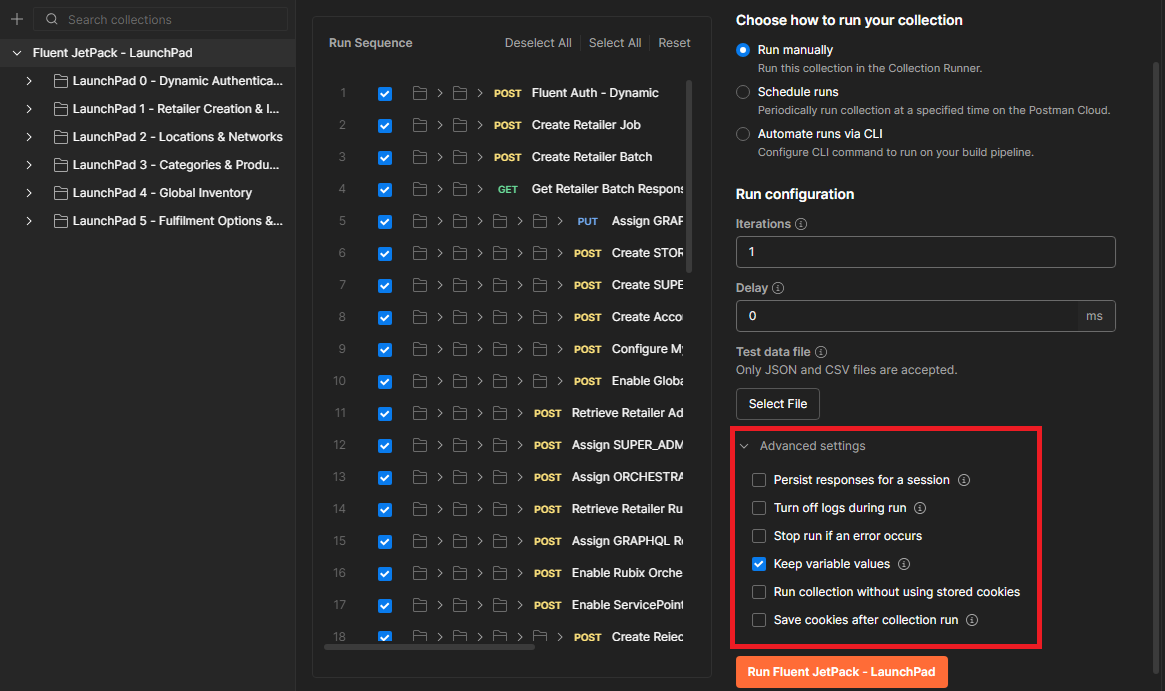
Selecting a data file
Click on the 'Select File' option in the Runner and navigate to the Sample Data folder you downloaded previously. Select the 'LaunchPad 1 - Retailers.csv' file and upload it to the workspace.
Running the retailer data
Click the orange Run button. The process may take a few minutes to complete. Ensure that there are no errors in the console logs.
Logging into the web app
Click on the first button next to the environment selector. You should see new variables in the list, such as
 `fluent.retailer`. Look for a variable that says `fluent.retailer.fc_fashion.user.username` and `fluent.retailer.fc_fashion.user.password`. These will be your credentials to log into the web app. Access the web app at https://< ACCOUNTID>.sandbox.console.fluentretail.com/#/orders and use your fashion retailer credentials to access the fashion retailer account. You can log into the sports retailer account by accessing the same link in an incognito window or a separate browser.
 Lab 2: Creating Locations
Video
Running the location data
Return to the Runner by selecting 'New Run' and replace the Retailers file with the Locations file. Click upload to Workspace. Once the file is loaded, press the Run button to create location data.
Checking location data has been loaded
Return to the sandbox environment and refresh the page. Locations should now be populated under Stores & Fulfillment for both fashion and sports retailers. These locations should all be ACTIVE.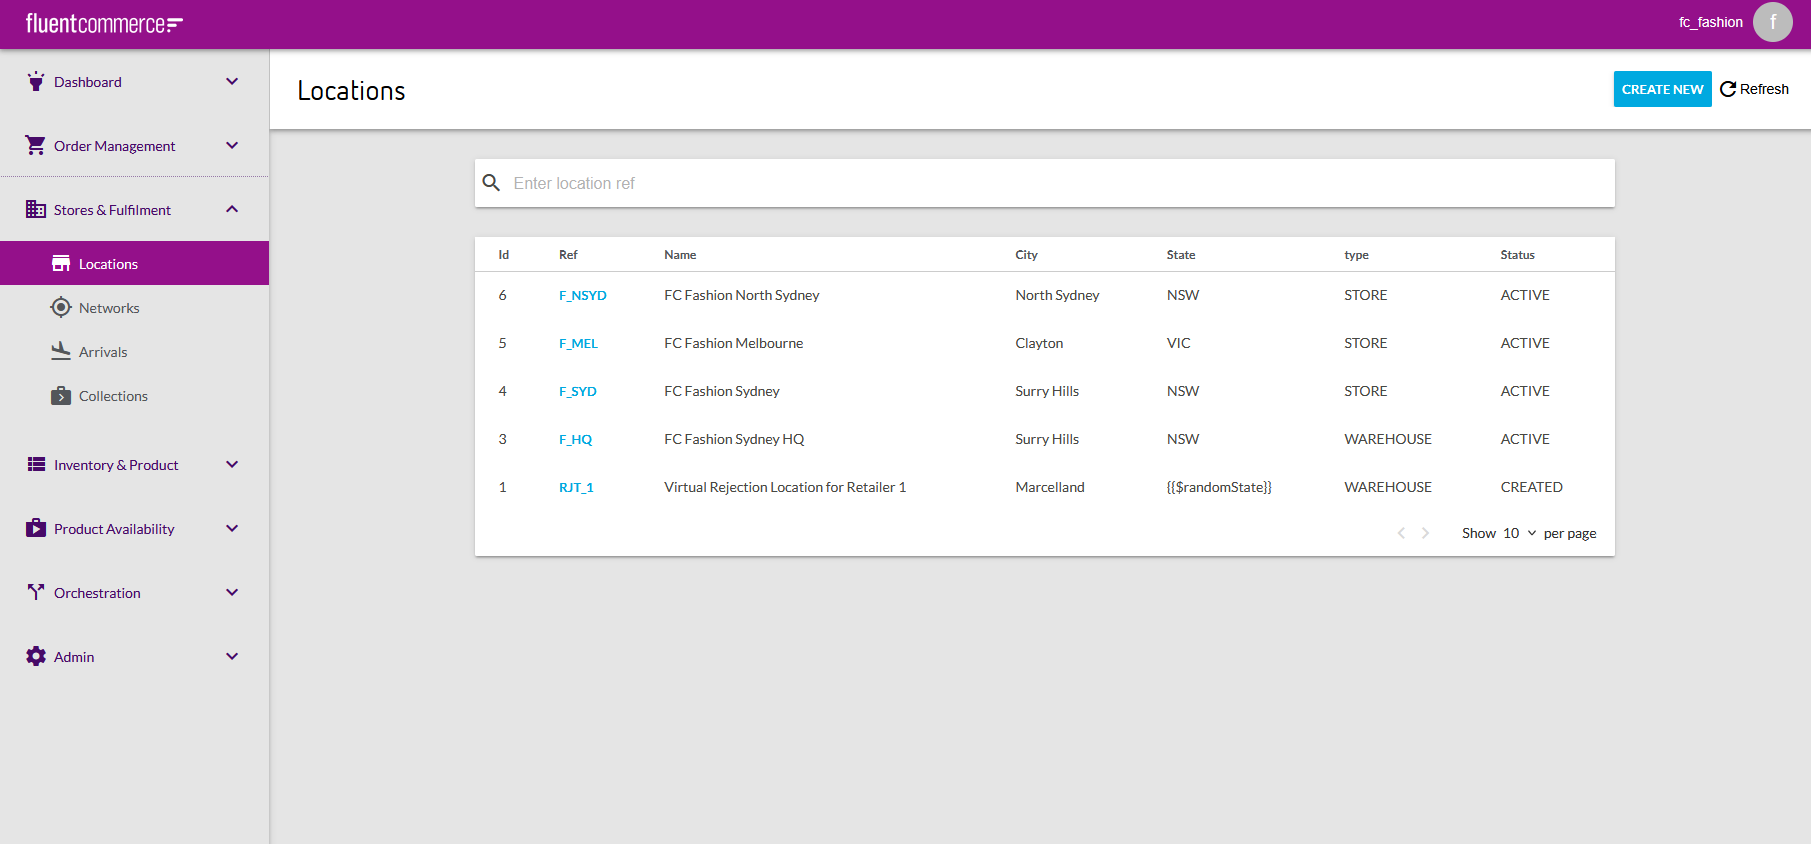
Checking Orchestration
Navigate to the Orchestration panel on the left hand side. There should be two workflows created. You can click into these to explore how workflows appear in Fluent.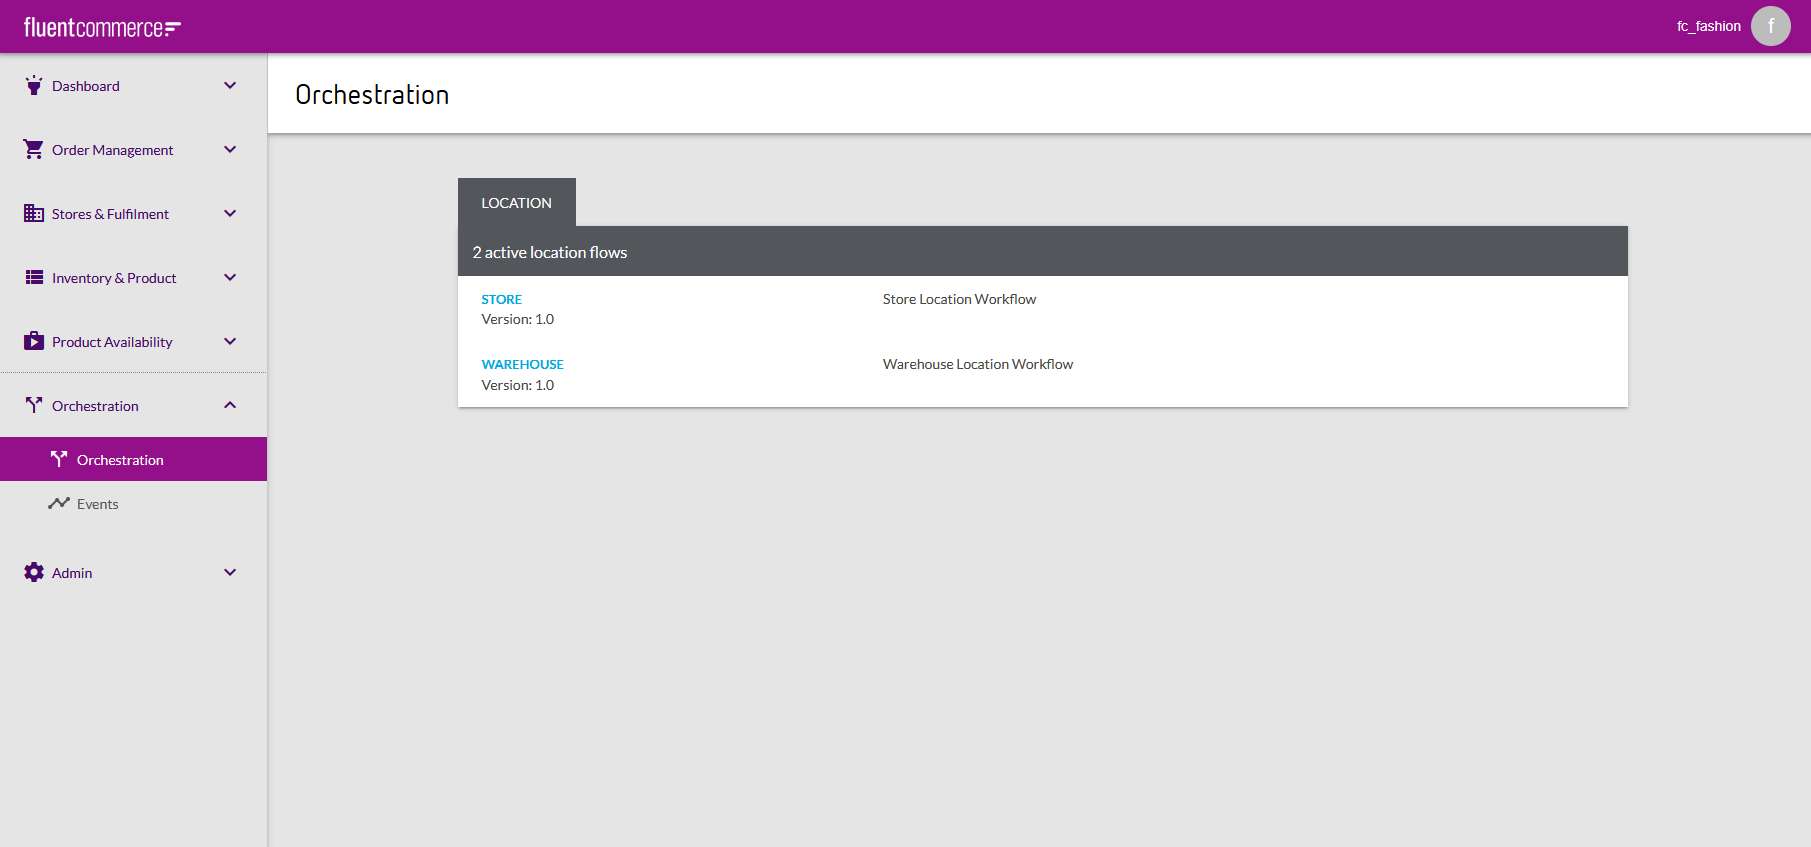
Lab 3: Creating Networks
Video
Running the network data
Return to the Runner by selecting 'New Run' and replace the previous file with the Network file. Click upload to Workspace. Once the file is loaded, press the Run button to create network data.
Checking network data has been loaded
Return to the sandbox environment and refresh the page. Networks should now be populated under Stores & Fulfillment > Networks for both fashion and sports retailers.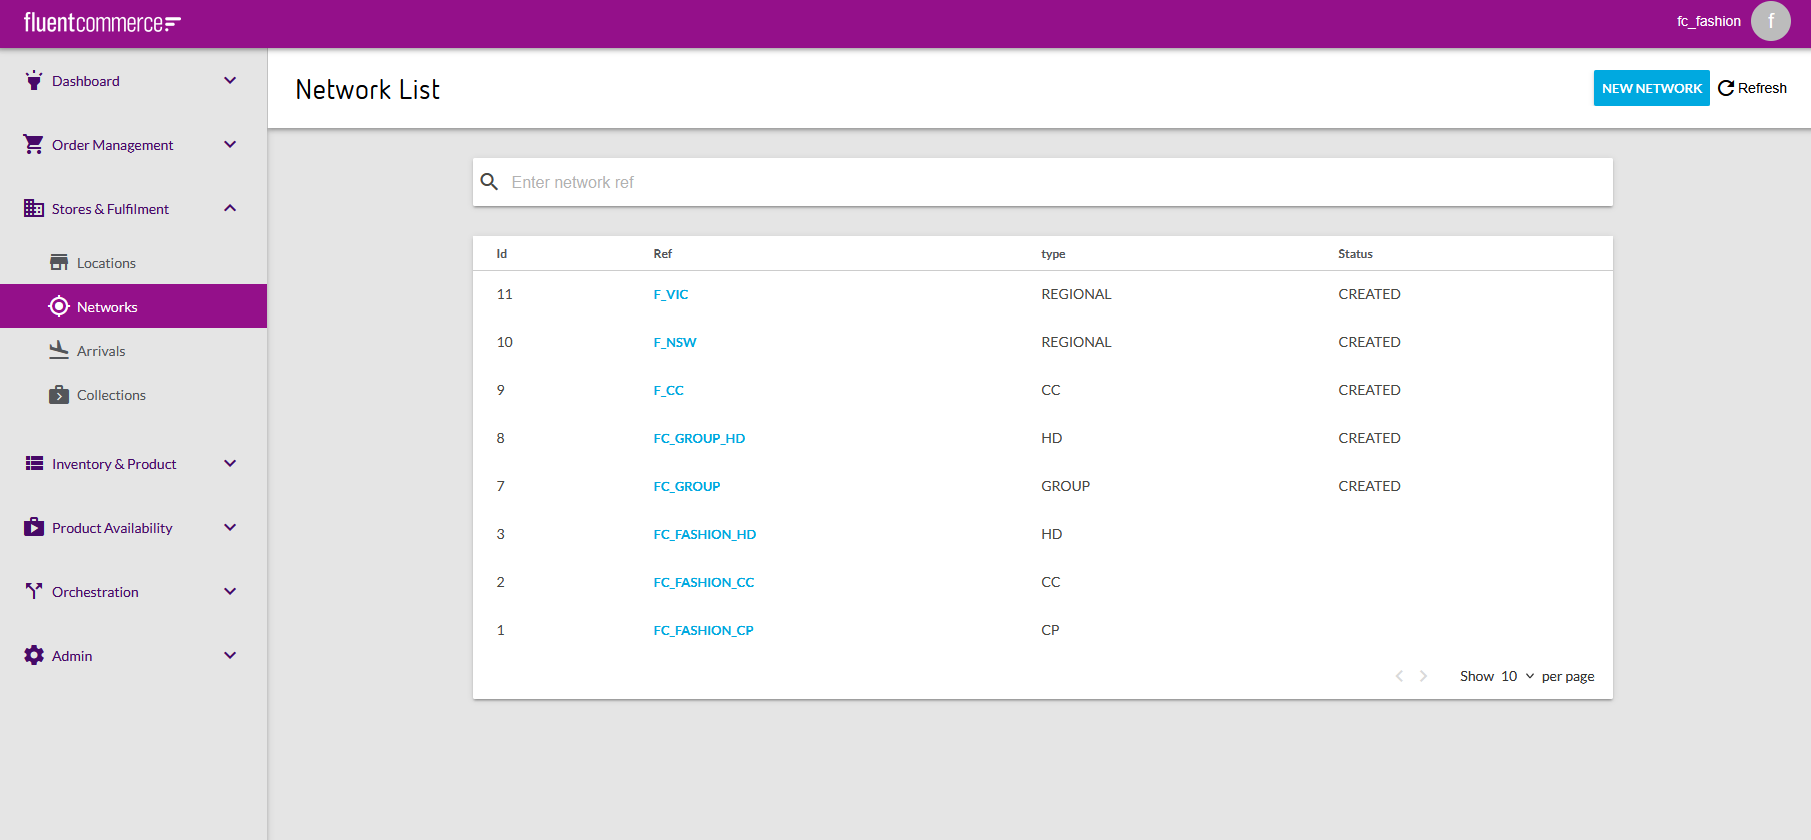
Creating additional data
Lab 4: Creating Product Catalogs
Video
Lab 5: Creating Categories
Video
Lab 6: Creating Products
Video
Lab 7: Creating Virtual Catalogues
Video
Lab 8: Creating Inventory Catalogs
Video
Lab 9: Creating Fulfillment Option Workflows
Video
Lab 10: Creating Order Workflows
Video
Lab 11: Loading Inventory
Video
End of Labs
Labs Complete
At the end of these labs, you should have a fully provisioned training account for use.