Configuring Order Revision
How-to Guide
Author:
Fluent Commerce
Changed on:
3 Oct 2025
Key Points
- Order Revision implementation can be done either from the UI or via Postman.
- This implementation requires workflow changes and adding a few specific settings. The detailed process is covered in this article.
Steps
 Overview
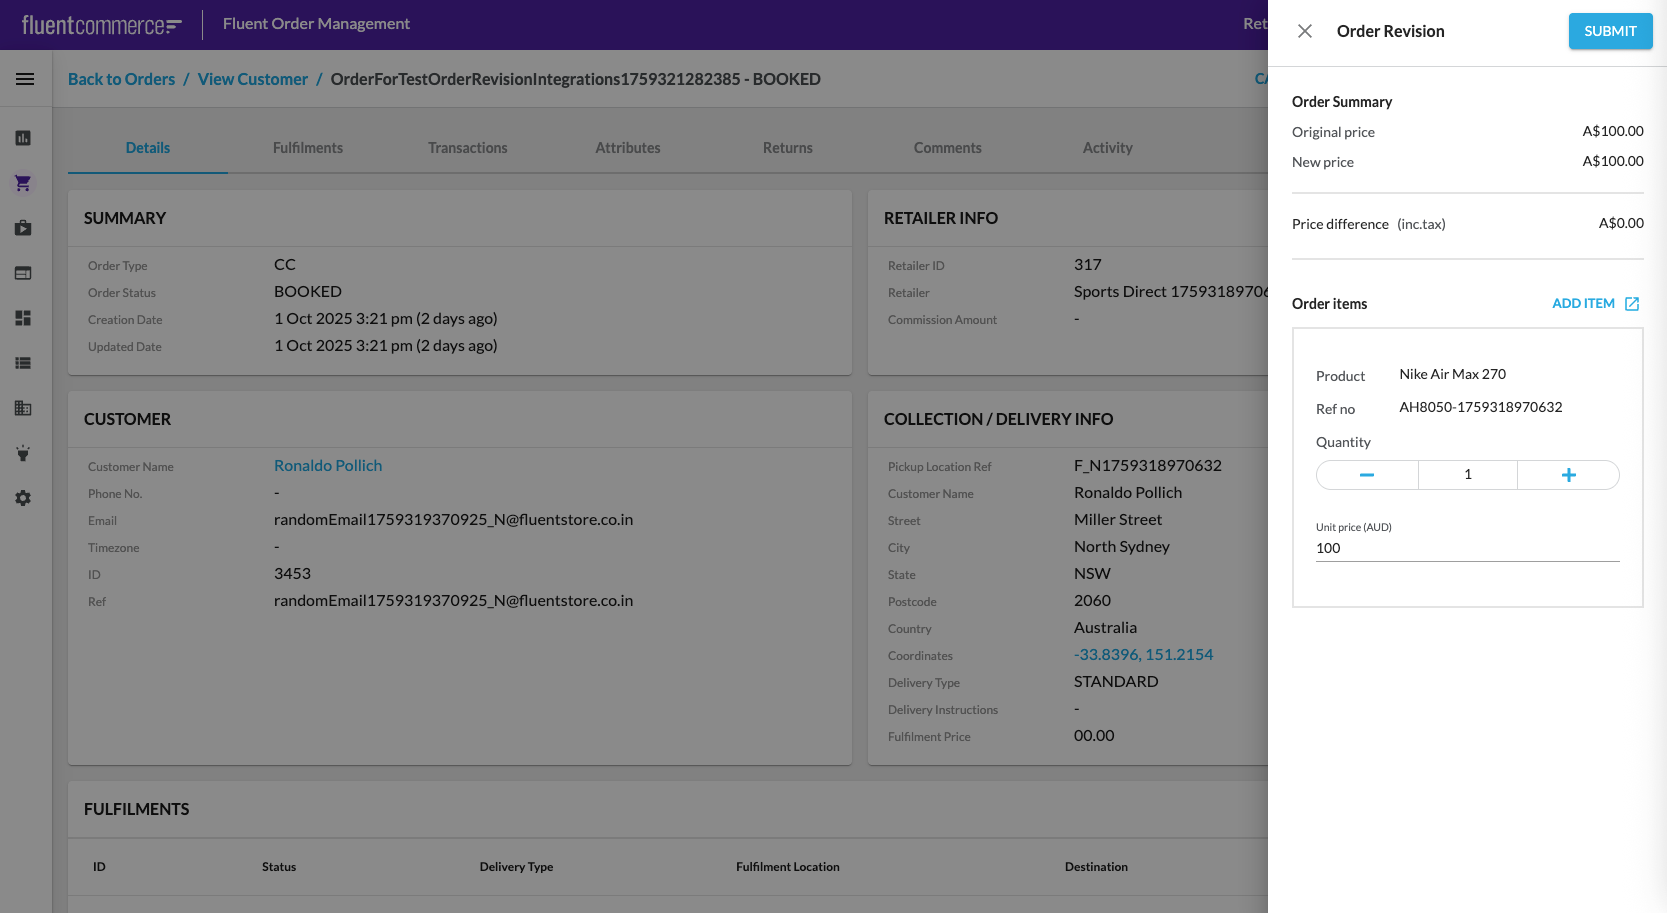
User action capability is used to revise an Order. It is possible to configure Order Revision functionality via both UI and Postman.
Configuration via UI
Step 1: Check Billing Account Flow
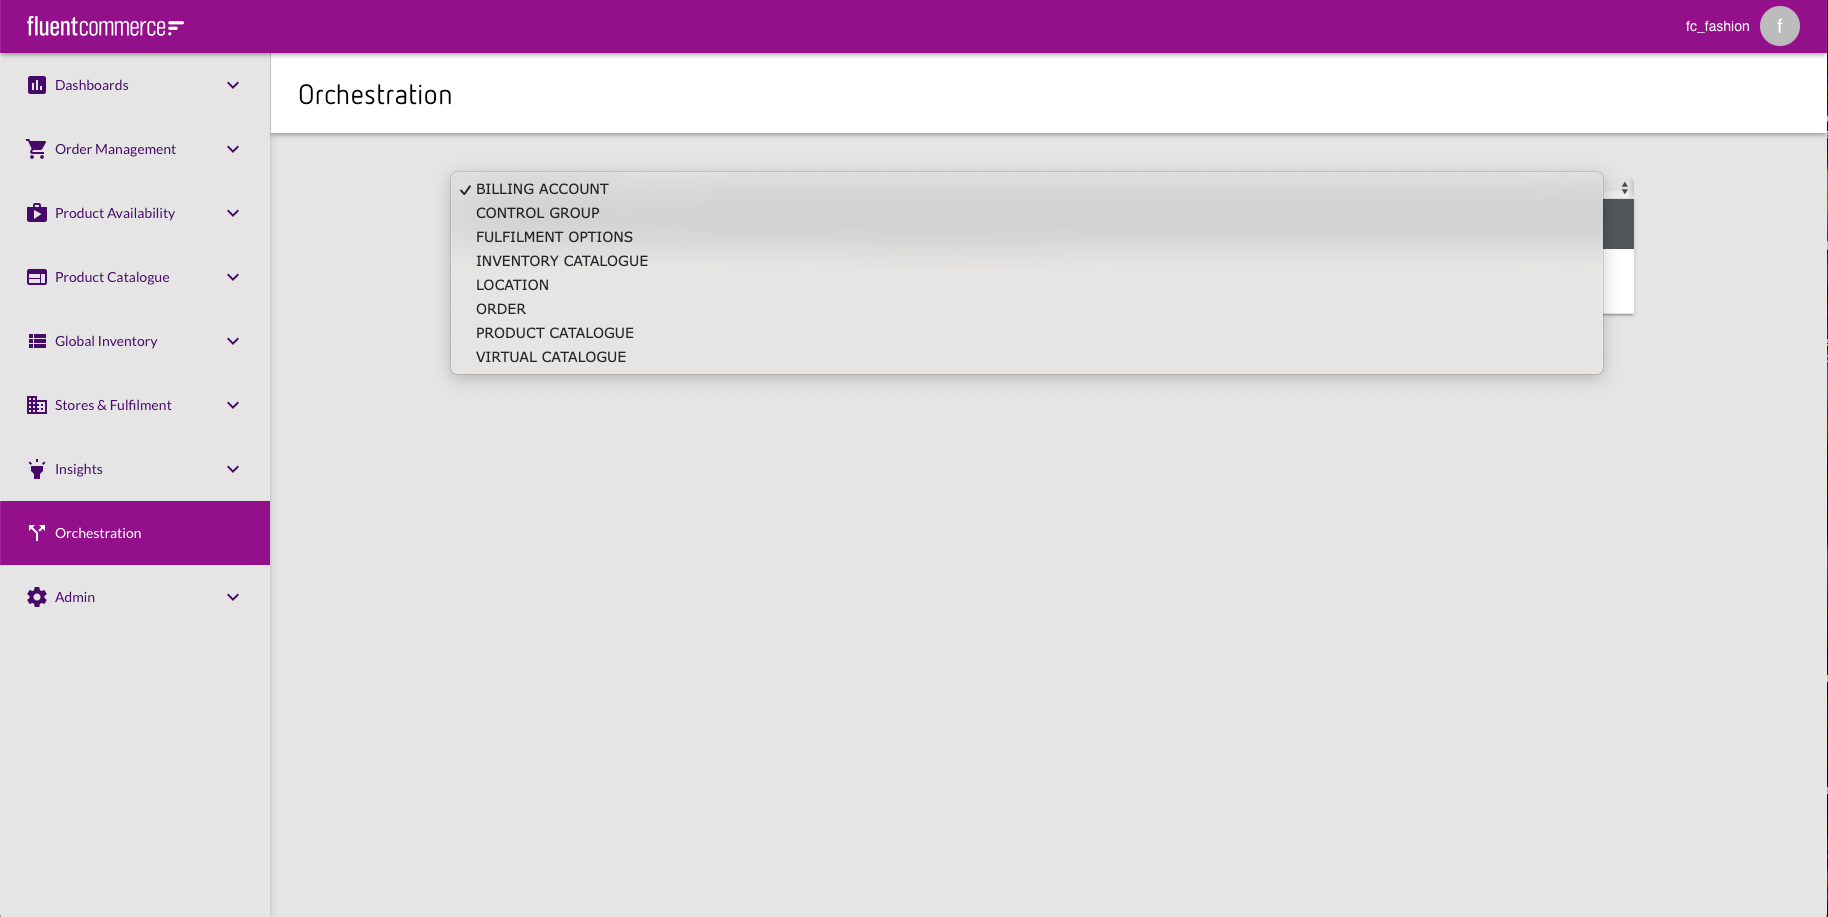 In case there is no Billing Account Flow in the Orchestration, it is necessary to add the workflow via PUT request using Postman.PUT request:
`https://<ACCOUNT_ID>.<environment>.api.fluentretail.com/api/v4.1/workflow`| Variable | Description |
| ACCOUNT_ID | The name of the Fluent account |
| environment | The Fluent deployment Environment type for the particular Fluent Account (SANDBOX, PRODUCTION, TEST, STAGING). |
Step 2. Update Order workflow
Home Delivery (HD) Order workflow
Add the following JSON fragments to the ruleset.Create RulesetCreate Ruleset HD JSONEvaluateRevisedOrder RulesetRevised Order Ruleset HD JSONOrderRevision RulesetOrder Revision Ruleset HD JSONNewBillingAccountNew Billing Account HD JSONProcessBillingAccountProcess Billing Account HD JSONOrderCancelOrder Cancel HD JSONAdd the following JSON fragment to the statuses:Click and Collect (CC) Order workflow
Add the following JSON fragments to the ruleset:Create RulesetCreate Ruleset CC JSONEvaluateRevisedOrder RulesetRevised Order Ruleset CC JSONOrderRevision RulesetOrder Revision CC JSONNewBillingAccountNew Billing Account CC JSONProcessBillingAccountProcess Billing Account CC JSONOrderCancelOrder Cancel CC JSONNote:`[[account.id]]` should be replaced with Account name.Add the following JSON fragment to the statuses:Step 3. Default Tax Type
Check if the setting 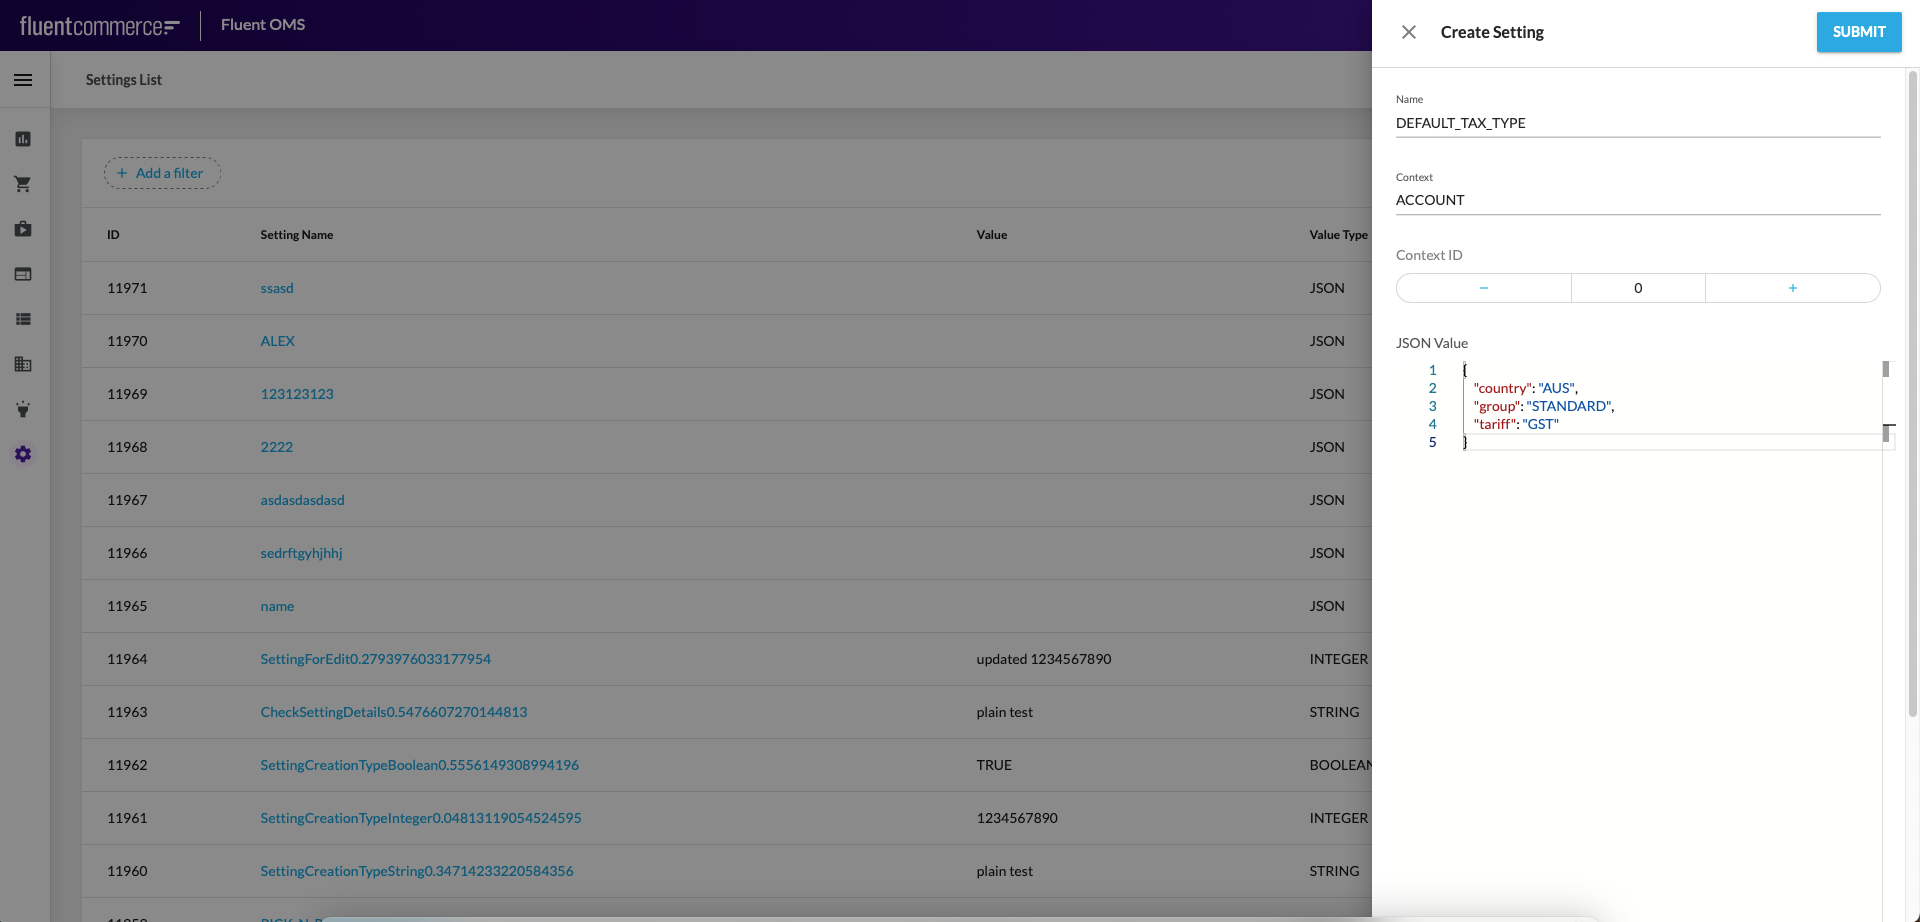 To add a new setting click on Create Setting button and fill the following:DEFAULT_TAX_TYPE setting
`DEFAULT_TAX_TYPE` exists. If not you need to add it.Go to Admin > Settings and filter the list of settings by name.To add a new setting click on Create Setting button and fill the following:DEFAULT_TAX_TYPE settingStep 4. Exchange Reason
Check if the setting 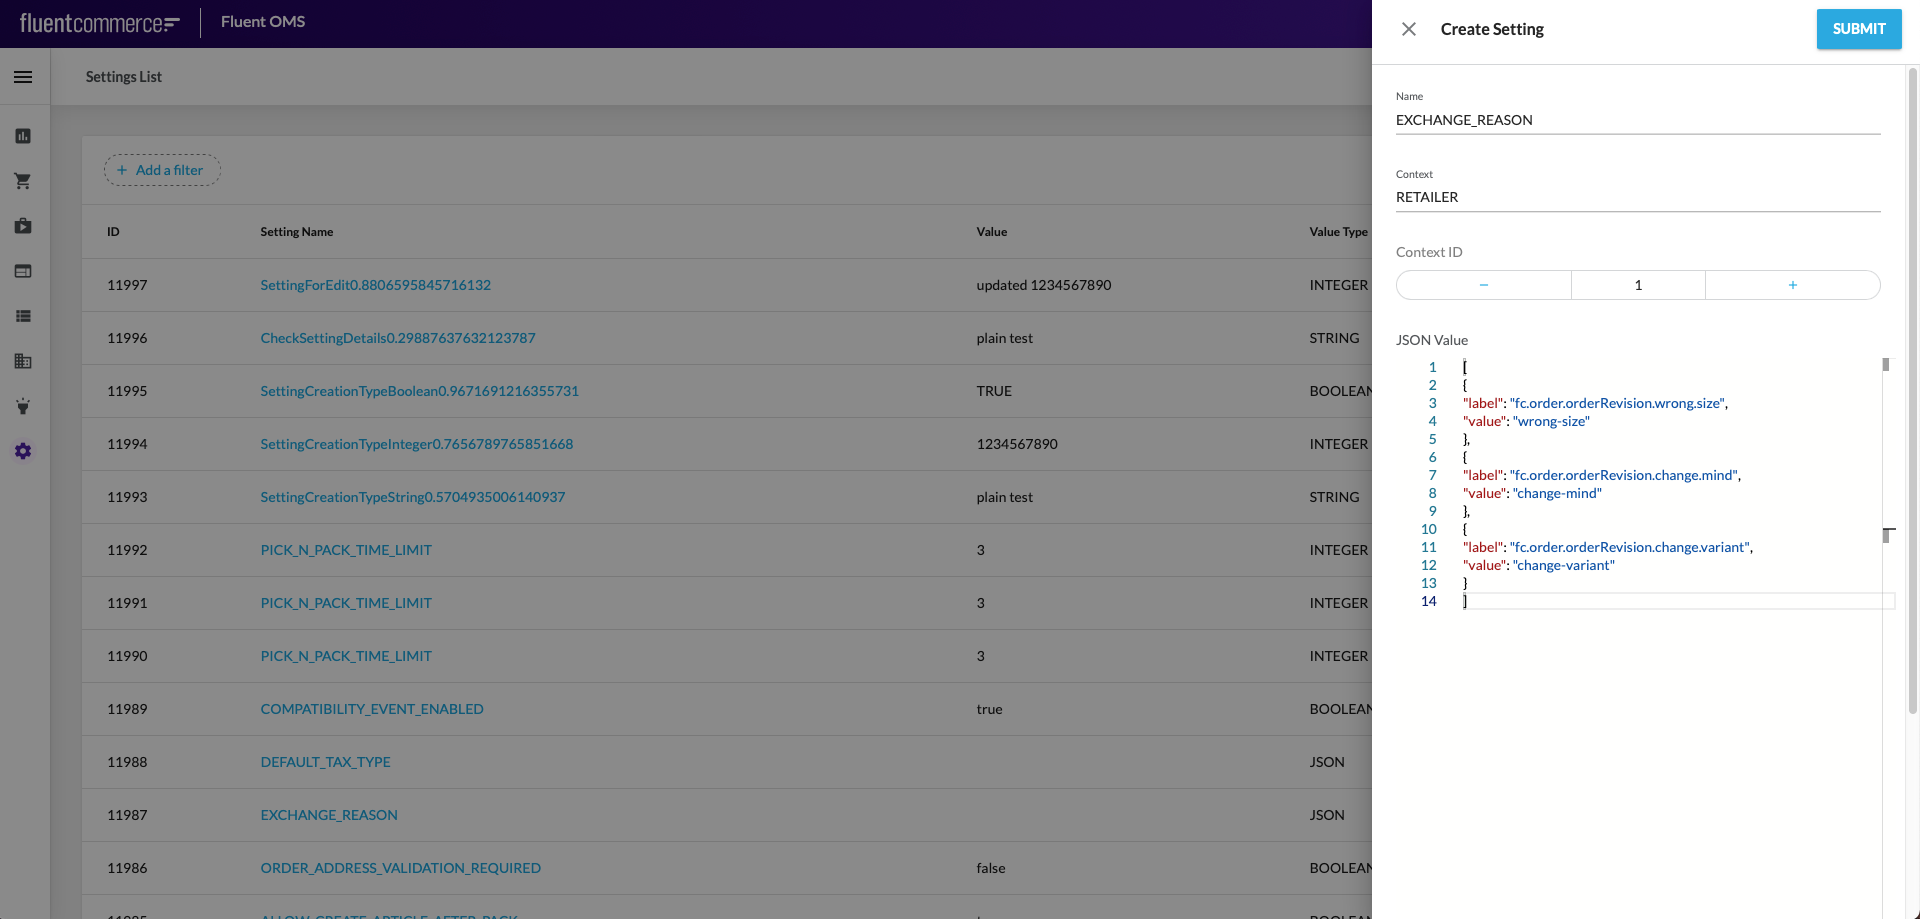 EXCHANGE_REASON settingNote: Context Id = Retailer Id
`EXCHANGE_REASON` exists. If not you need to add it.Go to Admin > Settings and filter the list of settings by name. To add a new setting click on Create Setting button and fill the following:EXCHANGE_REASON settingNote: Context Id = Retailer IdStep 5. GST setting
Check if the setting 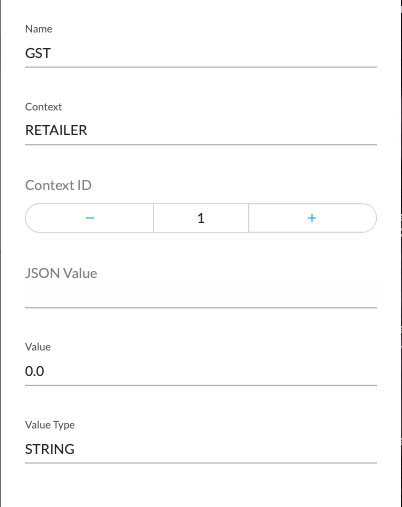
`GST` exists. If not you need to add it.Go to Admin > Settings and filter the list of settings by name. To add a new setting click on Create Setting button and fill the following:Step 6. Product list
Check if the setting  fc.mystique.search.product.list settingMystique Search Product List Setting JSONParameters from which displayed columns can be configured in
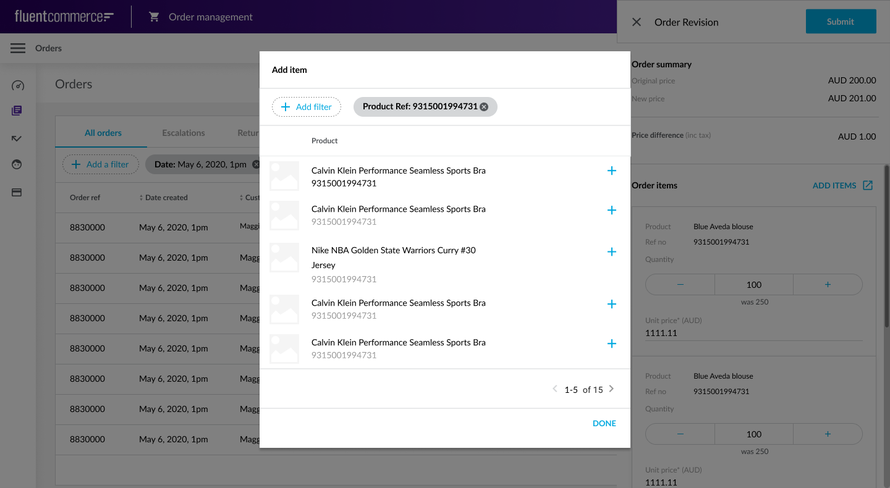
`fc.mystique.search.product.list` exists. If not you need to add it.Go to Admin > Settings and filter the list of settings by name. To add a new setting click on Create Setting button and fill the following:fc.mystique.search.product.list settingMystique Search Product List Setting JSONParameters from which displayed columns can be configured in `fc.mystique.search.product.list` setting:- imageURL
- Product name
- Product item reference
- Attributes
- Catalogue
- Price
`fc.mystique.search.product.list` setting doesn’t exist ‘Add Item’ dialogue will contain only a list of product items and their pictures (default configuration).'Add Item' dialogue default configurationStep 7. Product Query
Check if the setting 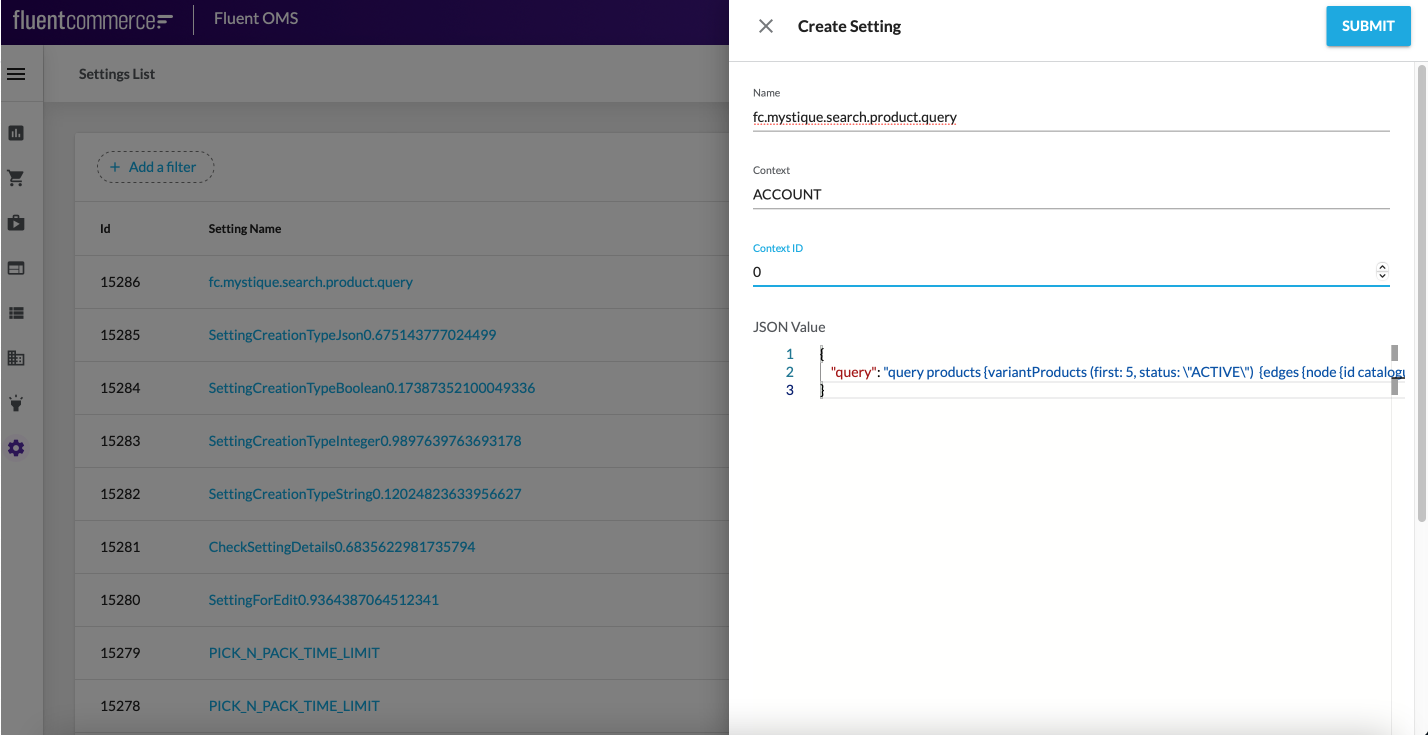 A base entity for Add item dialog query is VariantProduct. It has references with the following list of entities:
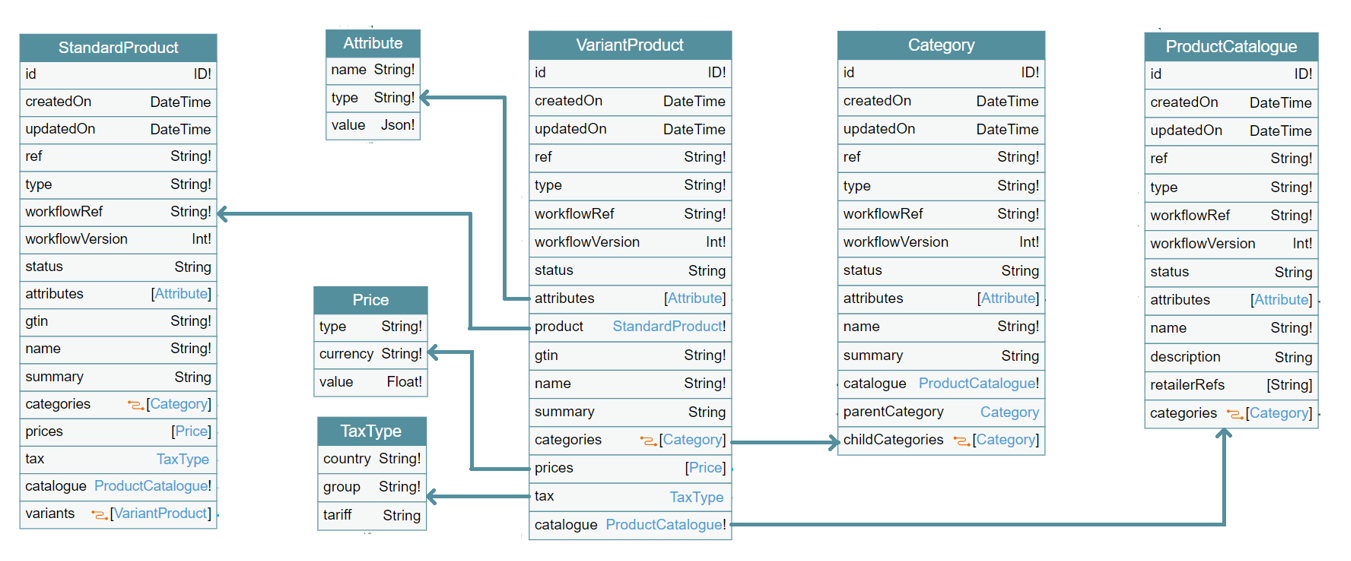 Database schema snippetVariantProduct.graphql file contains max amount of VariantProduct attributes. It is possible to make custom configuration excluding unnecessary attributes.Note: In case
`fc.mystique.search.product.query` exists. If not you need to add it.Go to Admin > Settings and filter the list of settings by name. To add a new setting click on Create Setting button and fill the following:A base entity for Add item dialog query is VariantProduct. It has references with the following list of entities:- StandardProduct
- ProductCatalogue
- Category
- Price
- TaxType
- Attribute
Database schema snippetVariantProduct.graphql file contains max amount of VariantProduct attributes. It is possible to make custom configuration excluding unnecessary attributes.Note: In case `fc.mystique.search.product.query` setting doesn’t exist ‘Add Item’ dialogue will contain data according to the default configuration.VariantProduct.graphql file containing a query which returns max amount of VariantProduct attributes.Configuration via Postman
Configuration guide
Order Revision configuration steps:Use Postman collection to do the following:
- Authenticate using POST request Fluent Auth - Retailer FC_FASHION.
- Get Setting using GET request Get the Retailer settings.
- Get workflow by Retailer Id and Workflow Name using GET request of the same name.
- Create settings (if necessary) using POST requests:
- Create
`DEFAULT_TAX_TYPE`setting - Create
`EXCHANGE_REASON`setting - Create
`GST`setting - Create
`fc.mystique.search.product.list`setting
- Create