
Transform a v1.0 Manifest into a v2.0 Manifest - Fluent Admin Console to Fluent OMS Example
How-to Guide
Authors:
Fluent Commerce, Cille Schliebitz
Changed on:
19 Nov 2026
Key Points
- Admin Console uses one large manifest (
`ADMIN_CONSOLE_MANIFEST`). Fluent OMS uses a main manifest (`fc.mystique.manifest.oms`) plus smaller fragment settings, such as`fc.mystique.manifest.oms.fragment.ordermanagement`. - In v2.0, each page uses a single GraphQL query. Queries cannot be split into fragments.
- Labels support i18n keys, for example
`i18n:fc.om.nav`. - Table links use
`link`instead of the v1.0`link_template`. - Mystique adds filter parameters to a query automatically. Remove any parameter you want to appear as a filter from the query.
- UserActions are usually configured in the workflow. Add them to the manifest only when needed, for example when you use a component from Mystique core.
- The examples use the Orders, Roles and Permissions, and Settings menu items.
Prerequisites
Steps
 1. Split the v1.0 Manifest into a Main Manifest and Fragments
- Create or open the main manifest setting,
`fc.mystique.manifest.oms`. - Move each module from
`ADMIN_CONSOLE_MANIFEST`into its own fragment setting, for example`fc.mystique.manifest.oms.fragment.ordermanagement`. - Reference each fragment from the main manifest.
2. Add the Module and Menu Items to the Side Navigation
- In the fragment setting, add the module and its menu items to the side navigation.
- Use i18n keys for labels, in the format
`i18n:fc.om.nav`.
3. Add Pages
- Add a
`pages`array to the fragment. - For each page, set
`type`,`path`and`component`(`fc.page`). - Set the page title in
`props`.
4. Add the Page Query
- Add
`"data":`to the page and add`"query":`inside it. - Add the GraphQL query after
`"query":`.
5. Set the Default Page Size
Add a variable to the query and set its value in
`"variables":`6. Add a Table
- Add a child element to the page in
`"descendants":`, with`component`set to`fc.list`. - In
`props`, set`dataSource`to the data from the query. - Add
`attributes`, an array with one entry per column. Set`"label":`to the column name and`"template":`to a dynamic value from the query, for example`{{node.ref}}`.
7. Link Table Values to Another Page
To make a column value link to another page, add
`"link":` to that entry in `"attributes":`. This replaces `"link_template":` from v1.0.8. Add Filters to the Table
- In the
`fc.list`props, add`filter`and set`enabled`to`true`. Set it to`false`to hide filters. - List any parameters to hide in
`exclude`.
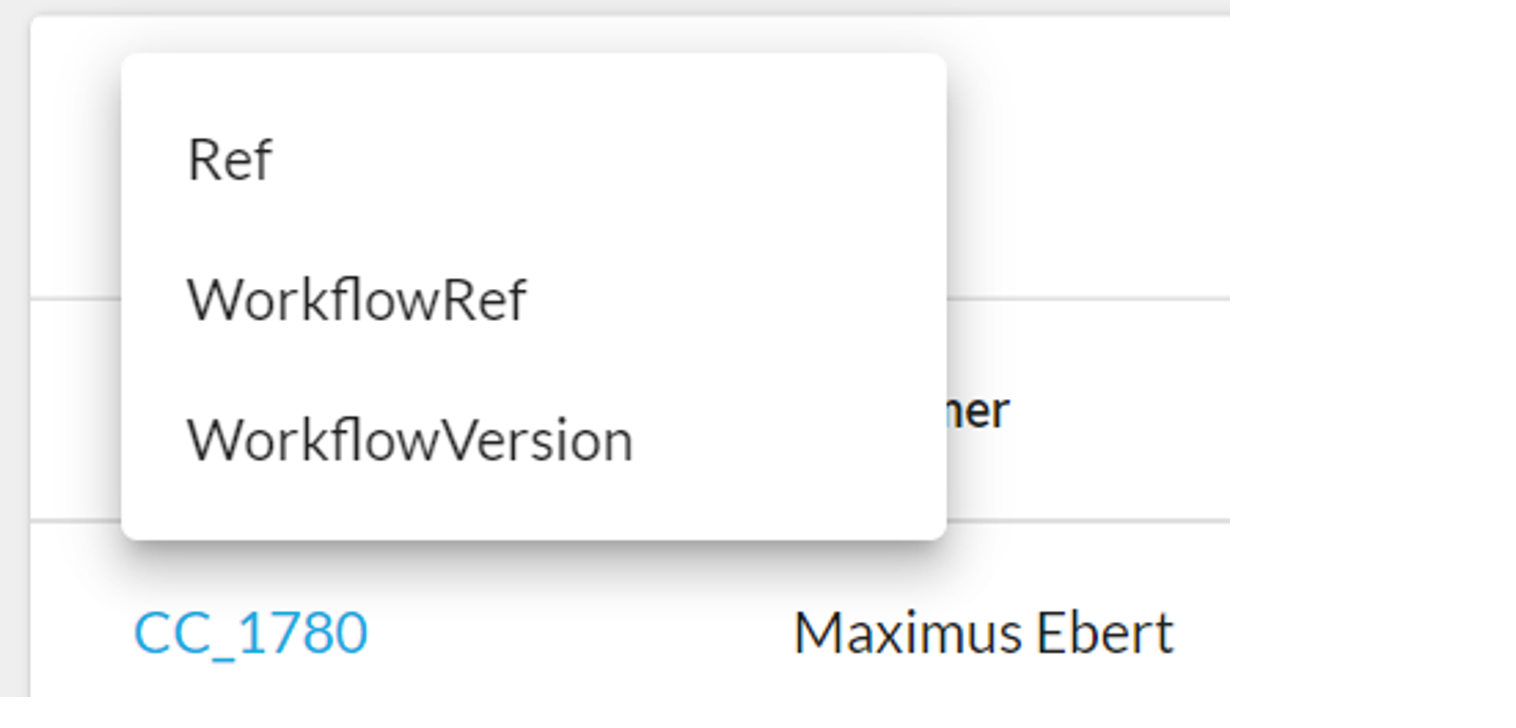
`ref` from the filters:Remove `$ref` and `ref` appears in the filter list: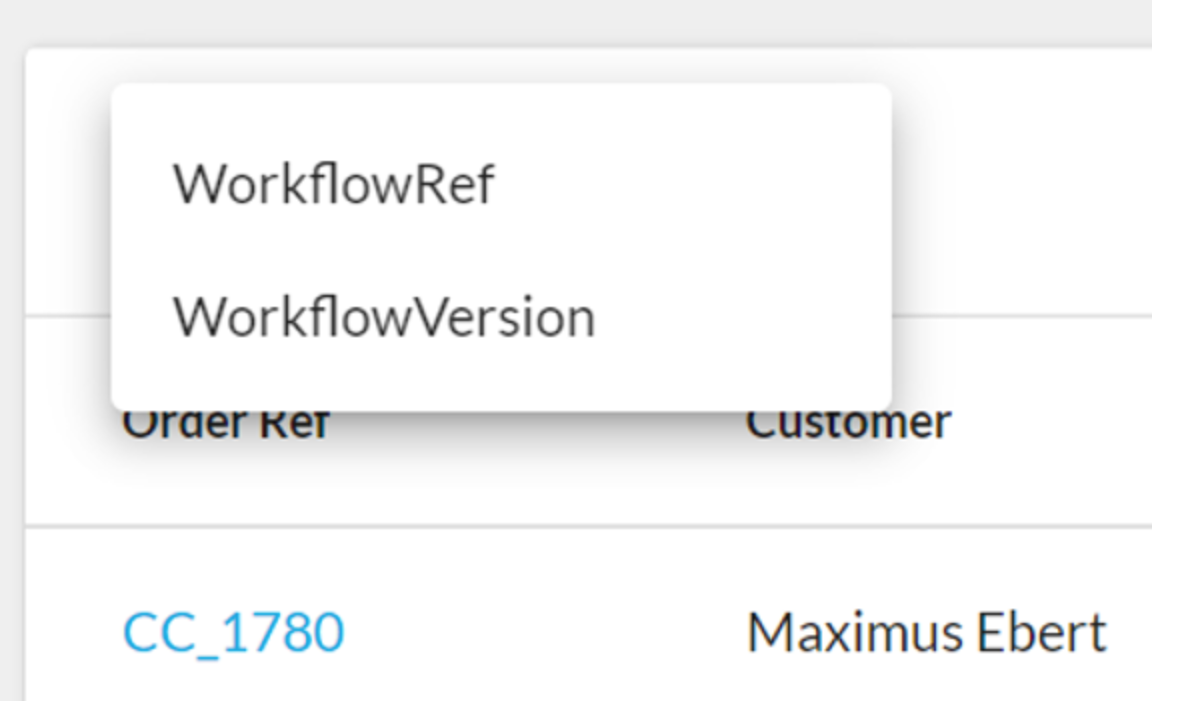
9. Create a Details Page with Tabs
- Add a page with
`type`set to`"page"`and`component`set to`"fc.page"`. - Set
`path`to match the`"link":`value from Step 7. - In
`data`, add the`query`and its`variables`. The variables come from the URL. - Set the title in
`"props":`. To make it dynamic, use values from the query:
`"descendants":` with the `fc.tabs` component and a `layouts` array:10. Add Components, Cards and Tables to a Tab
- In the tab's
`"descendants":`, add an`fc.page.section`component. - Inside the section's
`"descendants":`, add the components you need. For each, set`component`,`dataSource`and`props`.
`fc.card.attribute` and set `title`, `width`, `dataSource` and `attributes`.4. To add a table, use `fc.list` and set `title`, `dataSource` and `attributes`.11. Add Breadcrumbs
In the page
`props`, add a `"backButtons":` array. Set `path` and `menuLabel` for each breadcrumb.12. Add Mutations and UserActions
- In the page
`props`, add`actions`with a`primary`array, a`secondary`array, or both. - For a UserAction, set
`type`and`name`:
`type`, `label` and `name`:4. To pre-fill fields, add `overrides`. This example pre-fills a delivery address for a UserAction:This example pre-fills fields for a mutation:5. To add a component to a mutation form (drawer), set it in `overrides`. This example adds `fc.attribute.jsoneditor` to the Edit Setting drawer:The full example below combines both action types on the order details page: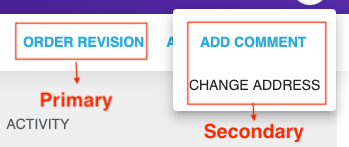
13. Add Components to Cards and Lists
- To add a component to a card, add an entry to
`"attributes":`with`type`set to`component`and`options`containing`component`and`dataSource`. This example adds`fc.attribute.json`to the card on the Setting details page:
`fc.list` cell, set the column `type` to `component` and add `options` with `component`, `props` and `dataSource`. This example adds `fc.attribute.column` to the Roles and Permissions list:14. (Optional) Link Dashboard Tiles to Filtered Pages
Link a dashboard tile to a page with a date and time range filter already applied.
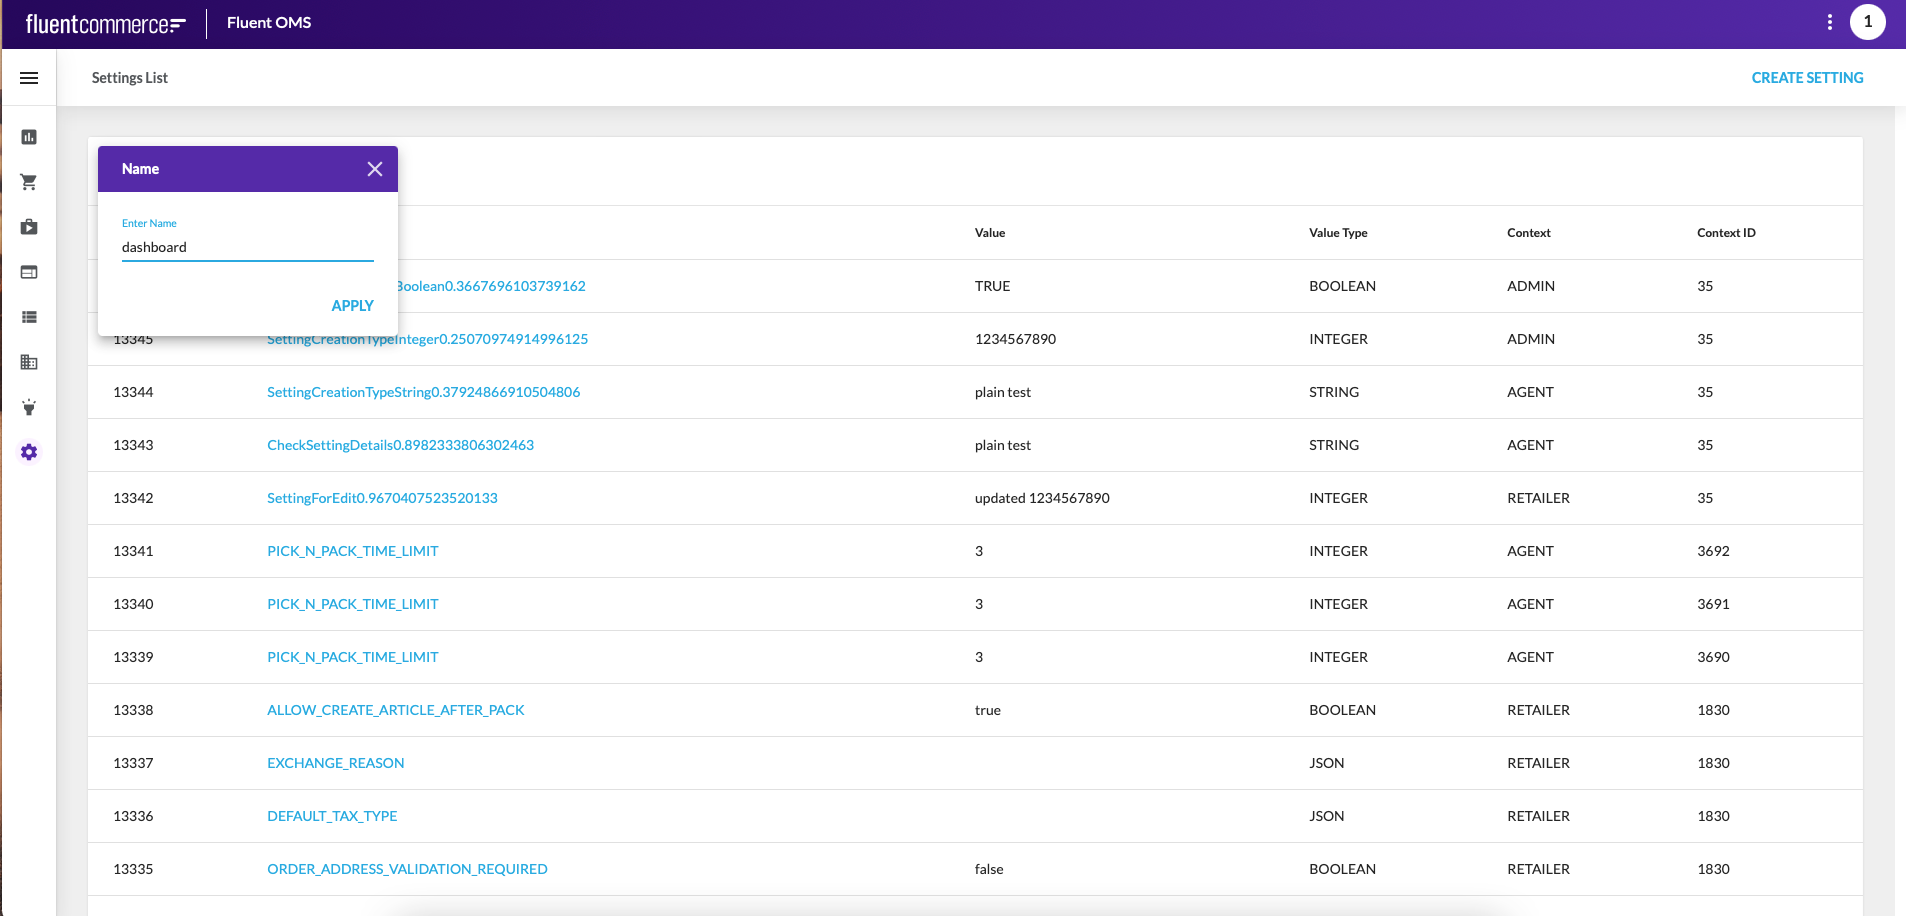
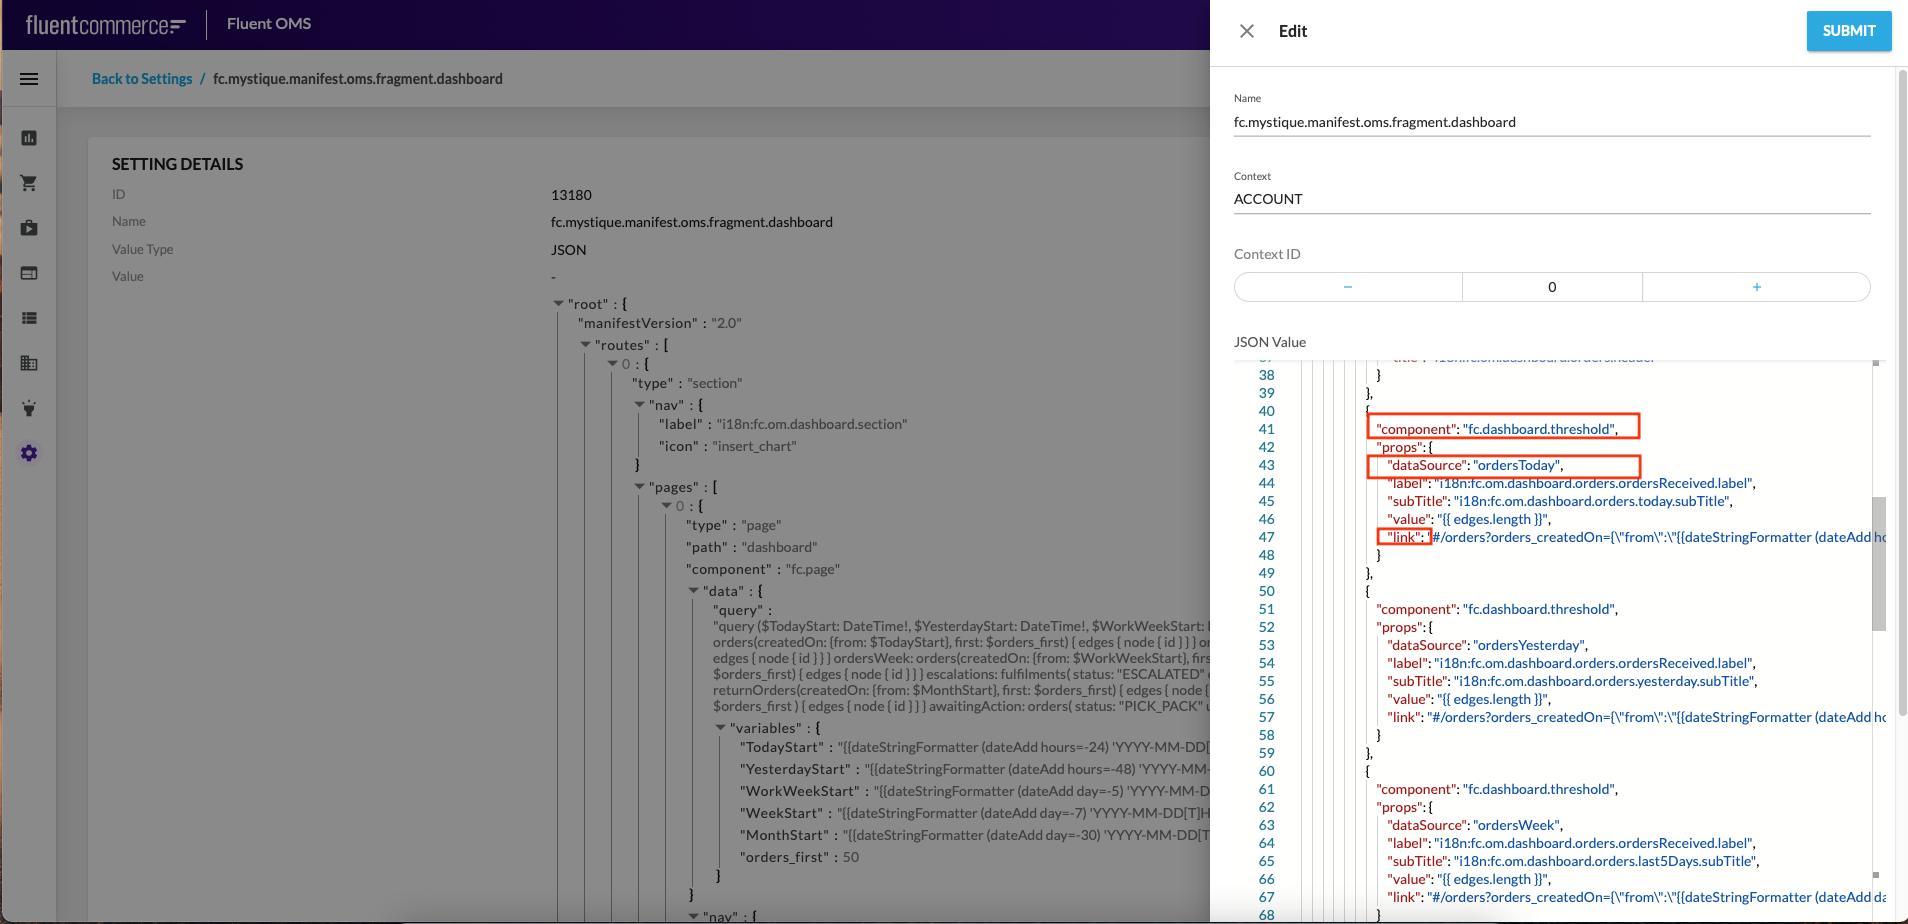
- Go to Admin > Settings and filter the settings by the name
`dashboard:`. - Open the setting and click Edit.
- Find the threshold for the tile you want to link.
- Update the
`link`value for that tile:
| Tile | Threshold `dataSource` | `link` value |
| ORDERS RECEIVED (Today, last 24 hours) | `ordersToday` | `#/orders?orders_createdOn={\"from\":\"{{dateStringFormatter (dateAdd hours=-24) 'YYYY-MM-DD[T]HH:mm:ss.SSS' true}}Z\"}` |
| ORDERS RECEIVED (Yesterday) | `ordersYesterday` | `#/orders?orders_createdOn={\"from\":\"{{dateStringFormatter (dateAdd hours=-48) 'YYYY-MM-DD[T]HH:mm:ss.SSS' true}}Z\",\"to\":\"{{dateStringFormatter (dateAdd hours=-24) 'YYYY-MM-DD[T]HH:mm:ss.SSS' true}}Z\"}` |
ORDERS RECEIVED (Last 5 Days) | `ordersWeek` | `#/orders?orders_createdOn={\"from\":\"{{dateStringFormatter (dateAdd day=-5) 'YYYY-MM-DD[T]HH:mm:ss.SSS' true}}Z\"}` |
| ORDERS RECEIVED (Last 30 Days) | `ordersMonth` | `#/orders?orders_createdOn={\"from\":\"{{dateStringFormatter (dateAdd day=-30) 'YYYY-MM-DD[T]HH:mm:ss.SSS' true}}Z\"}` |
| ORDERS ESCALATED (Last 30 Days) | `escalations` | `#/escalatedFulfilments?fulfilments_createdOn={\"from\":\"{{dateStringFormatter (dateAdd day=-30) 'YYYY-MM-DD[T]HH:mm:ss.SSS' true}}Z\"}` |
| RETURNS (Last 30 Days) | `returns` | `#/returns?returnOrders_createdOn={\"from\":\"{{dateStringFormatter (dateAdd day=-30) 'YYYY-MM-DD[T]HH:mm:ss.SSS' true}}Z\"}` |
| ORDERS CANCELLED (Last 30 Days) | `cancelled` | `#/orders?orders_status=CANCELLED&orders_updatedOn={\"from\":\"{{dateStringFormatter (dateAdd day=-30) 'YYYY-MM-DD[T]HH:mm:ss.SSS' true}}Z\"}` |
| ORDERS AWAITING ACTION (Older than a week) | `awaitingAction` | `#/orders?orders_status=PICK_PACK&orders_updatedOn={\"to\":\"{{dateStringFormatter (dateAdd day=-7) 'YYYY-MM-DD[T]HH:mm:ss.SSS' true}}Z\"}` |