Adding a State to your Workflow with User Action
How-to Guide
Extend
Author:
Fluent Commerce
Changed on:
14 Sept 2025
Key Points
- It’s possible to add a new state to an existing workflow by adding a new status to the
`Statuses array`of the workflow JSON. - Create a simple User Action to allow the user to change the status.
Steps
 Adding a State to your Workflow
Statuses within the workflow are represented by white rounded rectangles whose border colour matches the lifecycle phase they belong to. For example, within the Booking phase, the Order status could be:
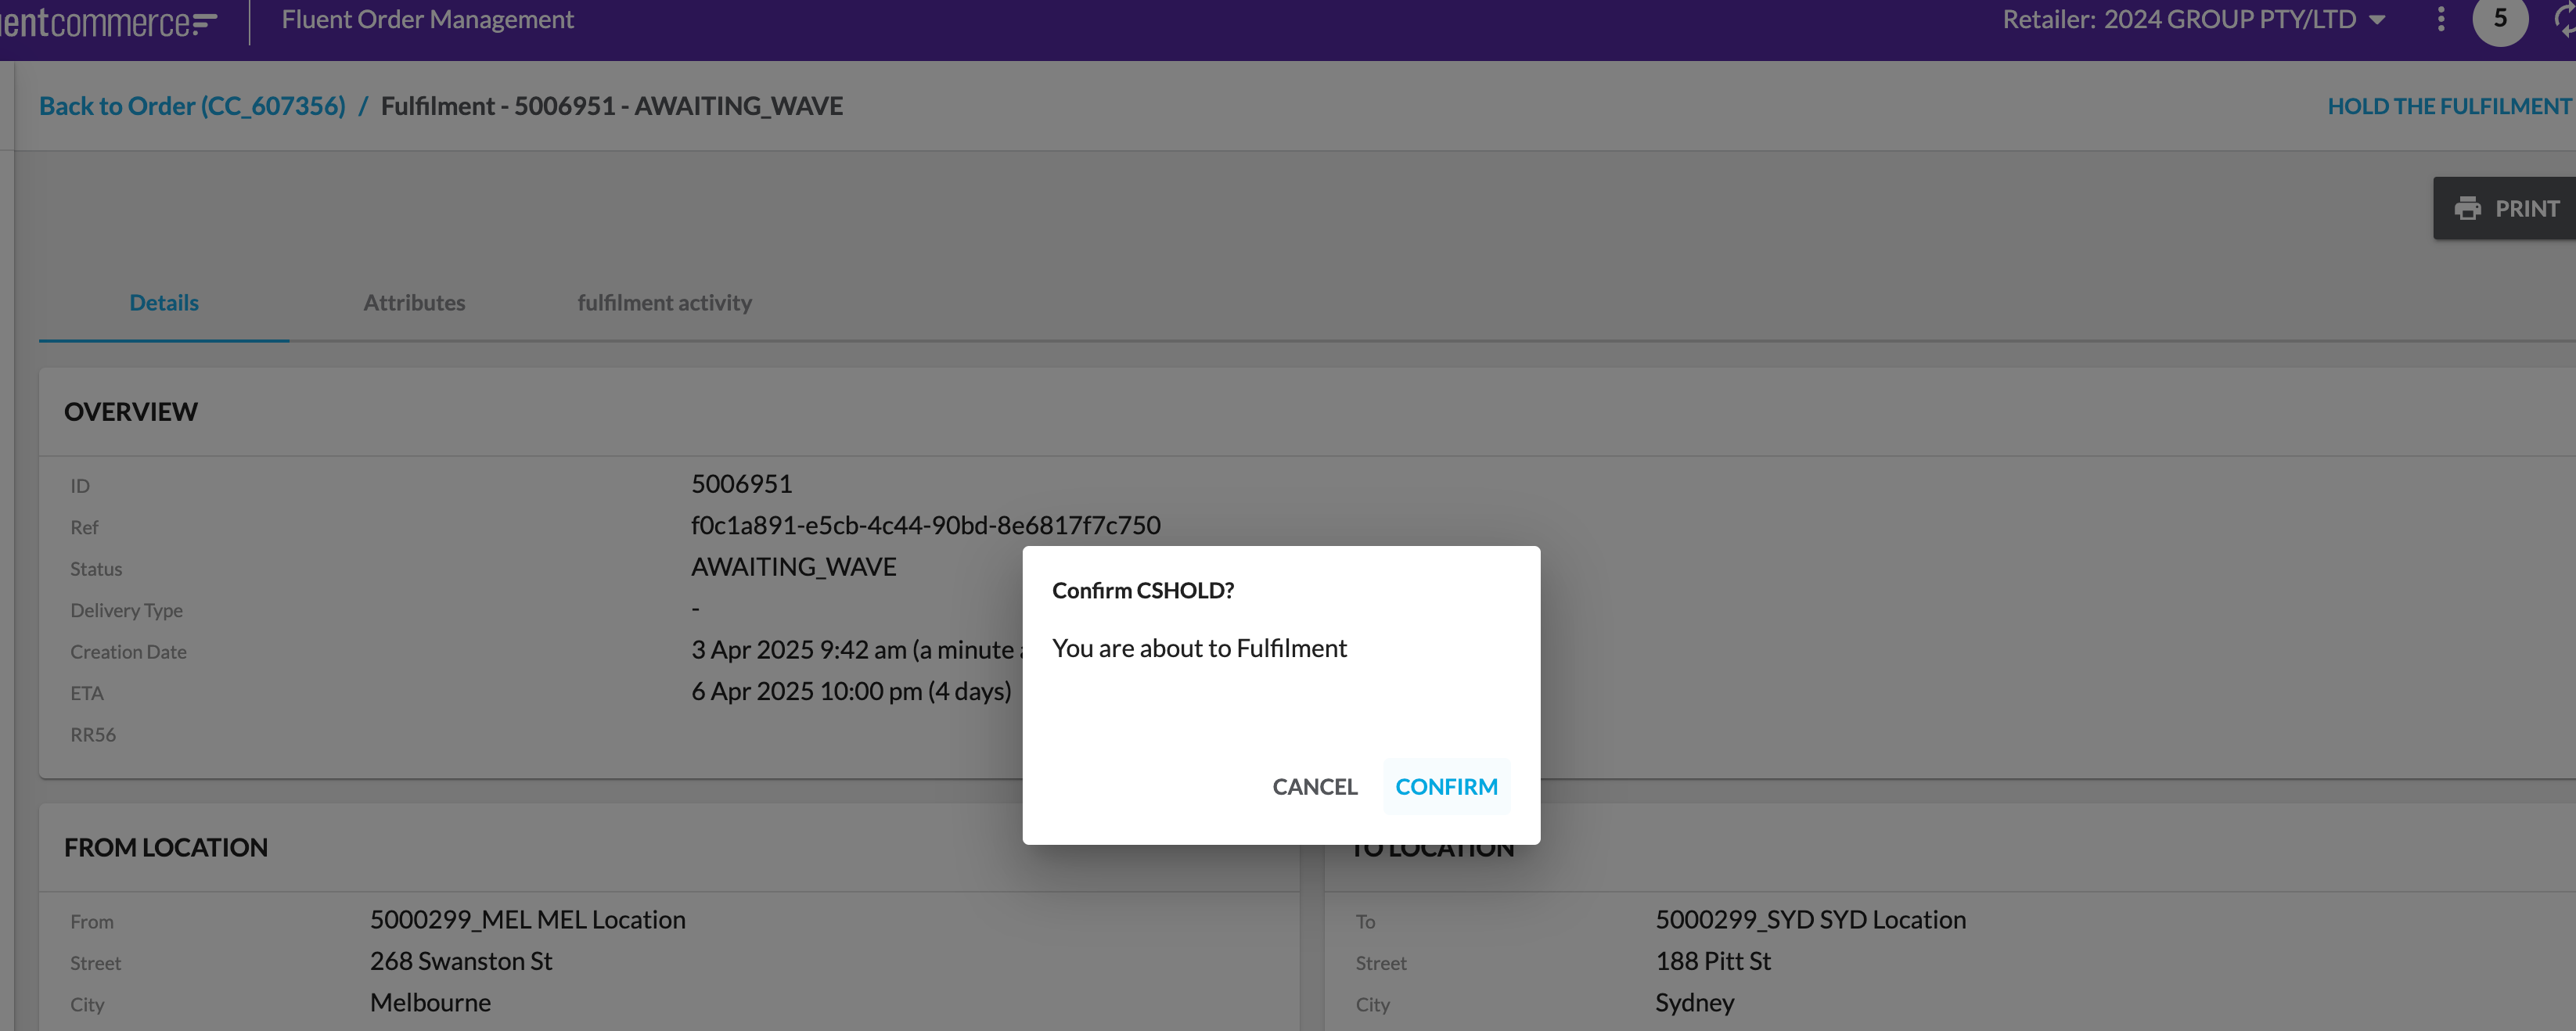
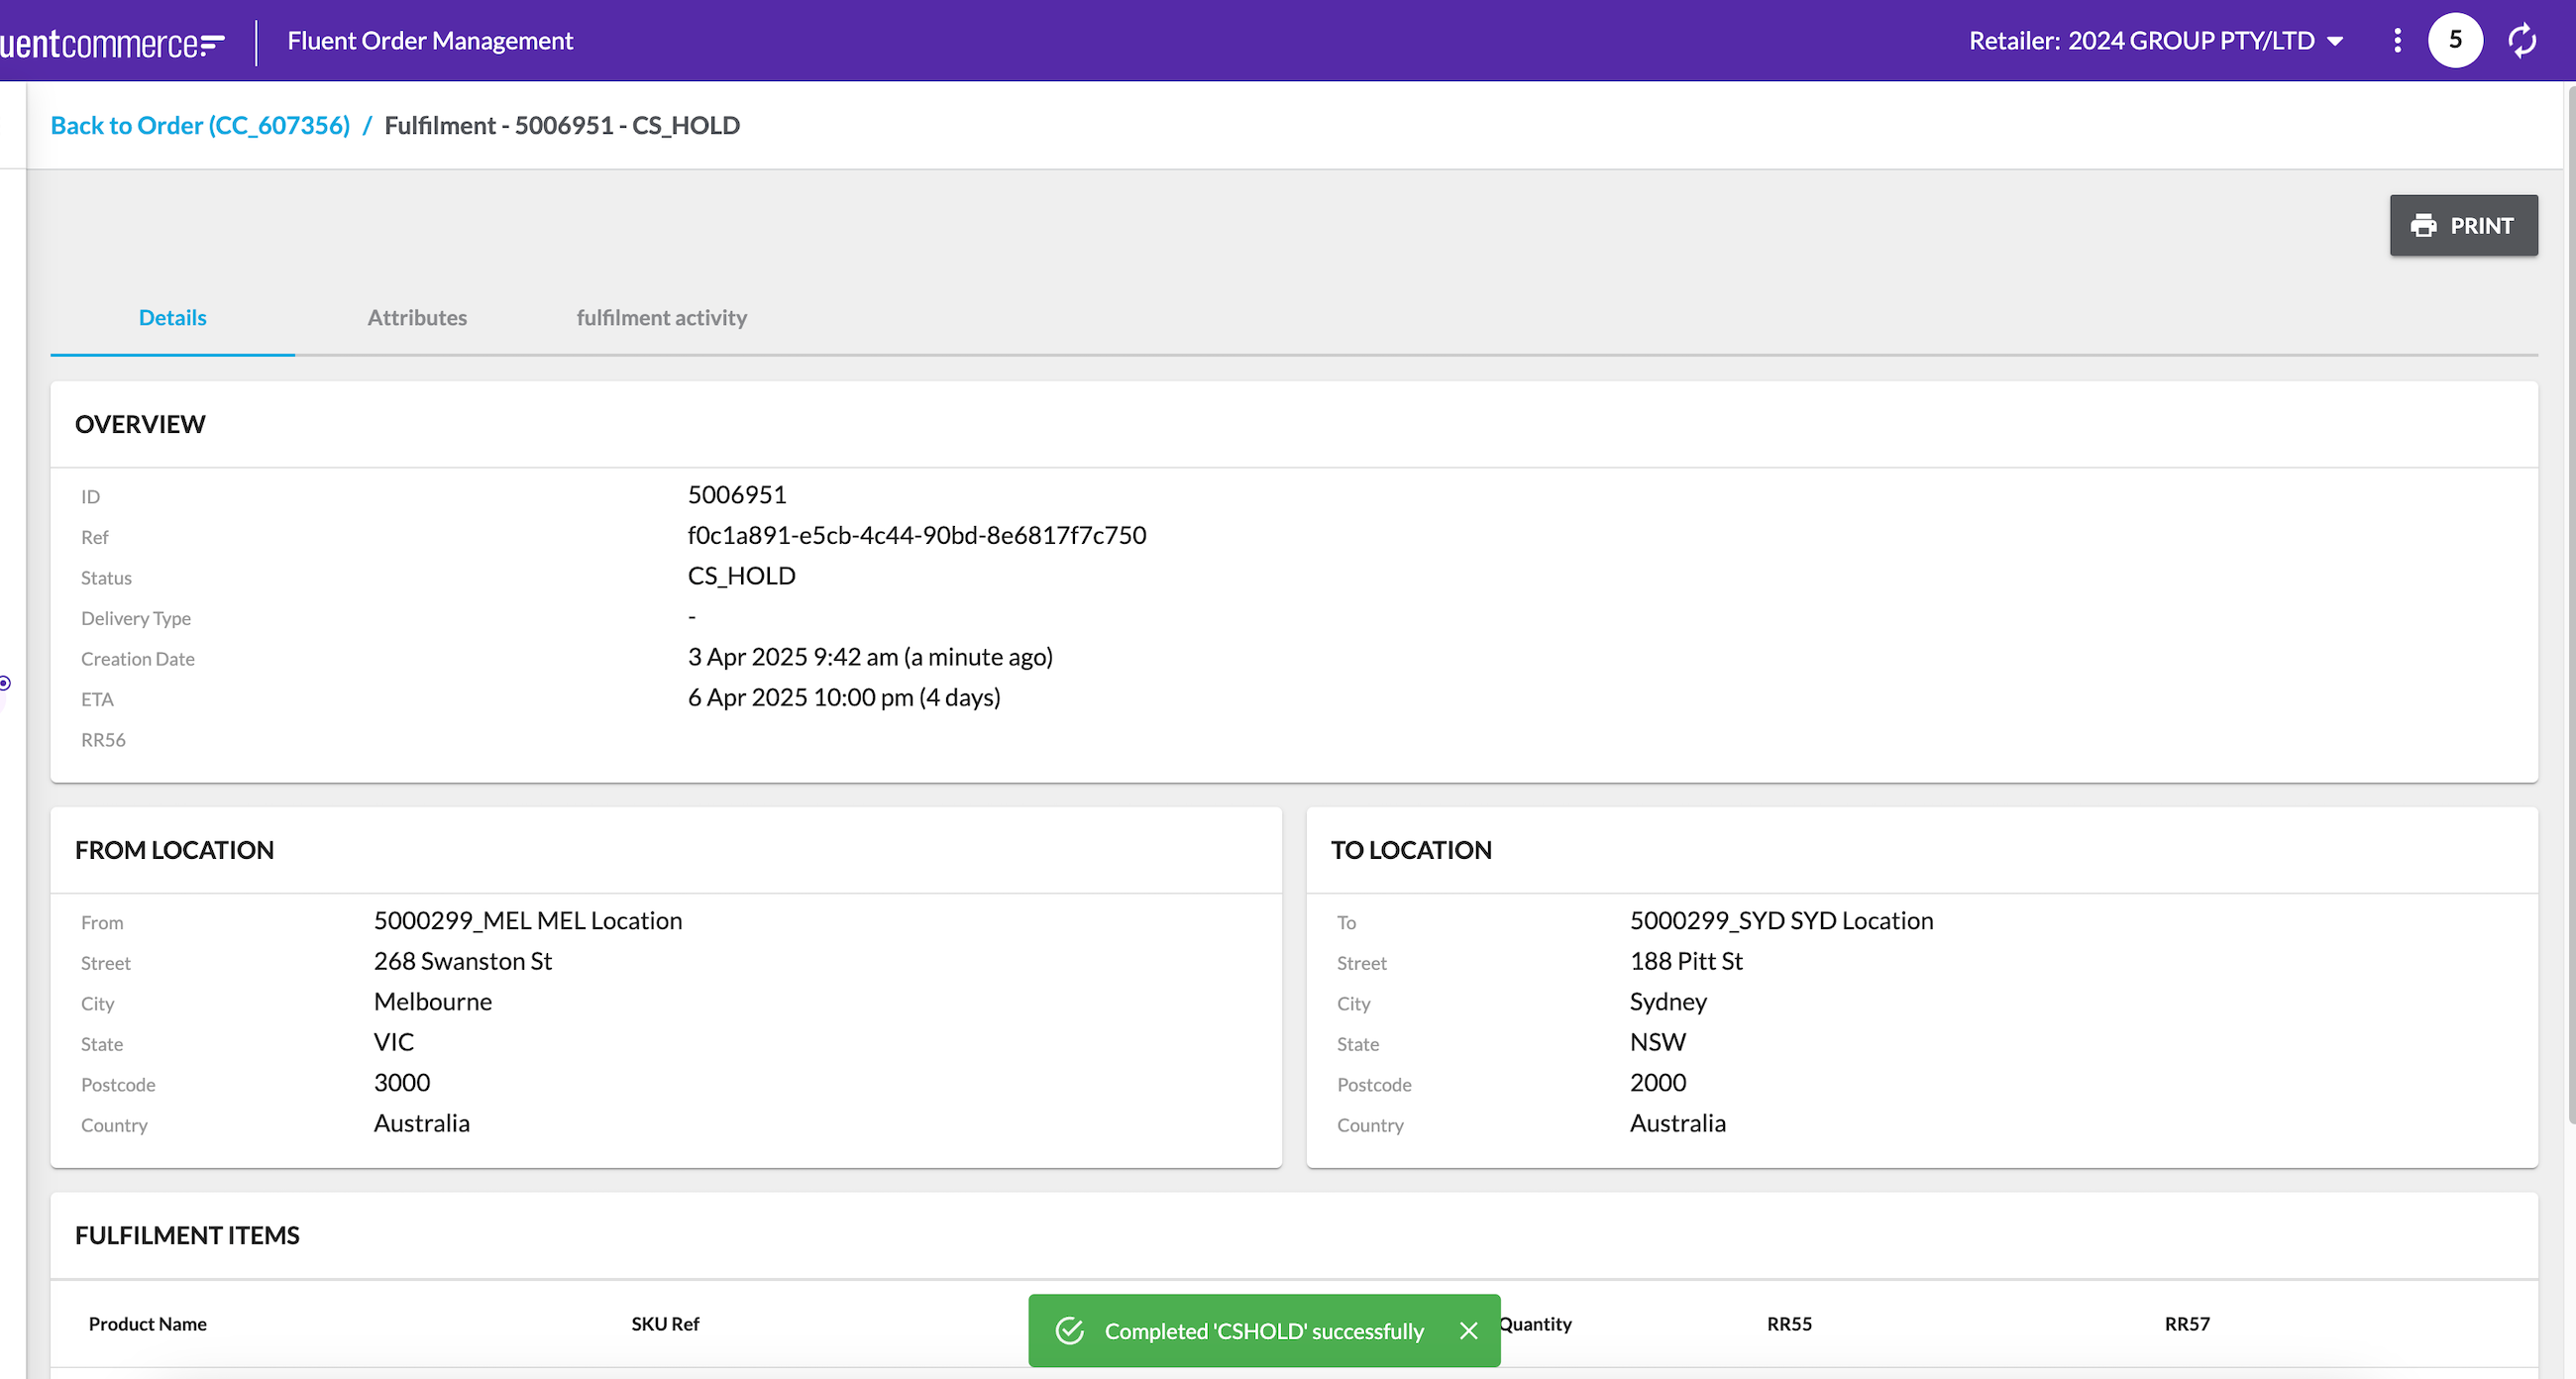
Here is an example of how to add a new manager Hold status to an Order:Step 1: go to the workflow modeller to view the CC order workflow. In the statuses section, add a new status called CS_HOLD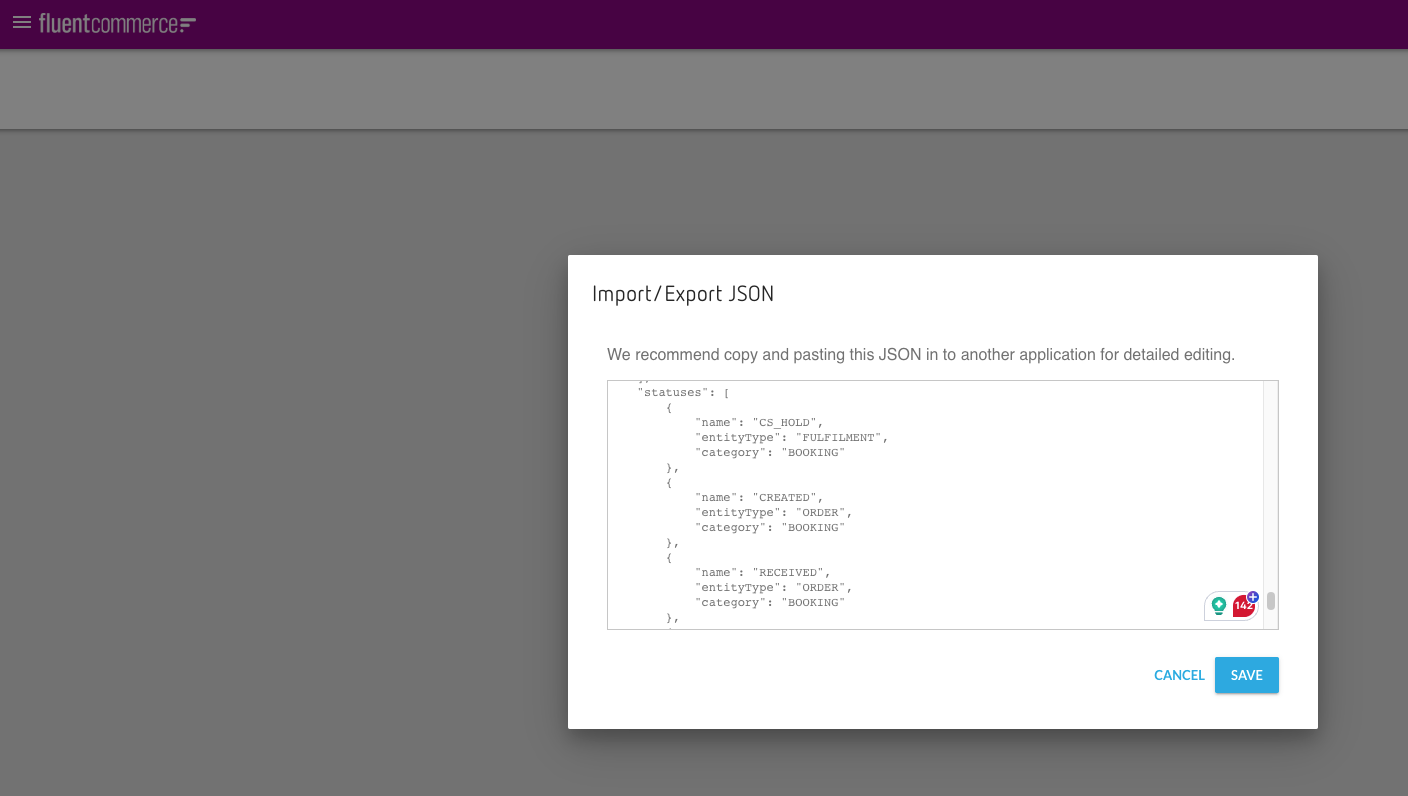 Step 2: Add a new ruleset that provides the user action to the OMS Webapp, which allows moving the fulfilment to CS_HOLD status if the fulfilment status has not passed the AWAITING_WAVE stage:
Step 3: Logon to OMS, then go to order -> fulfilment screen. User should able to see a new user action "HOLD THE FULFILMENT" button on the top right-hand corner: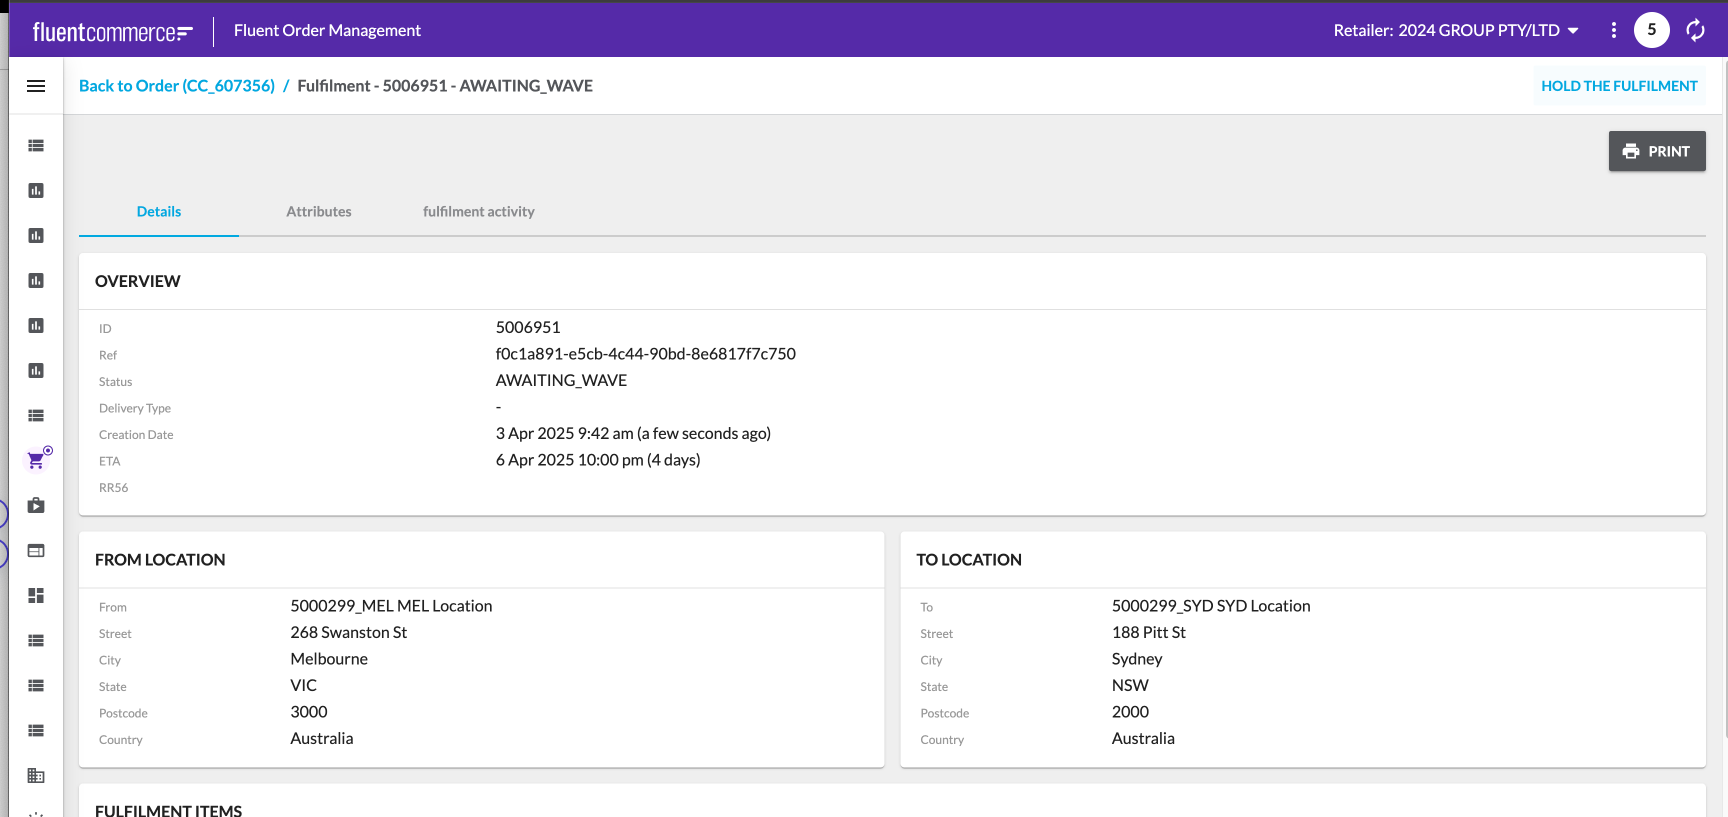
- Created
- Awaiting Payment
- Fraud Check
- Booked
Adding a State via the Workflow JSON
To add a State to a Workflow JSON, you must add a new Status to the`statuses` array of the Workflow JSON that matches the schema outlined below.Status schema
| JSON Key | Value Type | Mandatory | Description |
| name | String | YES | Name of the status. |
| entityType | String | YES | Name of the entity the status belongs to. |
| category | String | YES | Name of the category the status belongs to.There are four possible values:
|
Status sample
Here is an example of how to add a new manager Hold status to an Order:Step 1: go to the workflow modeller to view the CC order workflow. In the statuses section, add a new status called CS_HOLD
Step 2: Add a new ruleset that provides the user action to the OMS Webapp, which allows moving the fulfilment to CS_HOLD status if the fulfilment status has not passed the AWAITING_WAVE stage:Step 3: Logon to OMS, then go to order -> fulfilment screen. User should able to see a new user action "HOLD THE FULFILMENT" button on the top right-hand corner:
Except as otherwise stated in the Extend Knowledge Content site policy, the content on this page is licensed under the Creative Commons Attribution 4.0 Licence, and any code samples that appear on this page are licensed under the Apache 2.0 Licence, unless any code sample forms part of the Fluent Order Management Platform code. Neither of these licences apply to any content on any other page that can be reached via a link on this page unless otherwise specified on that other page. If you wish to use any of the Extend Knowledge Content, you must do so in compliance with the licenses referred to above and the Extend Knowledge Content site policy, including attribution in the manner set out on this page.