Setting Up Alerts in Analytics Studio
How-to Guide
Author:
Yulia Andreyanova
Changed on:
22 June 2026
Key Points
- Alerts can be configured for dashboard metrics that support alert conditions
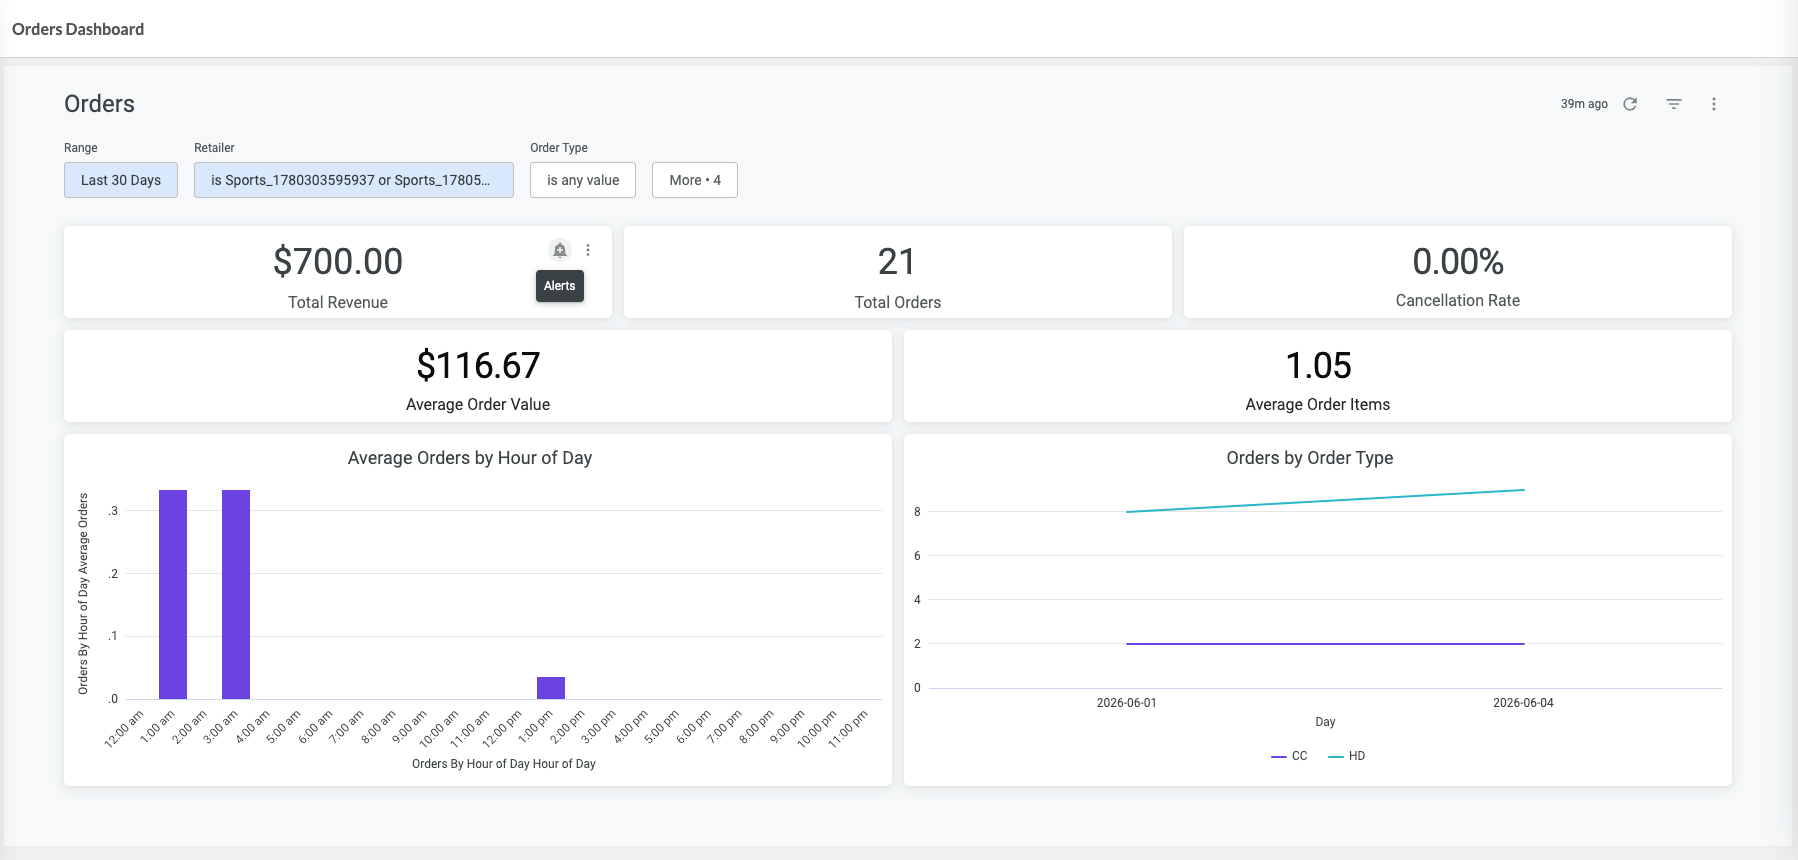
- Metrics that support alerts display the Alerts icon on the tile. If the icon is not visible, alerts are not available for that metric
- Alerts are evaluated automatically and trigger notifications when the configured condition is met
- Notification recipients, frequency, and evaluation time can be configured
- Alerts help monitor important metrics without manually reviewing dashboards
Steps
 Open the alert configuration
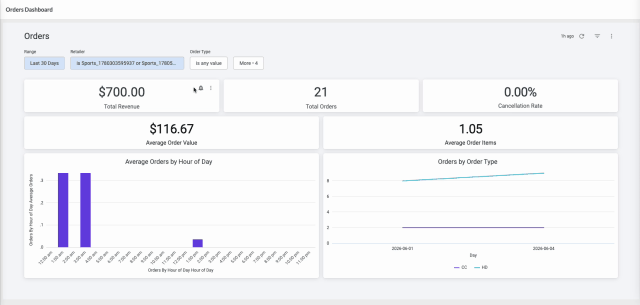
- Open Analytics Studio either by navigating directly to the URL or via the context switcher in Fluent OMS or Store, then select the Orders Dashboard.
- Locate the Total Revenue metric.
- Click the Alerts icon on the metric tile.
Configure the alert condition
- Select the metric to monitor.
- Choose the condition operator (>, <, =, ≧, ≦).
- Enter the threshold value that should trigger the alert.
- Total Revenue falls short of the target value
- Total Orders exceed an expected threshold
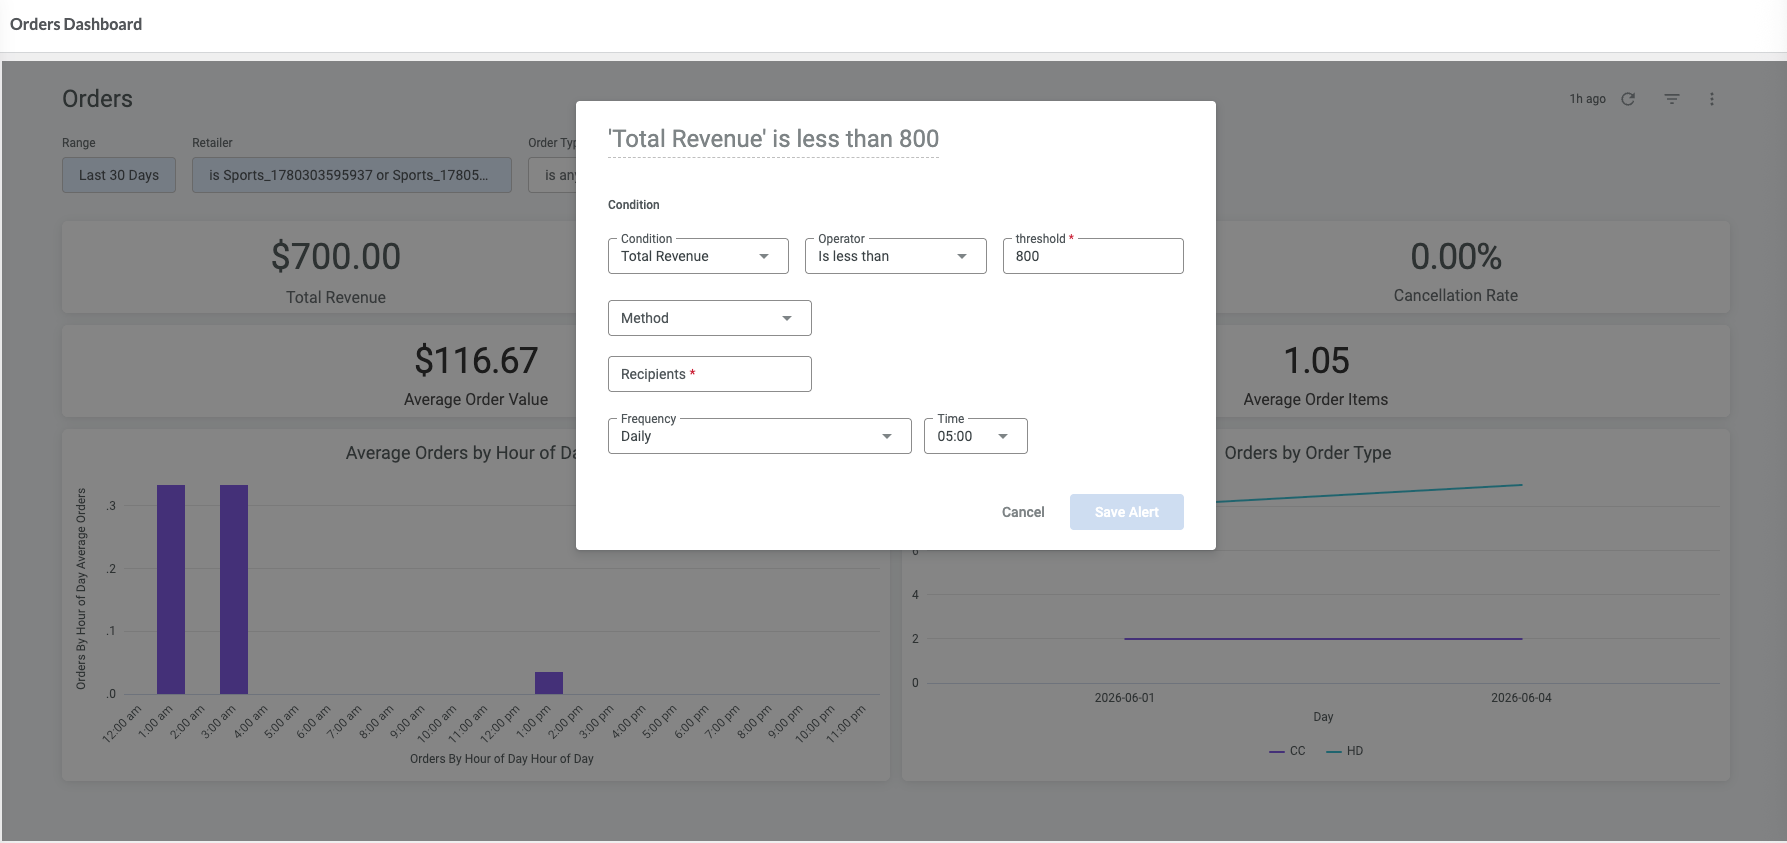
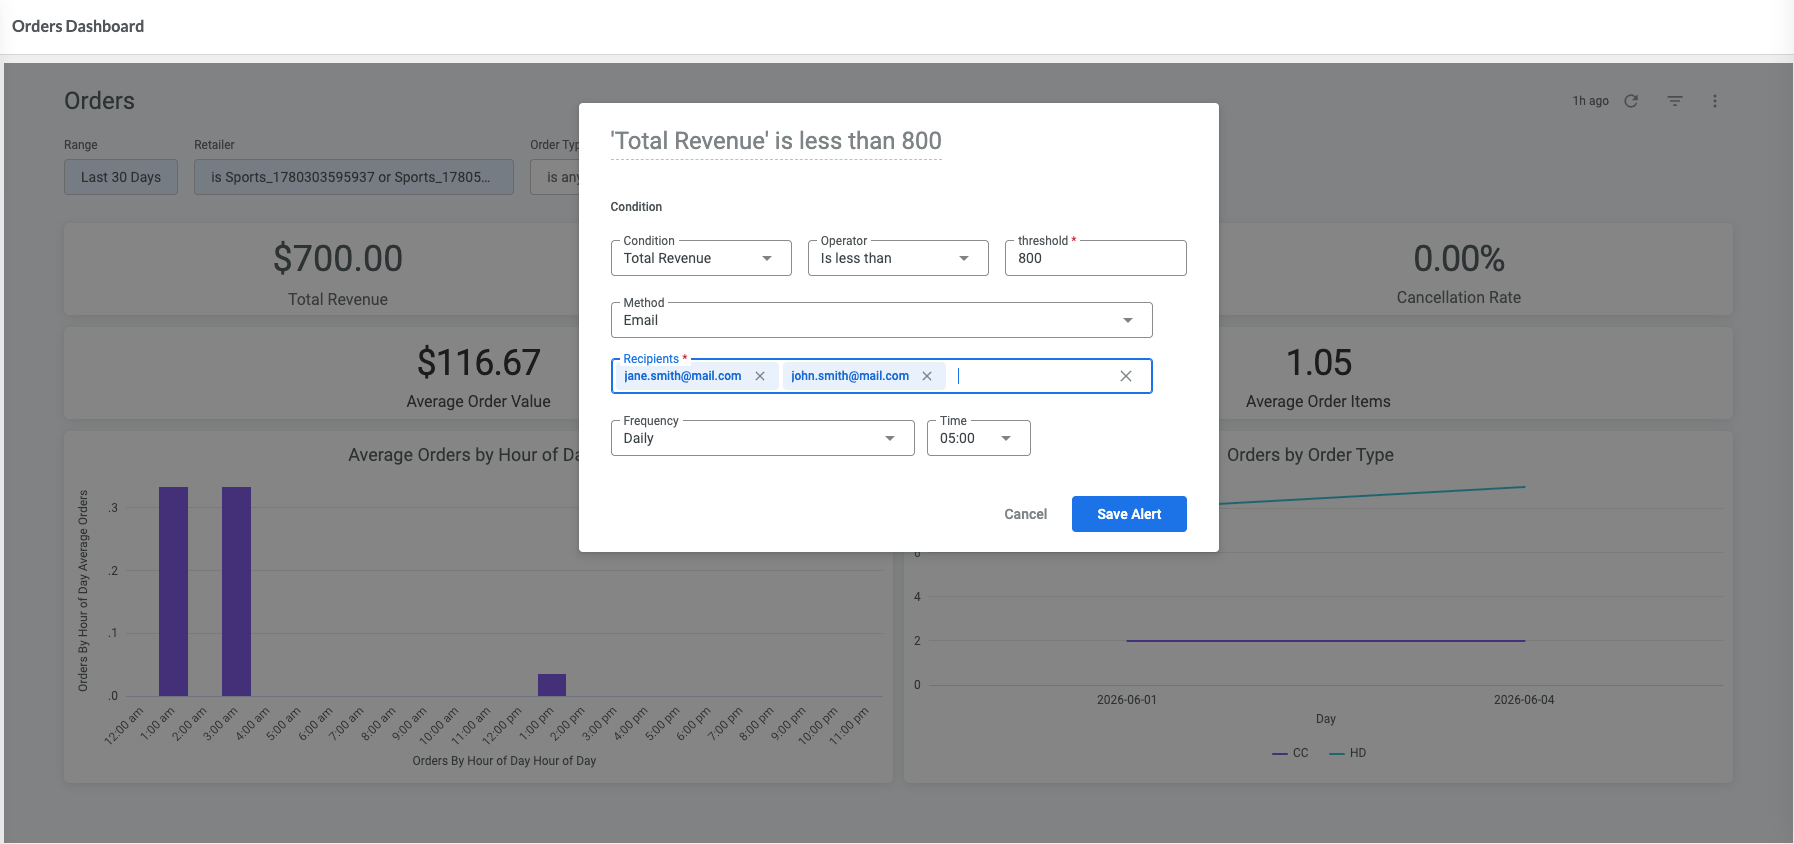
Configure the alert notifications
- Notifications are sent by email.
- Enter the email address of each recipient and press Enter to add it to the notification list.
- Choose how frequently the alert should be evaluated.
- Select the notification time.
- Click Save Alert.
Edit or delete an alert
To edit or delete an alert, click the Alerts icon on the metric tile and select the alert you want to modify or remove.
Result
Notifications are sent automatically when the configured metric meets the defined condition, helping you respond quickly to important changes.
Next Steps
To share dashboard results on a regular schedule, see Scheduling Reports in Analytics Studio.
