Azure Single Logout configuration
How-to Guide
Author:
Yulia Andreyanova
Changed on:
4 Mar 2024
Key Points
- The article offers detailed instructions for setting up Single Logout (SLO) for Azure AD, serving as an external identity provider.
- Users can establish a robust authentication system by following the precise steps outlined, enhancing security and efficiency.
Steps
 Capture Logout URL from Azure Portal
Navigate to the Microsoft Azure portal on Microsoft Azure. Then, choose your configured enterprise application. Proceed by clicking on Single sign-On, then simply copy the Logout URL provided.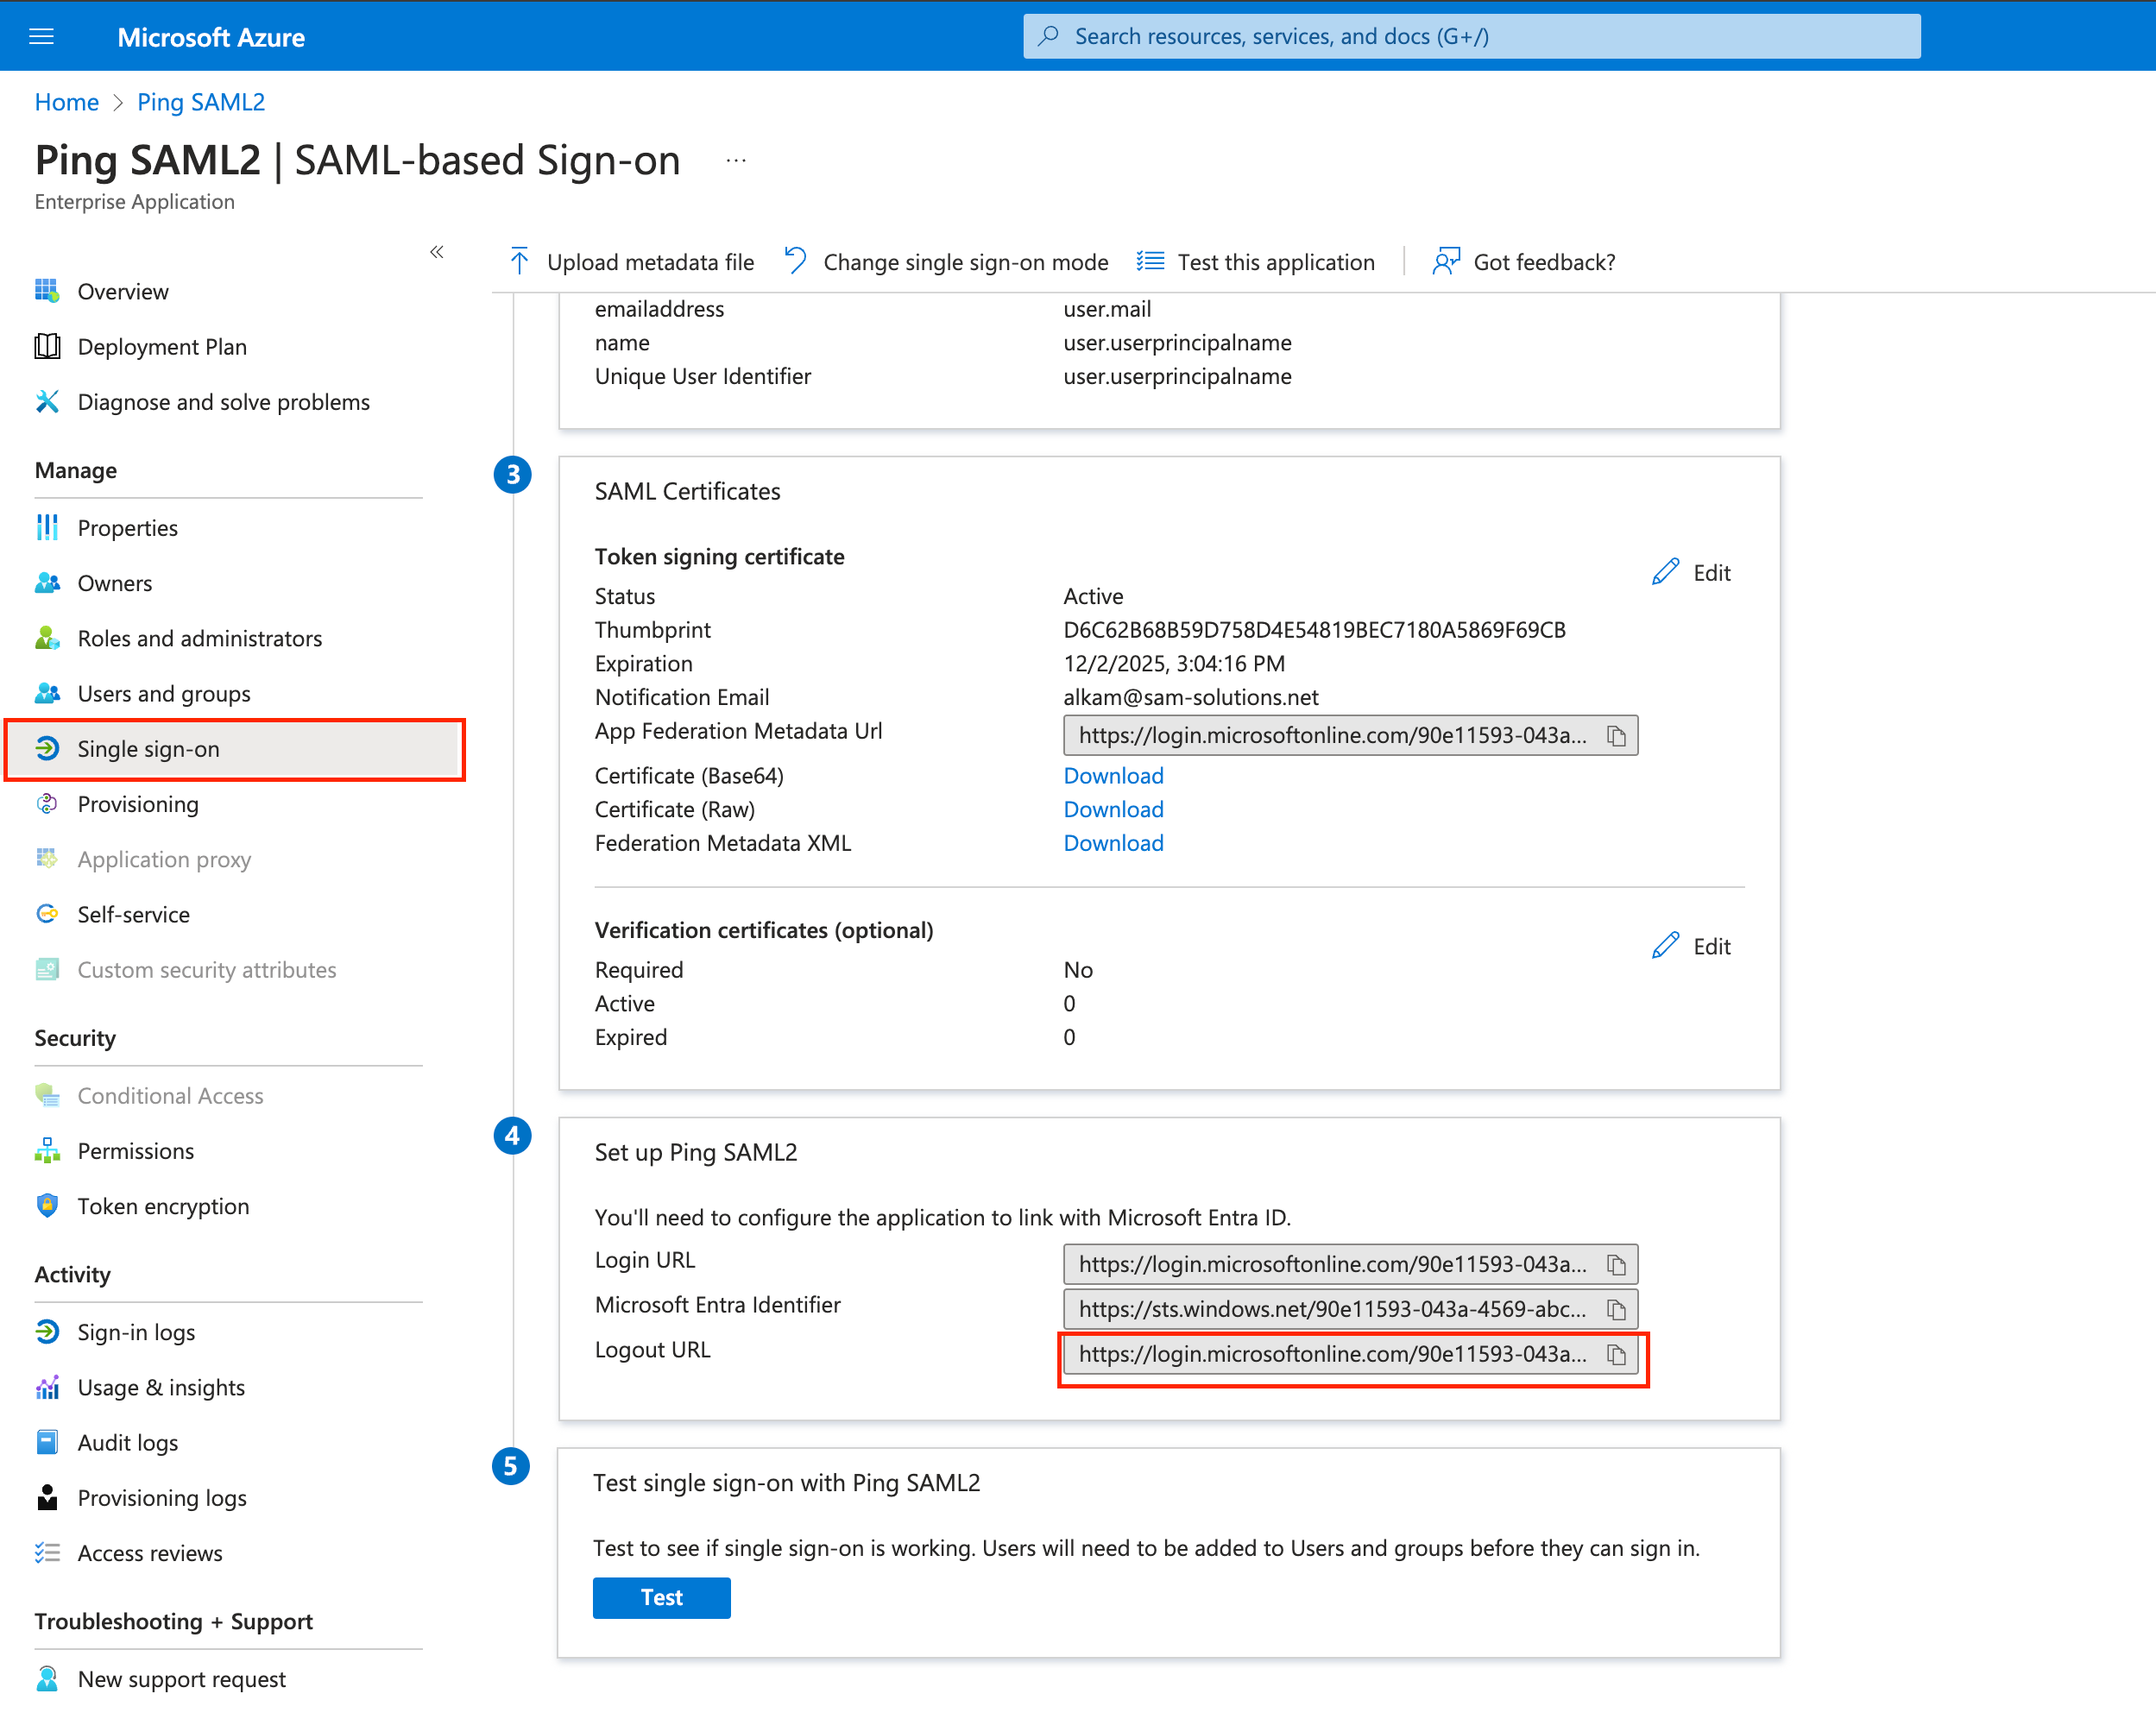
Configure PingOne Integration
To configure PingOne, first, access Integrations → External IDPs. Then, select your identity provider and navigate to the IDP Configuration tab. Click the Edit button to proceed with the configuration.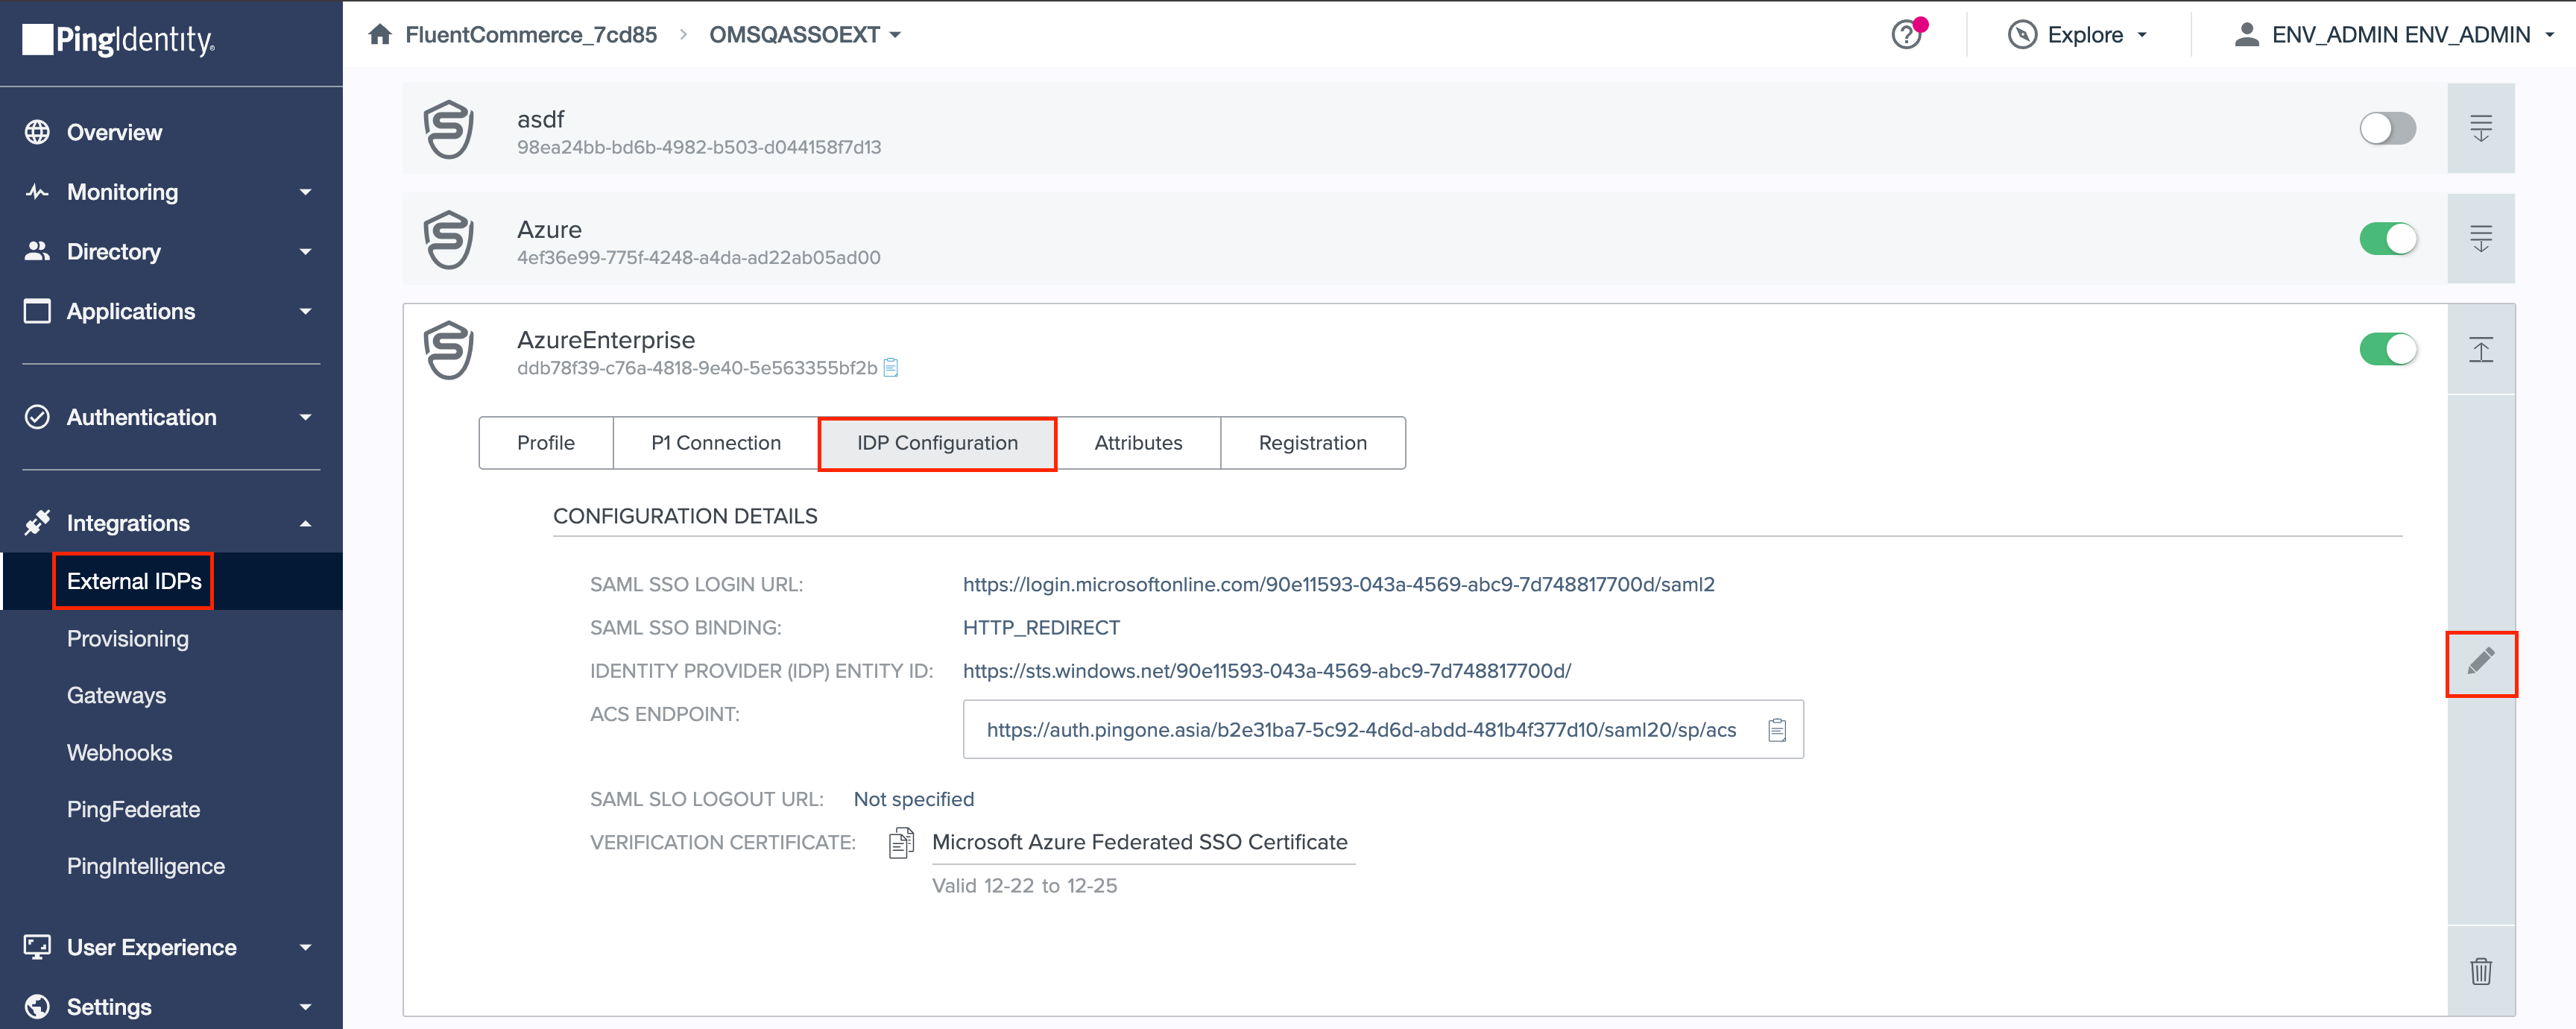
Integrate Logout URL with SLO Endpoint
Insert the Logout URL captured from Azure Portal into the SLO ENDPOINT field. Following this, save the modifications by clicking on the Save button.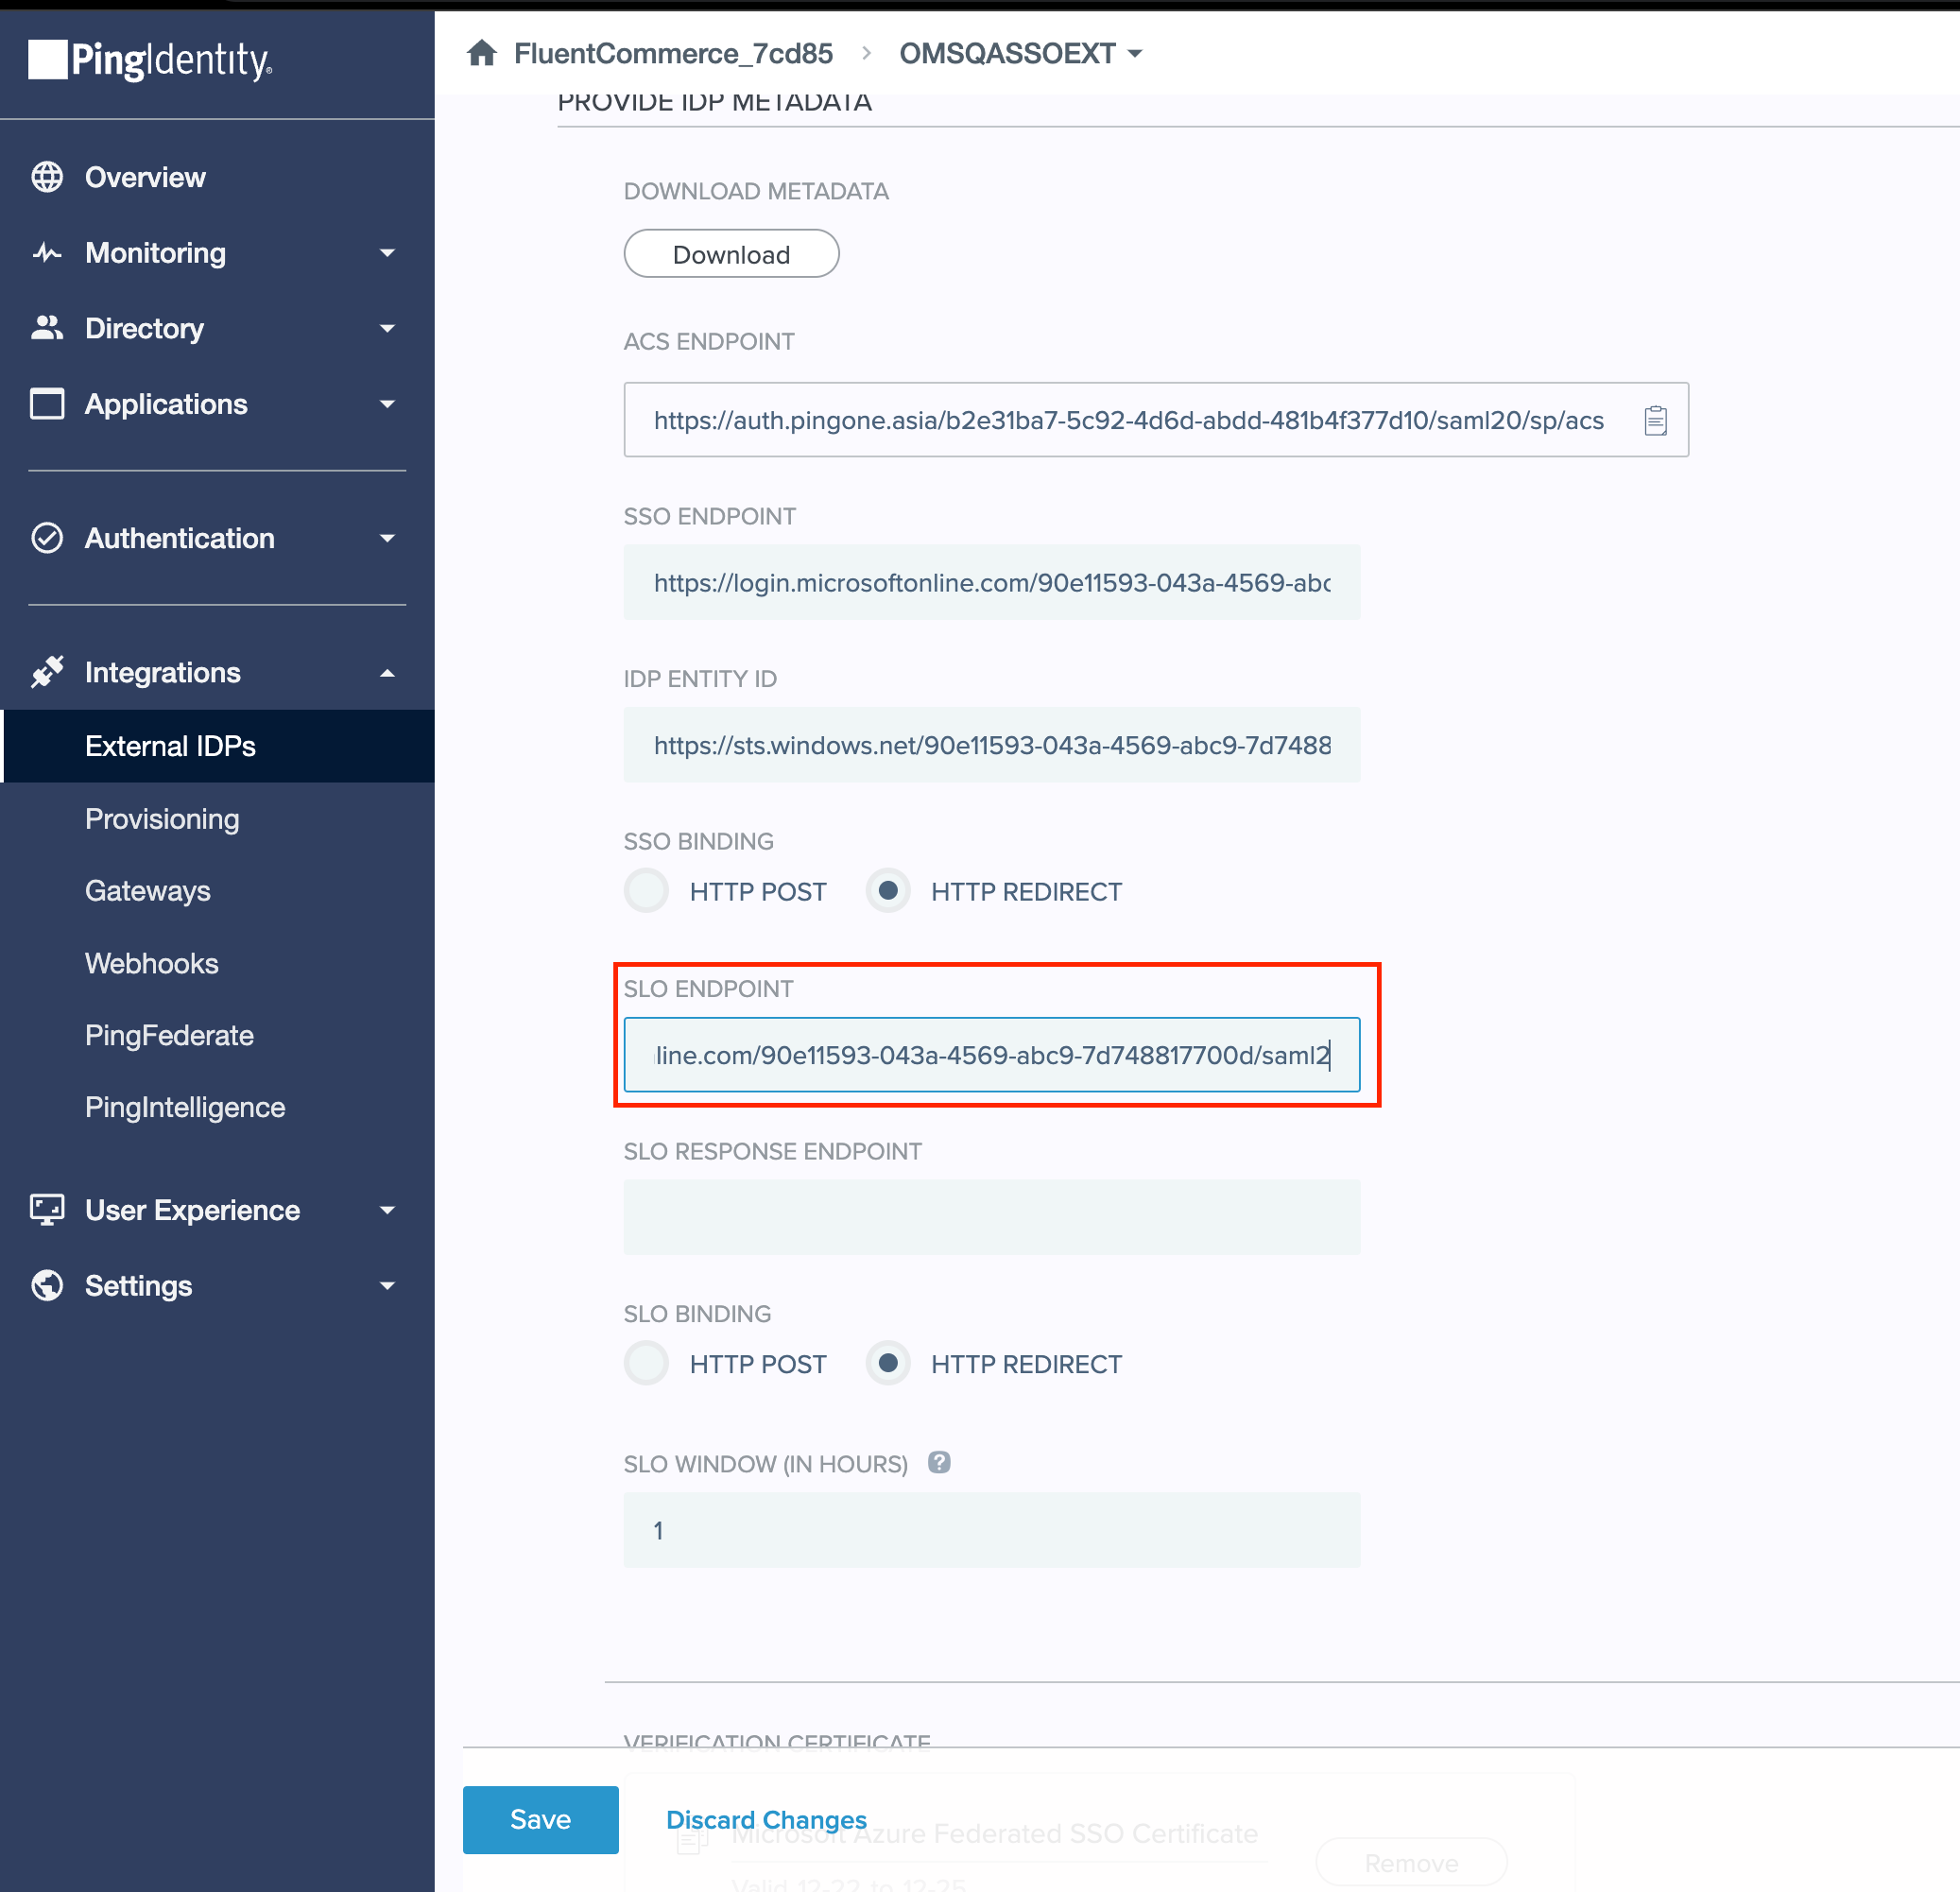
Update Single Sign-On Configuration in Fluent OMS
Navigate to Fluent OMS and access Admin → Settings. Find the SSO.DETAILS setting and switch it to edit mode. Update the
`signOffUrikey` with the value `"<authEndpoint>/<envId>/saml20/startslo"`. Once updated, save the changes by clicking the Submit button.