Switch Store Locations
Author:
Fluent Commerce
Changed on:
20 Feb 2025
Key Points
- This guide shows you how to seamlessly switch Store Locations within the Fluent Store web app
- This guide is aimed at In-Store users
Prerequisites
Steps
Who is this guide for?
This guide is aimed at In Store users.
Prerequisites
- Fluent Store is enabled
- The context switcher is enabled for Fluent Store.
- The logged-in user has been granted access to more than one location.
Step 1: Check User roles
Here is the step to ensure the user has the right roles. You can use Postman to get User details:
1POST: {{fluentApiHost}}/graphql
2
3
4Query:
5{
6 users ( first:10, ref:"%MANAGER%"){
7 edges {
8 node {
9 id
10 ref
11 status
12 type
13 username
14 primaryRetailer{
15 ref
16 }
17 status
18 primaryLocation{
19 ref
20 }
21 roles{
22 contexts{
23 contextId
24 contextType
25 }
26 role{
27 id
28 name
29 }
30 }
31 }
32
33 }
34
35 }
36 }
Language: json
Name: get Users query
Description:
Sample get Users query
The user should have multiple contexts:
1{
2 "data": {
3 "users": {
4 "edges": [
5 {
6 "node": {
7 "id": "33333",
8 "ref": "5000299_MANAGER01",
9 "status": "ACTIVE",
10 "type": "AGENT",
11 "primaryRetailer": {
12 "ref": "sample_retailer"
13 },
14 "primaryLocation": {
15 "ref": "5000299_SYD"
16 },
17 "roles": [
18 {
19 "contexts": [
20 {
21 "contextId": "5000299",
22 "contextType": "RETAILER"
23 },
24 {
25 "contextId": "5000238",
26 "contextType": "AGENT"
27 },
28 {
29 "contextId": "5000236",
30 "contextType": "AGENT"
31 },
32 {
33 "contextId": "5000237",
34 "contextType": "AGENT"
35 }
36 ],
37 "role": {
38 "id": "3",
39 "name": "STORE"
40 }
41 }
42 ]
43 }
44 }
45 ]
46
47 }
48 }
49}
Language: json
Name: Sample query users output
Description:
this user have access to locations 5000236, 5000237 and 5000238.
1POST: {{fluentApiHost}}/graphql
2
3Query:
4mutation updateUser ($input: UpdateUserInput) {
5 updateUser (input: $input) {
6 id
7 ref
8 username
9 title
10 firstName
11 primaryLocation{
12 id
13 }
14 lastName
15 language{
16 label
17 value
18 }
19 primaryEmail
20 primaryPhone
21 type
22 status
23 department
24 country
25 timezone
26 promotionOptIn
27 createdOn
28 updatedOn
29 }
30}
31
32
33Variable:
34{
35 "input": {
36 "id": 33333,
37 "roles": {
38 "role": {
39 "name": "STORE"
40 },
41 "contexts": [
42 {
43 "contextId": "5000299",
44 "contextType": "RETAILER"
45 },
46 {
47 "contextId": "5000238",
48 "contextType": "AGENT"
49 },
50 {
51 "contextId": "5000236",
52 "contextType": "AGENT"
53 },
54 {
55 "contextId": "5000237",
56 "contextType": "AGENT"
57 }
58 ]
59 }
60
61
62
63 }
64}
65
66
Language: json
Name: updateUser mutation to add roles/contexts to an user
Description:
sample updateUser mutation
Step 2: Check manifest
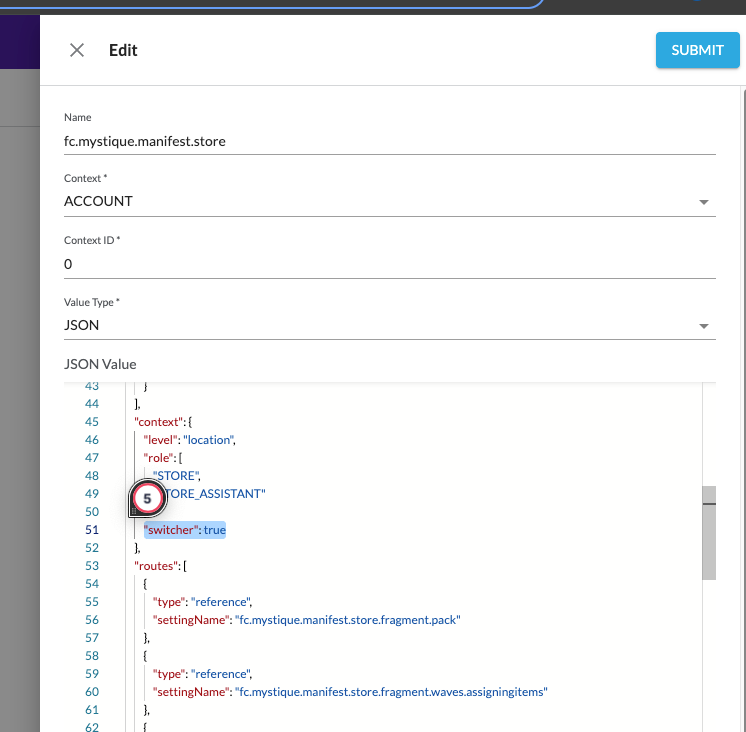
Go to OMS web app -> setting page to look up setting:
`fc.mystique.manifest.store`
Ensure it has the switcher setup in the manifest:
Step 3: logon to Fluent STORE
Log into Fluent Store as a user who has been granted access to multiple locations
Step 4: check the navigation bar
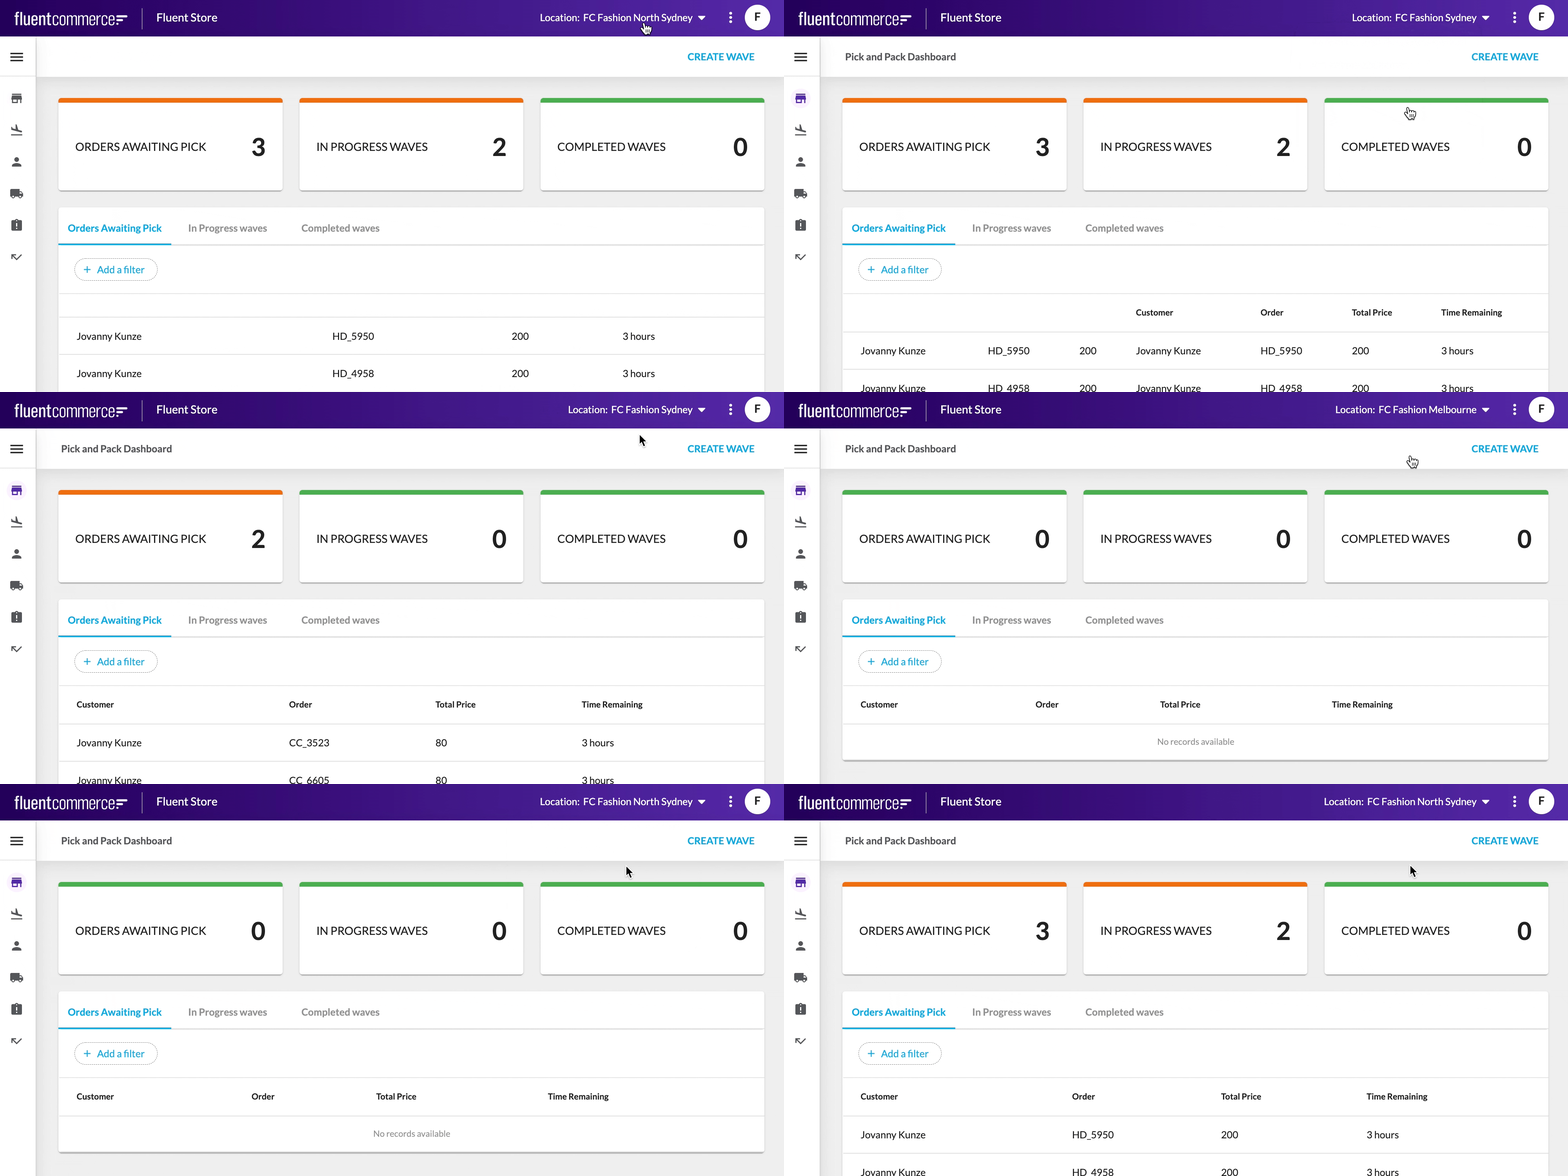
Click on the active location in the top navigation bar, the list of available locations to navigate to should then appear in a dropdown. You can then switch to one of the available locations by choosing one from the list.
Step 5: switch location
You can navigate back to the previous location by repeating Step 2 and choosing the original location