Deploy and Run your Rules SDK project
How-to Guide
Author:
Lesley Dean
Changed on:
9 Feb 2026
Key Points
- A step-by-step guide to deploy your custom Rules Plugin and run the project.
- A fully setup and functioning Fluent Account is required.
- An API User with the
`DEVELOPER`role (Note: If using a Training Account, the Account Admin already has this role applied)
Prerequisites
Steps
 Version and Package Your Custom Rules Plugin
Before deployment, you need to understand the plugin naming convention and version your plugin correctly.A plugin is uniquely identified by:
Complete Examples:
`{accountId}.{pluginNamespace}::{version}`Component Breakdown:| Component | Description | Example | Rules |
`{accountId}` | Your Fluent Account ID or wildcard (for more details see Create a new Rules SDK Plugin Project). | `ACME` or `_` | Must match deployment account or use `_` for any account |
`{pluginNamespace}` | Unique namespace for your plugin | `customDomain` | no special characters except underscore |
`{version}` | Semantic version number | `0.0.1` | Follow SemVer format (major.minor.patch) |
`ACME.customOrders::0.0.1``ACME.inventoryExtensions::1.0.0``_.returnExtensions::2.1.3`
`0.0.1` and package your Plugin using `mvn clean package`.This will create a JAR file in the project's `target` directory.Plugins are deployed using the Plugin REST API, and include 3 simple steps:Make sure you have authenticated a user with the DEVELOPER role to perform the above steps.Add your custom Rule to a Workflow
Using the Workflow Modeller, add your LogHelloWorld rule to the Order CC workflow CREATE Ruleset.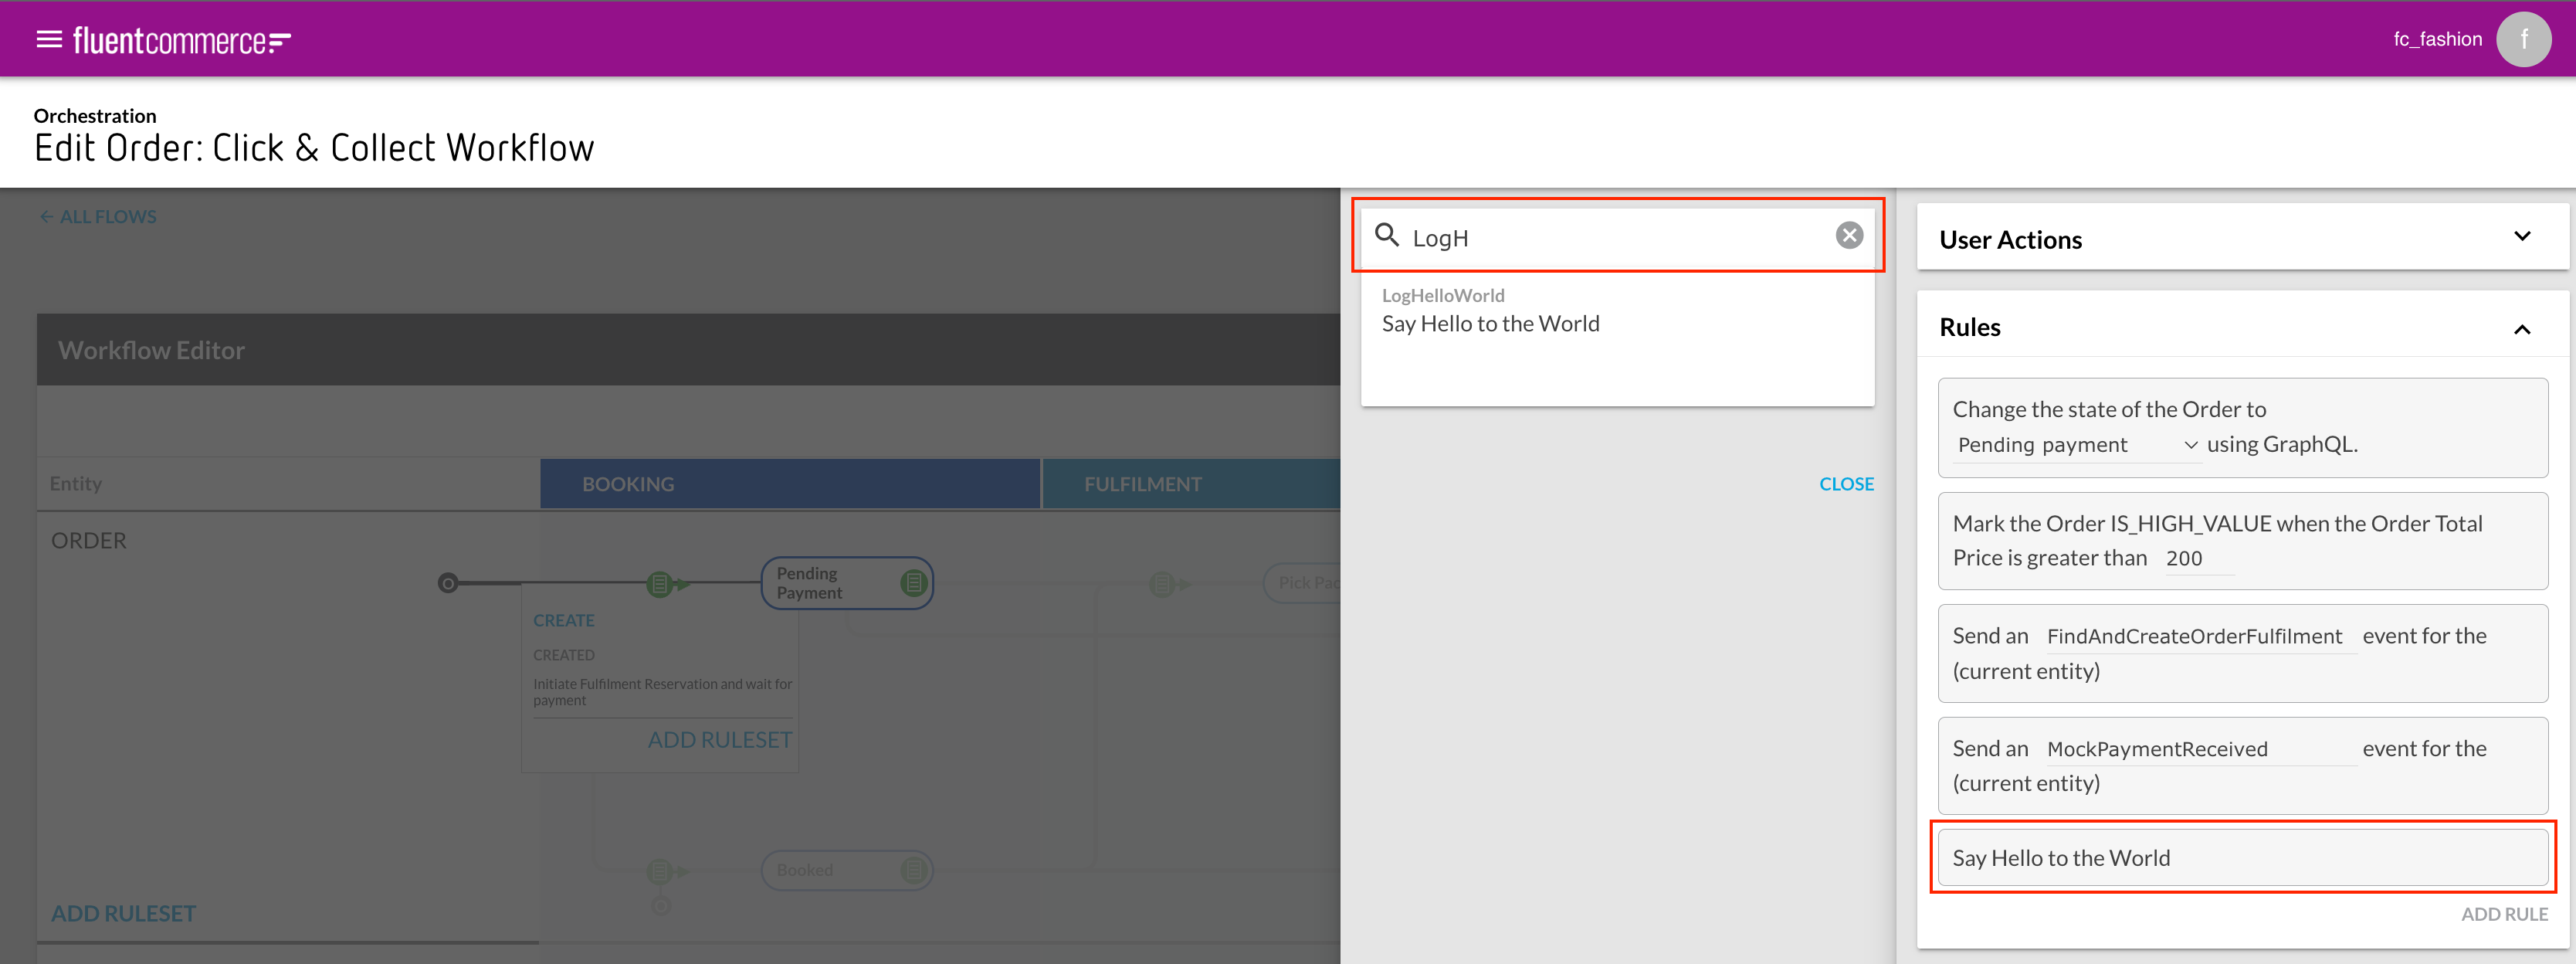 For additional help with the above, see the building workflows documentation.
For additional help with the above, see the building workflows documentation.Fire an Event to execute your Rule
To execute your LogHelloWorld Rule, you will need to trigger the Order CC workflow CREATE Ruleset.Do this by creating a new CC Order for the Retailer using a GraphQL 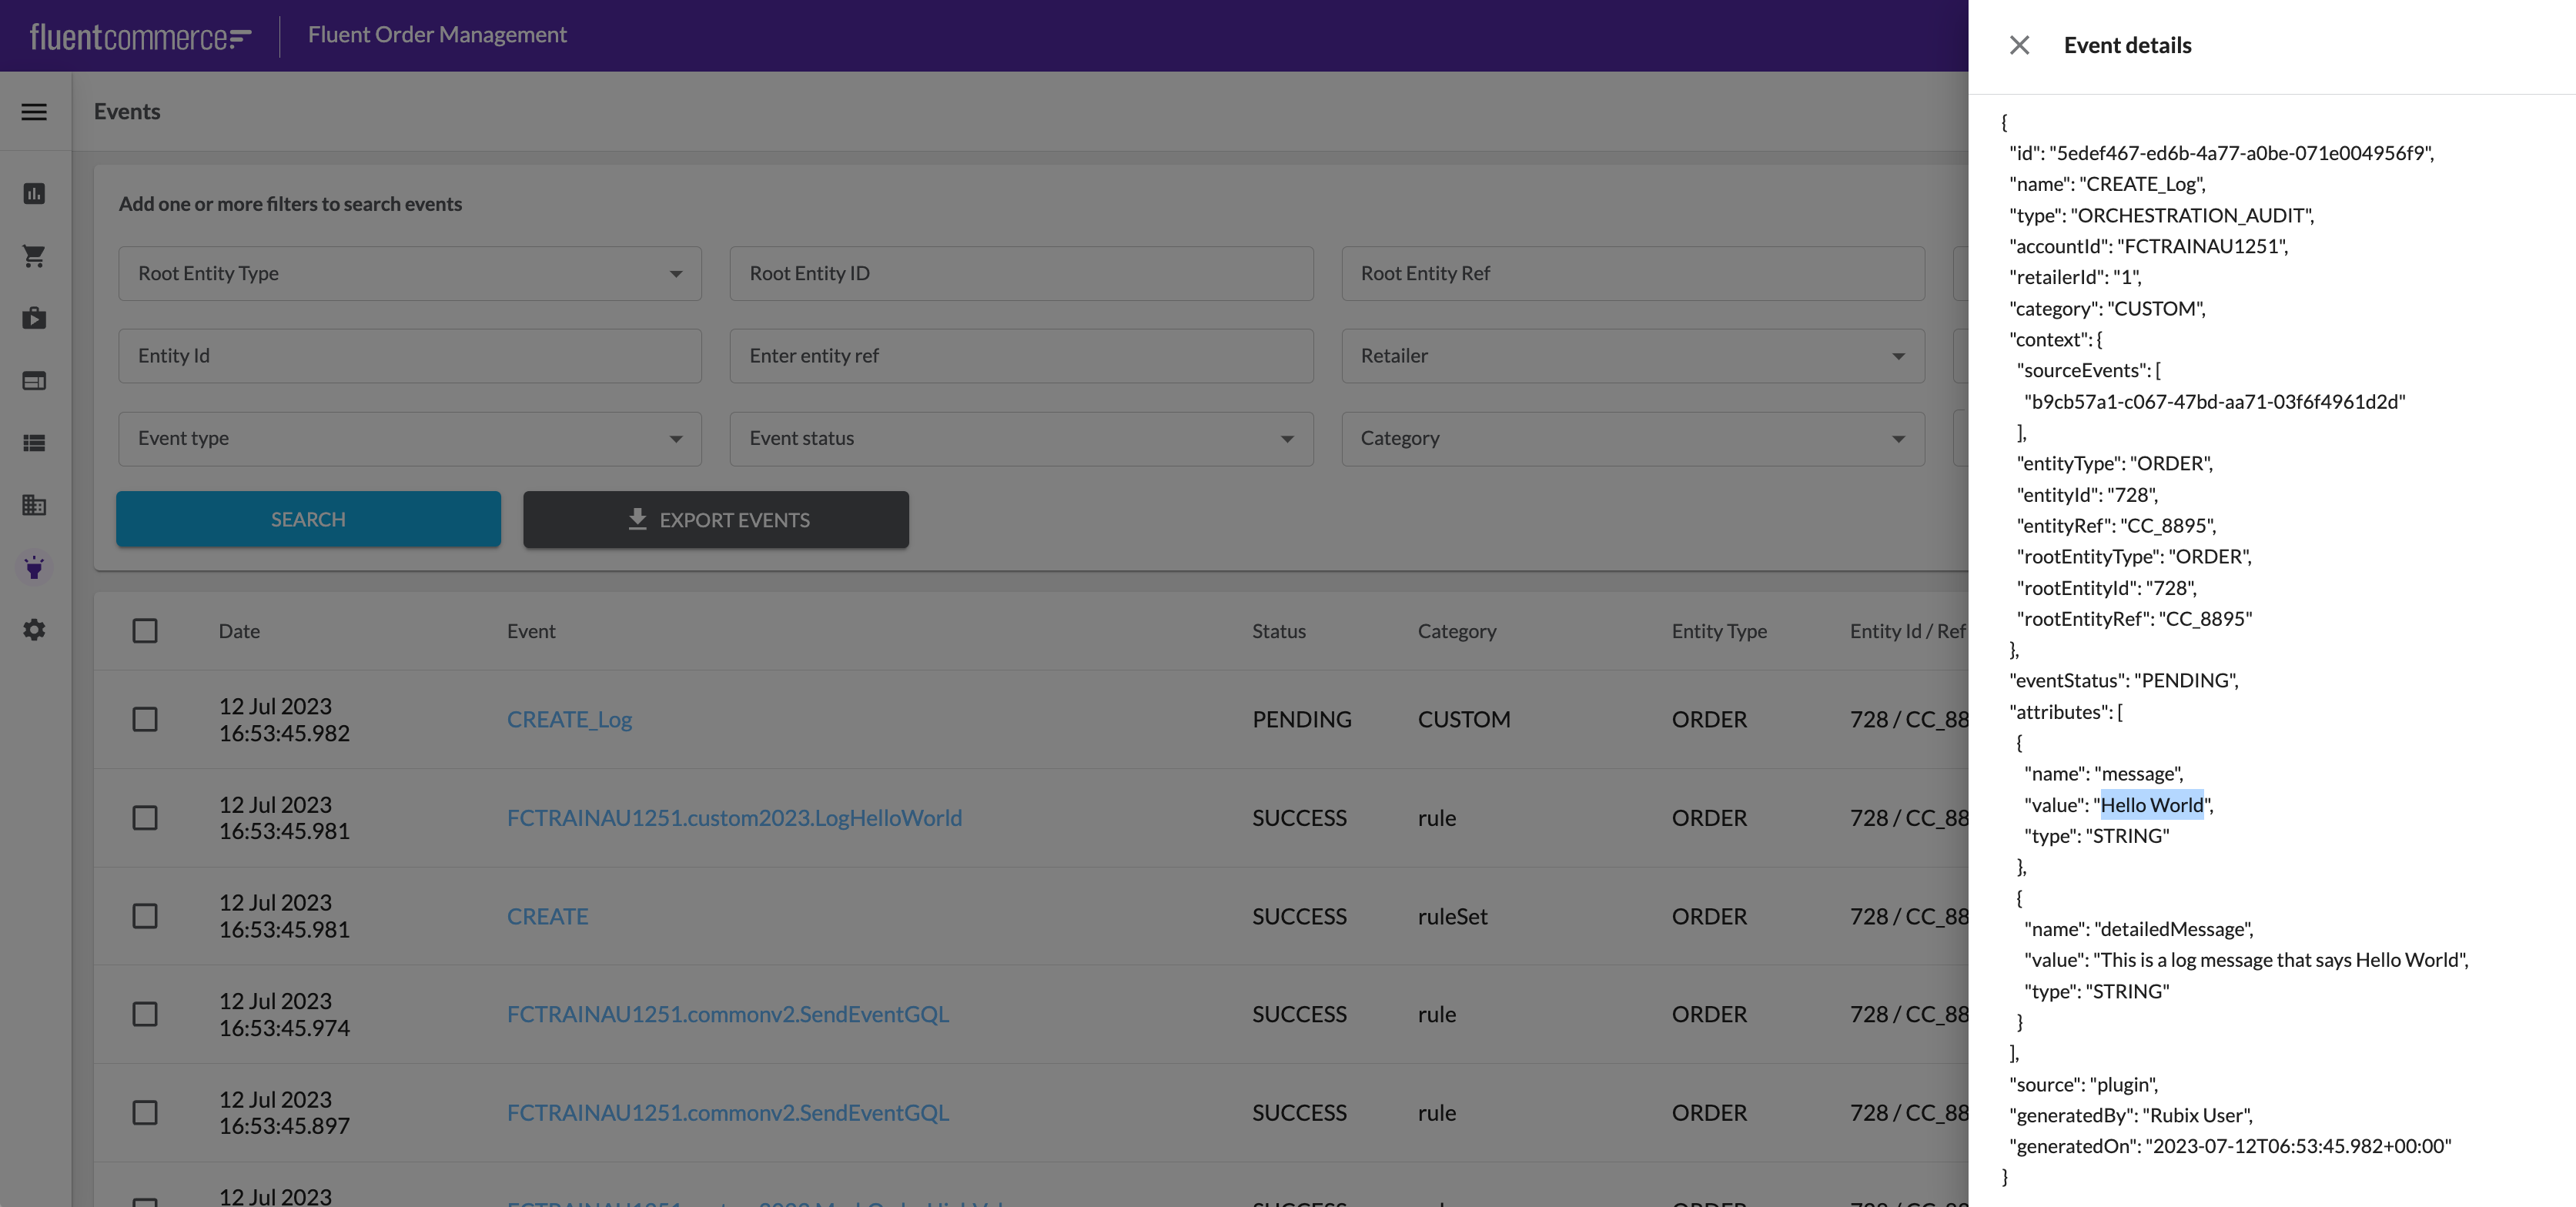
`createOrderWithCustomer` mutation.This should successfully create the new Order in your Account, and fire the CREATE Orchestration Event to trigger execution of your Rule.You can view the Orchestration Audit Events log to see the custom Log Action produced by your Rule using the OMS Events Search:What's next?
You have now completed the Getting Started guide.You are now ready to learn more about implementing Rules with the following topics: