Docs
Authors:
Dominik Malzacher, Esma Tuzovic, Cille Schliebitz, Anita Gu
Changed on:
2 June 2025
 You can add new Rulesets via an existing list or the Entity Workflow Swim lane. Clicking on the green icon reveals a list of Rulesets configured within that state or transition.Each Ruleset displays the following:
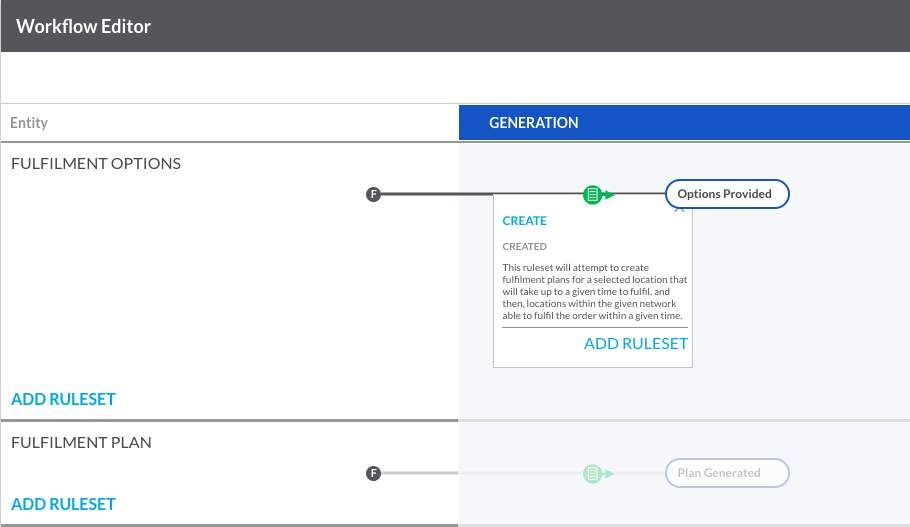
 Each of these sections can expand or collapse by clicking on the section header. The expand/collapse feature makes it much easier to work with large Rulesets.
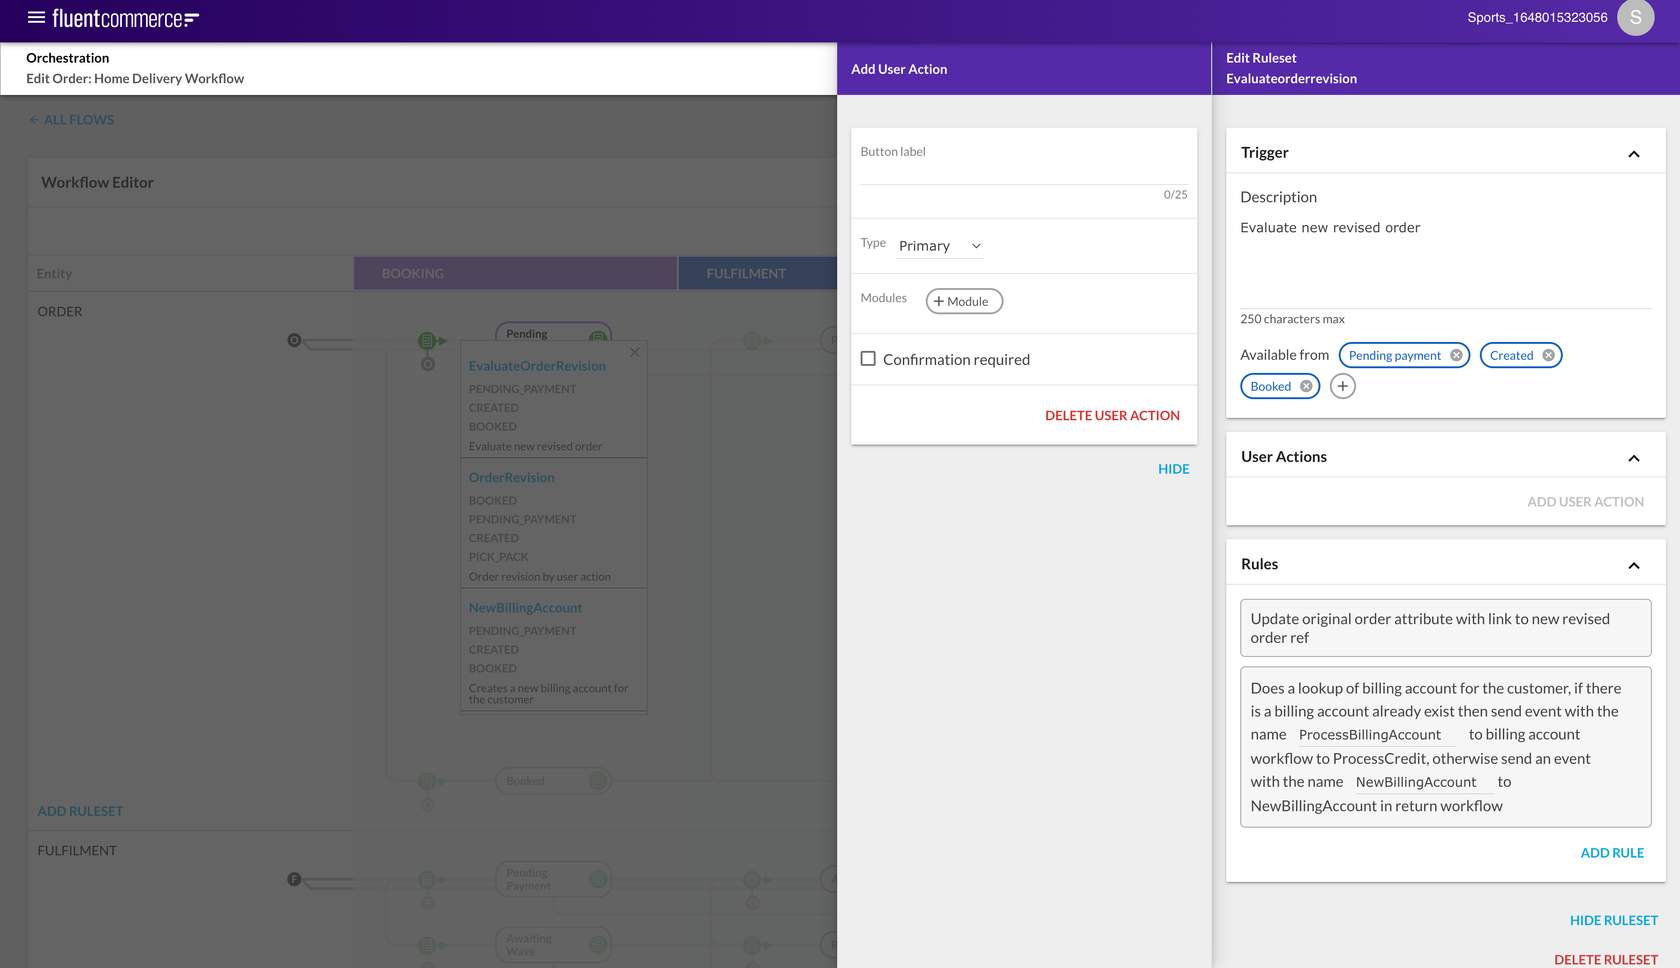
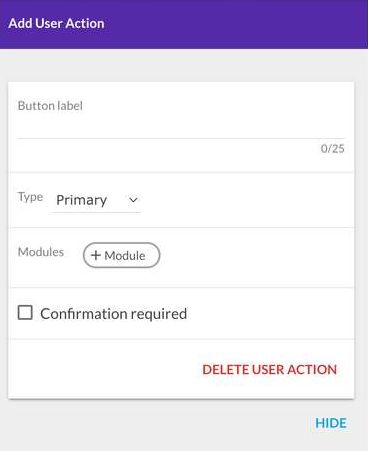 Configuring User Actions involves linking a Button Configuration with a Trigger and a Ruleset. The Button Configuration captures the Button Label, Button Type (type of button), Module Selector (where the button should be displayed), and Confirmation Required check
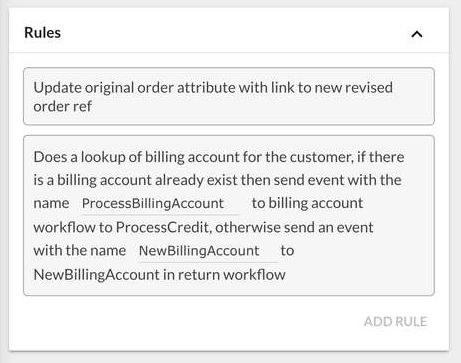 Clicking the Add Rule button brings up the Rule Library panel on the left of the Ruleset panel. Here, you will find a list of all available Rules based on which Rule Plugins are installed (and Active) for the given Account and Workflow. You can add, change, or remove Rules in this section, as well as use drag and drop to change the order of execution.Most Rules will provide input areas for their required parameters or configuration. E.g., the Change State Rule requires the new Status to be provided so that the rule knows what state to change the entity to.
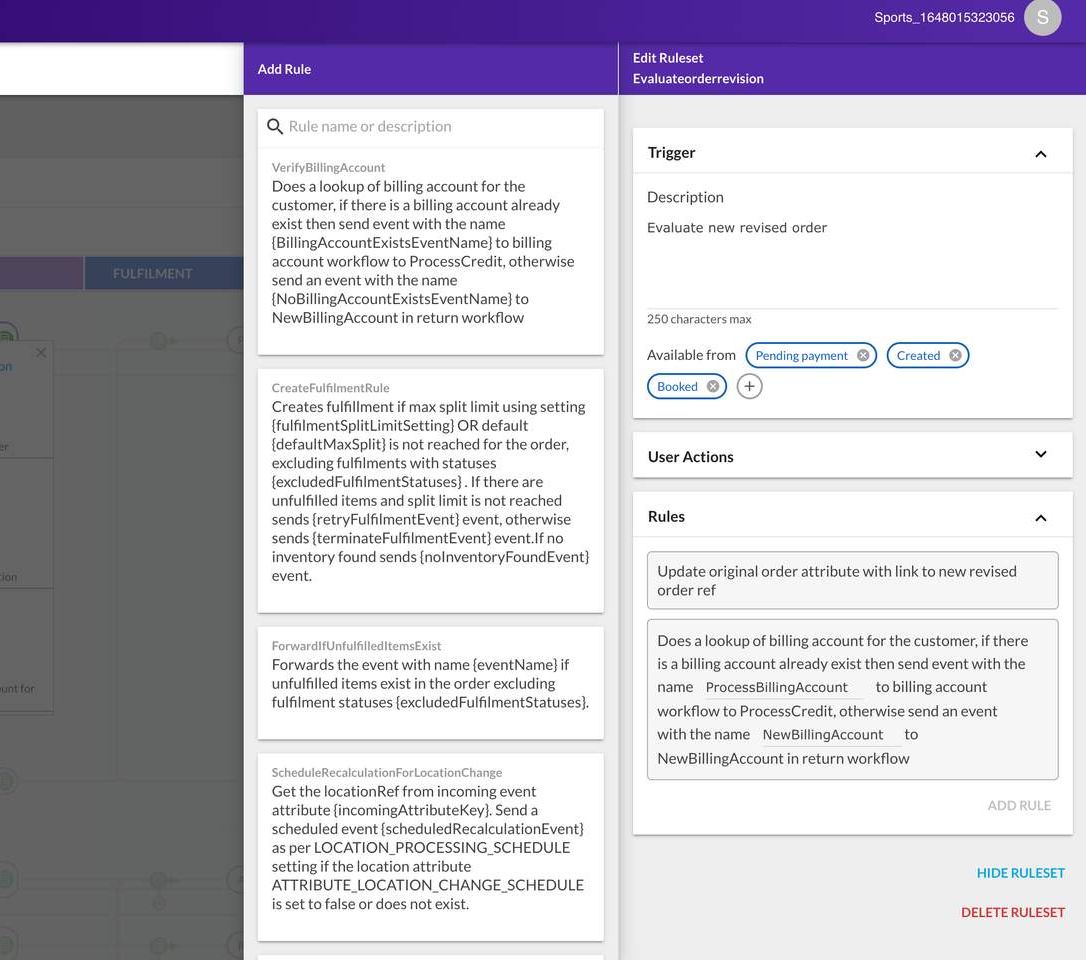 Rules in a Ruleset will be executed in the order displayed, from top to bottom. You can add, change, or remove Rules in this section, as well as use drag and drop to change the order of execution.
Copyright © 2024-2026 Fluent Retail Pty Ltd (trading as Fluent Commerce). Unless otherwise expressly stated in a current written agreement with Fluent Commerce or any of its affiliates or on any single page of the docs.fluentcommerce.com site, use of the materials on this site is strictly limited to viewing by individuals over 18 years old for legitimate commercially appropriate reasons; and any downloading, copying or other actions or uses of any kind or by any means of the materials on this site, including by artificial intelligence tools, is strictly prohibited. All other rights reserved.