SCIM Connector Provisioning Configuration
How-to Guide
Author:
Fluent Commerce
Changed on:
27 Oct 2023
Key Points
- You can configure provisioning function for Fluent OMS in Azure Active Directory.
- You would first need to have access to Microsoft Azure Portal to update the credentials and map the relevant attributes. Next step is triggering the start/stop provisioning form the portal.
Steps
Provisioning Configuration
Step 1: Update Credentials
 Step 1
Go to Microsoft Azure portal.
Step 2
Select your Enterprise application.
Step 3
Select Provisioning on the side menu, you might see the Get started in the right pane for the first access. If you see it, select it.
Step 4
Select Update Credential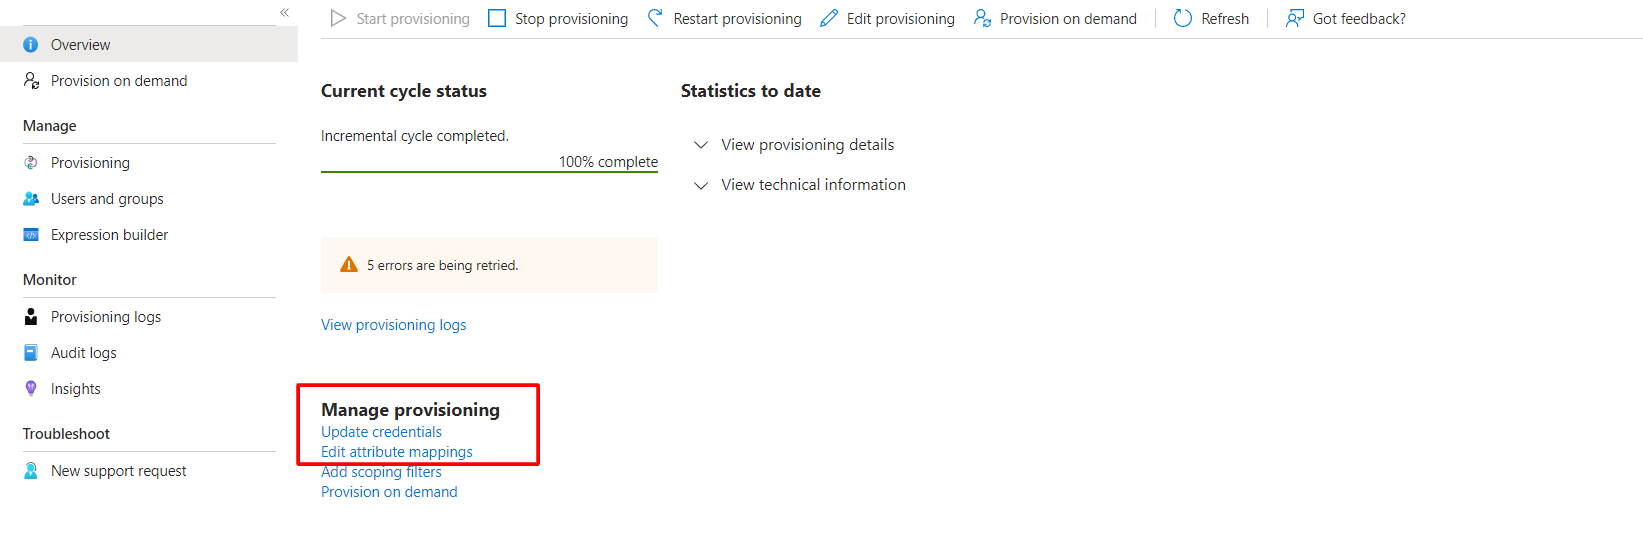
Step 5
On the form, select Provision Mode = Automatic
Step 6
Expand Admin Credentials and input your Tenant URL and Secret TokenTenant URL: the exposed endpoint of SCIM connector when published.Secret Token: go here for the details.Note: Azure recommends the flag feature, and this is important for the connector to work: Known issues with System for Cross-Domain Identity Management (SCIM) 2.0 protocol compliance - Microsoft Entra | Microsoft Lear.So, after the URL, there should be a suffix <Tenant URL>/?aadOptscim062020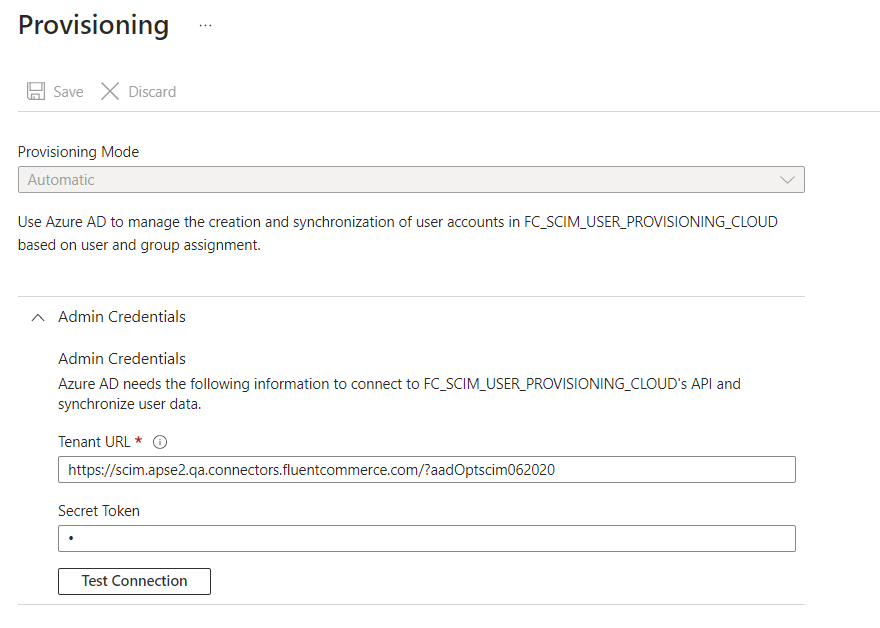
Step 7
Select Test Connection. The connection should work well.
Step 8
Select Save
Step 2: Attribute Mapping
Step 1
Go to Microsoft Azure portal.
Step 2
Select your Enterprise application. 1.Select “Provisioning” on the side menu, and select “Edit attribute mappings” on the panel.
Step 3
Expand Mappings and set: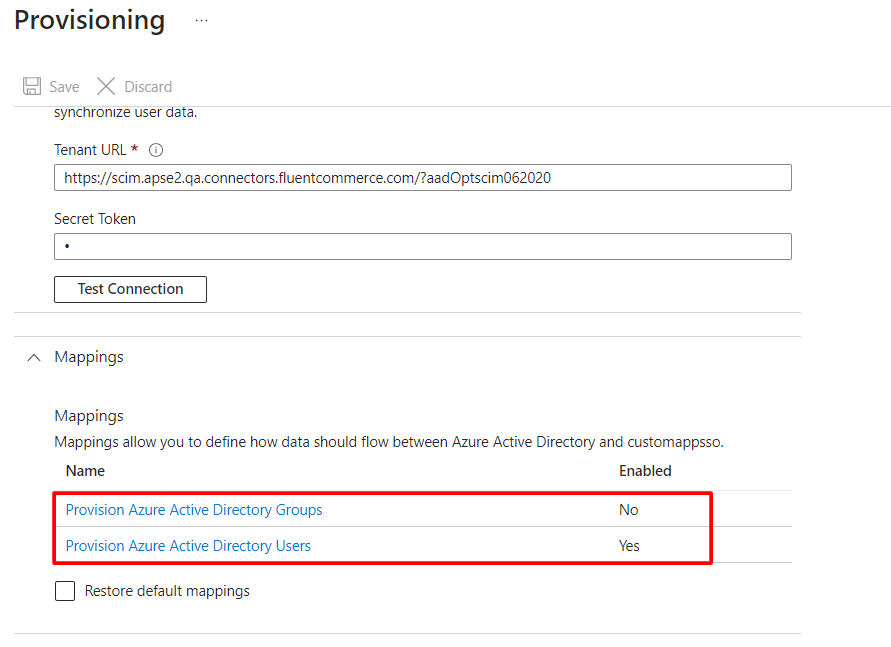
 4. Input new attributes Roles
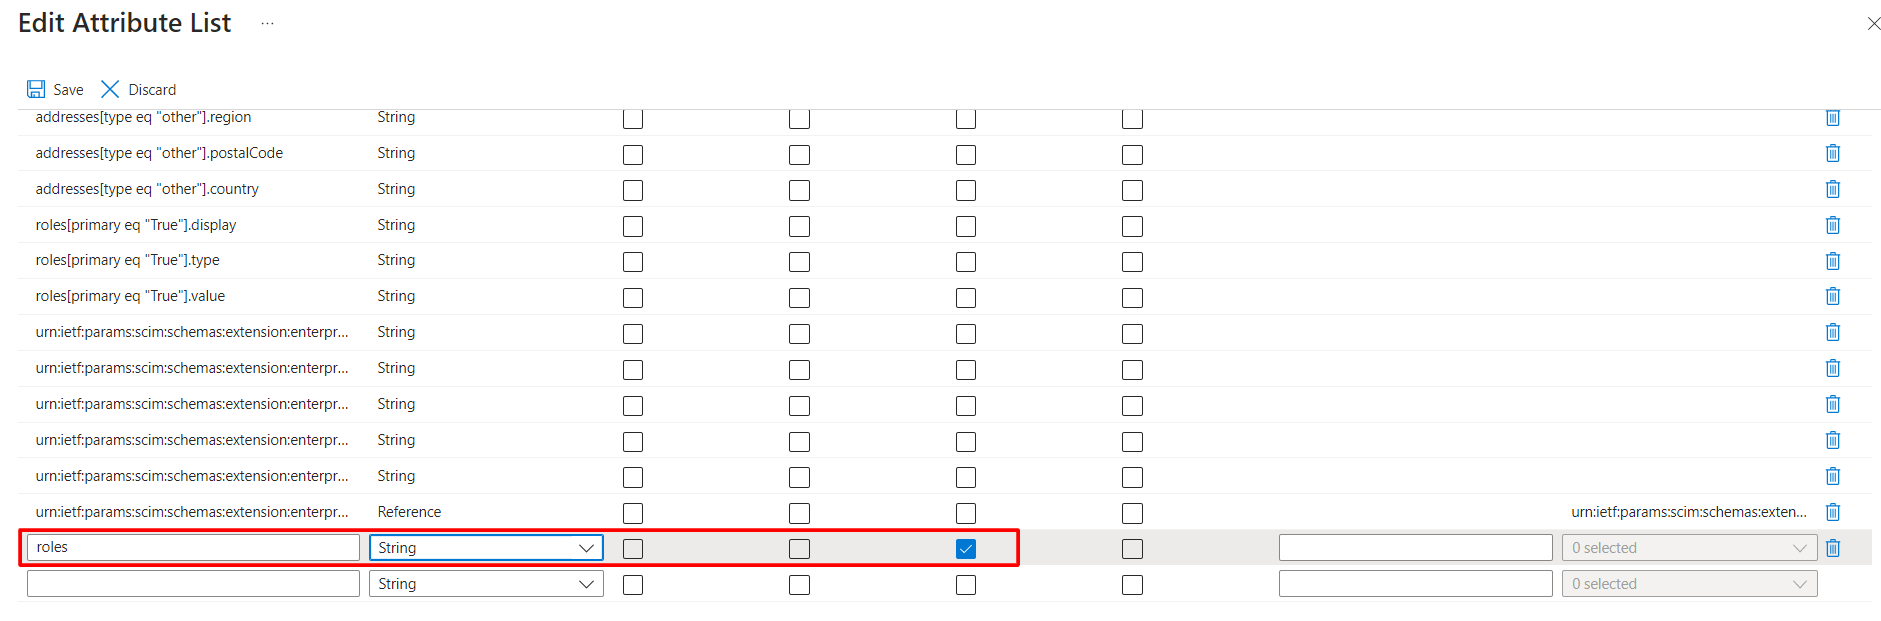 5. Click Save
- Provision Azure Active Directory Groups = No
- Provision Azure Active Directory Users = Yes
Custom target attribute
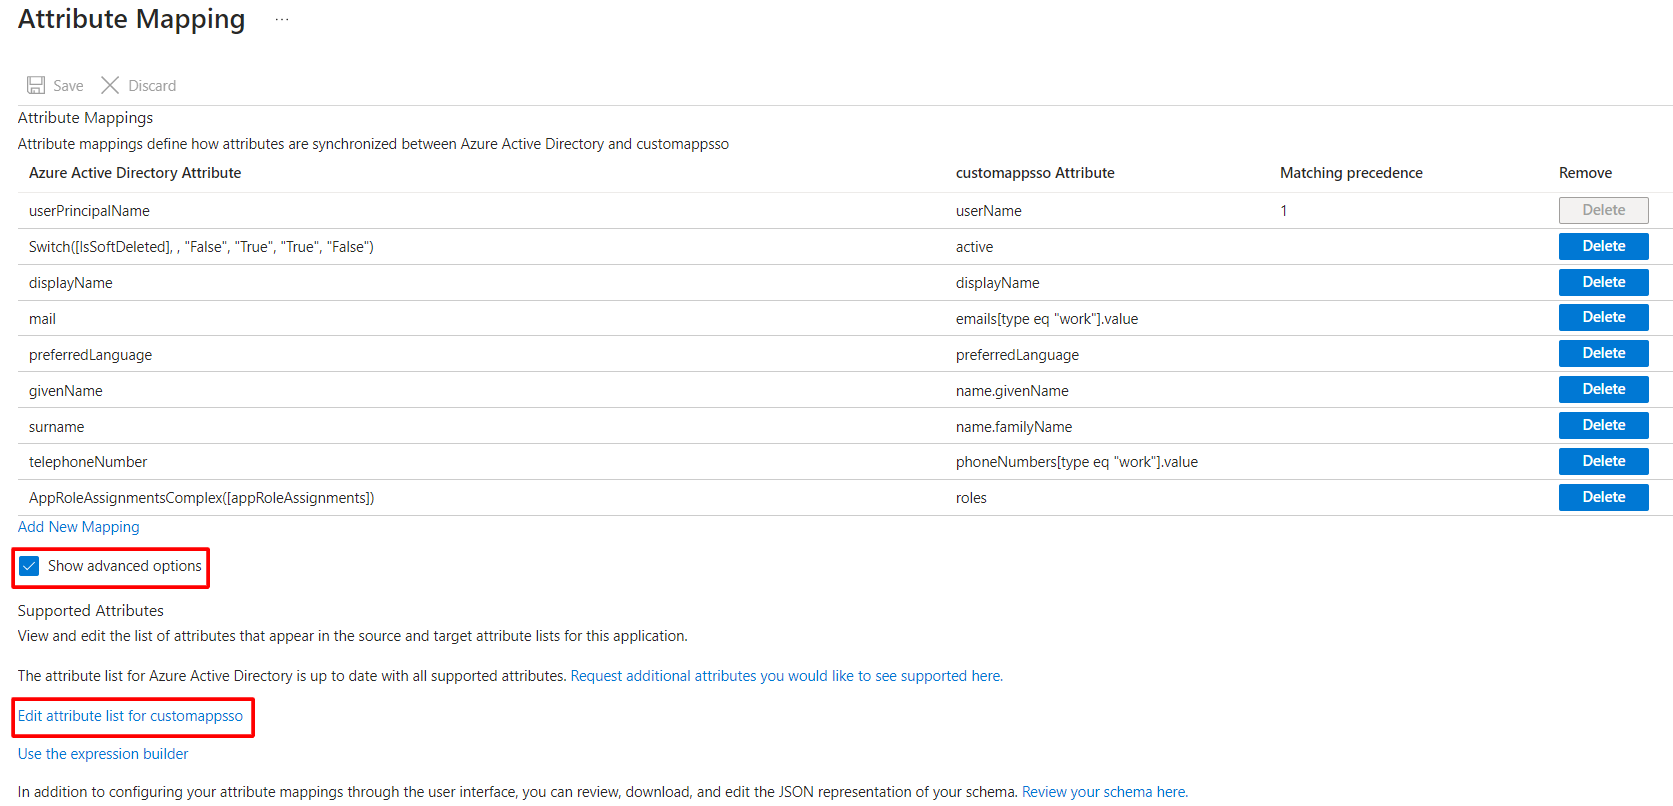
follow the steps to add new “roles" attribute for target source:1. Select “Provisioning” on the side menu, and select “Edit attribute mappings” on the panel.2. Expand Mappings and select Provision Azure Active Directory Users3. Select Show advanced options then select Edit attribute list for customappsso4. Input new attributes Roles5. Click SaveUpdate Attribute Mapping
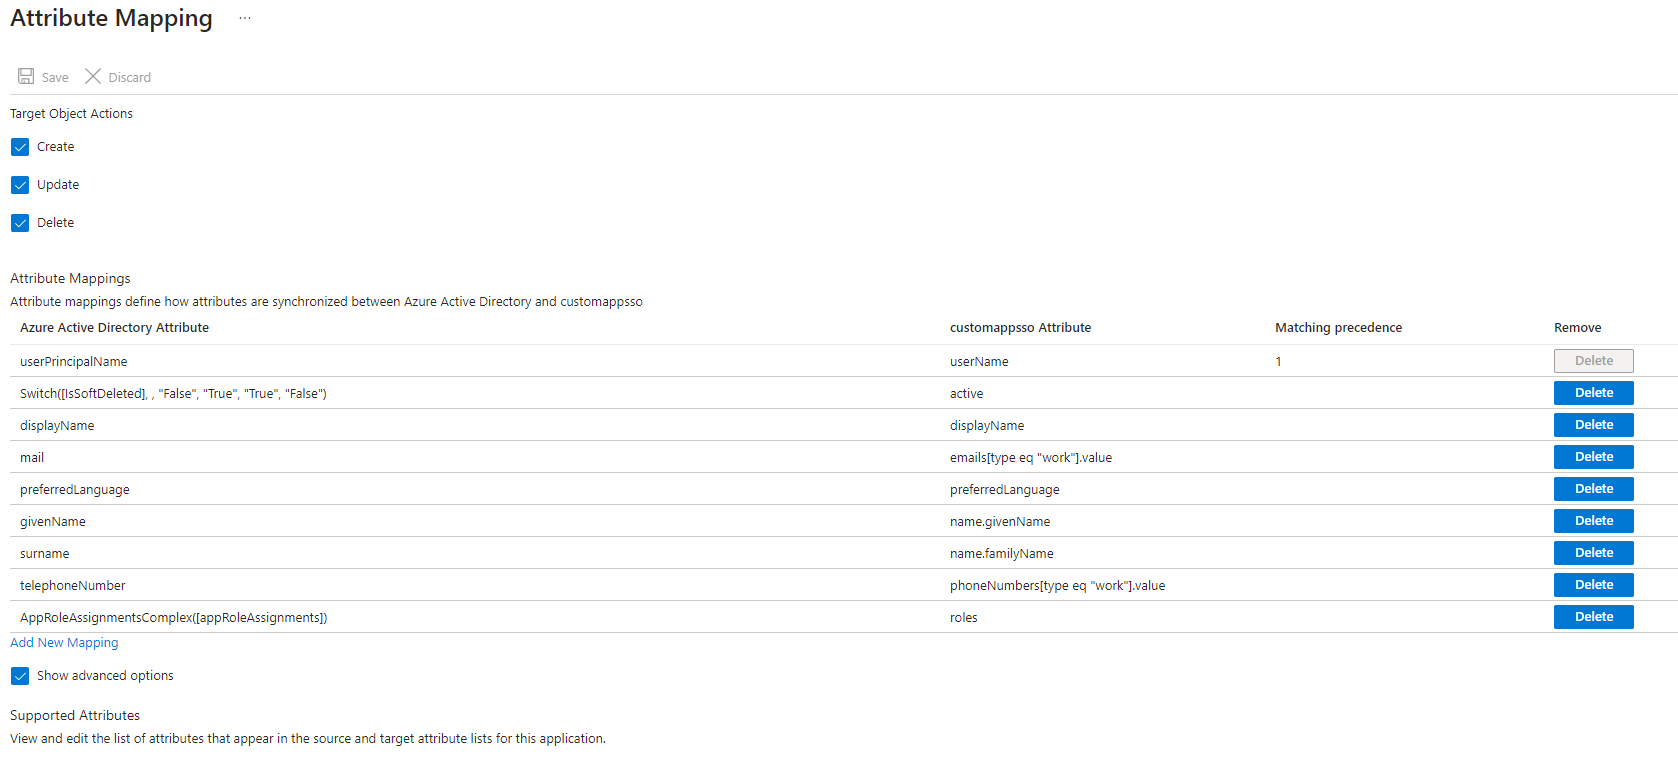
1. Go back to the Attribute Mappings screen of Provision Azure Active Directory Users and update the list of attributes like table below then select Save| Azure AD | SCIM User Resource | ←Mapping & Transformation→ | Fluent Commerce User | Required | Notes |
| userPrincipalName | userName | ref, username | yes | Unique User Identifier, Login name | |
| N/A | password | Not used - Defaulted to random uuid string | password | yes | mandatory for fluent |
| givenName | name.givenName | firstName | |||
| surname | name.familyName | lastName | |||
| emails[type eq "work"].value | Filter by primary = true | primaryEmail | yes | User Primary Email | |
| telephoneNumber | phoneNumbers[type eq "work"].value | Filter by primary = true | primaryPhone | User Primary Phone | |
| Switch([IsSoftDeleted], , "False", "True", "True", "False") | active | For active=true set status=ACTIVE For active=false set status=INACTIVE | status | Indicates if User is active or not. | |
| AppRoleAssignmentsComplex([appRoleAssignments]) | roles | roles | The list of user assigned roles. Please note that roles could be mapped directly or via a dynamic mapping pipeline based on configuration. | ||
| userType | Not used - Defaulted to RETAILER | type | yes | Defaulted to RETAILER. The type of the user can have the following values [ACCOUNT, ADMIN, AGENT, API, DEBUG, GLOBAL, RETAILER, SUPPORT]. Scim protocol definition: Used to identify the organization to user relationship. Typical values used might be 'Contractor', 'Employee', 'Intern', 'Temp', 'External', and 'Unknown' but any value may be used. | |
| timezone | Not used - Defaulted to AU-Sydney | timezone | yes | The User's time zone in the 'Olson' timezone database format; e.g.,'America/Los_Angeles' |
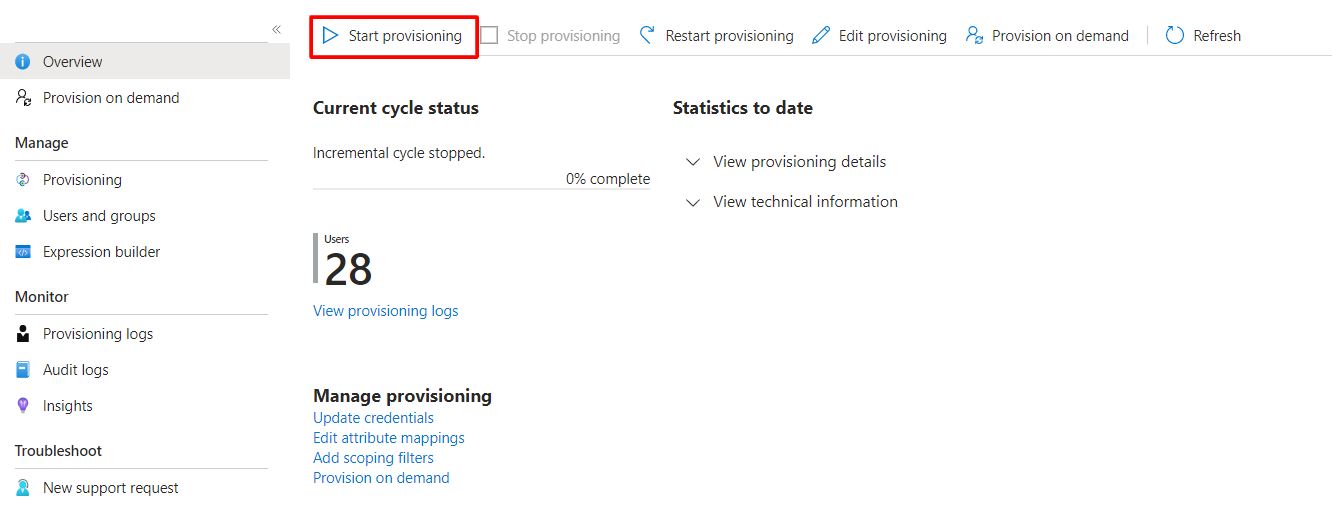
Step 3: Start / Stop Provisioning
Step 1
Select your Enterprise application.
Step 2
Select Provisioning on the side menu
Step 3
Select Start Provisioning. Now you can provision users and their roles to your Fluent application. Once started, you can stop provisioning whenever you want by selecting Stop Provisioning.