Custom UI Field Component on Add Network to Location user action
How-to Guide
Extend
Authors:
Randy Chan, Cameron Johns
Changed on:
25 Feb 2025
Key Points
- This component simplifies the addition of networks to locations by providing an easy to use selector of available networks
- The basic principles can be used in other scenarios where complex fields and values may be required
Prerequisites
Steps
 Before you start creating a custom UI Component
- Download the Component SDK to build a new component.
- Ensure you have a good knowledge of the following:
- Fluent OMS framework
- Front End development knowledge, including REACT JS and Typescript
- Download the ES Starter Pack and install it in your sandbox. More info can be found in Partner-hub
- After the ES starter pack is installed in the sandbox, you can check the following:
- Ensure the
`locationupsert`plugin is uploaded and activated in your sandbox. - Ensure the ruleset
`AddNetworkToLocation`is in the location workflow.
- Ensure the
- Log in to the OMS web app and go to the location detail page. You should see the ADD NETWORK user action at the top right-hand corner.
- Then you are good to start creating the new UI component!

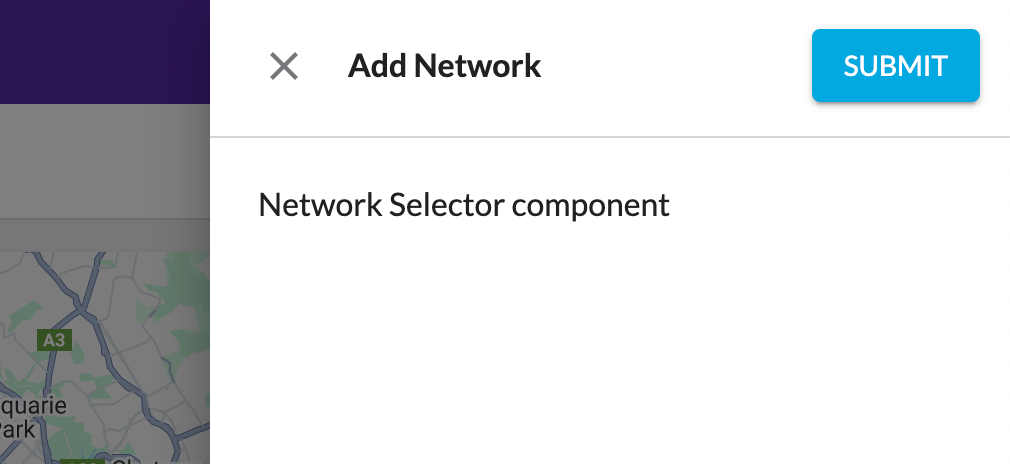
Test out the ADD NETWORK user action
First, try out the ADD NETWORK user action is working as expected, before creating a new UI Component.
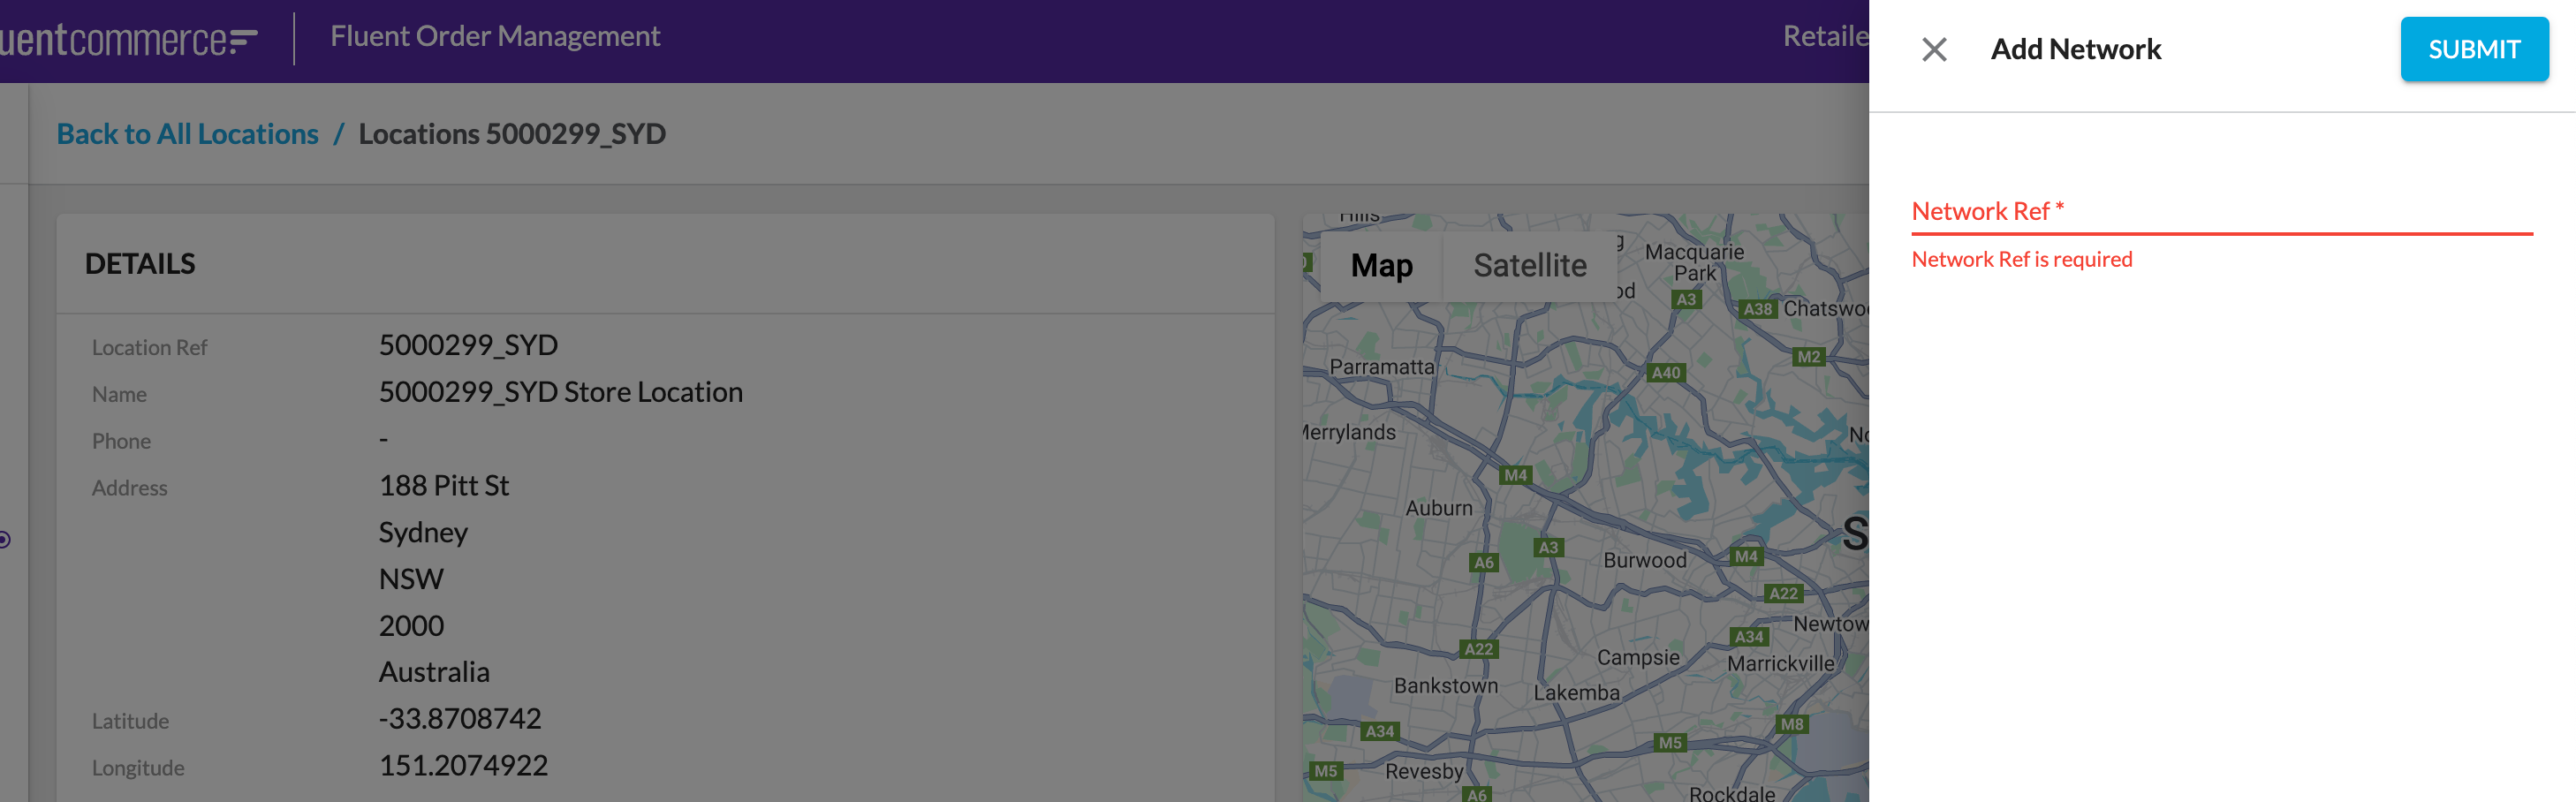 Enter the Network Ref in the provided textfield and click the submit button.
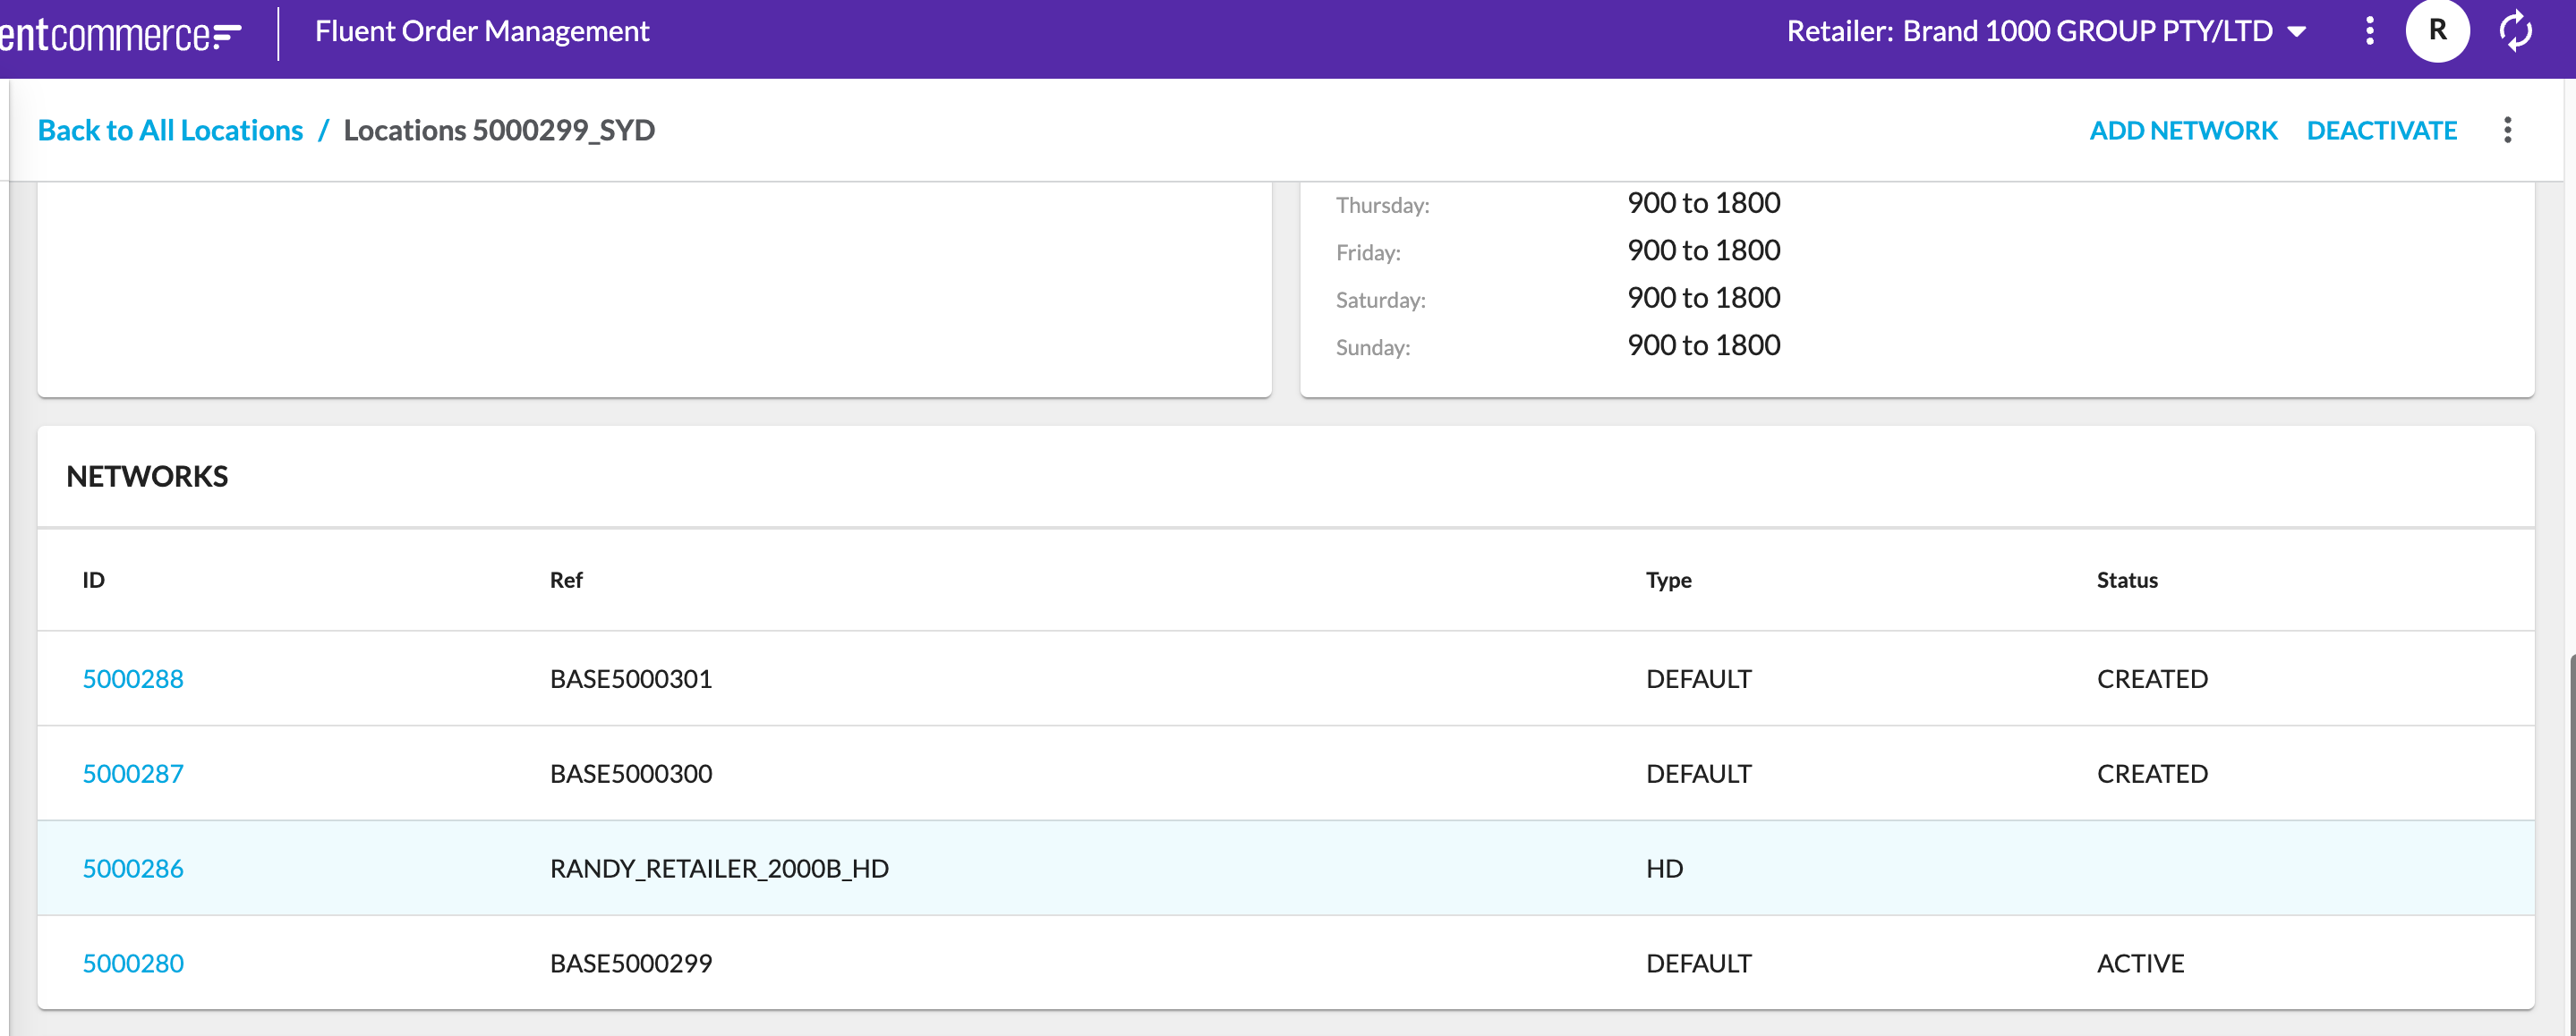
 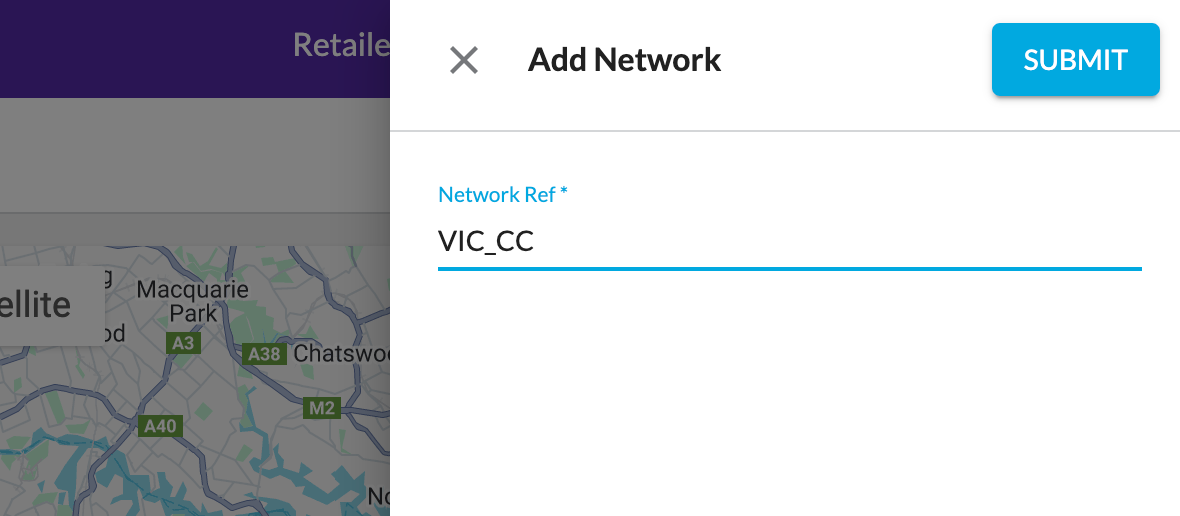 After submitting, check the NETWORKS section, the new network should be added to the list:
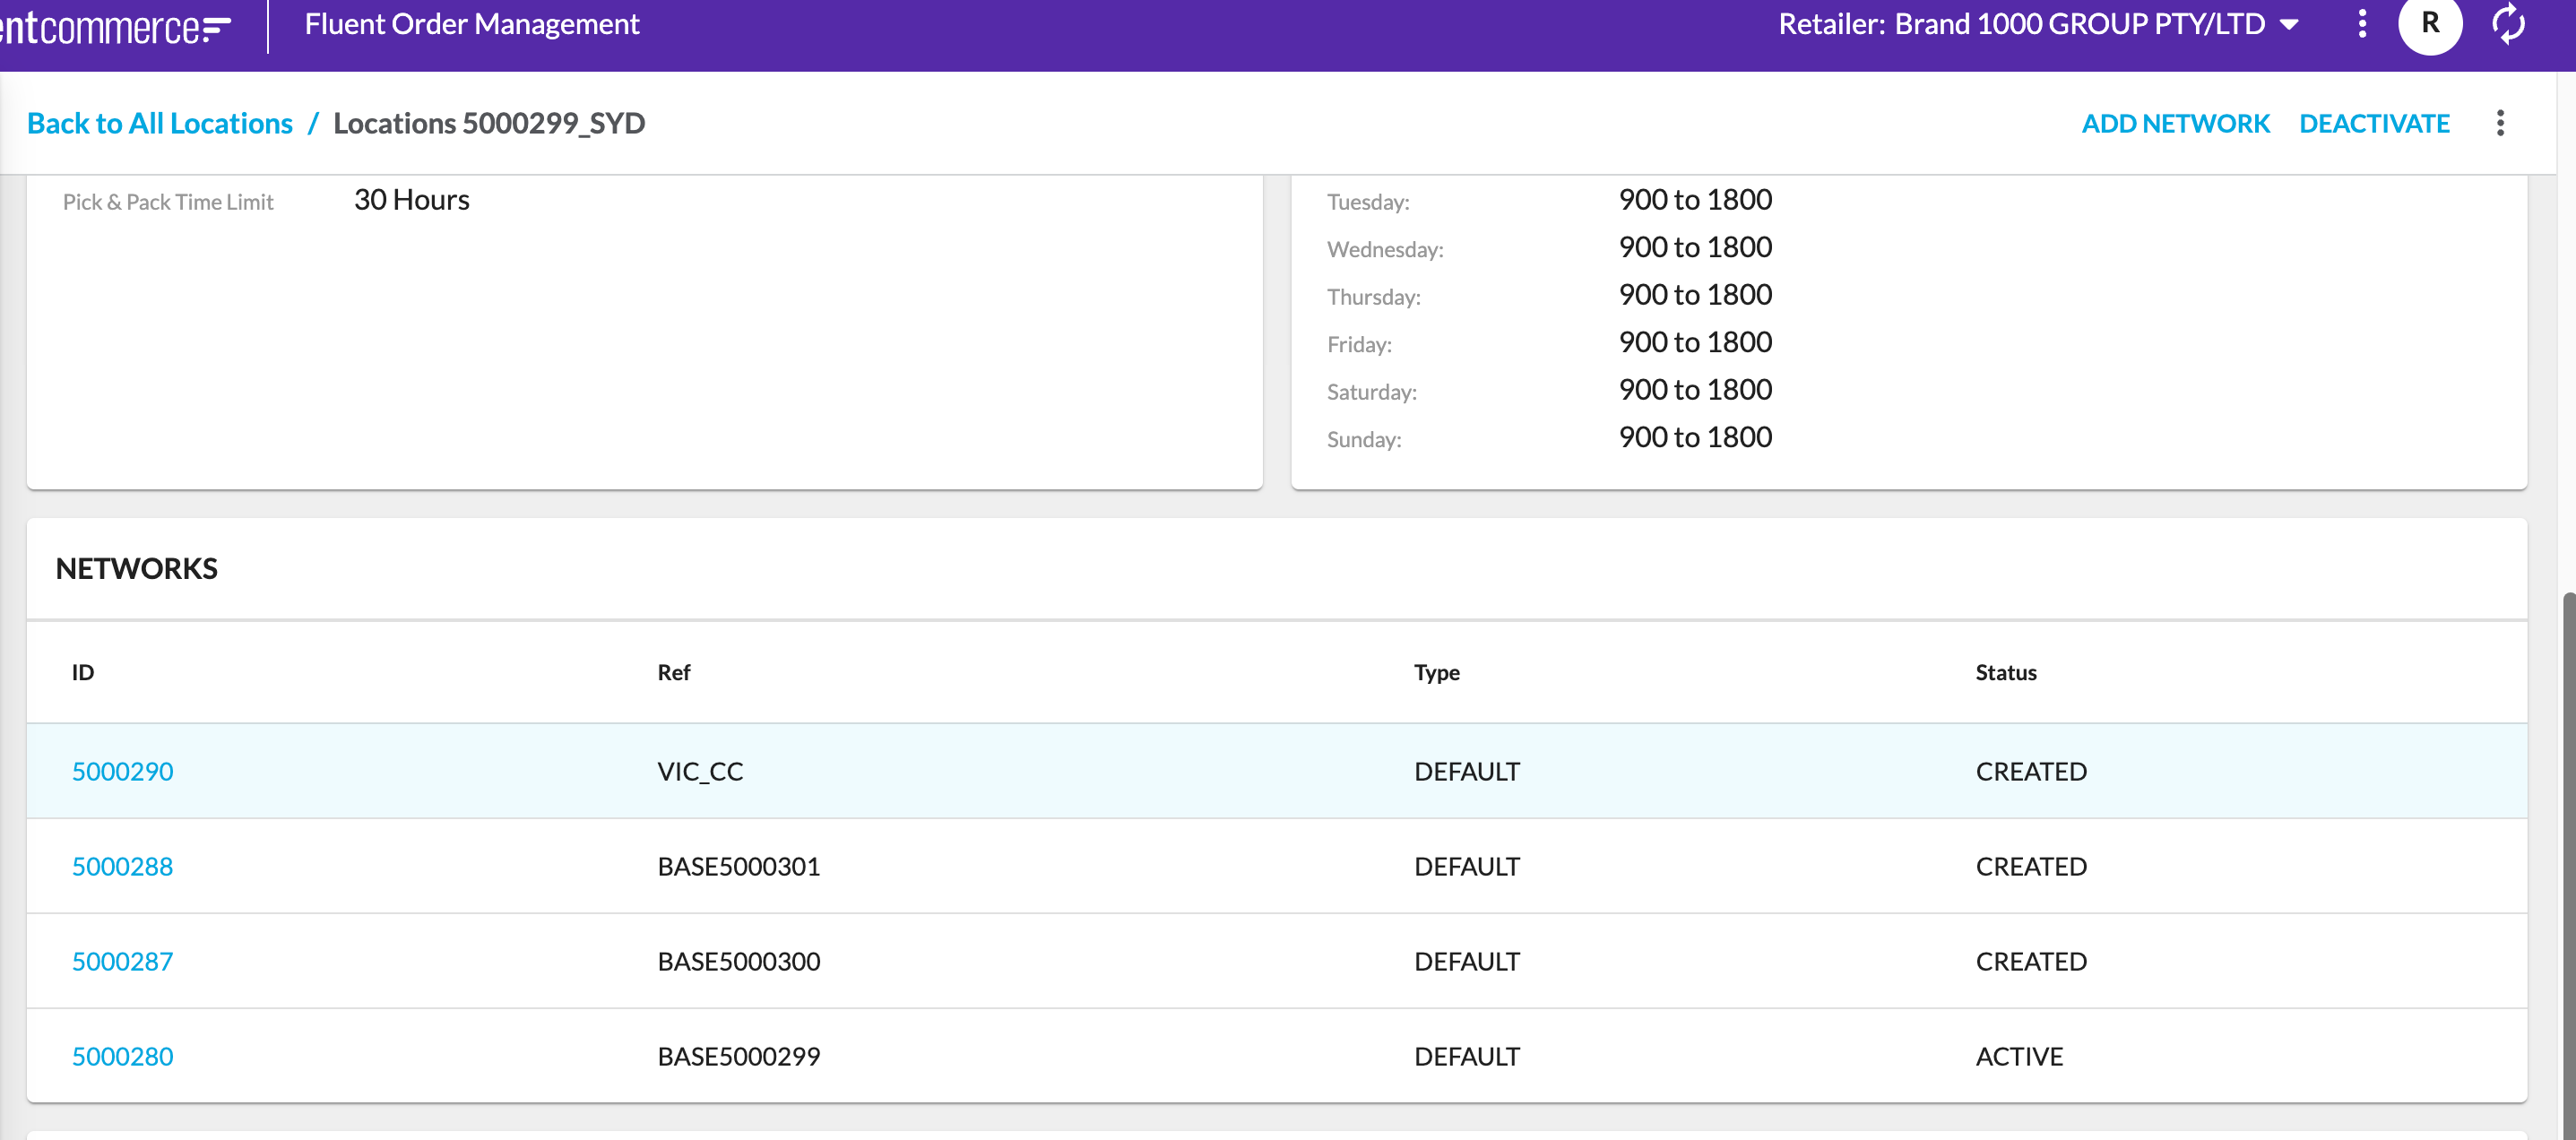
Enter the Network Ref in the provided textfield and click the submit button. After submitting, check the NETWORKS section, the new network should be added to the list:Purpose of our new UI field
As you can see, the 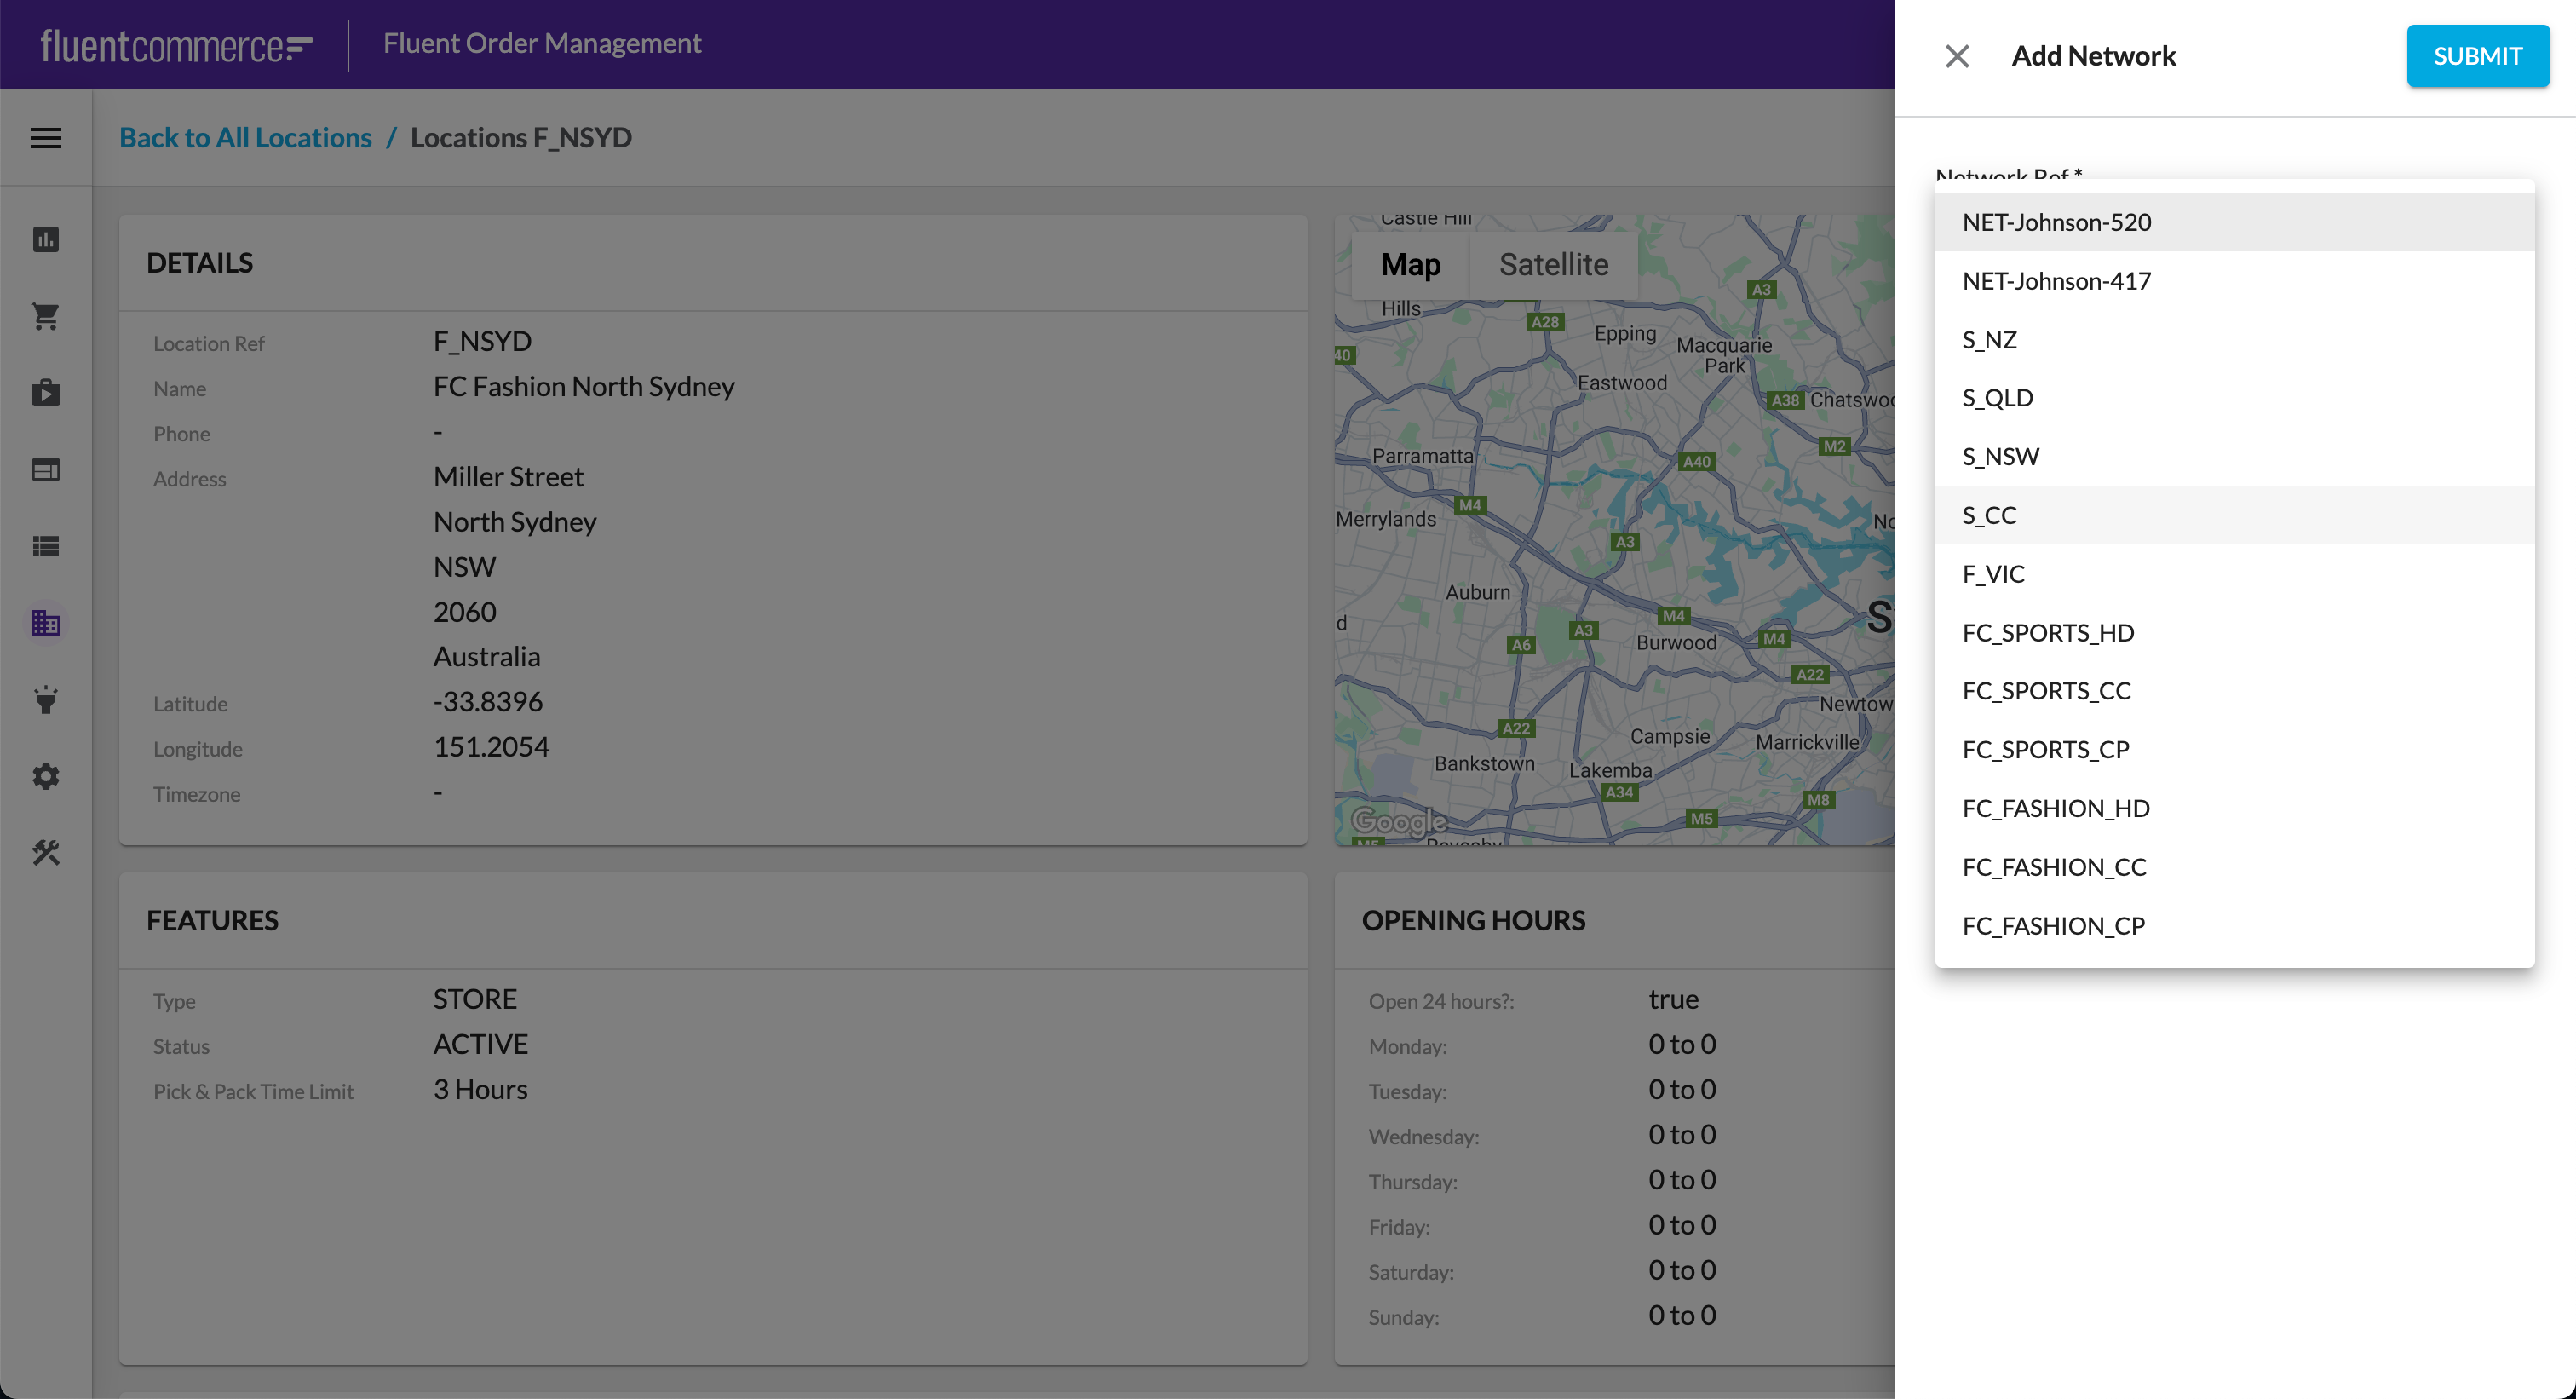 To acheive this we will follow these steps:
`AddNetworkToLocation` ruleset only provides the textfield for the user to enter the networkRef to add it to the location. To improve the user experience, we will create a new field that displays both a dropdown showing a list of networks that have not been added to this location and a list of networks currently added. The user can select a network from the list and submit it to trigger the action.The outcome will look like the below screenshot:To acheive this we will follow these steps:- Create a new component file and component code
- Register the new field in
`index.tsx` - Change the attribute type in the ruleset (so that we can show our new field)
- Utilise the
`useQuery()`hook provided in the SDK to get the list of available networks - Further utilise the
`useQuery()`hook to get the current location's networks and filter them from the available networks list - Sort the output network list (sorting can be customised per your needs)
- Leverage the available design system to provide consistent style and layout
- Test the new Component
Create a network selector tsx file
Open the OMX component SDK, create a new file in 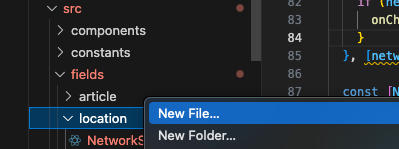 For this article, I will name the file
 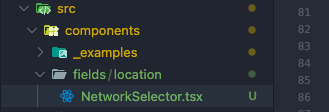 Open your IDE of choice (VS Code recommended) and enter the following code:Save the file.
`src/fields/location`For this article, I will name the file `NetworkSelector.tsx`Open your IDE of choice (VS Code recommended) and enter the following code:Save the file.Register the new field in index.tsx
Now go to index.tsx file and add the following to register the component:
- import { NetworkSelector } from './fields/location/NetworkSelector';
- FieldRegistry.register(['NetworkSelector'], NetworkSelector);
`FieldRegistry` enables the field to be automatically selected when a requesting type (from a user action, mutation, query etc) matches the registered string. In this case `NetworkSelector`. Change the attribute type in the ruleset and validate output
This step is to update the ruleset to use the new UI field component. Load the workflow (or use workflow modeller) and update the ruleset -> useractions -> attributes -> ref type from 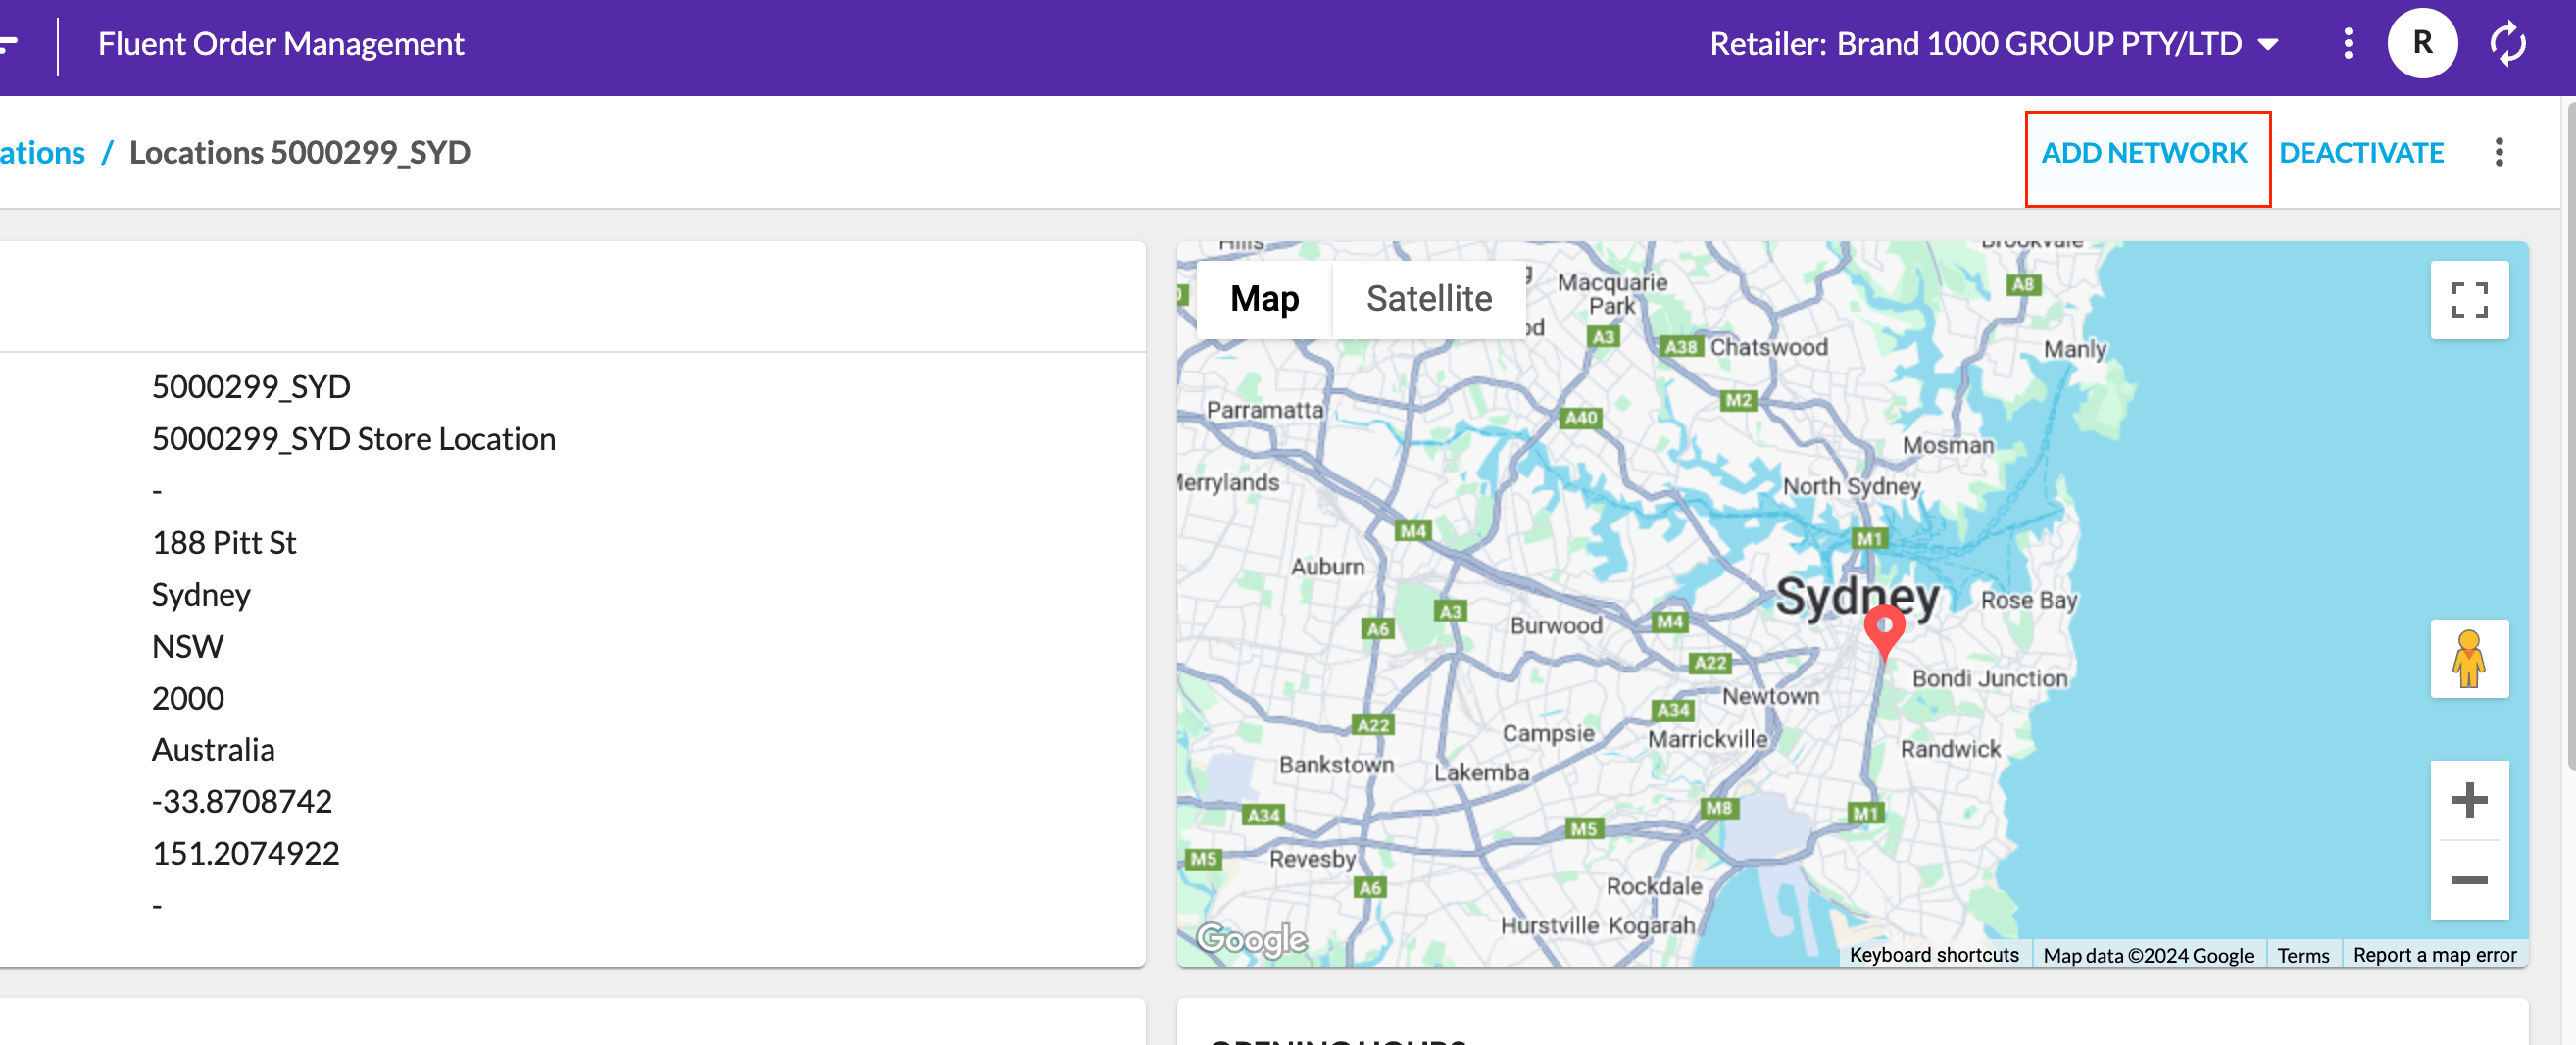
`string` to `NetworkSelector`After saving the workflow, refresh the OMS webapp and click on the ADD NETWORK button. The drawer should be showing the text from the custom component:Add useQuery() to get the list of available and current networks
The next step is to add 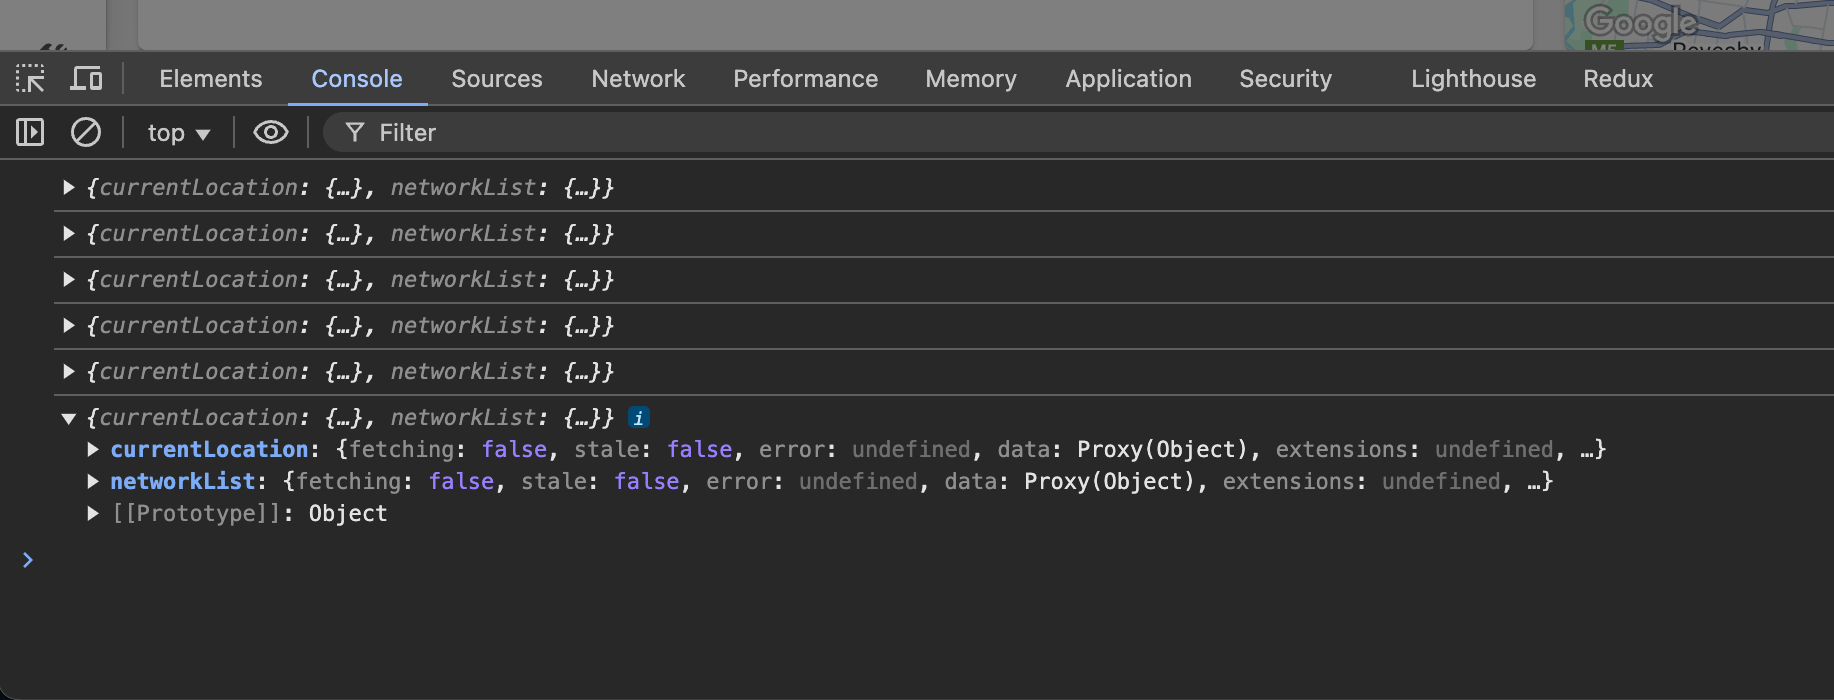
`useQuery()` to get both the available and current networks and output them to the console.Update our component with the following codeAfter saving the changes, refresh the OMS webapp and click on the ADD NETWORK button. You should see the output from the queries in the console:Filter and sort the available networks
Now that we have the queries working lets filter and sort the available networks from the currentWith the above code added save the file and refresh the OMS. You should see output in the console like this: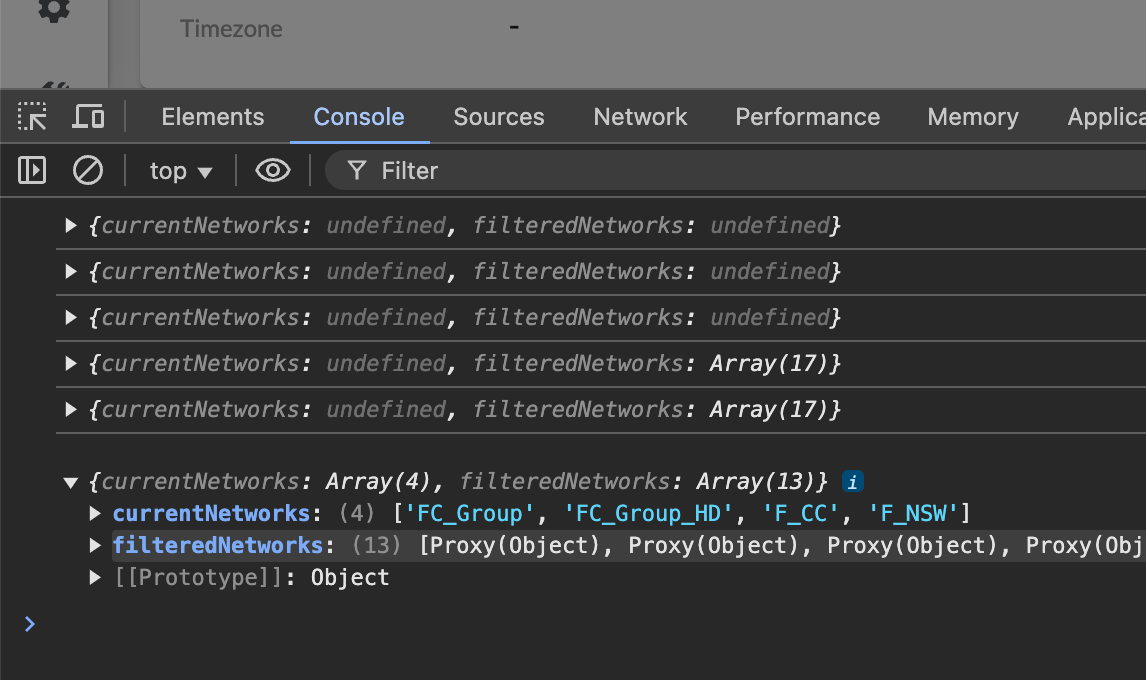
Create the dropdown and populate with available networks
Utilising the available design system (MUIV4) we will now create and populate the dropdown selector. Start by updating the file to the below snippet.With the above code saved and OMS refreshed you should see this when selecting add network: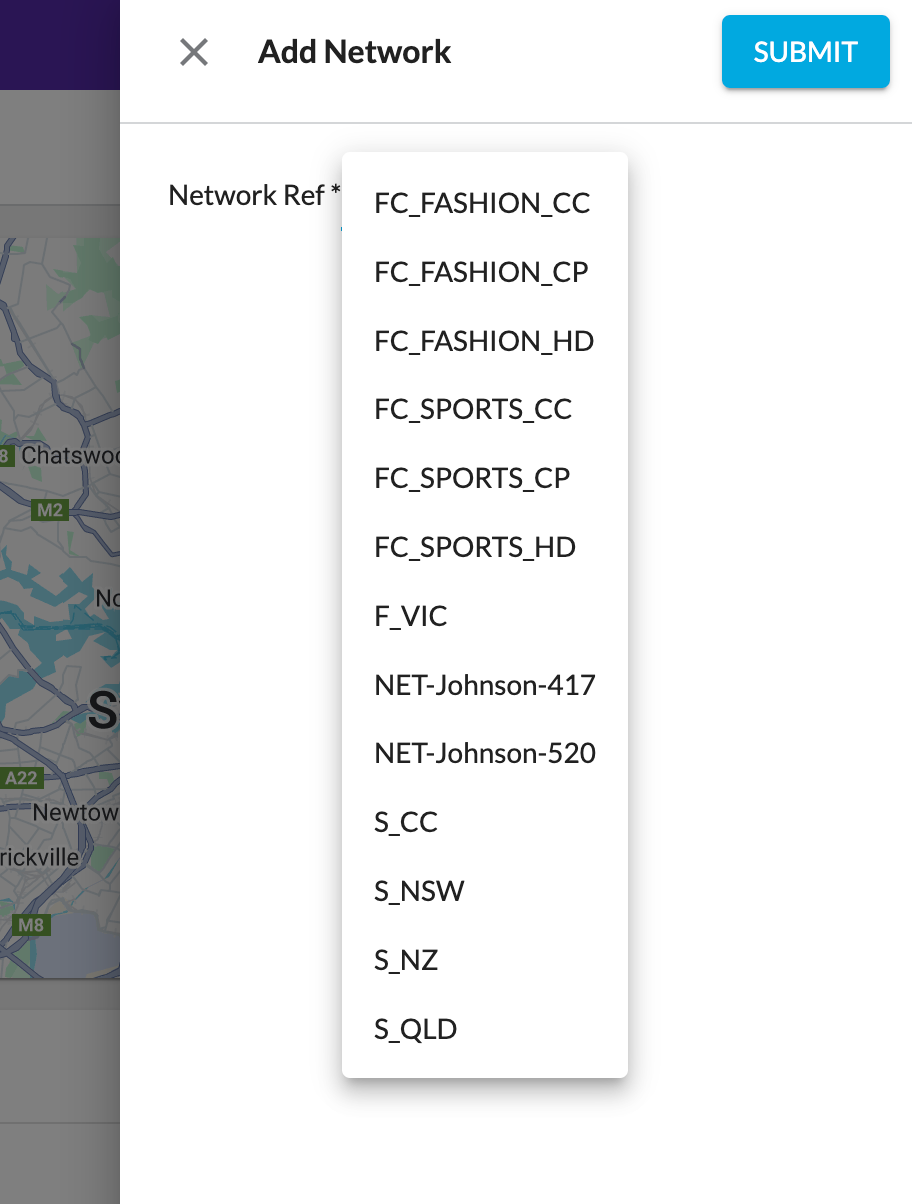 This is functional but it doesn't look great so lets fix that.We'll leverage the built in props of the MUI Select and Grid components The new component should look like this:
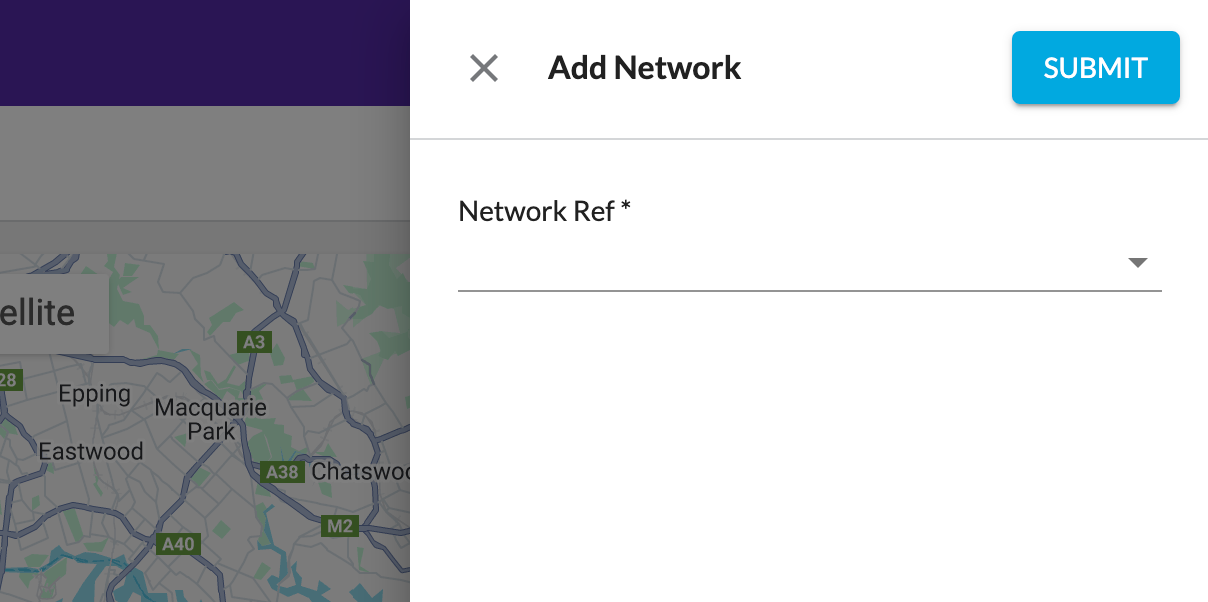
This is functional but it doesn't look great so lets fix that.We'll leverage the built in props of the MUI Select and Grid components The new component should look like this:Final touches
The component is now perfectly functional but we can add a couple of final touches to make it a little more usefulLets start by adding a loading indicator should the queries take a while to loadNext we will add a list of currently added networks as a separate listWith these changes saved and the OMS refreshed you should see the final output like this: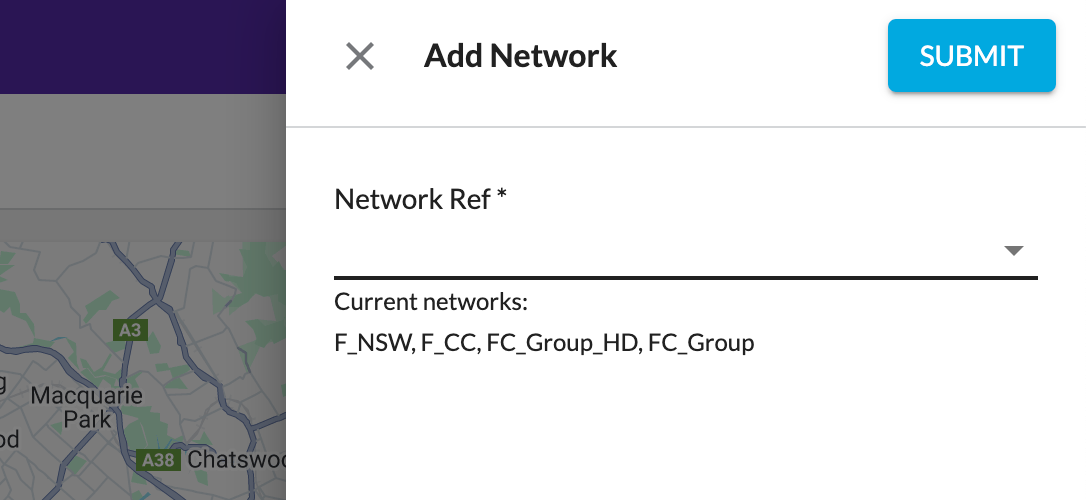
Test the new component with the user action flow

Except as otherwise stated in the Extend Knowledge Content site policy, the content on this page is licensed under the Creative Commons Attribution 4.0 Licence, and any code samples that appear on this page are licensed under the Apache 2.0 Licence, unless any code sample forms part of the Fluent Order Management Platform code. Neither of these licences apply to any content on any other page that can be reached via a link on this page unless otherwise specified on that other page. If you wish to use any of the Extend Knowledge Content, you must do so in compliance with the licenses referred to above and the Extend Knowledge Content site policy, including attribution in the manner set out on this page.