Fluent Commerce Logo
Sign In

Create a custom Click and Collect pack label

How-to Guide
Extend

Author:

Randy Chan

Changed on:

16 May 2025

Key Points

  • The CC pack label on the Fluent Store can be customised via an HTML template.
  • This guide will take you through the setup and fragment changes required to customise the pack label.
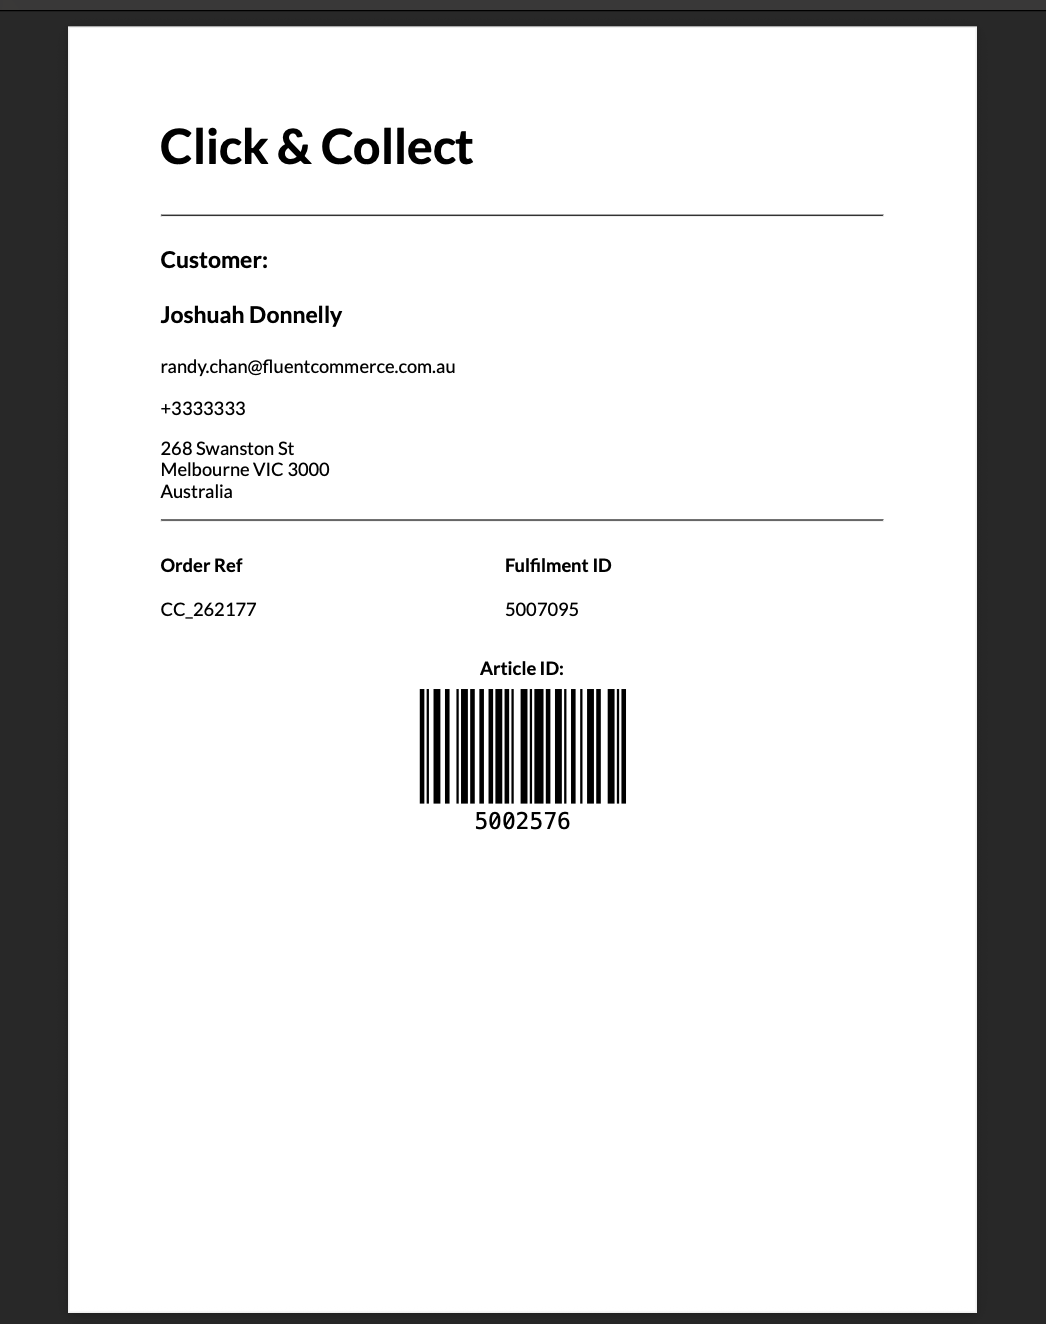
  • The printed pack label can then be attached to the paper bag or parcel ready for customer collection in-store.
  • Enhancements can be made to the reference label content. For example, the client's logo or an additional barcode for scanning purposes can be included.

Steps

Step arrow right iconOverview

Here are the steps to implement a custom click and collect pack label:

  • Configure the page query in the Waves fragment
  • Create a setting fc.store.print.cc.label
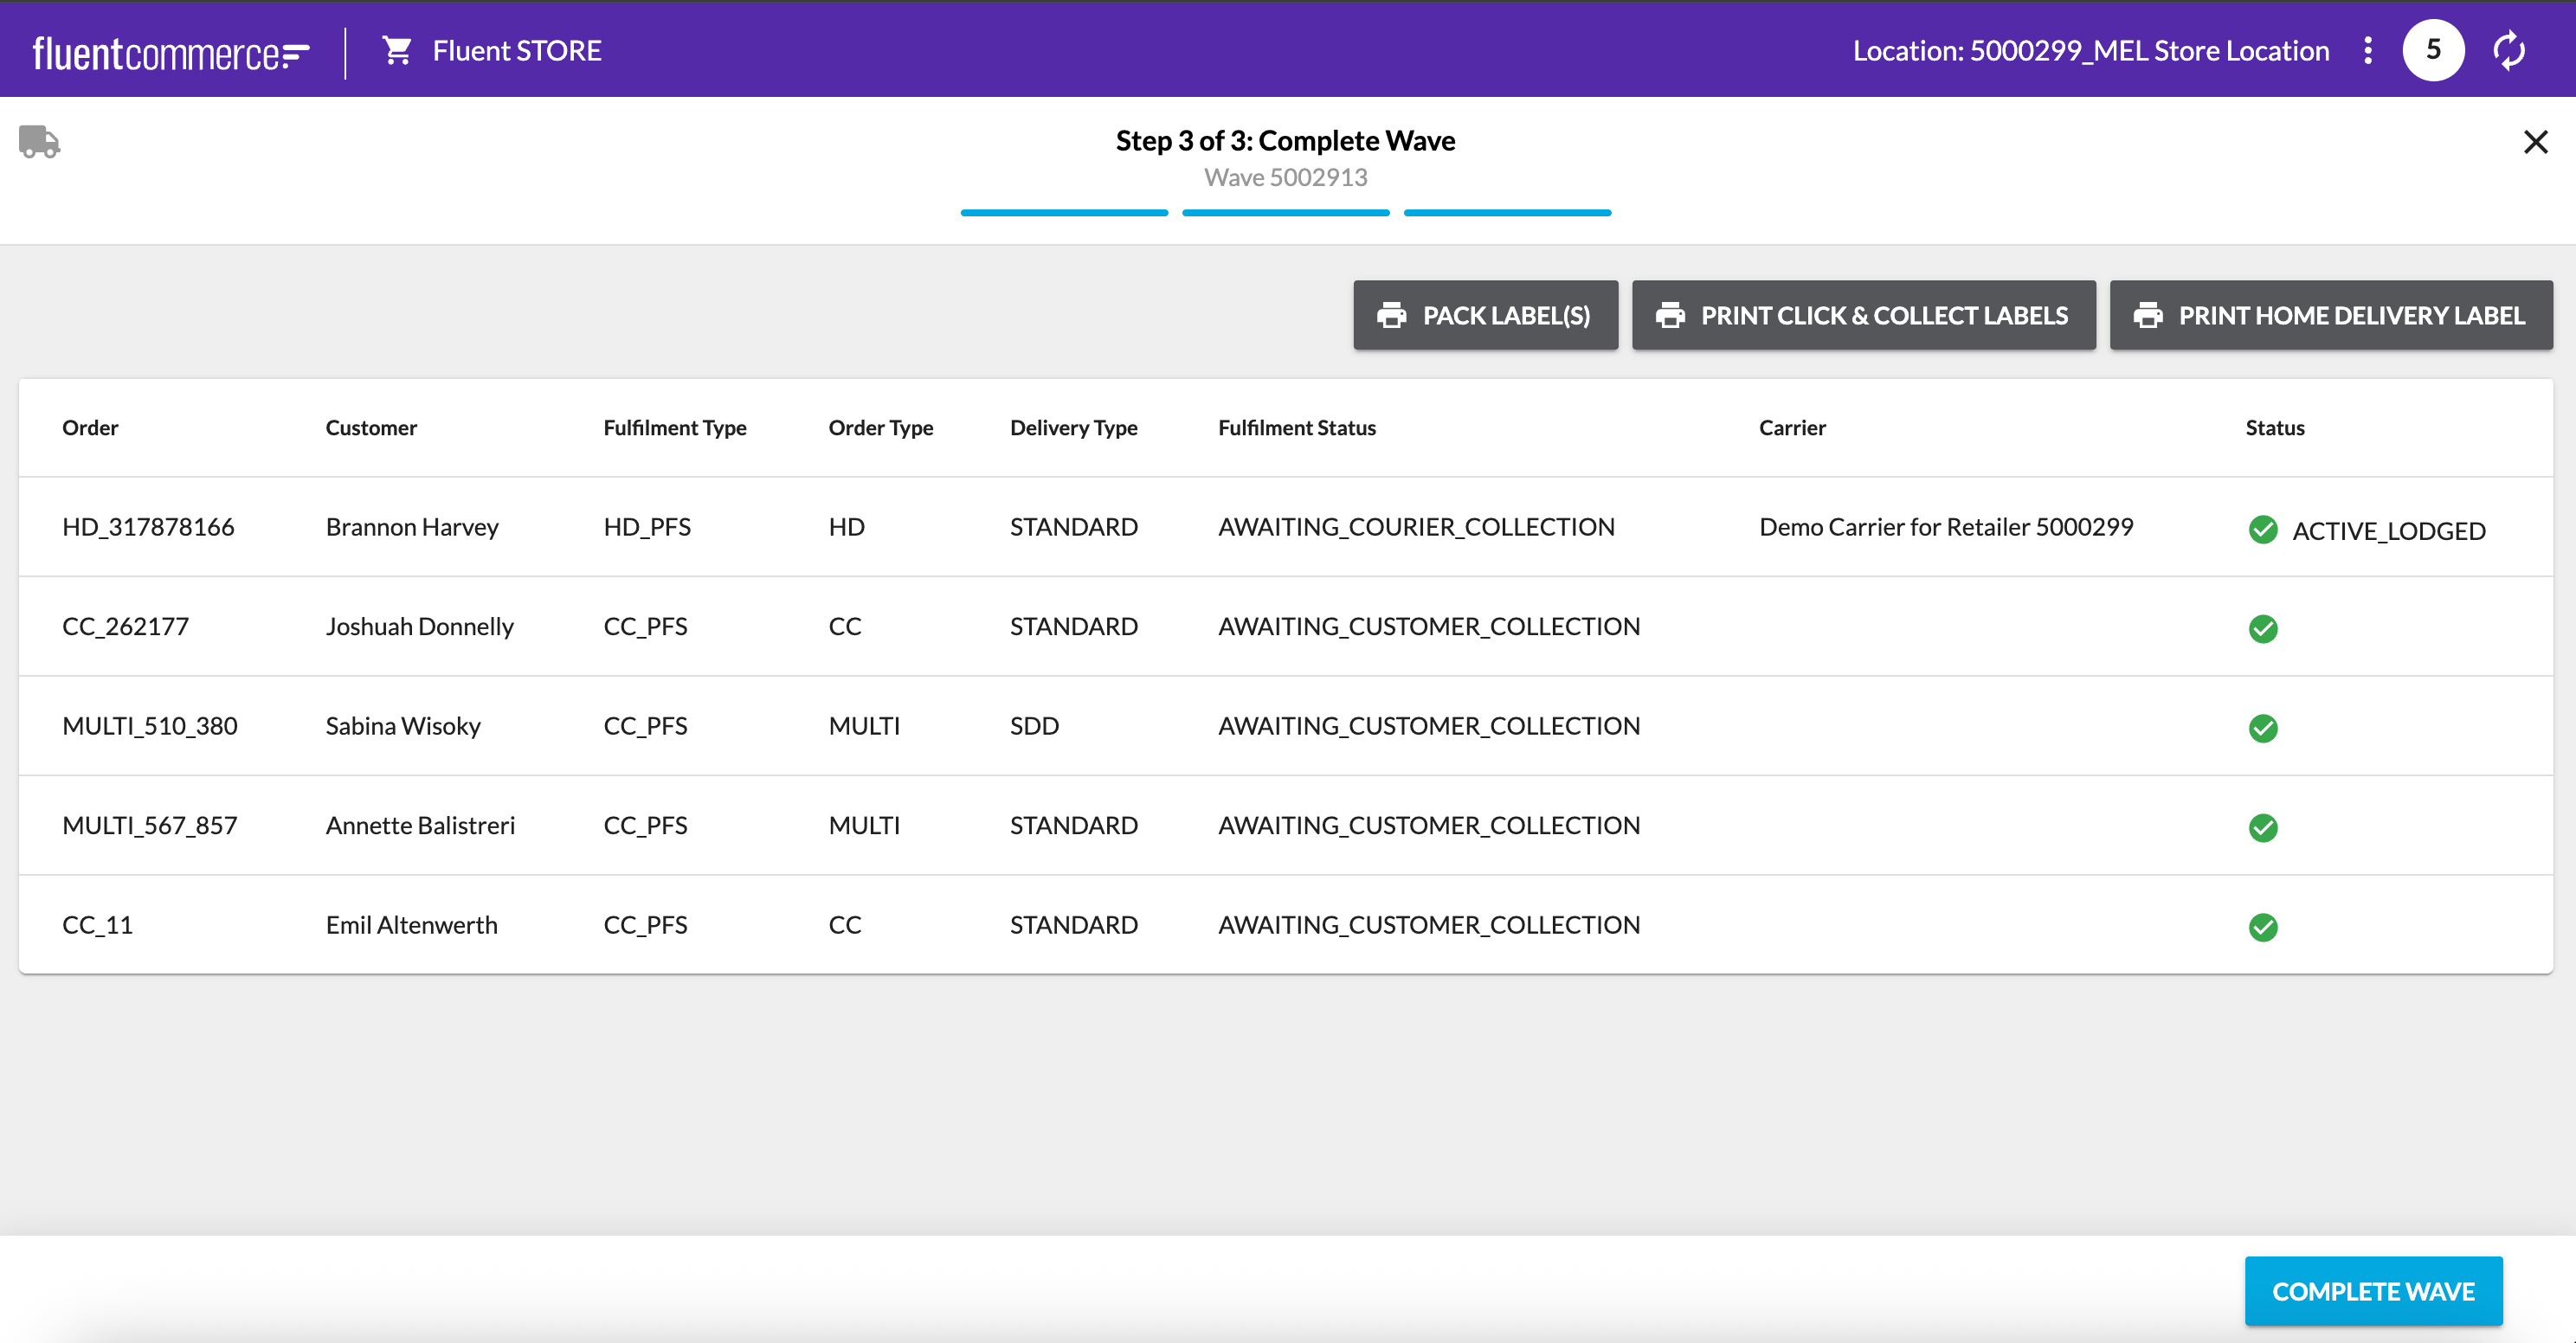
  • Configure the Waves fragment to include the "Print Click & Collect Labels" button
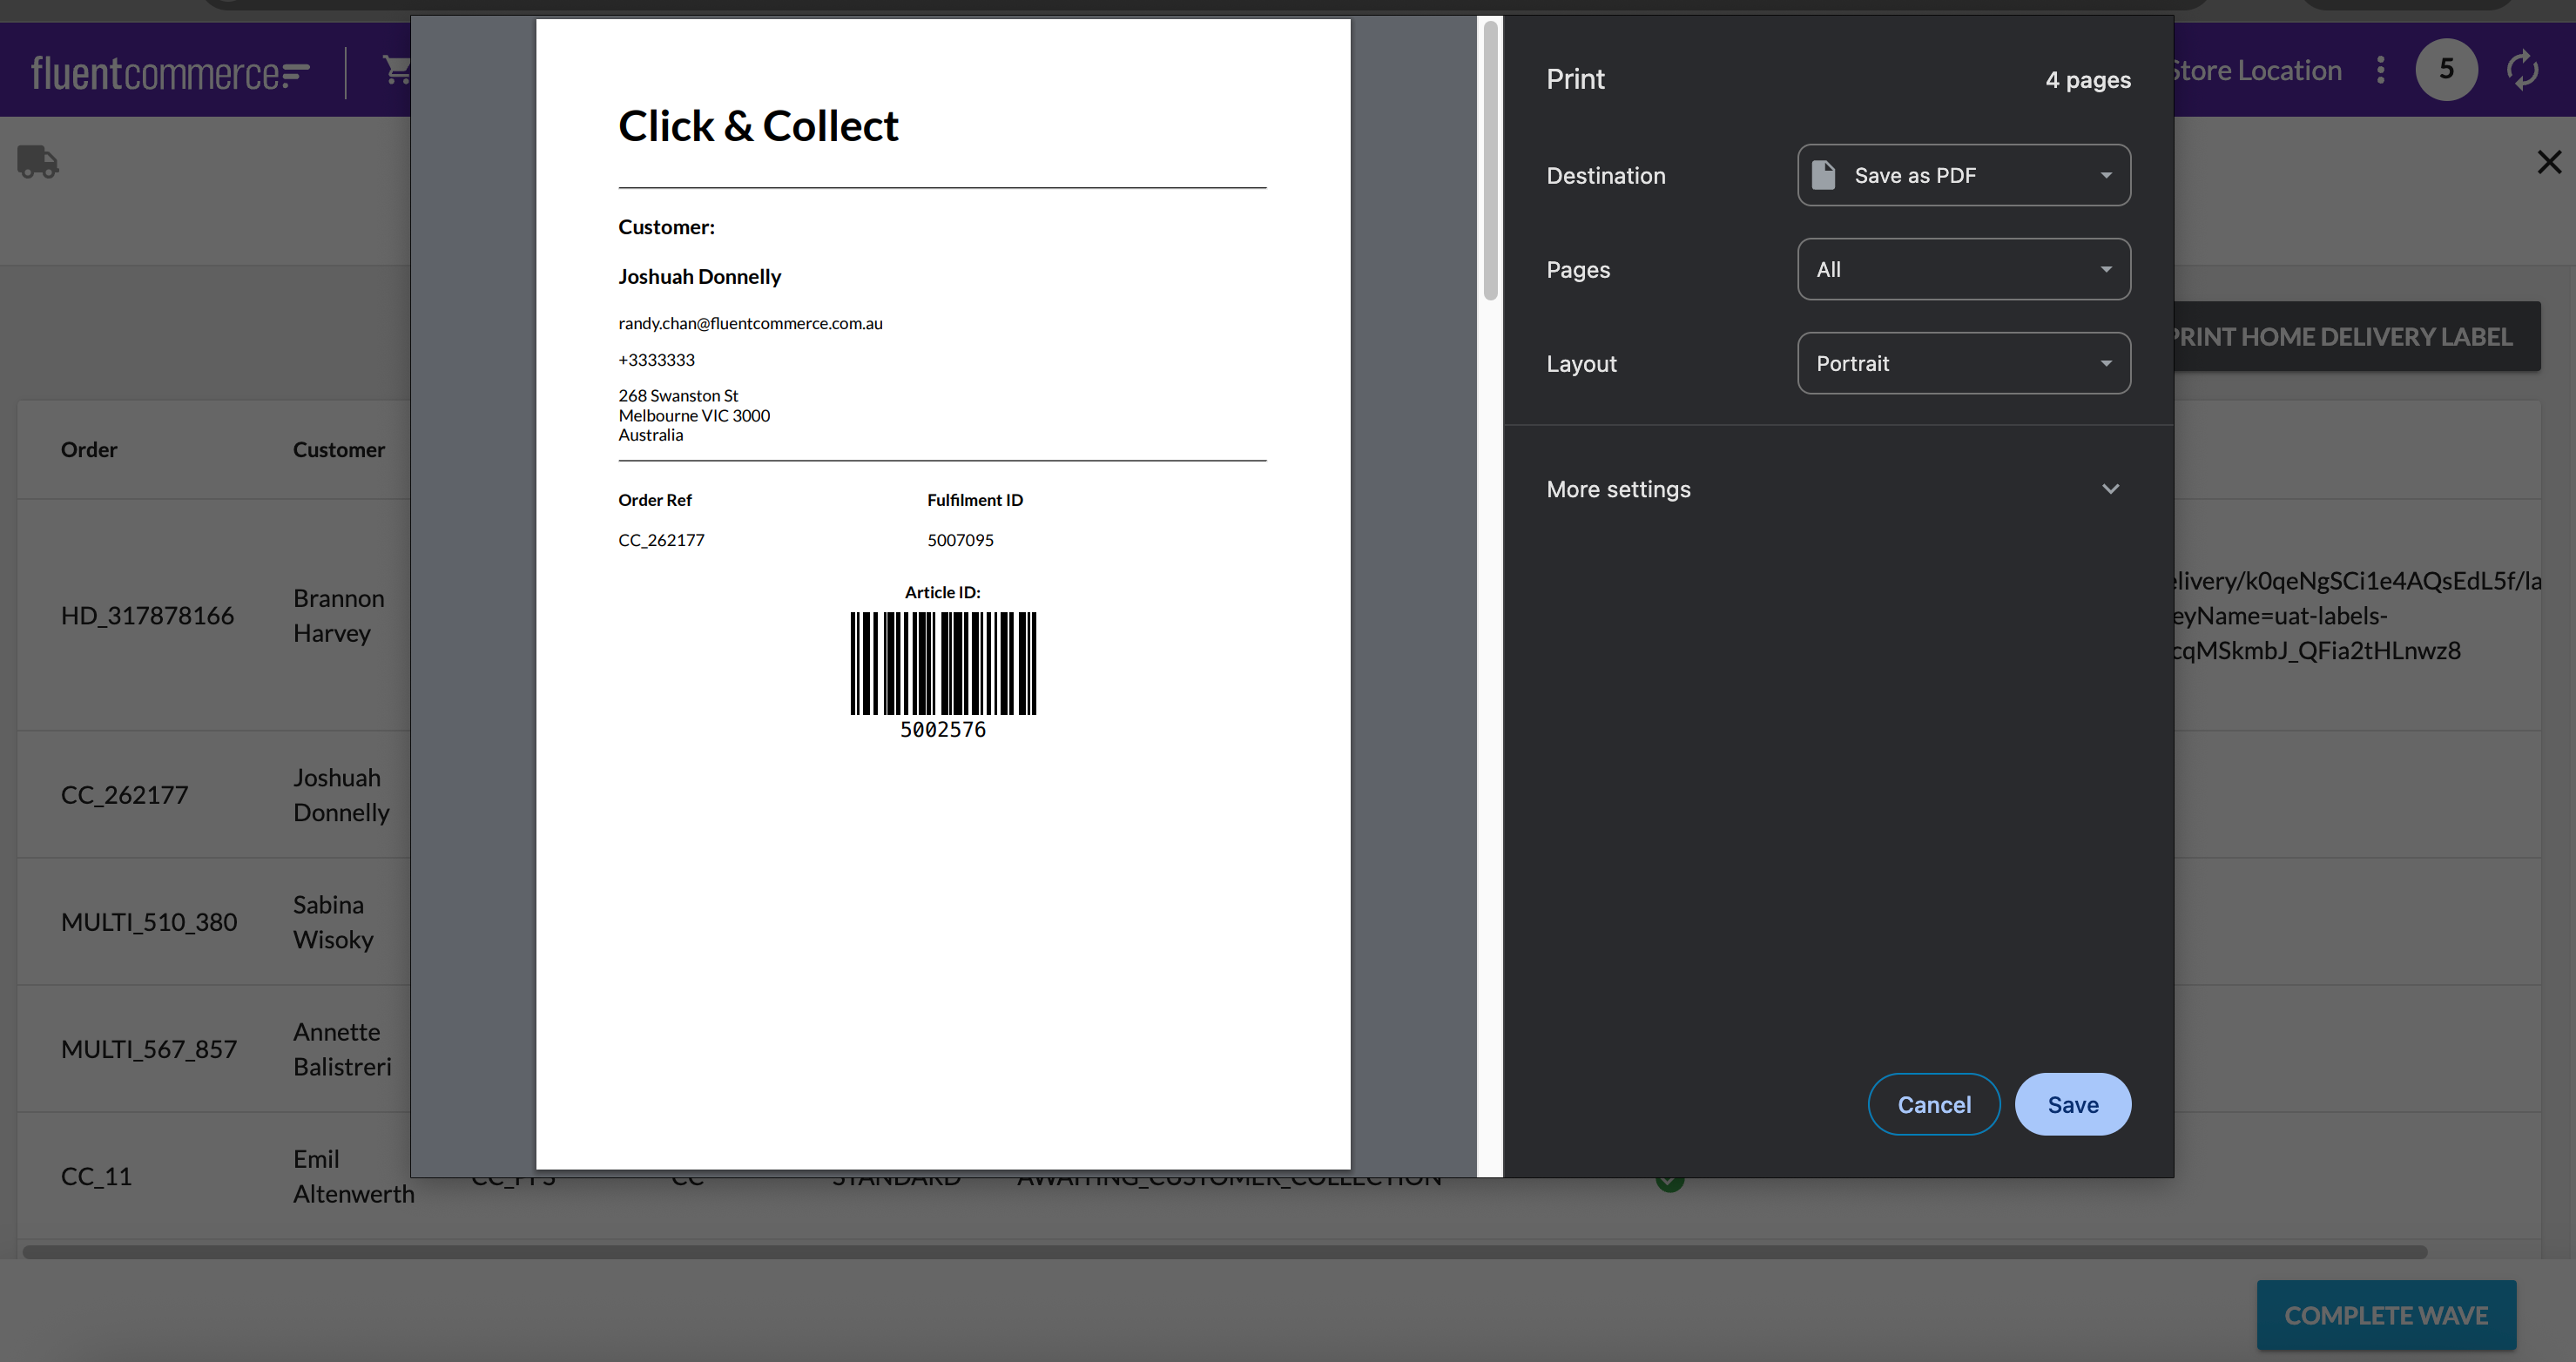
  • Test the outcome

Step arrow right iconConfigure the page query in the Waves fragment

Add the required fields in the page query of the waves fragment to populate the details on the custom pack label.

The sample configured page query is as follows:

1"data": {
2    "query": "query ($id: ID!) {  waveById(id: $id) { items{ edges{  node{ product{name ref  ... on VariantProduct{gtin} attributes{ name type        value } } quantity  }  } } location { id ref } id    ref    status    location {      id      ref    }    fulfilments {      edges {        node {          id     type     ref          status  toAddress{street street2 city state postcode country }  attributes{name value type}        fromAddress {            id            ref          }          toAddress {            id            ref          }          items (first:130) {            edges {              node {                ref                                rejectedQuantity  requestedQuantity     filledQuantity      orderItem{product{... on VariantProduct{ name ref gtin  attributes{name type value} Product:product{ ... on StandardProduct{               __typename       ref                      attributes{                        name                        value                        }    }                }}}}                 }            }          }          order {            id            ref            type            status    attributes{name value type}         fulfilmentChoice {              deliveryType            }            customer {              firstName              lastName              primaryEmail              primaryPhone            }          }          articles {            edges {              node {            id     ref                consignmentArticles(first: 1) {                  edges {                    node {                      consignment {                        id                        ref                        carrier {                          name                        }                        trackingLabel                        status                        updatedOn                      }                    }                  }                }              }            }          }        }      }    }  }}",
3    "variables": {
4        "id": "{{params.id}}"
5    }
6}

Language: json

Name: The sample configured page query is as follows:

Description:

in this example, the additional fields are added for article id and fulfilment type.

Step arrow right iconCreate a setting fc.store.print.cc.label

Name

fc.store.print.cc.label

Value type

`LOB`

LOB value

`<..The HTML template example provide below>`

Context

`RETAILER -or- ACCOUNT`

Context ID

`<RetailerID> -or- 0`

There is a base template to get started with. Please use your preferred HTML editor to edit the fields and layout to your desired outcome.

1<!DOCTYPE html>
2<html lang="en">
3  <head>
4    <meta charset="UTF-8" />
5    <meta name="viewport" content="width=device-width, initial-scale=1.0" />
6    <title>Click & Collect</title>
7    <style type="text/css">
8      * {
9        margin: 0;
10        padding: 0;
11        text-indent: 0;
12      }
13      body {
14        padding: 41px 44px 41px 44px;
15        font-family: "Lato", sans-serif;
16      }
17      hr {
18        border-top: 1px solid black;
19      }
20      h1 {
21        font-size: 42px;
22        line-height: 50.4px;
23        margin-bottom: 36px;
24      }
25      h2 {
26        font-size: 20px;
27        font-weight: 700;
28        line-height: 24px;
29        margin-top: 24px;
30        margin-bottom: 24px;
31      }
32      span.deliver-to {
33        display: block;
34        font-size: 16px;
35        line-height: 19.2px;
36        margin-bottom: 16px;
37      }
38      span.deliver-to:last-of-type {
39        margin-bottom: 24px;
40      }
41
42      table {
43        width: 100%;
44        border-collapse: collapse;
45        text-align: left;
46        margin-top: 24px;
47        margin-bottom: 24px;
48      }
49      th {
50        font-size: 16px;
51        font-weight: 700;
52        line-height: 26px;
53        padding-bottom: 16px;
54      }
55      td {
56        padding-bottom: 8px;
57      }
58      .article-ref {
59        font-size: 16px;
60        line-height: 26px;
61        text-align: center;
62        margin-bottom: 4px;
63      }
64      .barcode-ref {
65        text-align: center;
66        margin-bottom: -30px;
67      }
68      .barcode-ref-title {
69        font-weight: 700;
70      }
71      .article-ref > span:first-of-type {
72        font-weight: 700;
73      }
74      .barcode {
75        display: flex;
76        justify-content: center;
77      }
78      .page-break {
79        display: block;
80        page-break-before: always;
81      }
82      .barcodek:last-child {
83        page-break-after: auto;
84      }
85      th {
86        padding-right: 10px;
87      }
88      .nowrap {
89        white-space: nowrap;
90      }
91      th,
92      td {
93        padding-right: 10px;
94      }
95      td {
96        vertical-align: top;
97      }
98      @media print {
99        #pagebreak {
100          float: none;
101          break-after: page;
102        }
103      }
104    </style>
105  </head>
106  <body>
107{{#each waveById.fulfilments.edges}}
108{{#if (eq node.type 'CC_PFS')}} 
109    <h1>Click & Collect</h1>
110    <hr />
111    <h2>Customer:</h2>
112    <p>
113      <span class="deliver-to">
114        <h2>{{{node.order.customer.firstName}}} {{{node.order.customer.lastName}}} </h2>
115      </span>
116      <span class="deliver-to">{{{node.order.customer.primaryEmail}}}</span>
117      <span class="deliver-to">{{{node.order.customer.primaryPhone}}}</span>
118      <span class="deliver-to">
119        {{{node.toAddress.street}}} {{{node.toAddress.street2}}}<br />
120        {{{node.toAddress.city}}} {{{node.toAddress.state}}}
121        {{{node.toAddress.postcode}}}<br />
122        {{{node.toAddress.country}}}<br />
123      </span>
124    </p>
125    <hr />
126    <table cellspacing="0">
127      <thead>
128        <tr>
129          <th>Order Ref</th>
130          <th>Fulfilment ID</th>
131        </tr>
132      </thead>
133      <tbody>
134        <tr>
135          <td>{{{node.order.ref}}}</td>
136          <td>{{{node.id}}}</td>
137        </tr>
138      </tbody>
139    </table>
140    <div class="barcode-ref">
141
142<span class="barcode-ref-title">Article ID:</span>
143    <div class="barcode">{{{barcode node.articles.edges.0.node.id null true}}}</div></div>
144</div>
145
146
147  <div id="pagebreak"></div>
148{{/if}}
149 {{/each}}
150
151  </body>
152</html>

Language: html

Name: HTML Example

Description:

At a high level, the HTML will loop through each fulfilment entity, if the fulfilment type is CC_PFS then generate the CC label.


Step arrow right iconConfigure the Waves fragment to include the “Print Click & Collect Labels“ button

If the Waves fragment has not been configured previously then you will first need to get the content of the baseline waves fragment. Otherwise, if you have already configured the waves fragment on your account, then get the content from your account settings instead.

Once you have accessed the baseline waves fragment, copy the content into your preferred text editor.

Define the following component to the third step of Wave (DISPATCH stage), just below the component 

`fc.button.print`

1{
2    "component": "fc.button.print",
3    "props": {
4        "label": "i18n:fc.sf.ui.waves.detail.action.ccLabel.download.label",
5        "setting": "fc.store.print.cc.label",
6        "data": "waveById",
7        "behavior": "print"
8    }
9}

Language: json

Name: Code sample

Description:

Please make sure to add label/value to your language setting.

`"fc.sf.ui.waves.detail.action.ccLabel.download.label": "Print Click & Collect Labels"`


Step arrow right iconTest the outcome

No alt providedNo alt providedNo alt provided