Azure AD & Microsoft Entra ID OIDC Configuration: Unified Guide
How-to Guide
Author:
Fluent Commerce
Changed on:
13 Feb 2025
Key Points
- Adding the application to PingOne
- Registering application with Microsoft
- Getting the client ID and client secret for the application
- Setting up API permissions
- Adding the identity provider in PingOne
- Adding the Redirect URI to the Microsoft portal
- Do not forget
Steps
Adding the application to PingOne
Registering application with Microsoft
 Step 1
Go to Microsoft Azure portal. If one does not have a Microsoft Azure account, they can create one.
Step 2
Under Azure services, click Azure Active Directory.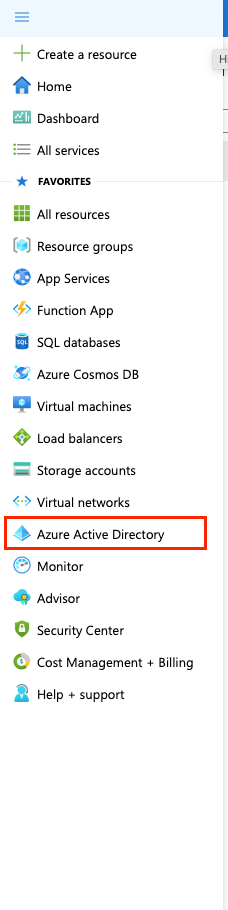
Step 3
On the left, click App registrations.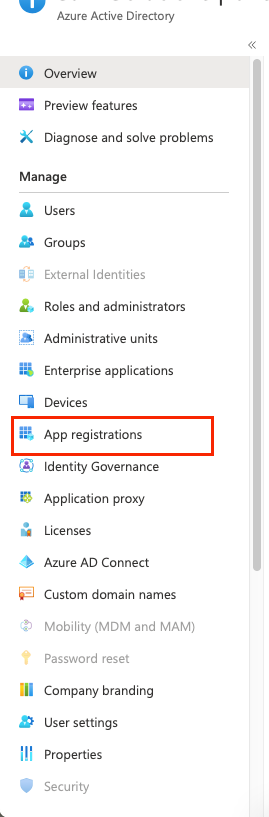
Step 4
At the top, click New registration.
Step 5
Under Name, enter a user-facing display name for the application.
Step 6
Under Supported account types, select any multi-tenant option. In case you need help to choose the option, click Help me choose link.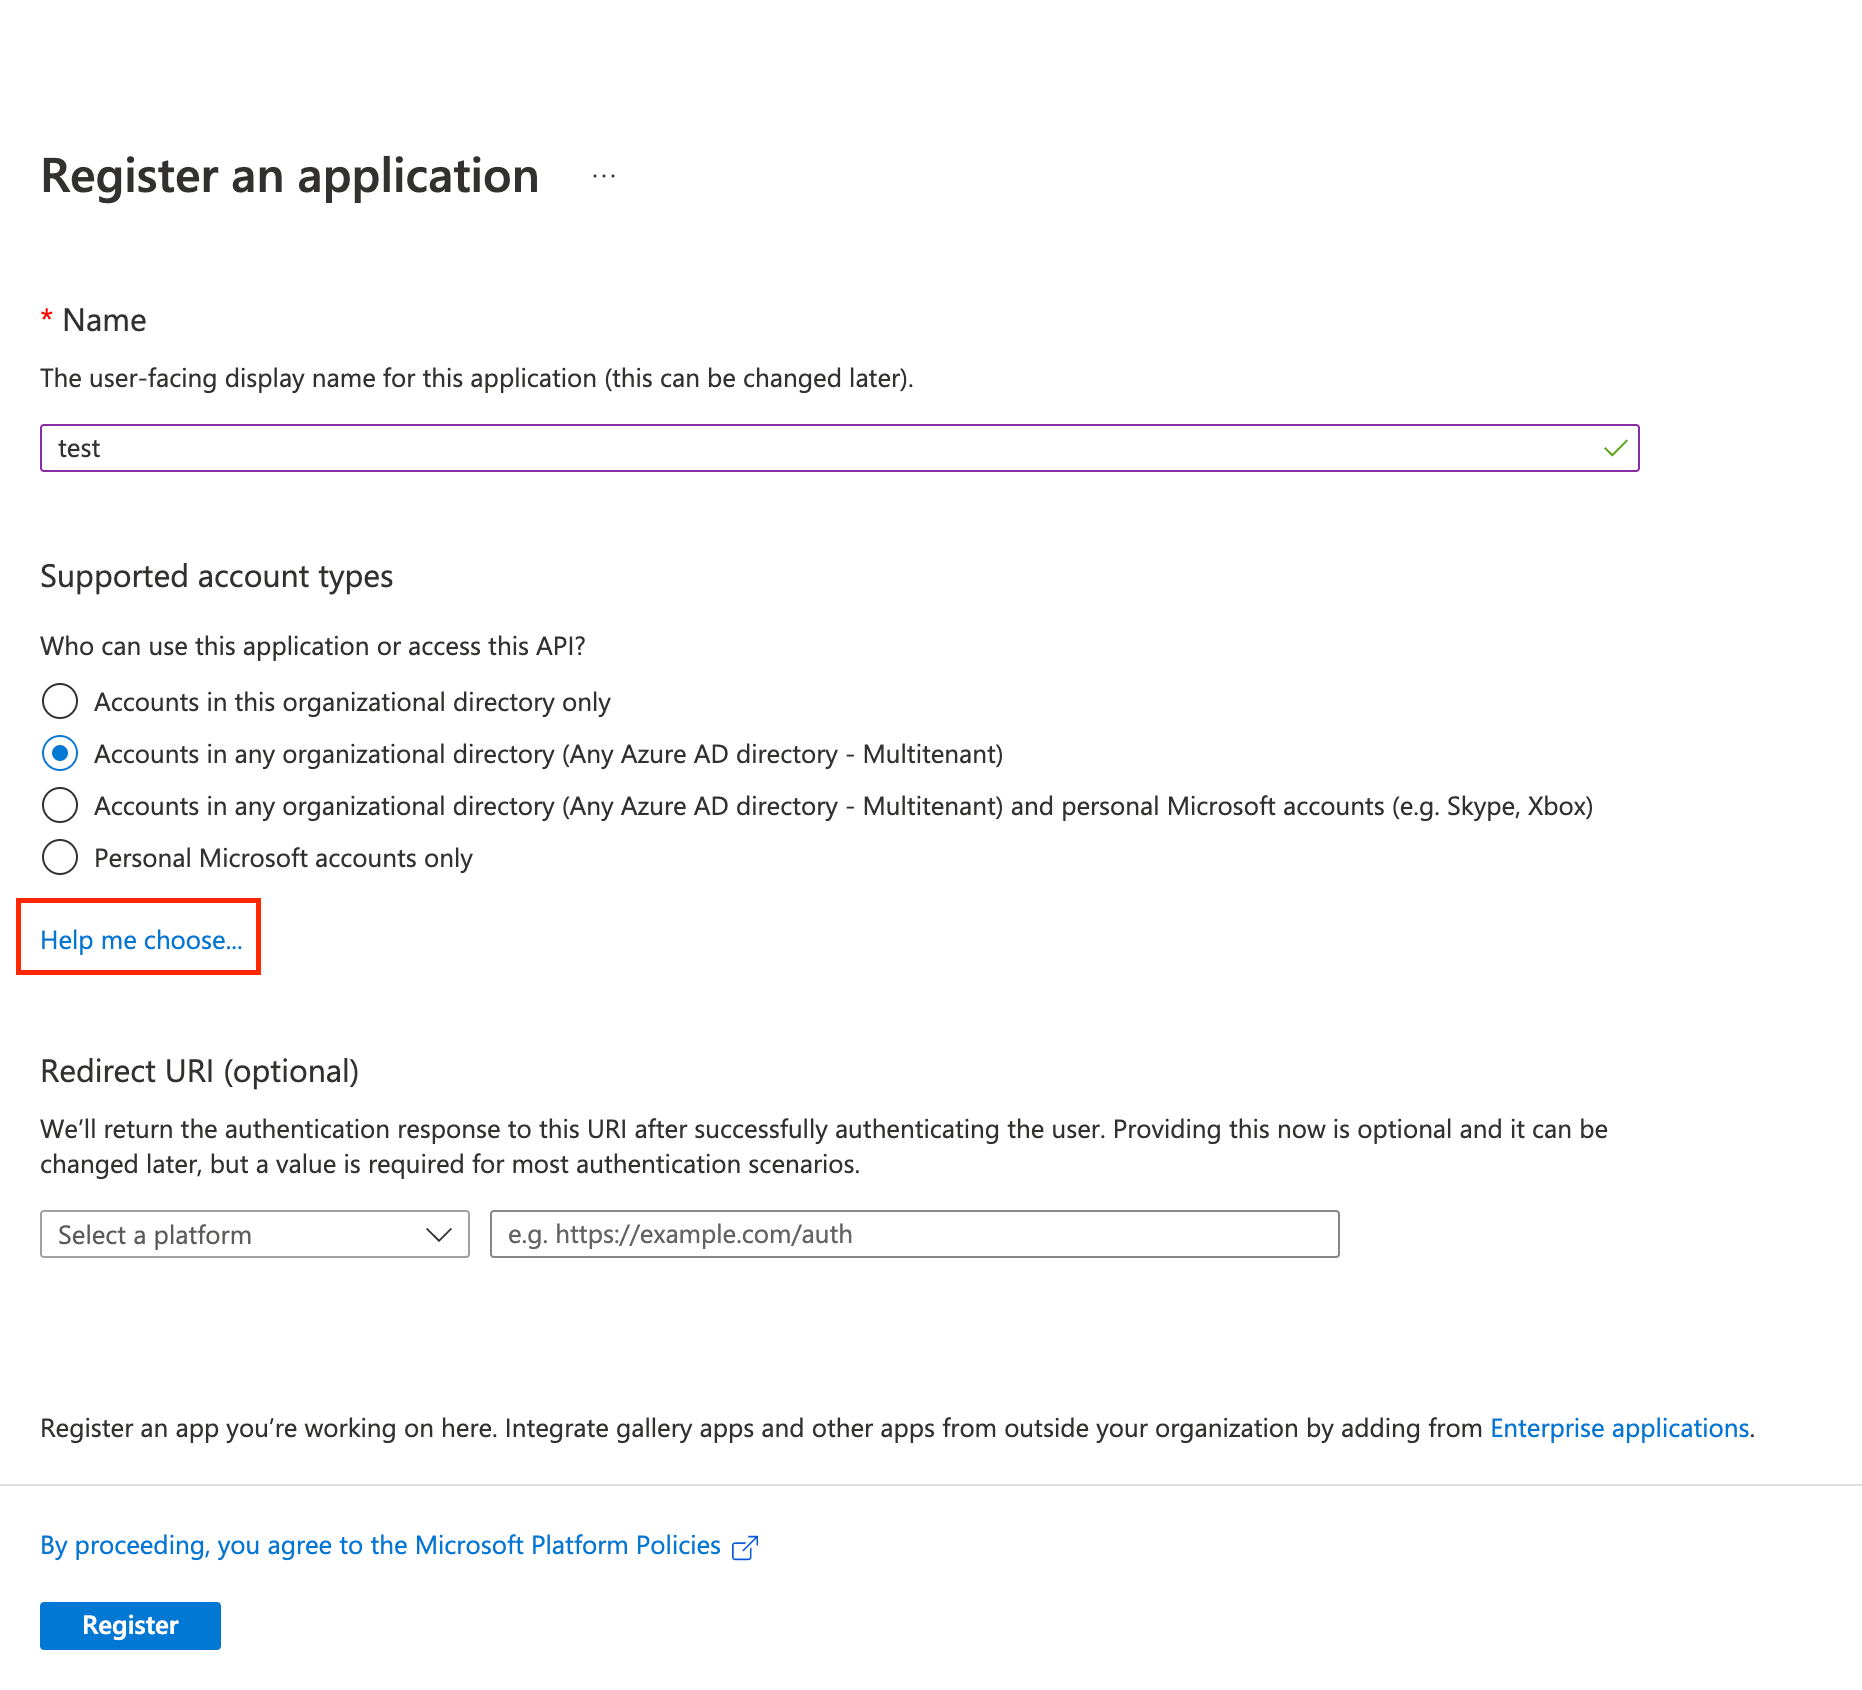
Step 7
Leave Redirect URI blank for now. This value will be required to enter after creation the identity provider in PingOne.
Step 8
Click Register.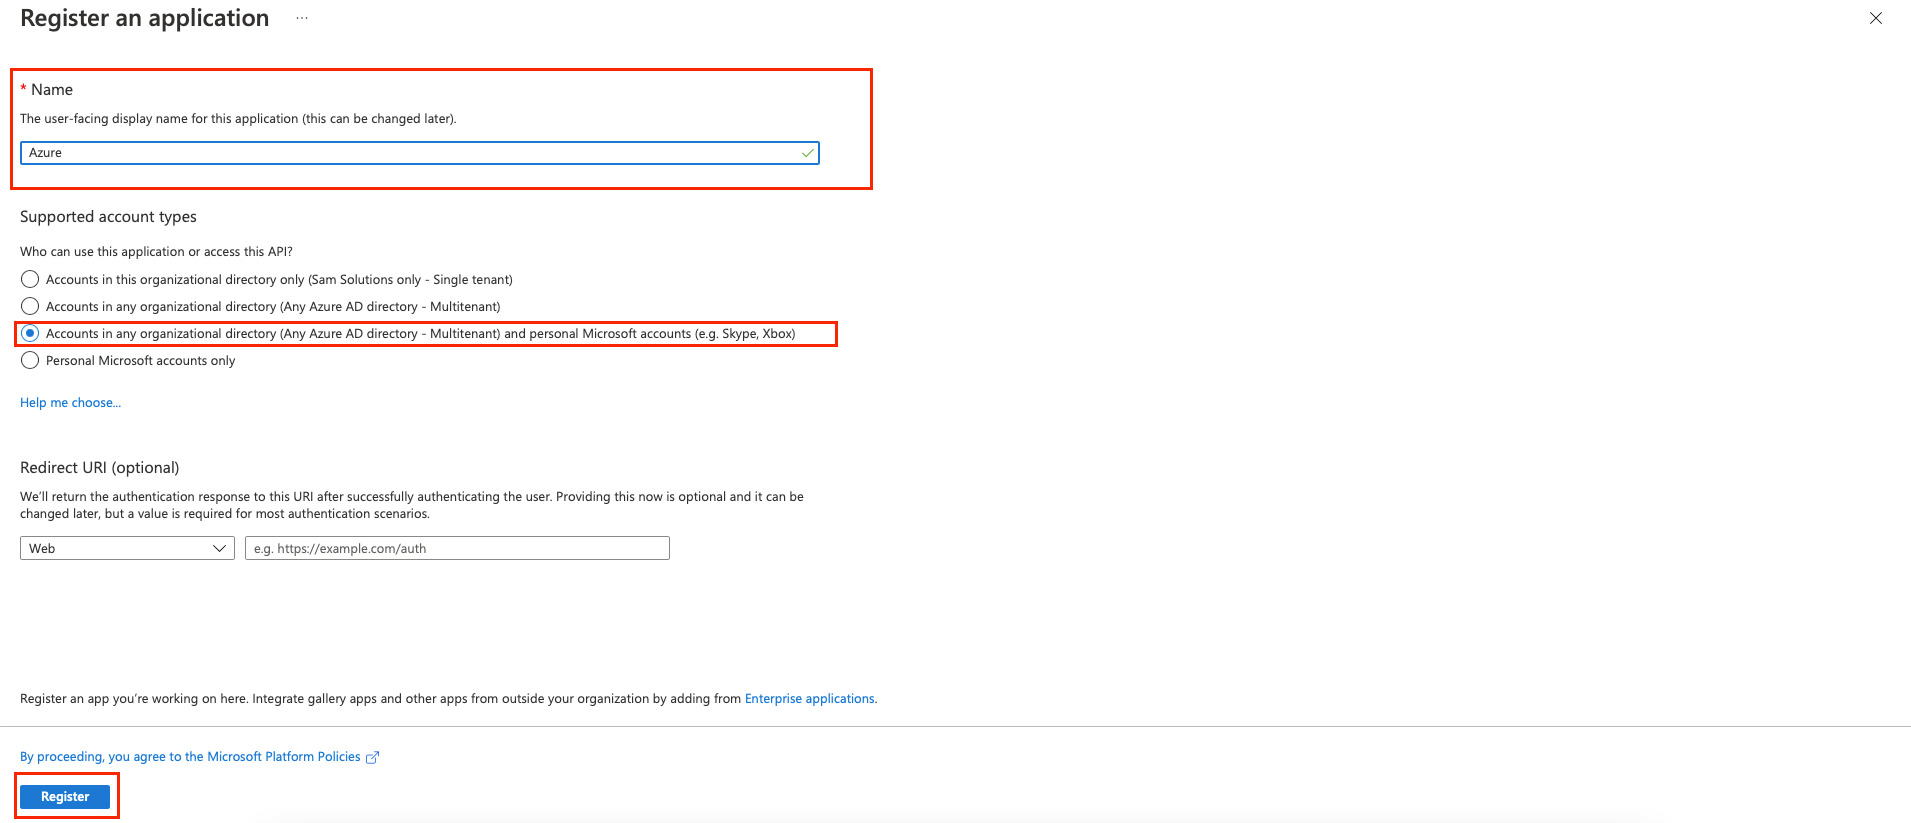
Getting the client ID and client secret for the application
Step 1
Go to Microsoft Azure portal.
Step 2
Under App registrations, select the application.
Step 3
On the left, click Certificates and secrets.
Step 4
Under Client secrets, click + New client secret.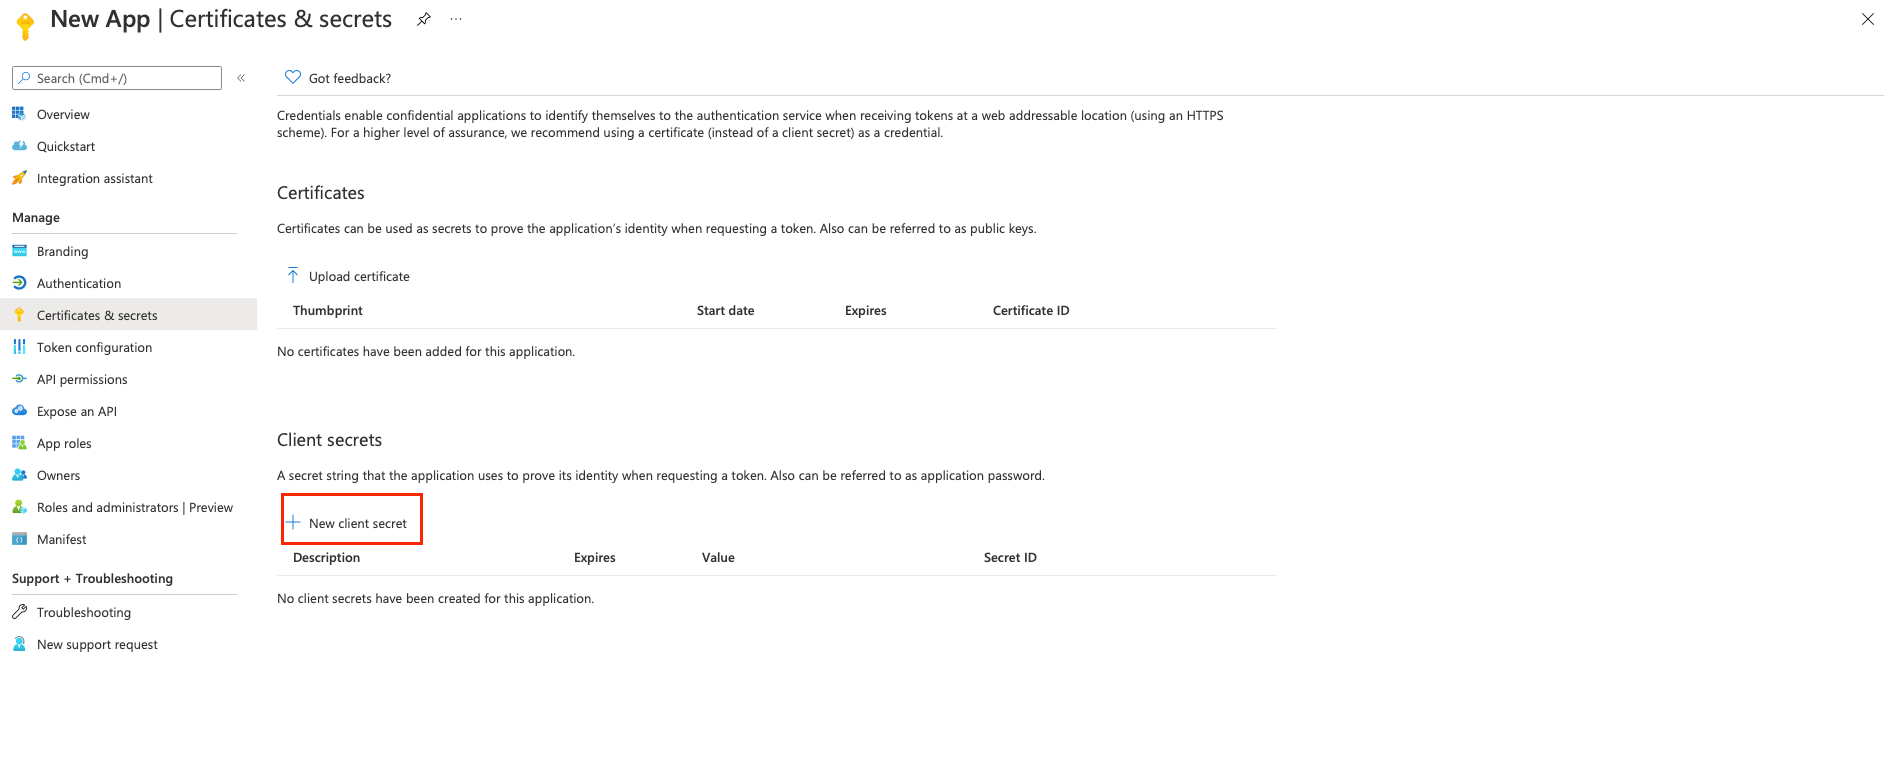
Step 5
Enter the following: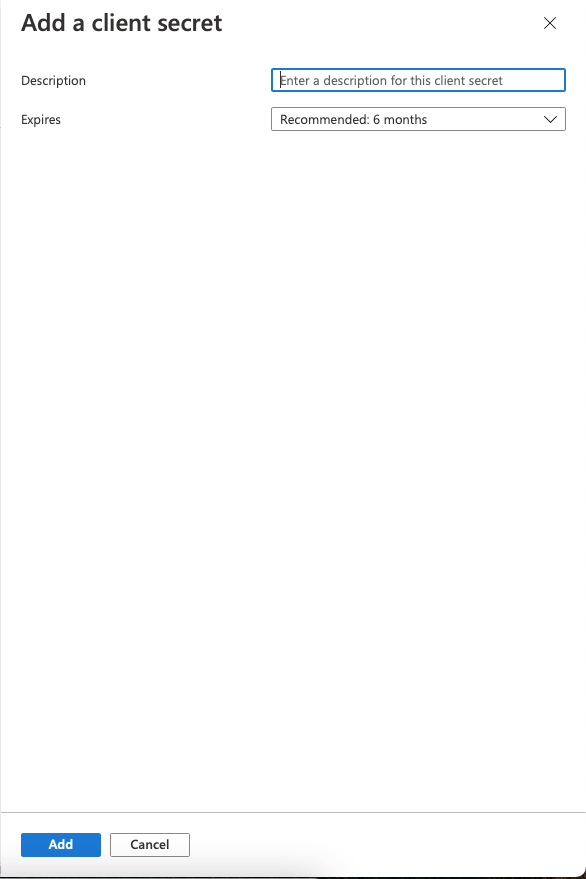
- Description. A brief characterization of the client secret.
- Expires. Select the duration of the certificate, based on the needs of your organization.
Step 6
Click Add.
Step 7
Under Client secrets, locate the value for the appropriate secret and copy it to a secure location.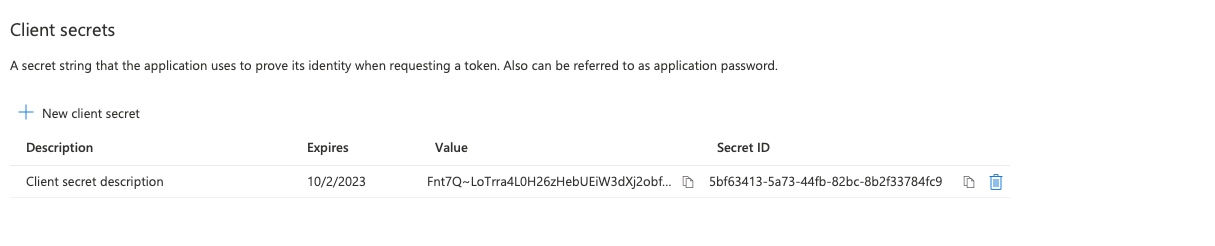
Step 8
On the left, click Overview.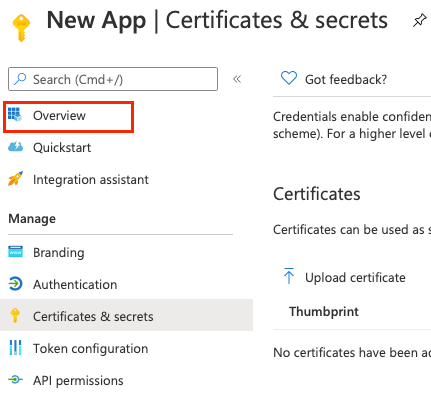
Step 9
Locate the Application (client) ID and copy it to a secure location.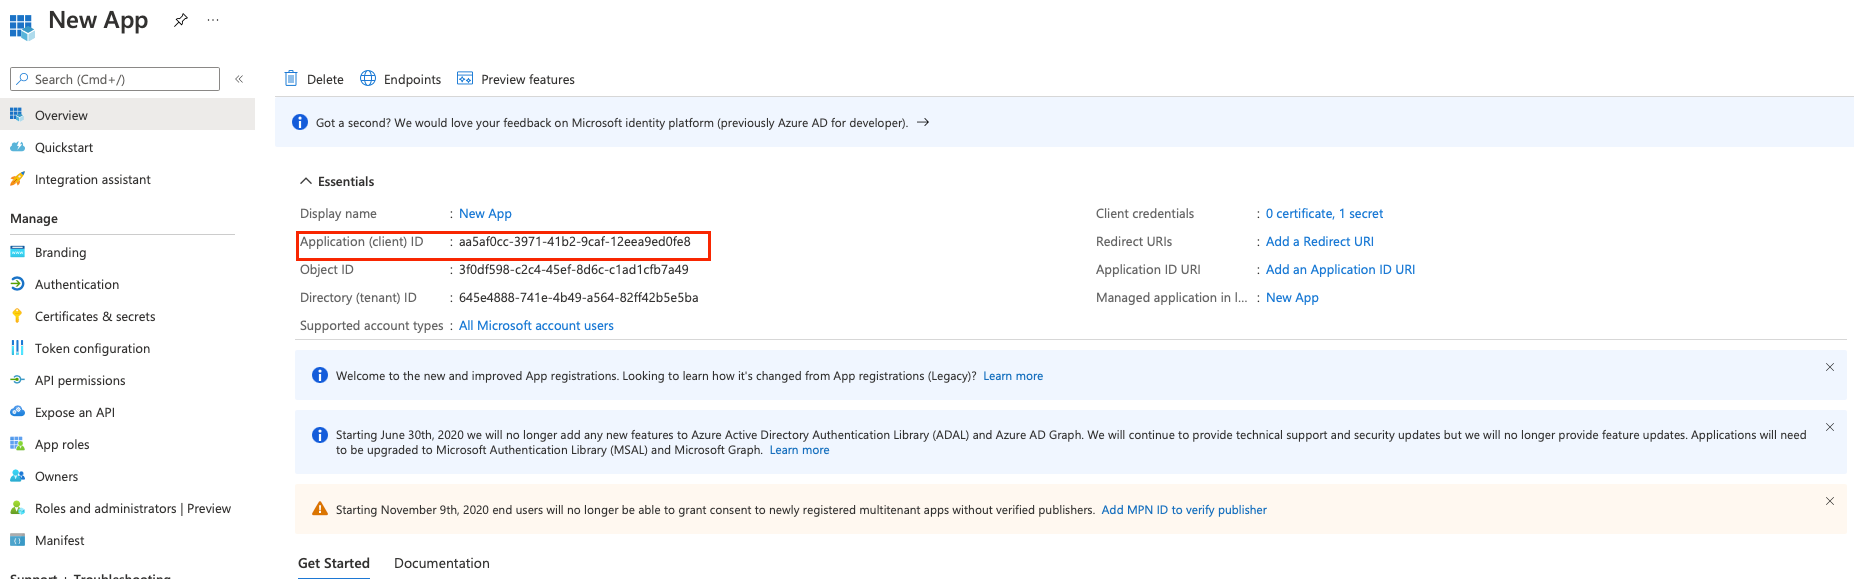
Setting up API permissions
Step 1
Go to Microsoft Azure portal.
Step 2
Under App registrations, select the application.
Step 3
On the left, click API permissions.
Step 4
Click the + Add a permission button.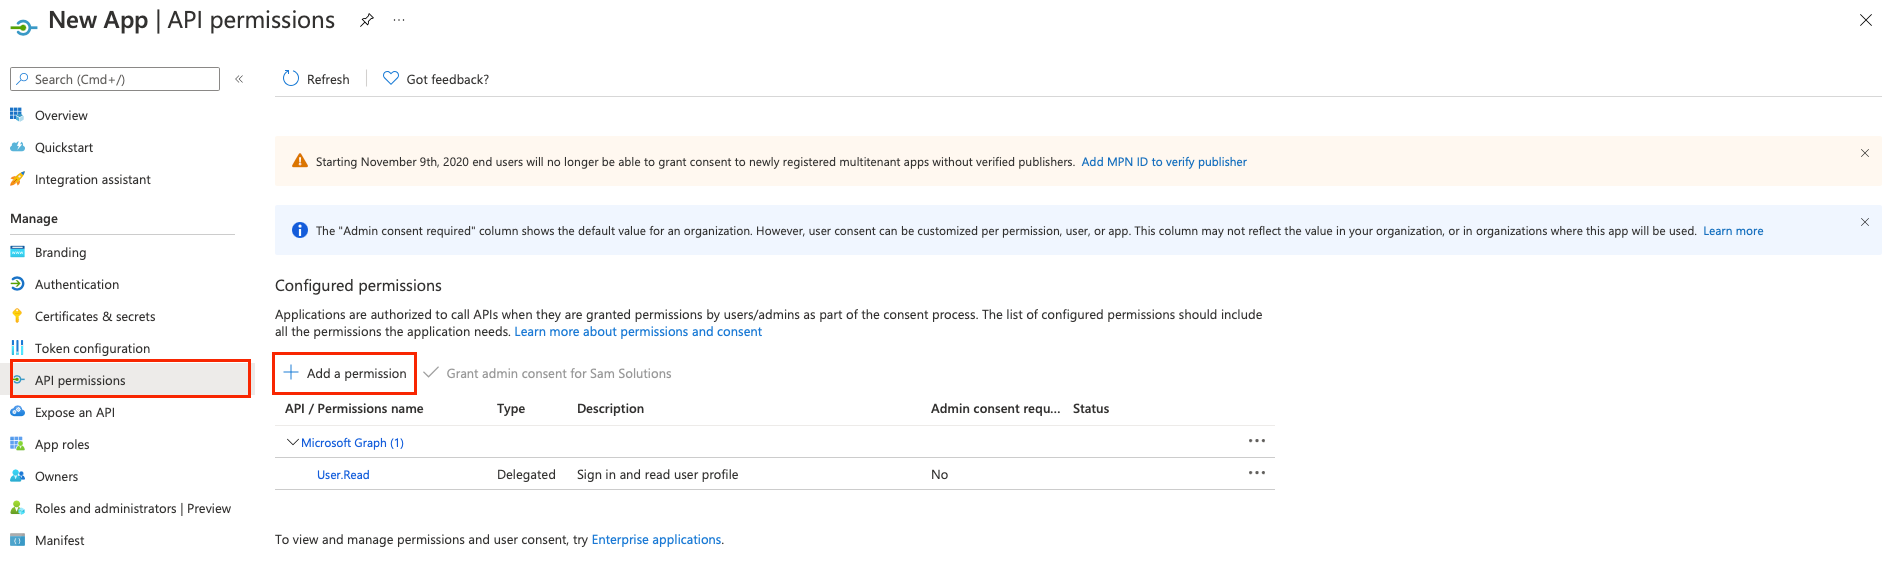
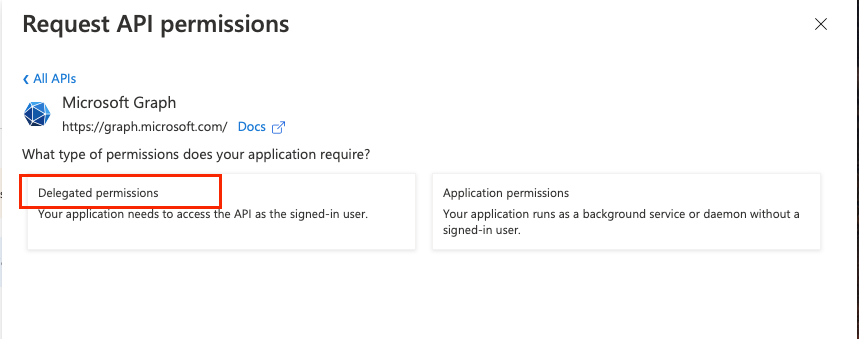
Step 5
Click Microsoft Graph, then click Delegated permissions.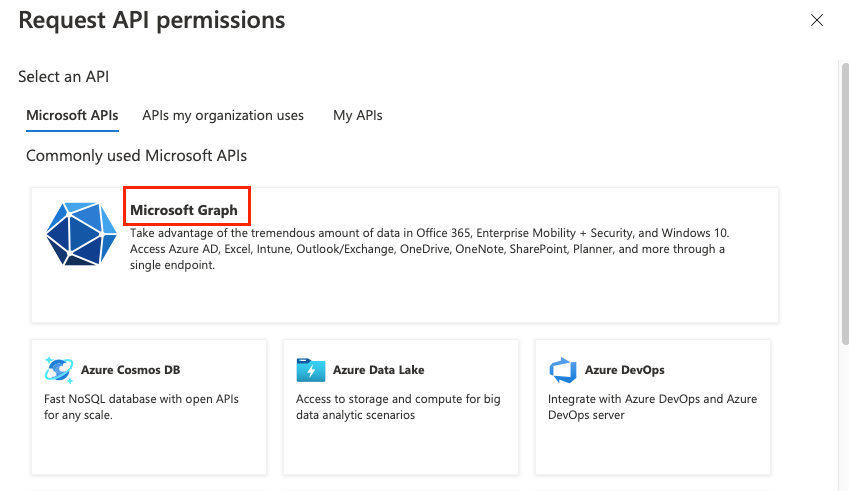
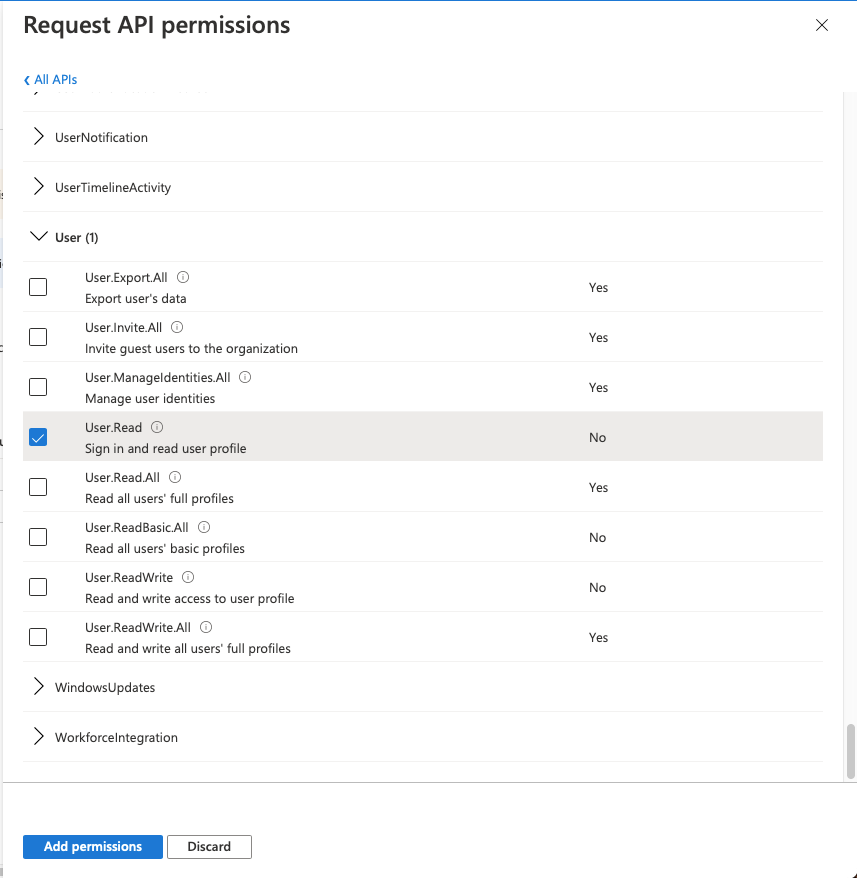
Step 6
Select the following:
`email``offline_access``openid``profile``User.Read`
Step 7
Click the Add permissions button.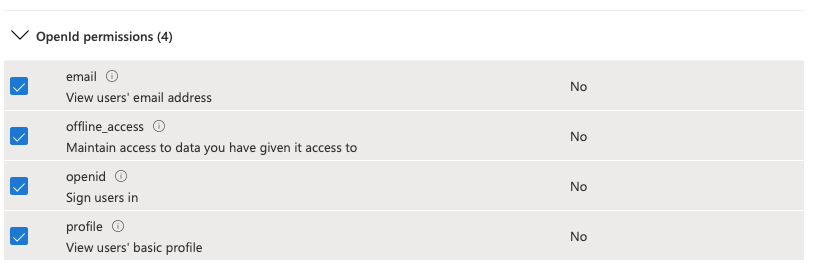
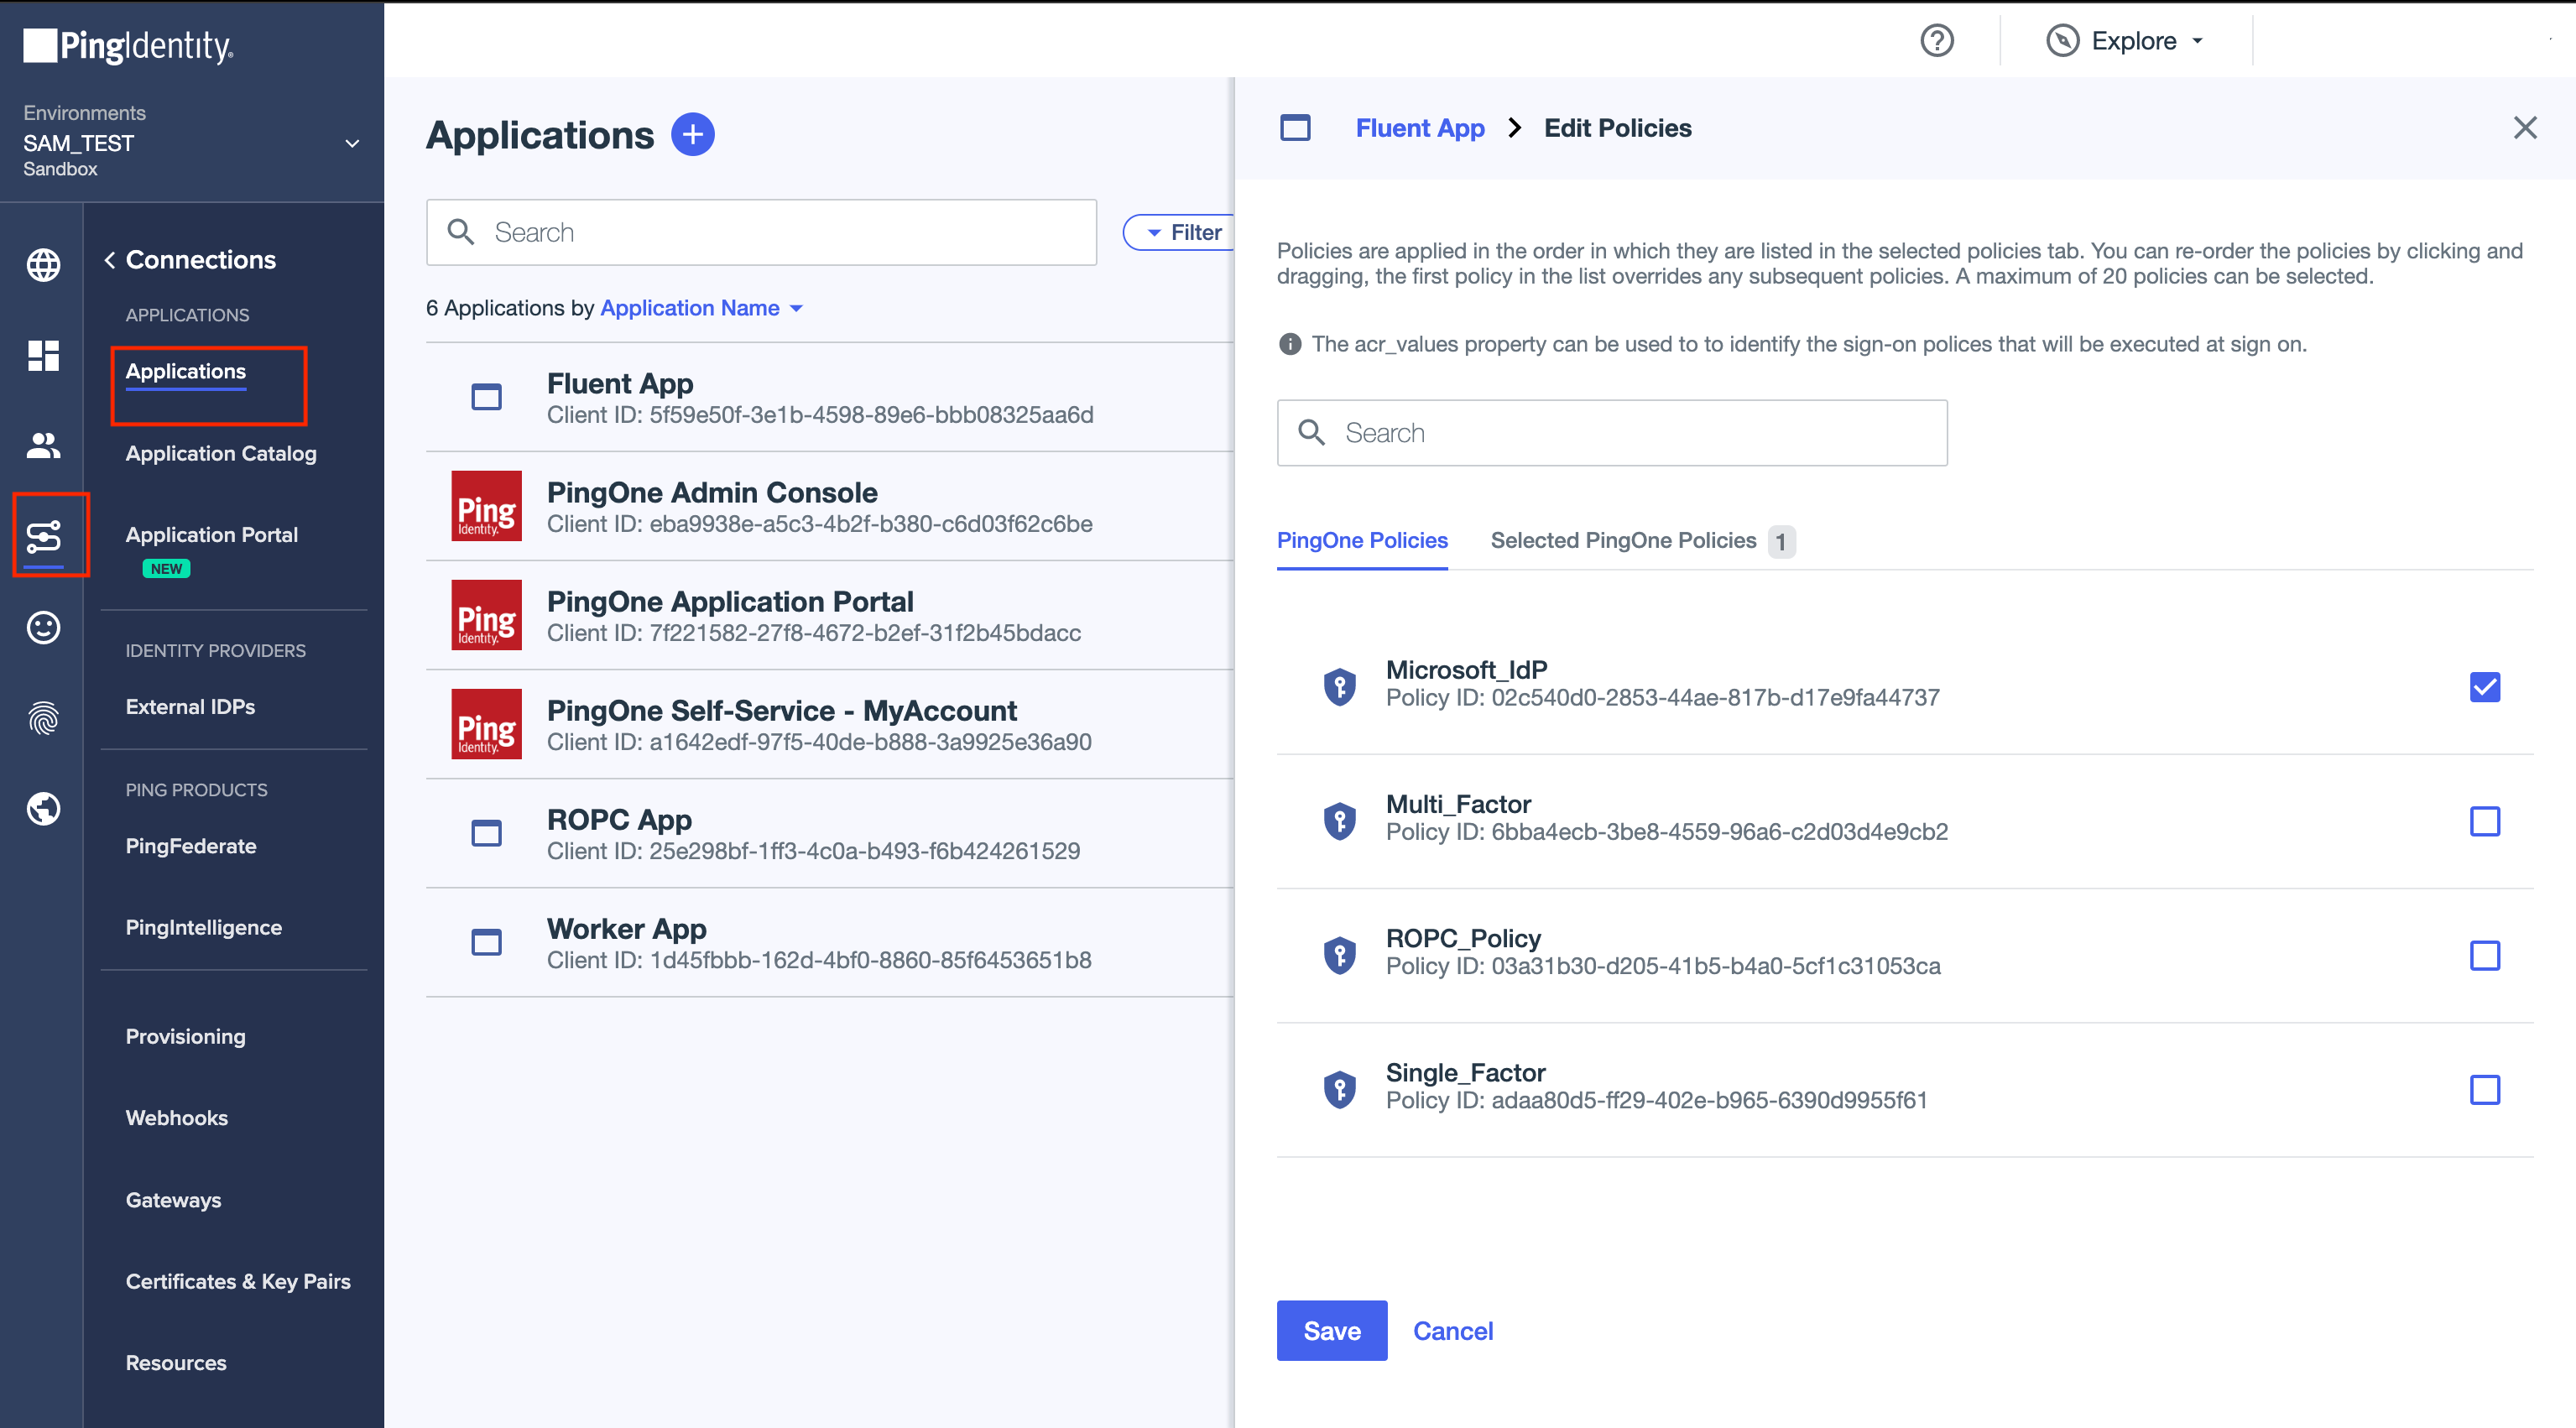
Adding the identity provider in PingOne
Step 1
Go to Connections → External IDPs.
Step 2
Click + Add Provider.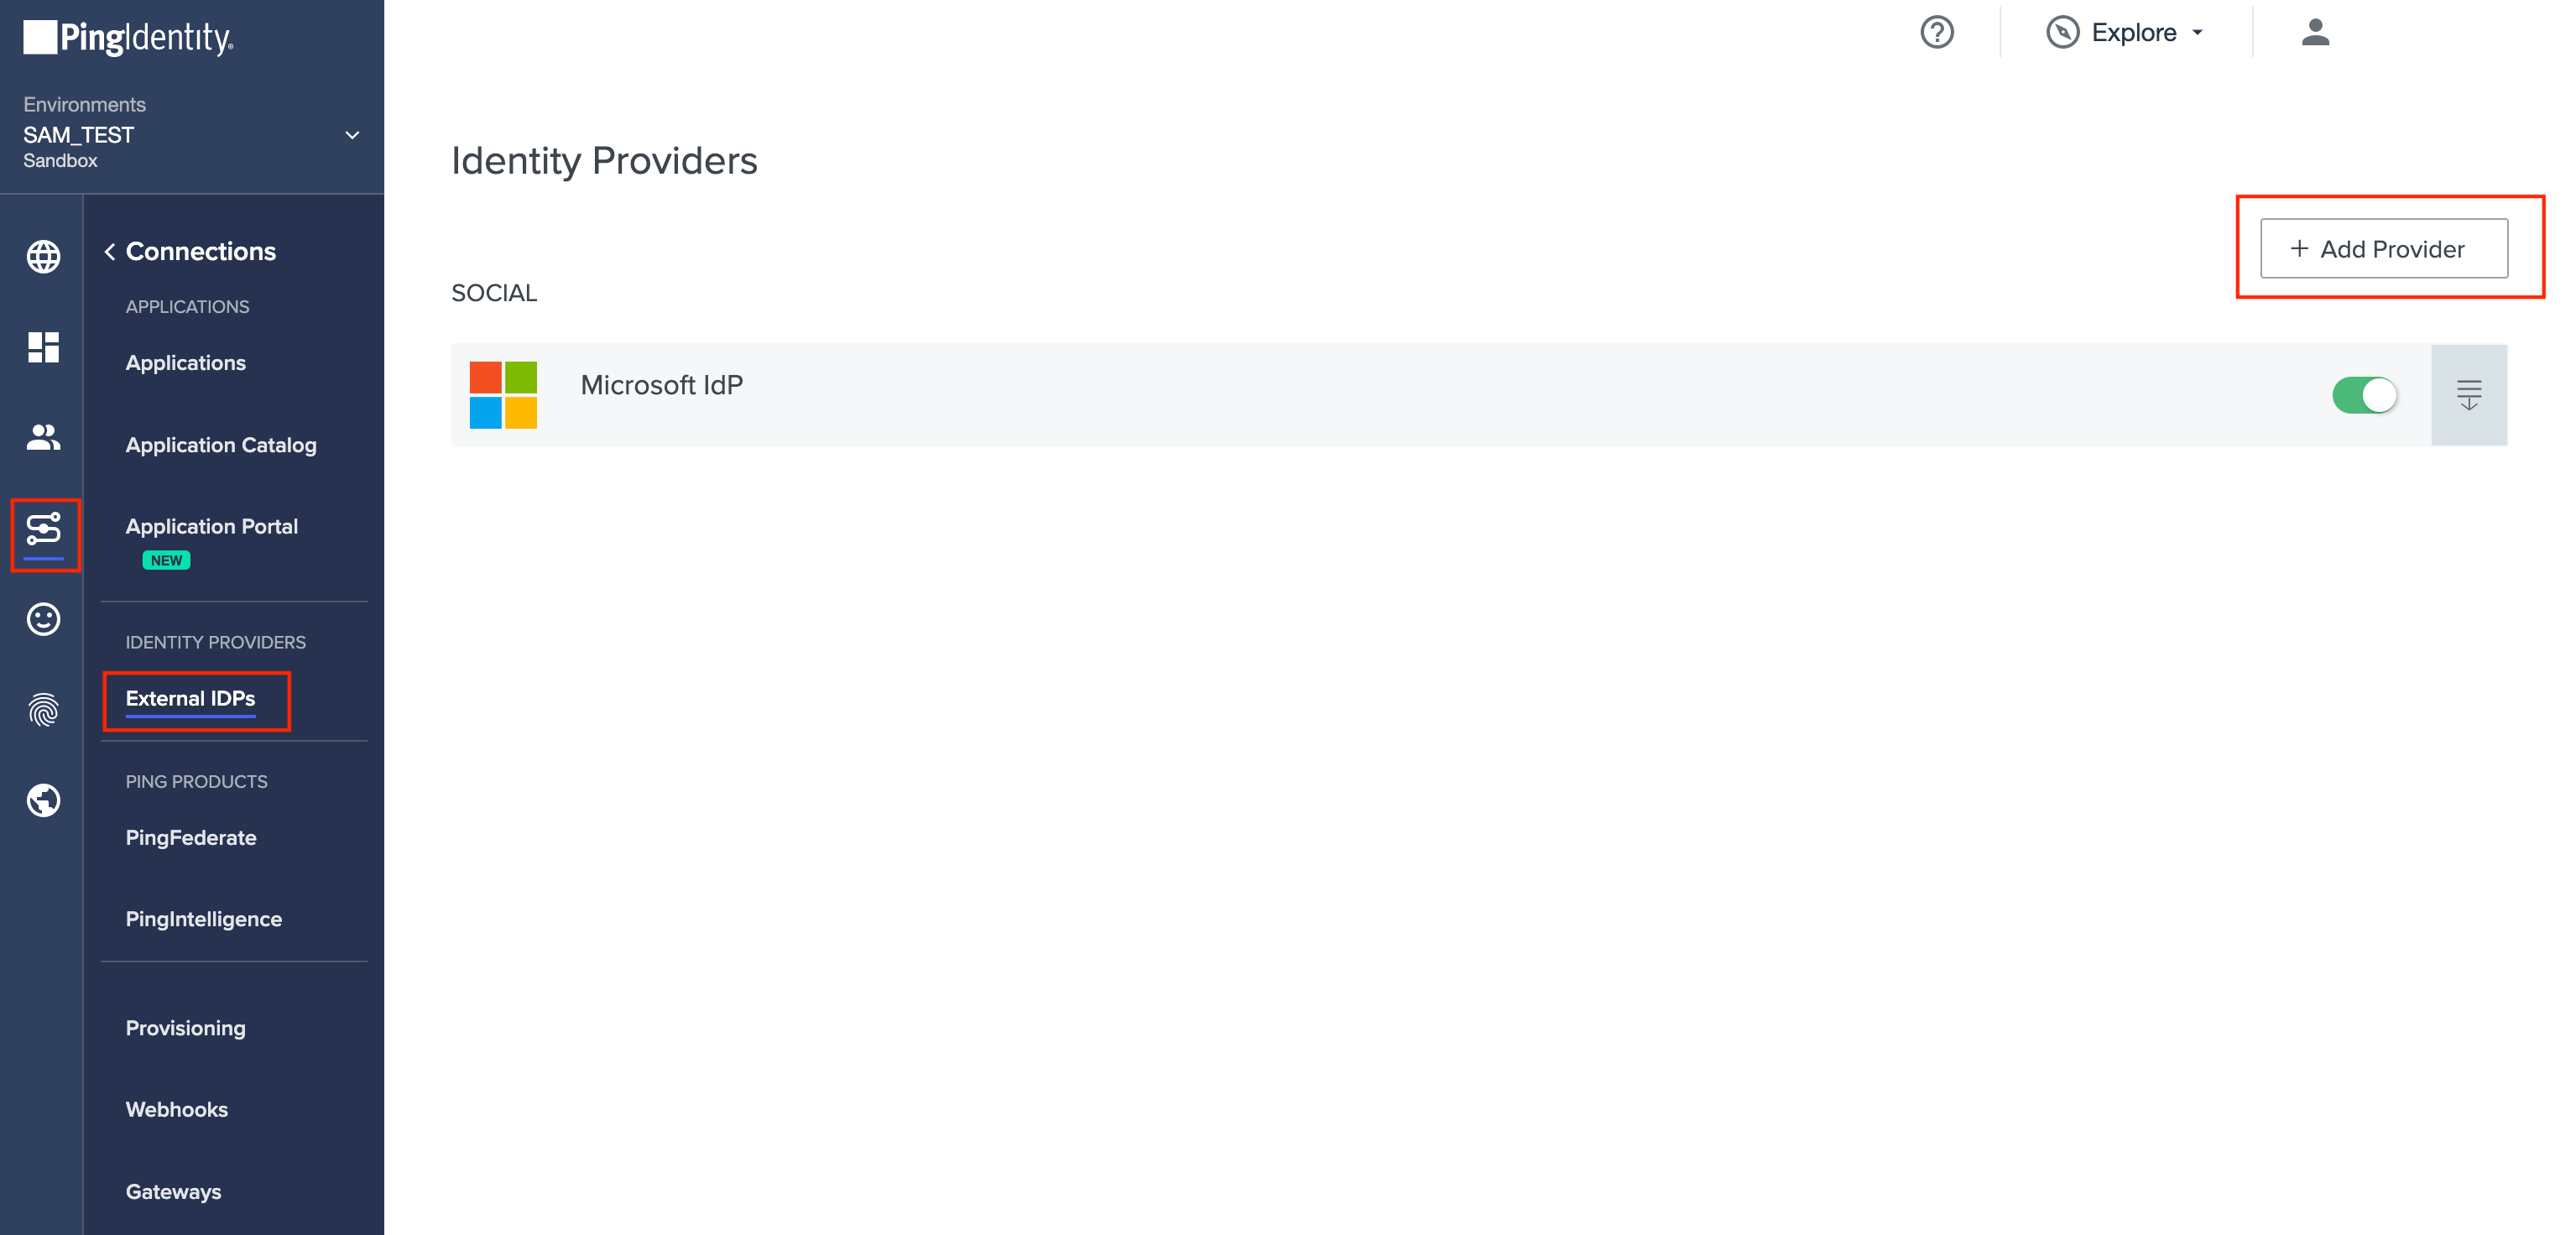
Step 3
Click Microsoft.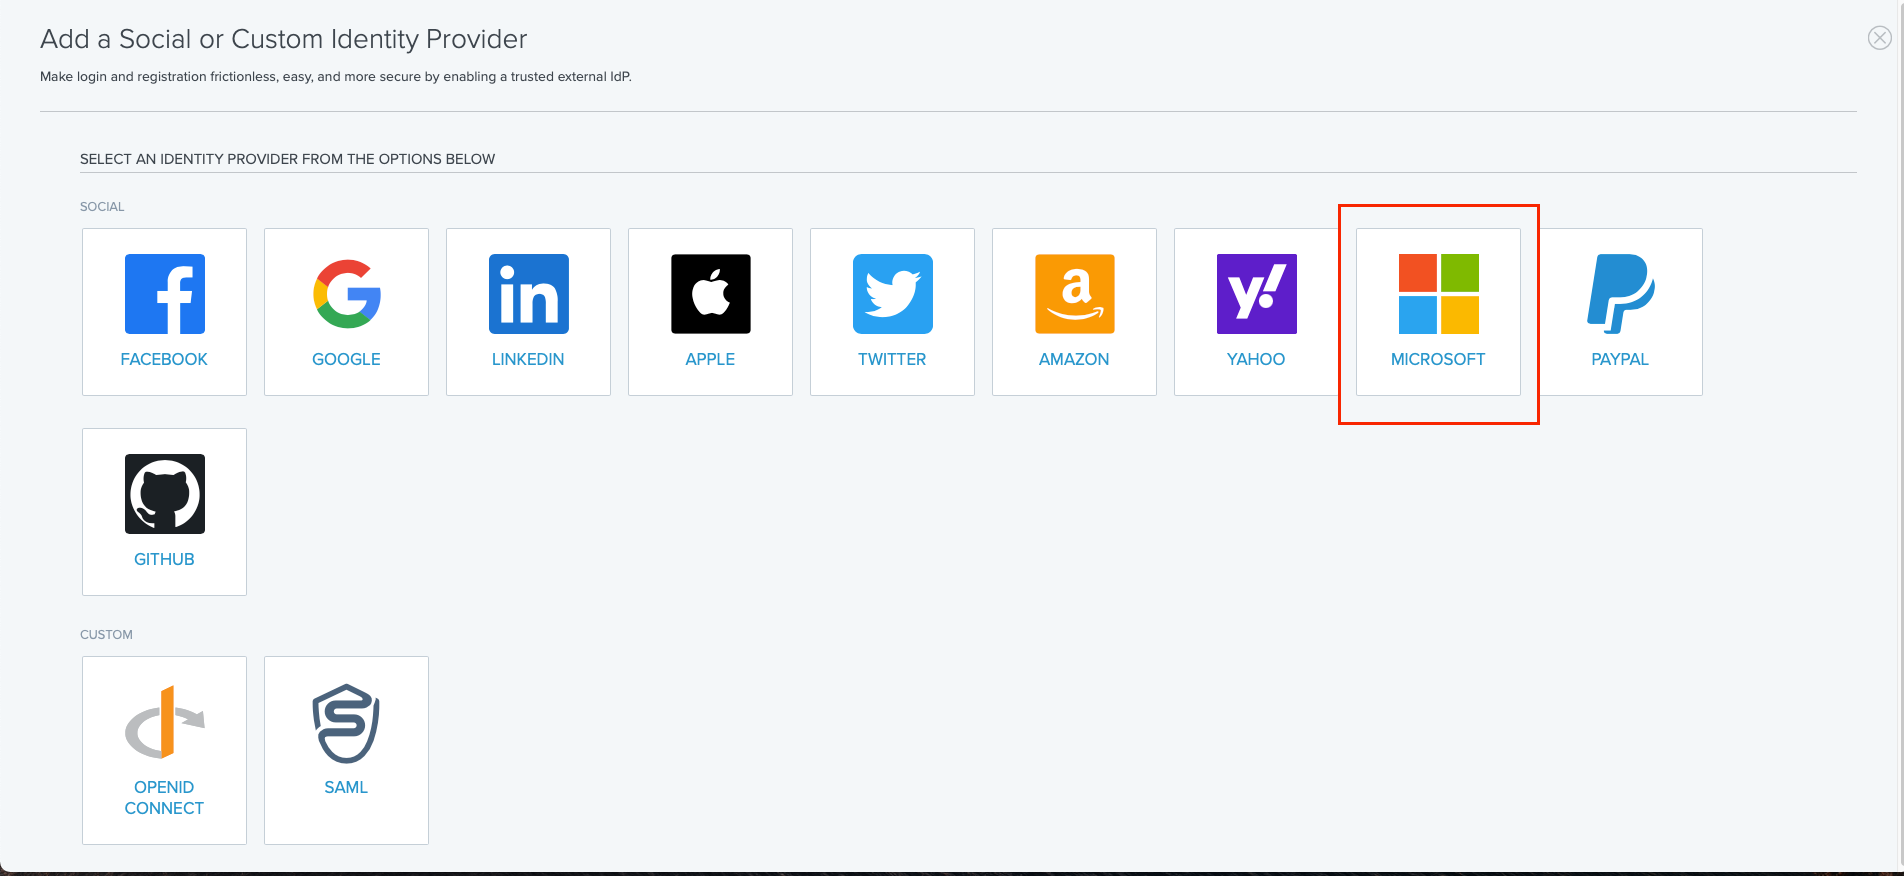
Step 4
On the Create Profile screen, enter the following information: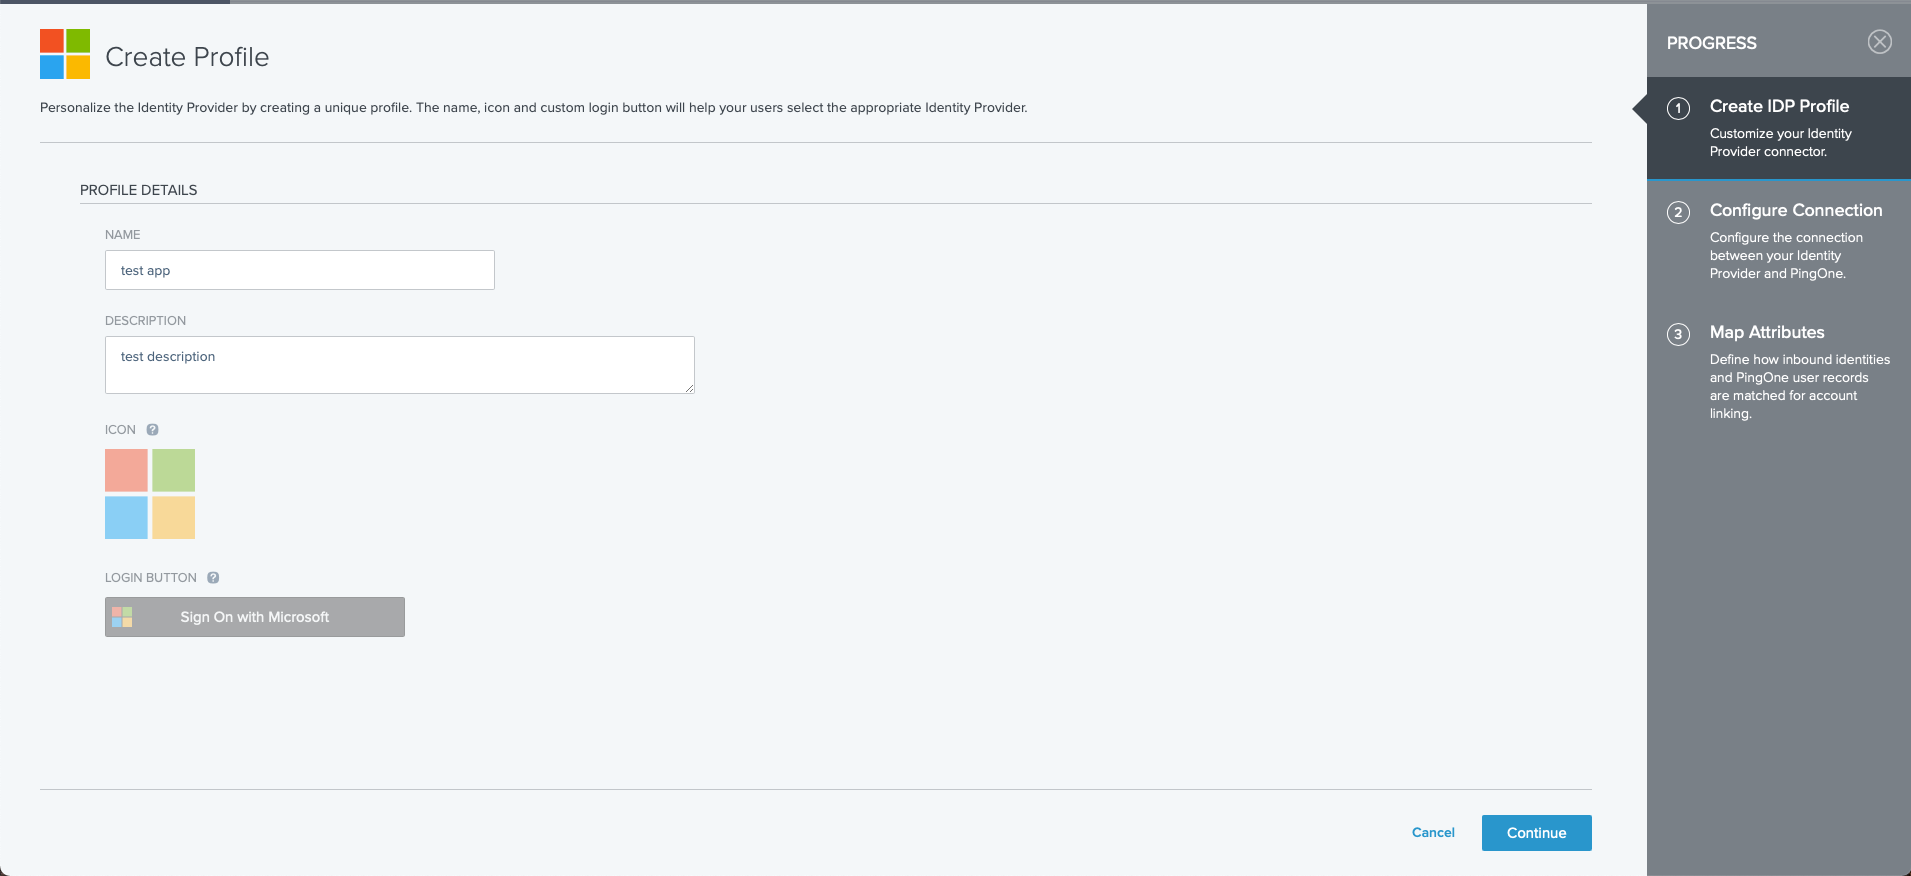
- Name. A unique identifier for the identity provider.
- Description (optional). A brief characterization of the identity provider.
Step 5
Click Next.
Step 6
On the Configure Connection screen, enter the following information:
- Client ID. The application ID from the identity provider that you copied earlier. You can find this information on the Microsoft Azure portal.
- Client secret. The application secret from the identity provider that you copied earlier. You can find this information on the Microsoft Azure portal.
Step 7
Click Save and Continue.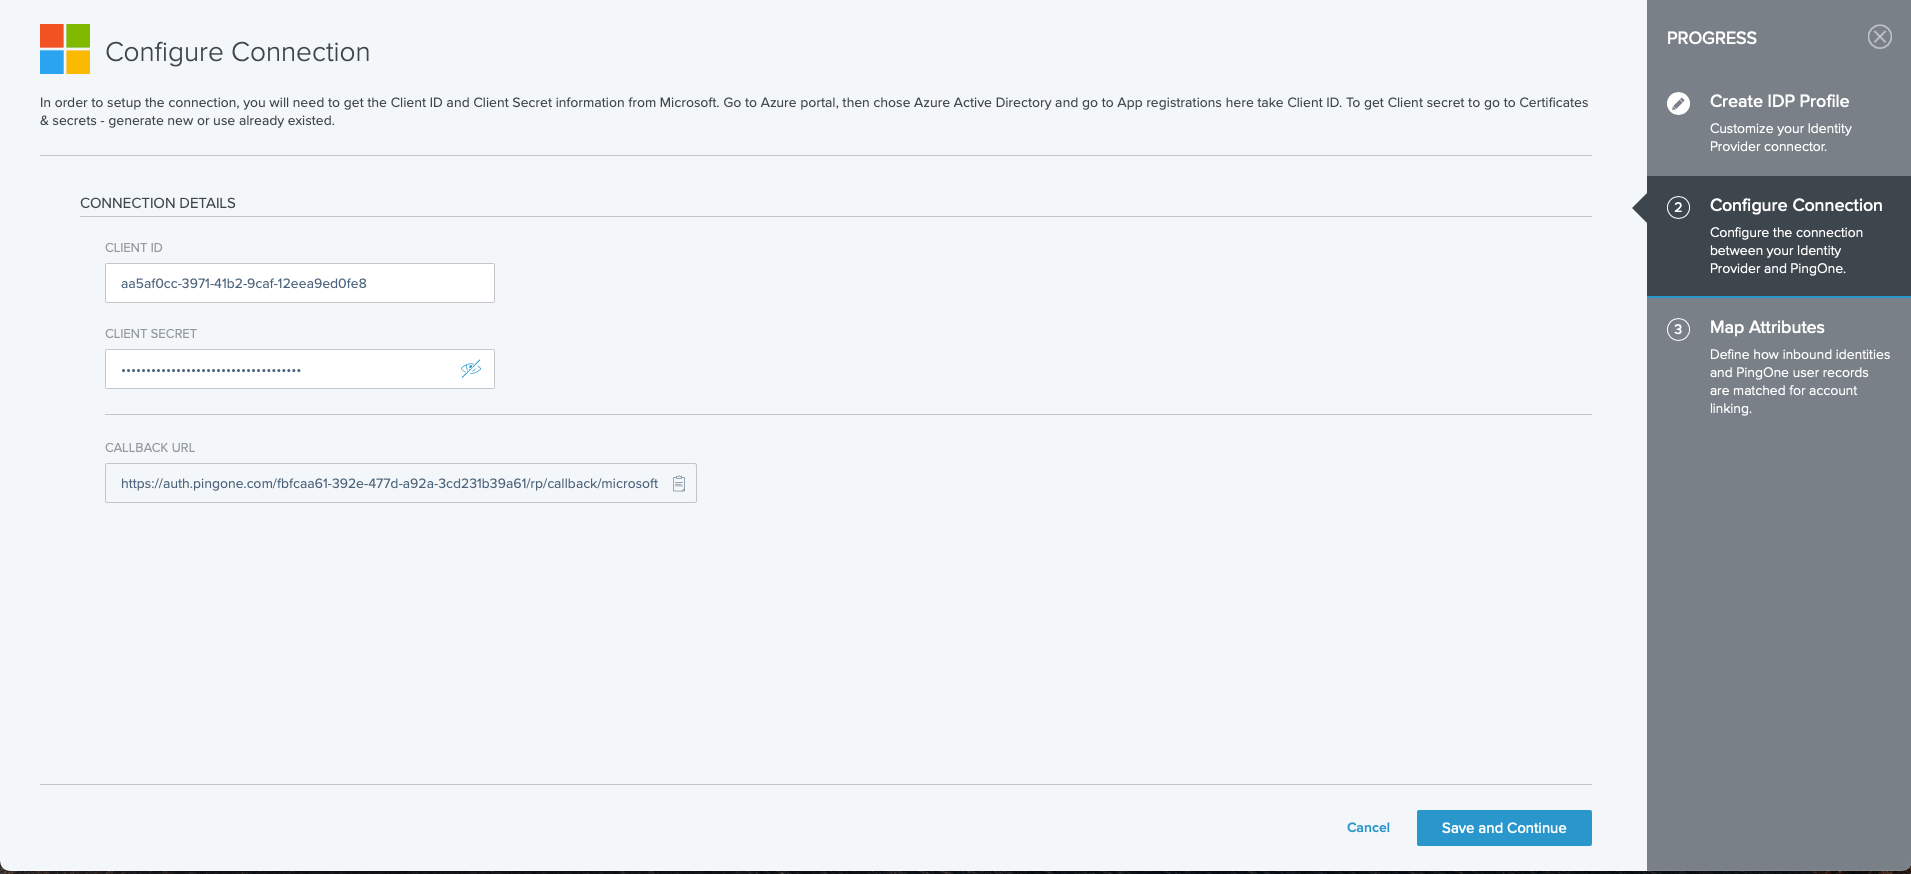
Step 8
On the Map Attributes screen, define how the PingOne user attributes are mapped to Microsoft attributes. Select the PingOne attribute, then select the equivalent Microsoft attribute. Select the update condition, which determines how PingOne updates its user directory with the values from Microsoft.The options are:
`Empty only` (update the PingOne attribute only if the existing attribute is empty) and `Always` (always update the PingOne directory attribute).Step 9
Click Save and Close.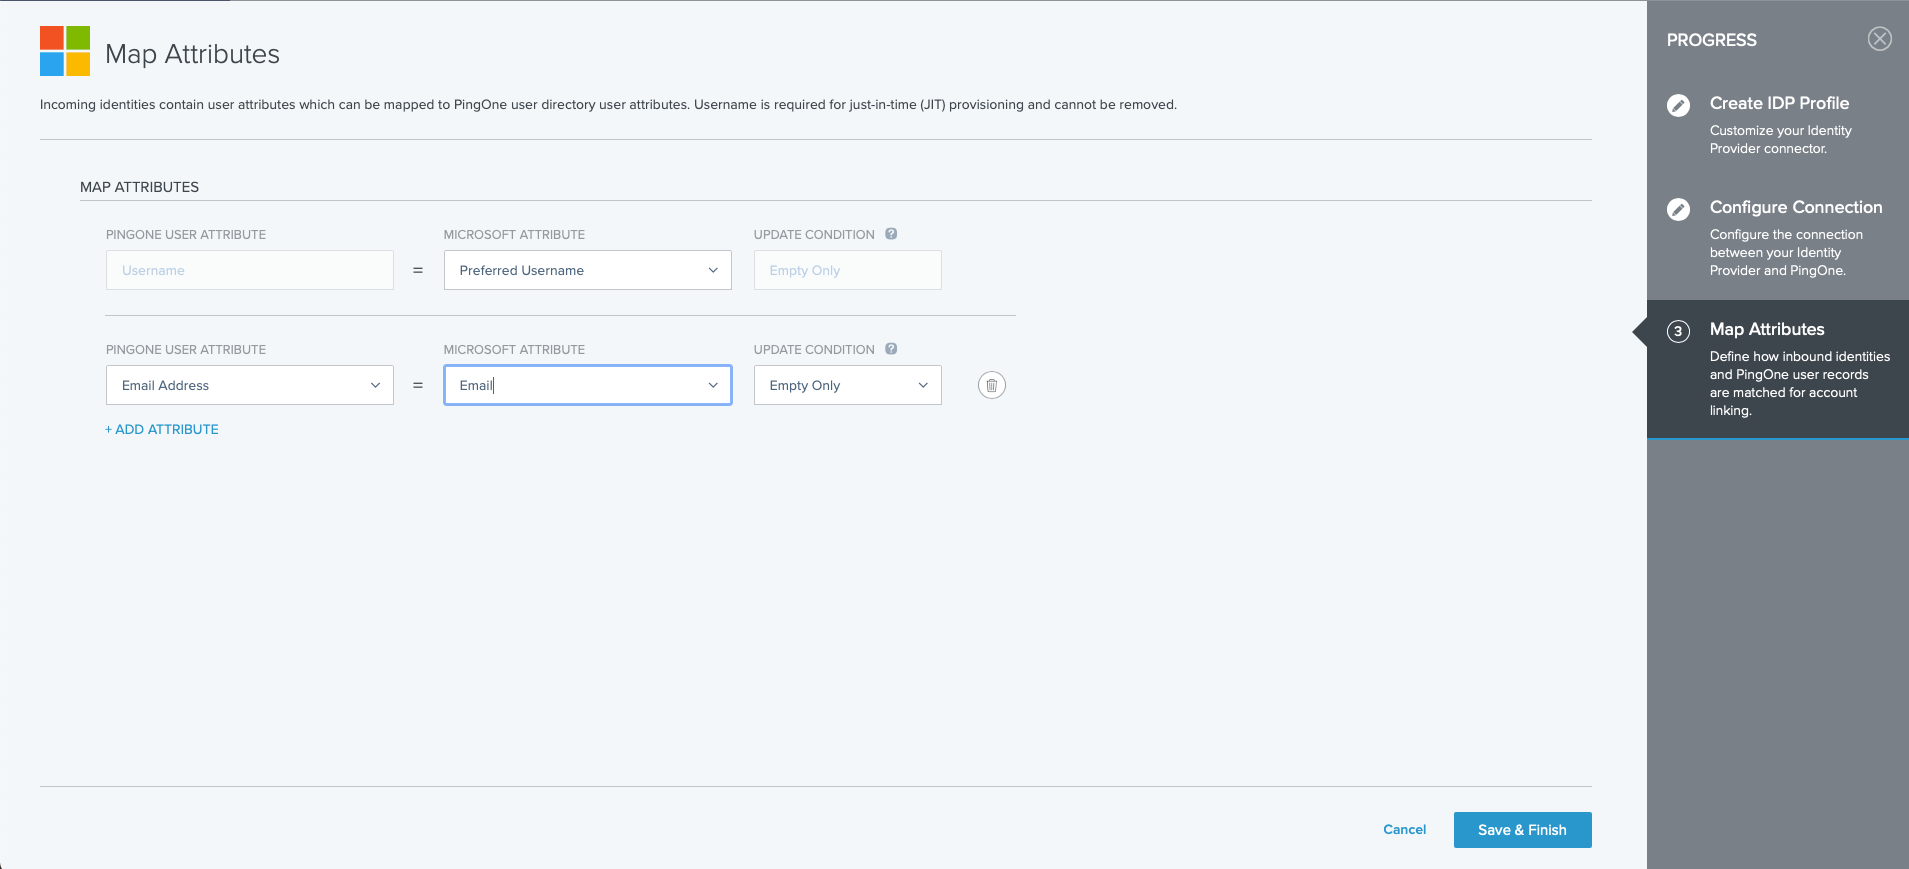
Adding the Redirect URI to the Microsoft portal
Step 1
Go to the PingOne console.
Step 2
Go to Connections → External IDPs.
Step 3
Locate the appropriate identity provider and then click the details icon to expand the identity provider.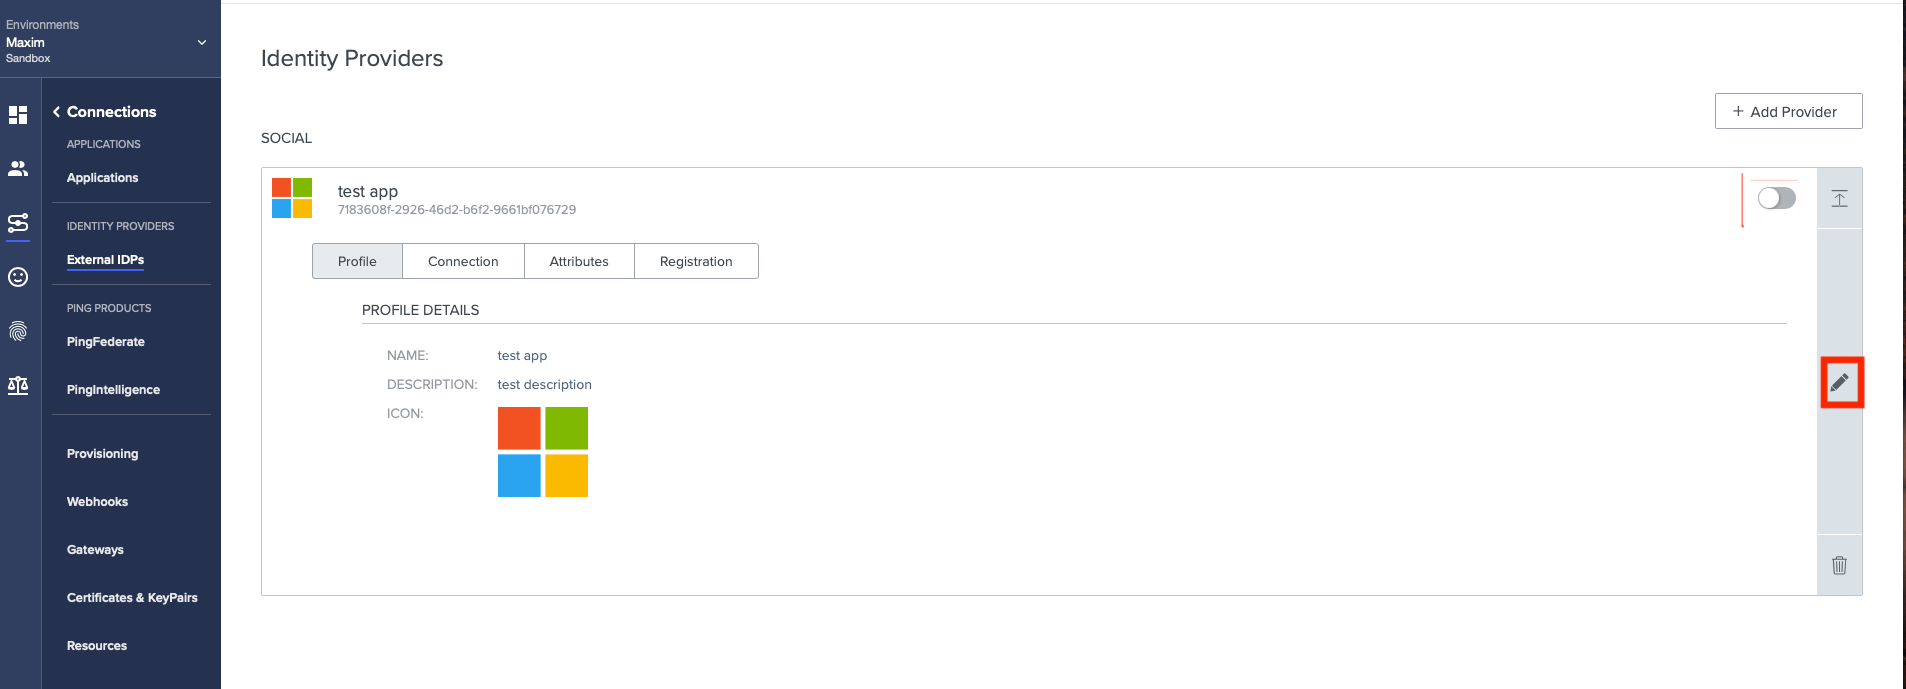
Step 4
Click the Connection tab. Copy the Callback URL and paste it in a secure location.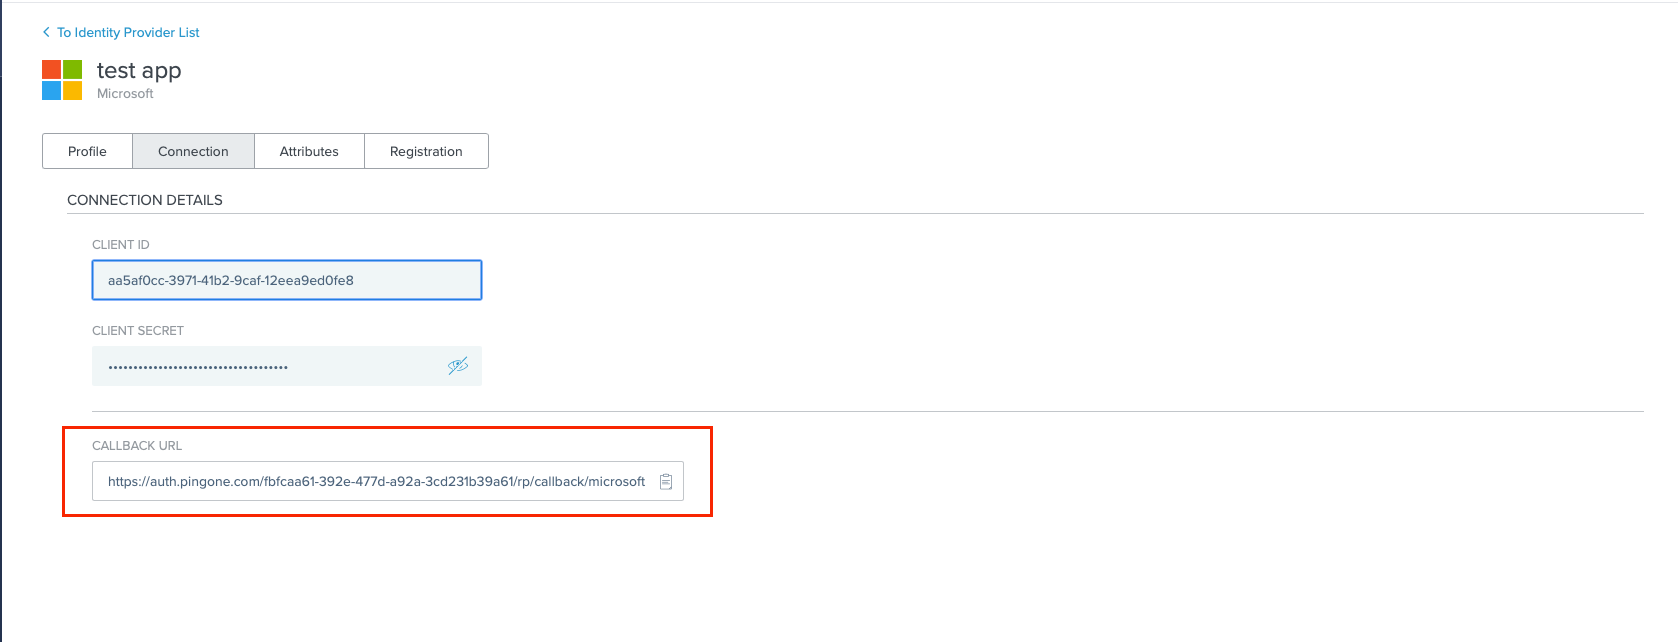
Step 5
Go to Microsoft Azure portal.
Step 6
Under App registrations, select your application.
Step 7
On the left, click Overview.
Step 8
For Redirect URIs, click Add a Redirect URI.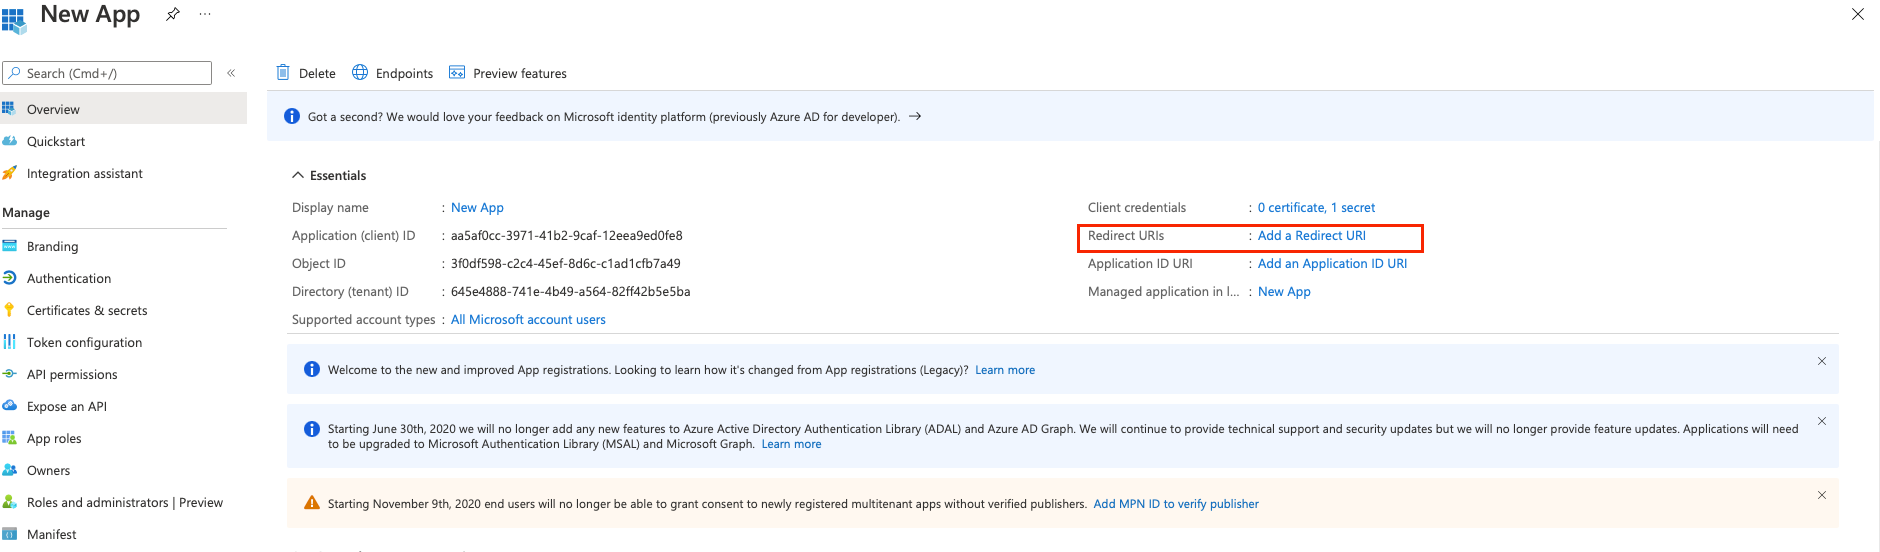
Step 9
For Platform configurations, click + Add a platform.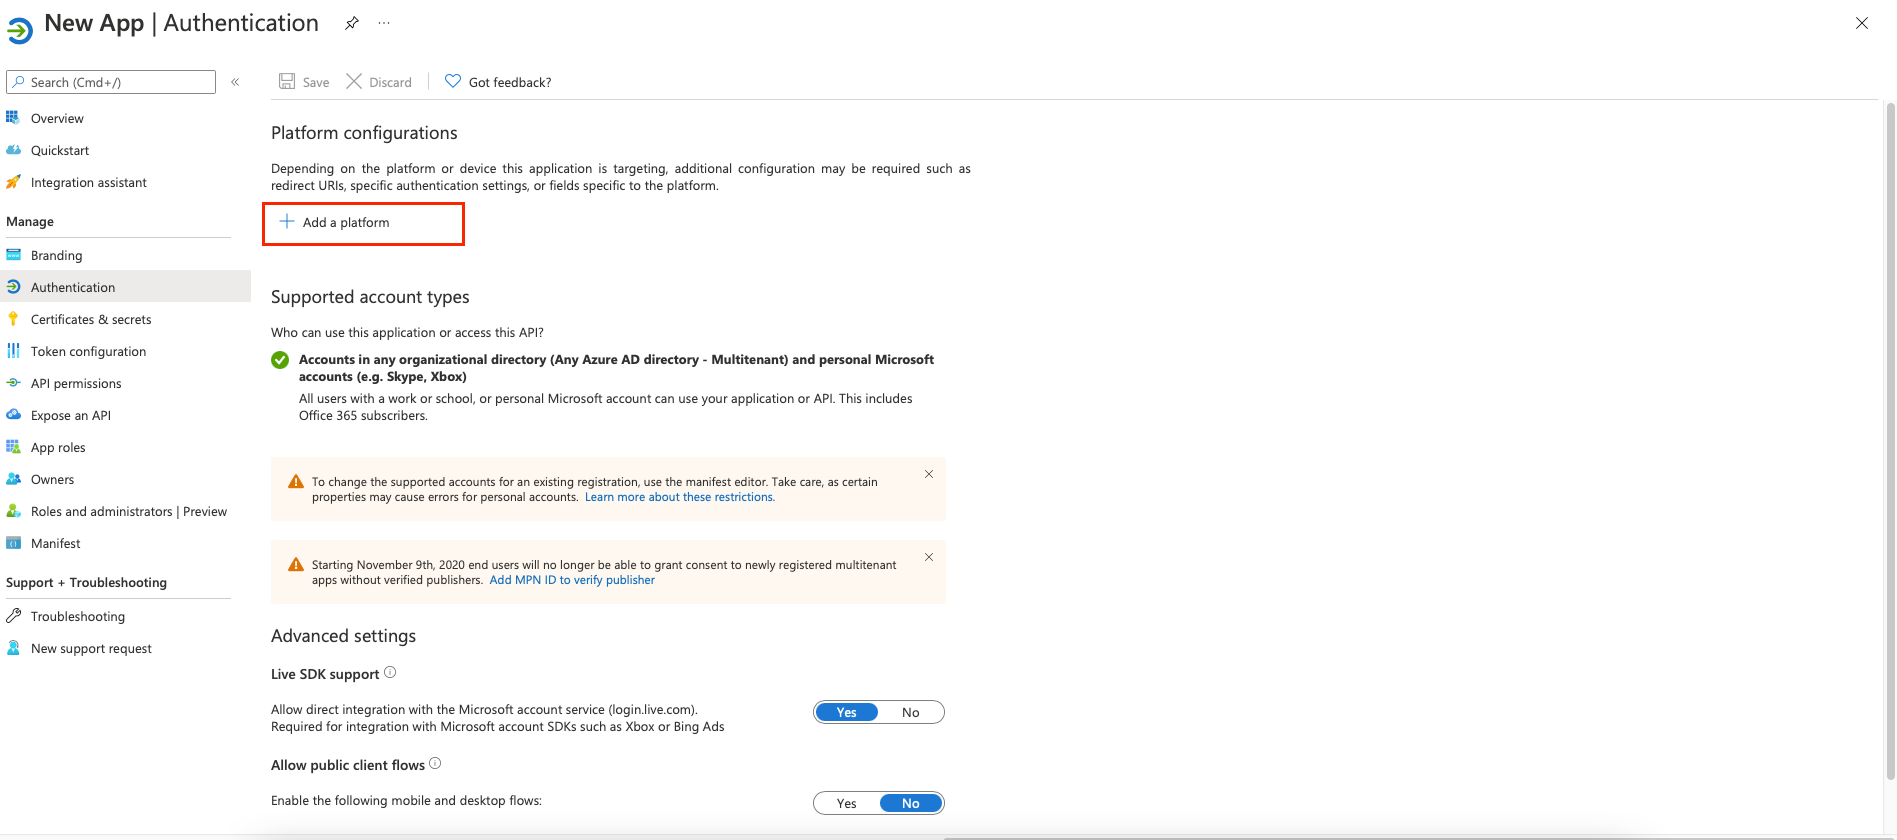
Step 10
Under Web applications, click Web.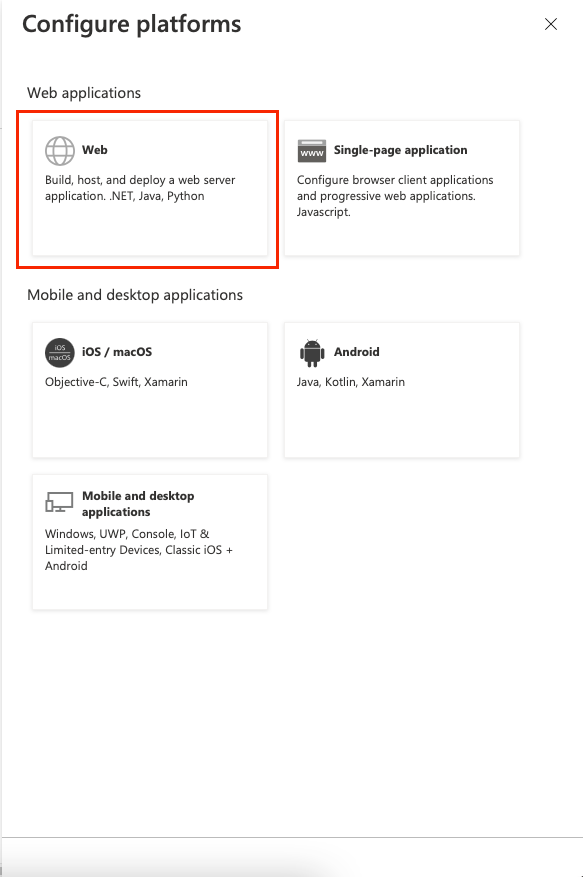
Step 11
For Redirect URIs, enter the value that you copied from PingOne.
Step 12
Click Configure.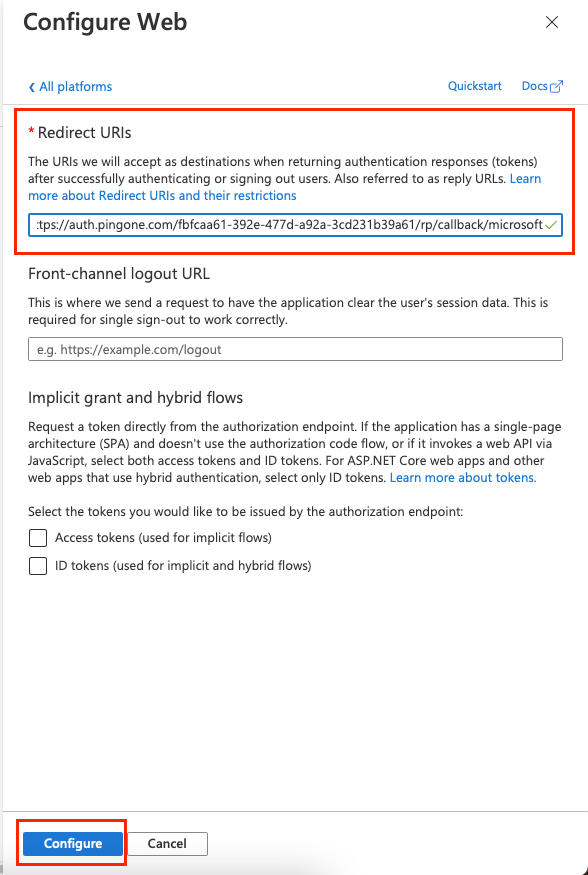
Do not forget
1.
Enable the External Identity Provider.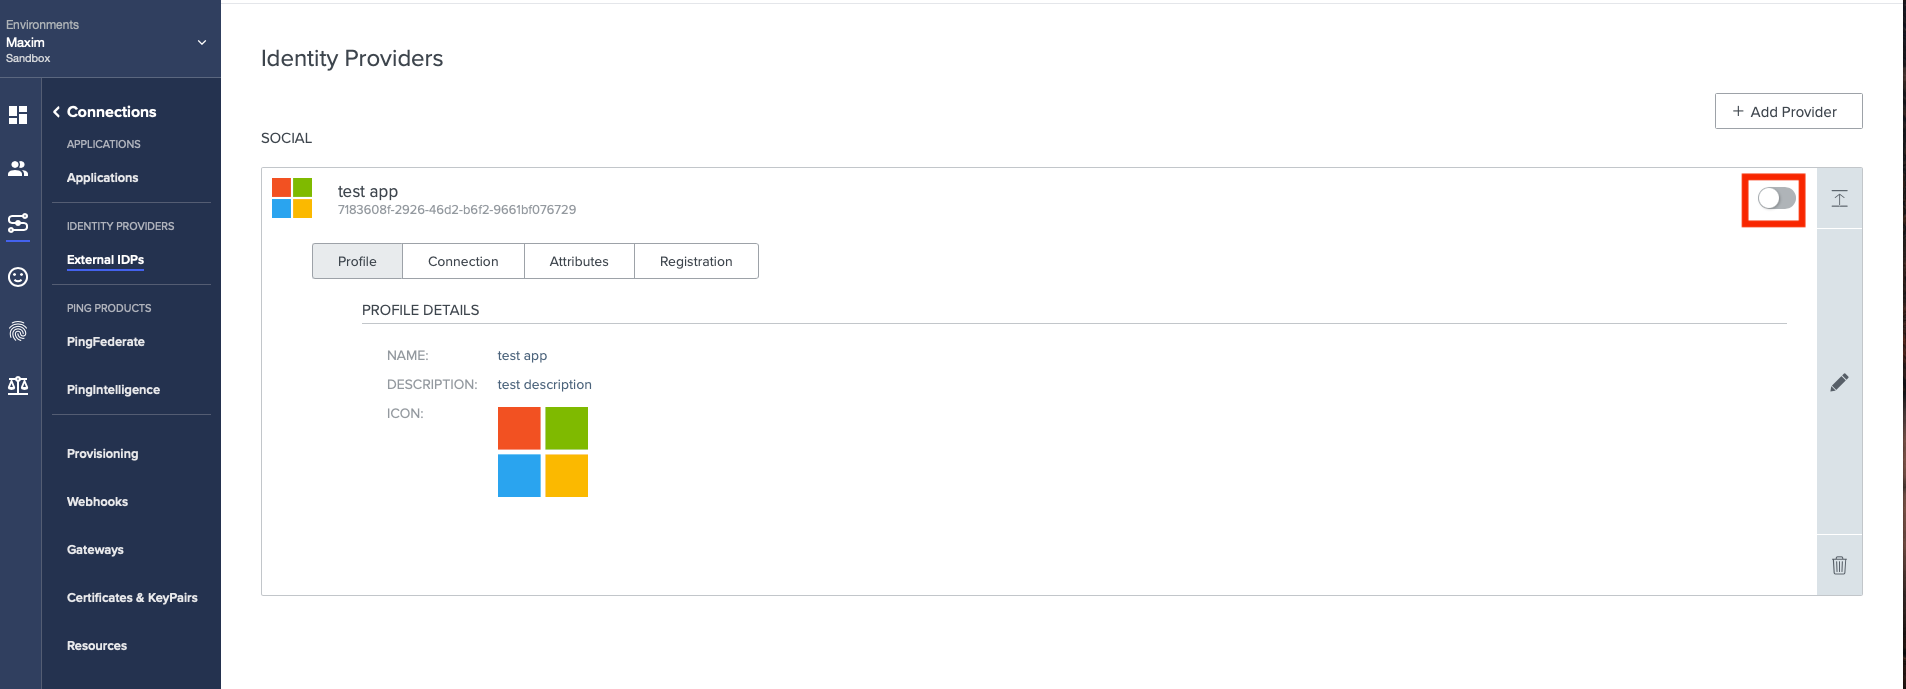
2.
Create a new Authentication Policy and add the newly created External Identity Provider to it.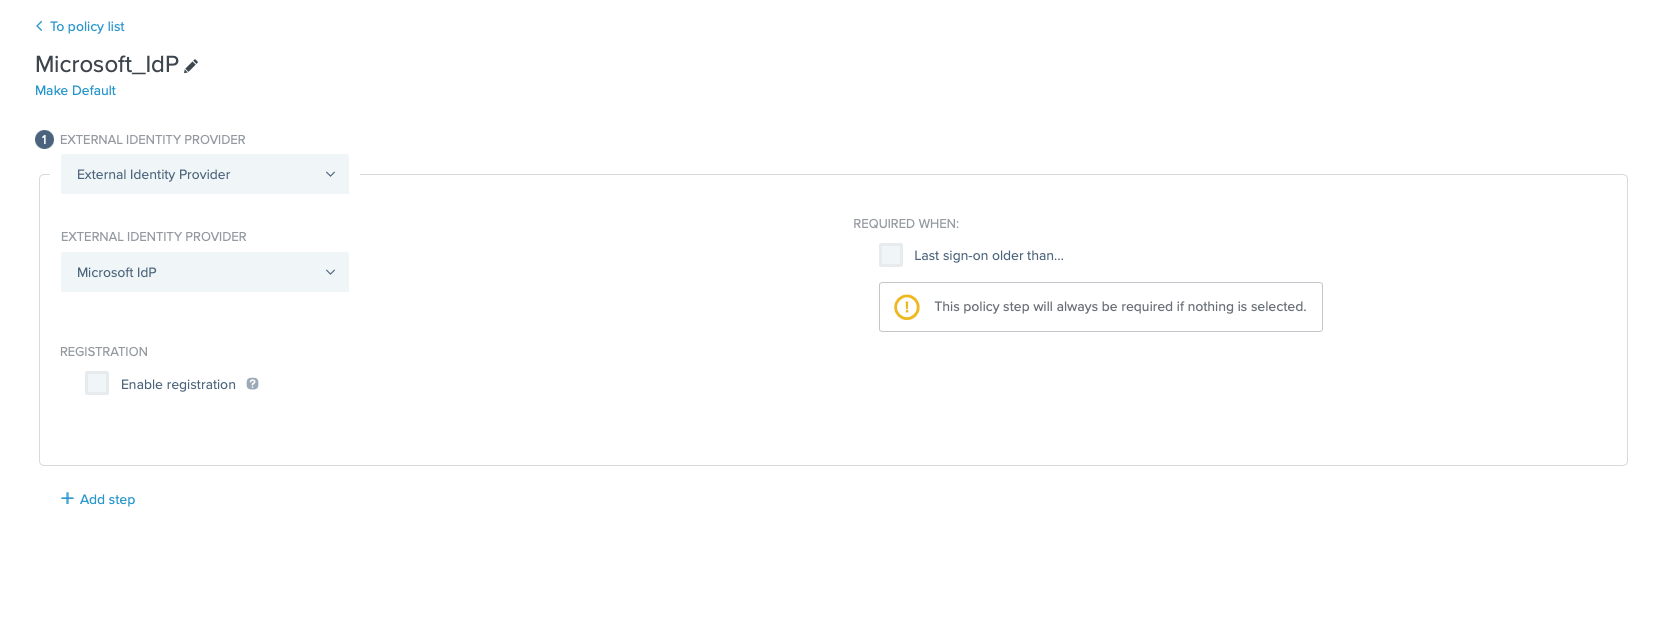
3.
Add the Authentication Policy to the application.