SSO - Multi-Factor Authentication (MFA) Configuration
How-to Guide
Author:
Fluent Commerce
Changed on:
8 Oct 2025
Key Points
- In order to enable MFA, you need to log into pingOne to make sure that MFA is enabled for Fluent App and for the logged user.
- You would then need to log in the system via Fluent’s self service link.
- Once this has been completed, a new authentication method needs to be added on Ping Identity.
Steps
Configuration Steps
 Step 1: Verify that Fluent App has Authentication Policy MFA enabled
In PingOne go to Connections → Applications and see detailed information about Fluent App (tab Policies). Multi-Factor Authentication Policy (not MFA login itself) is enabled by-default during environment setup.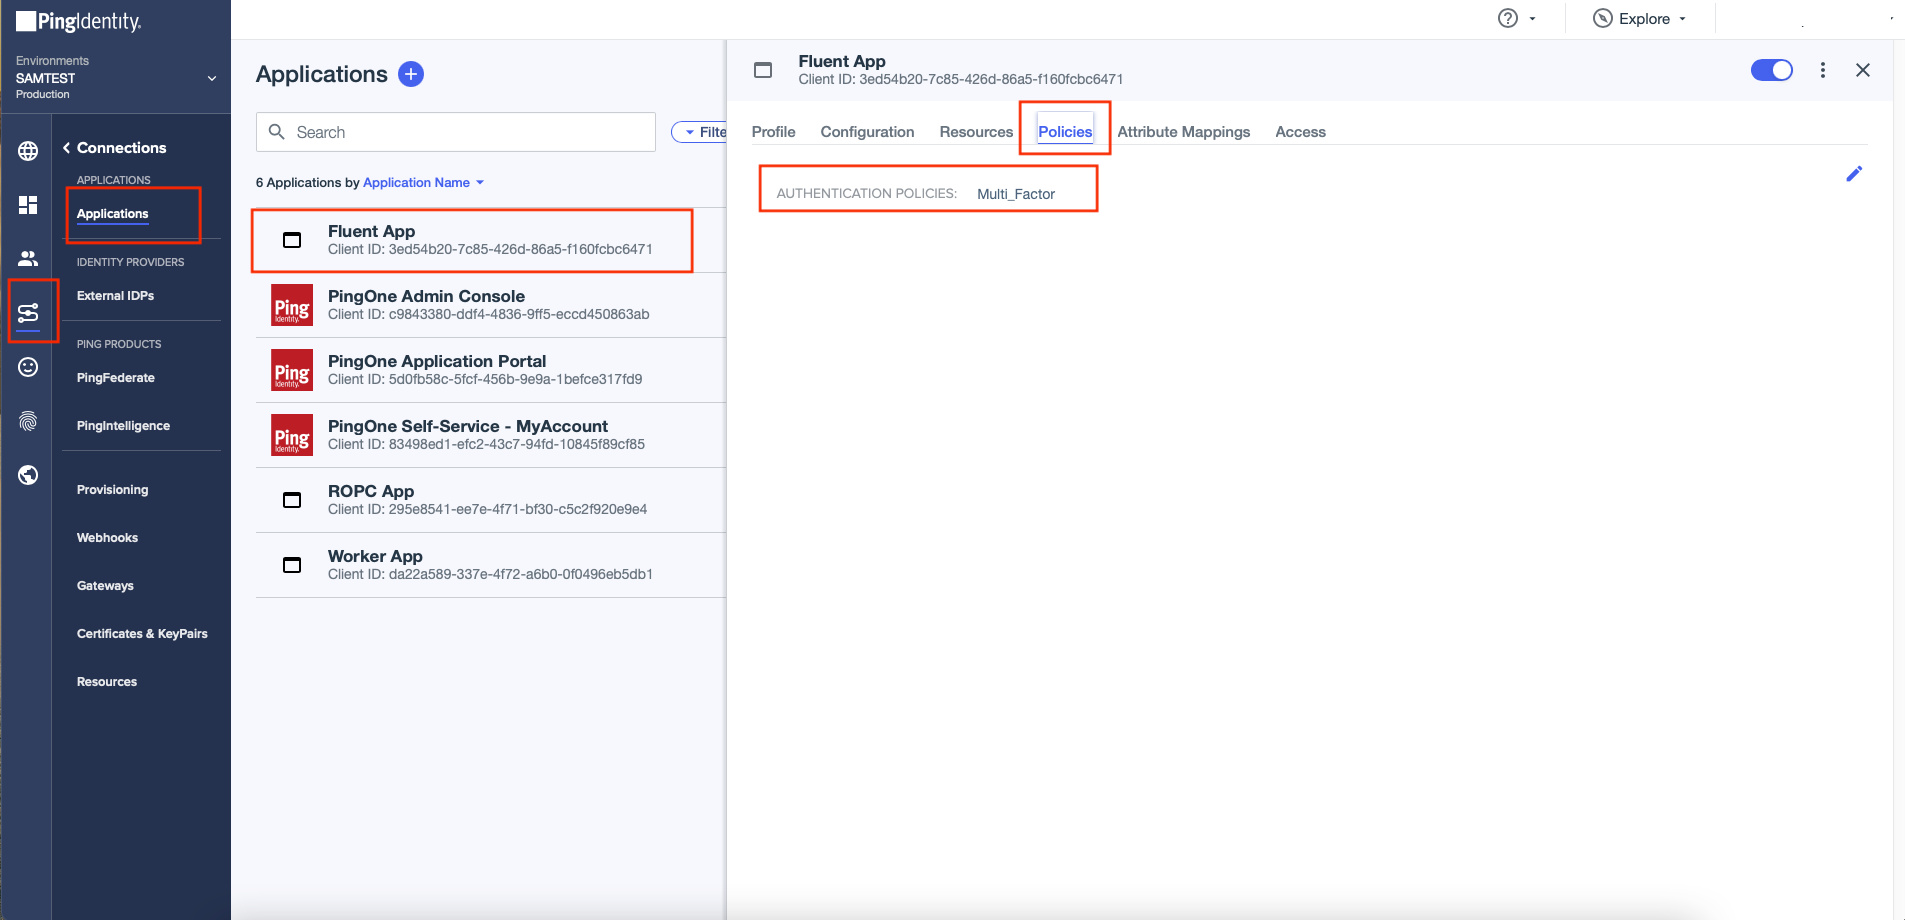
Step 2: Verify a user who wants to log in with MFA has MFA login feature enabled
In PingOne go to Identities → Users and see detailed information about a user (tab Authentication). Change MFA status to enabled if necessary.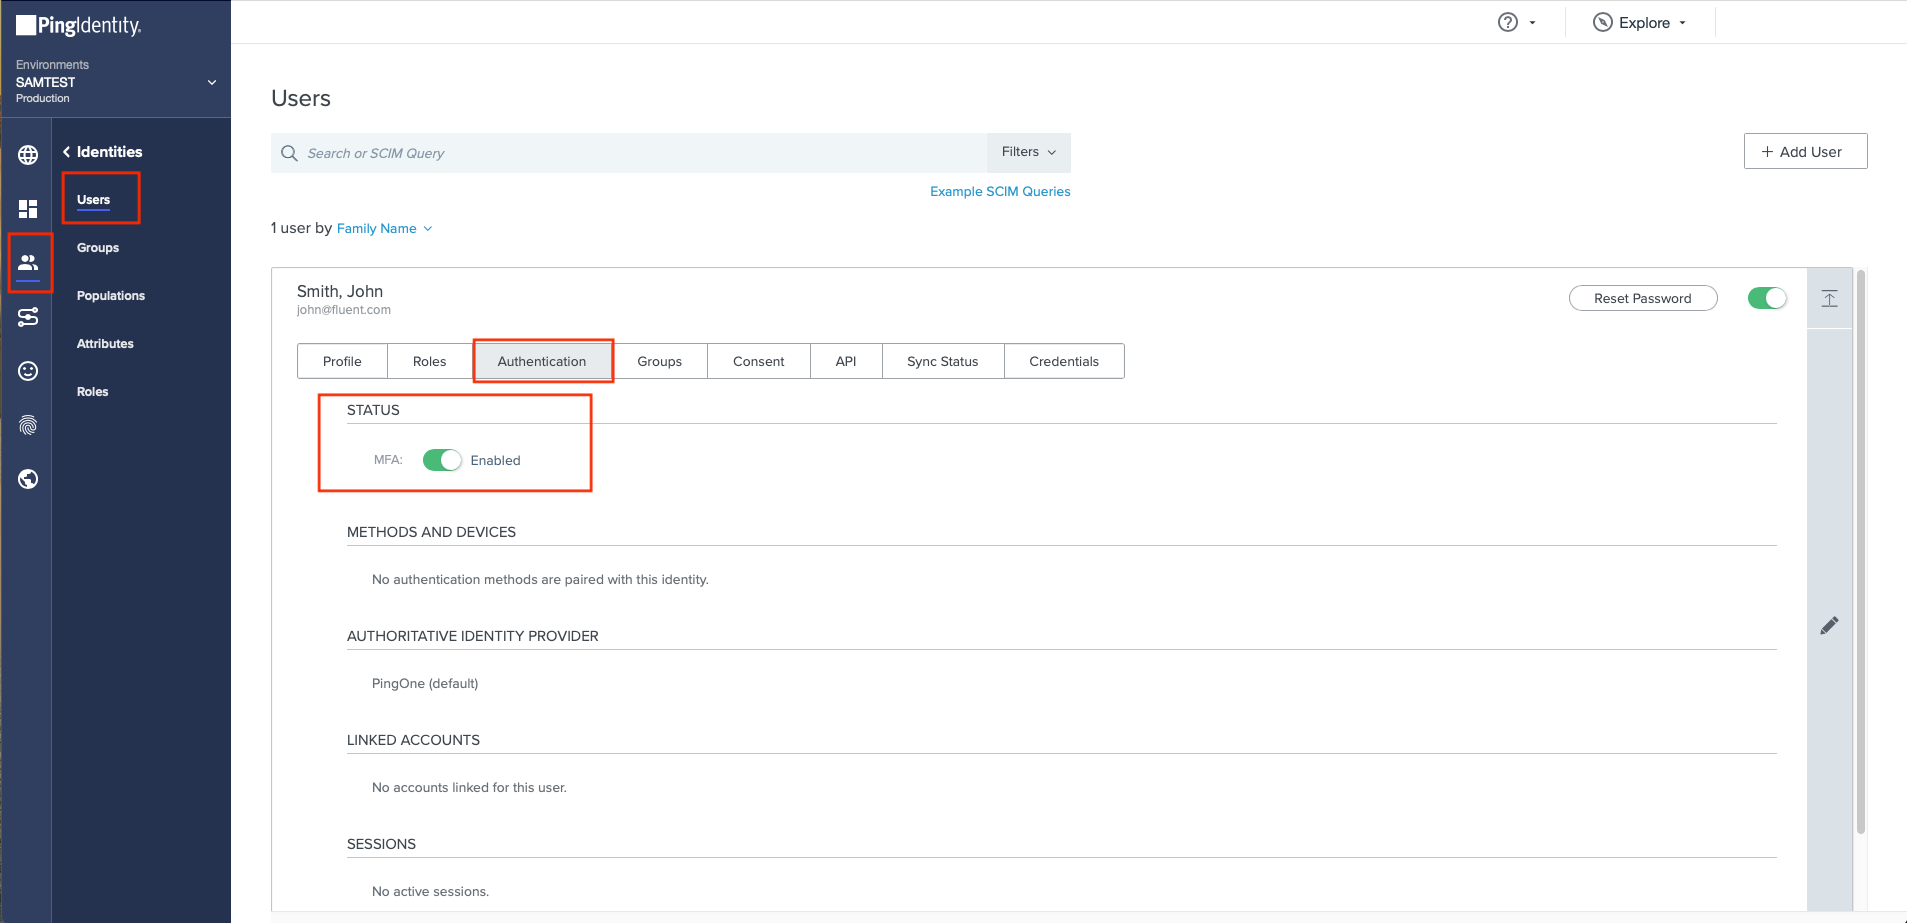
Step 3: Send a self-service link to a user to allow one to continue setting MFA by selecting a device or method.
In PingOne go to Environment → Properties and copy the self-service link.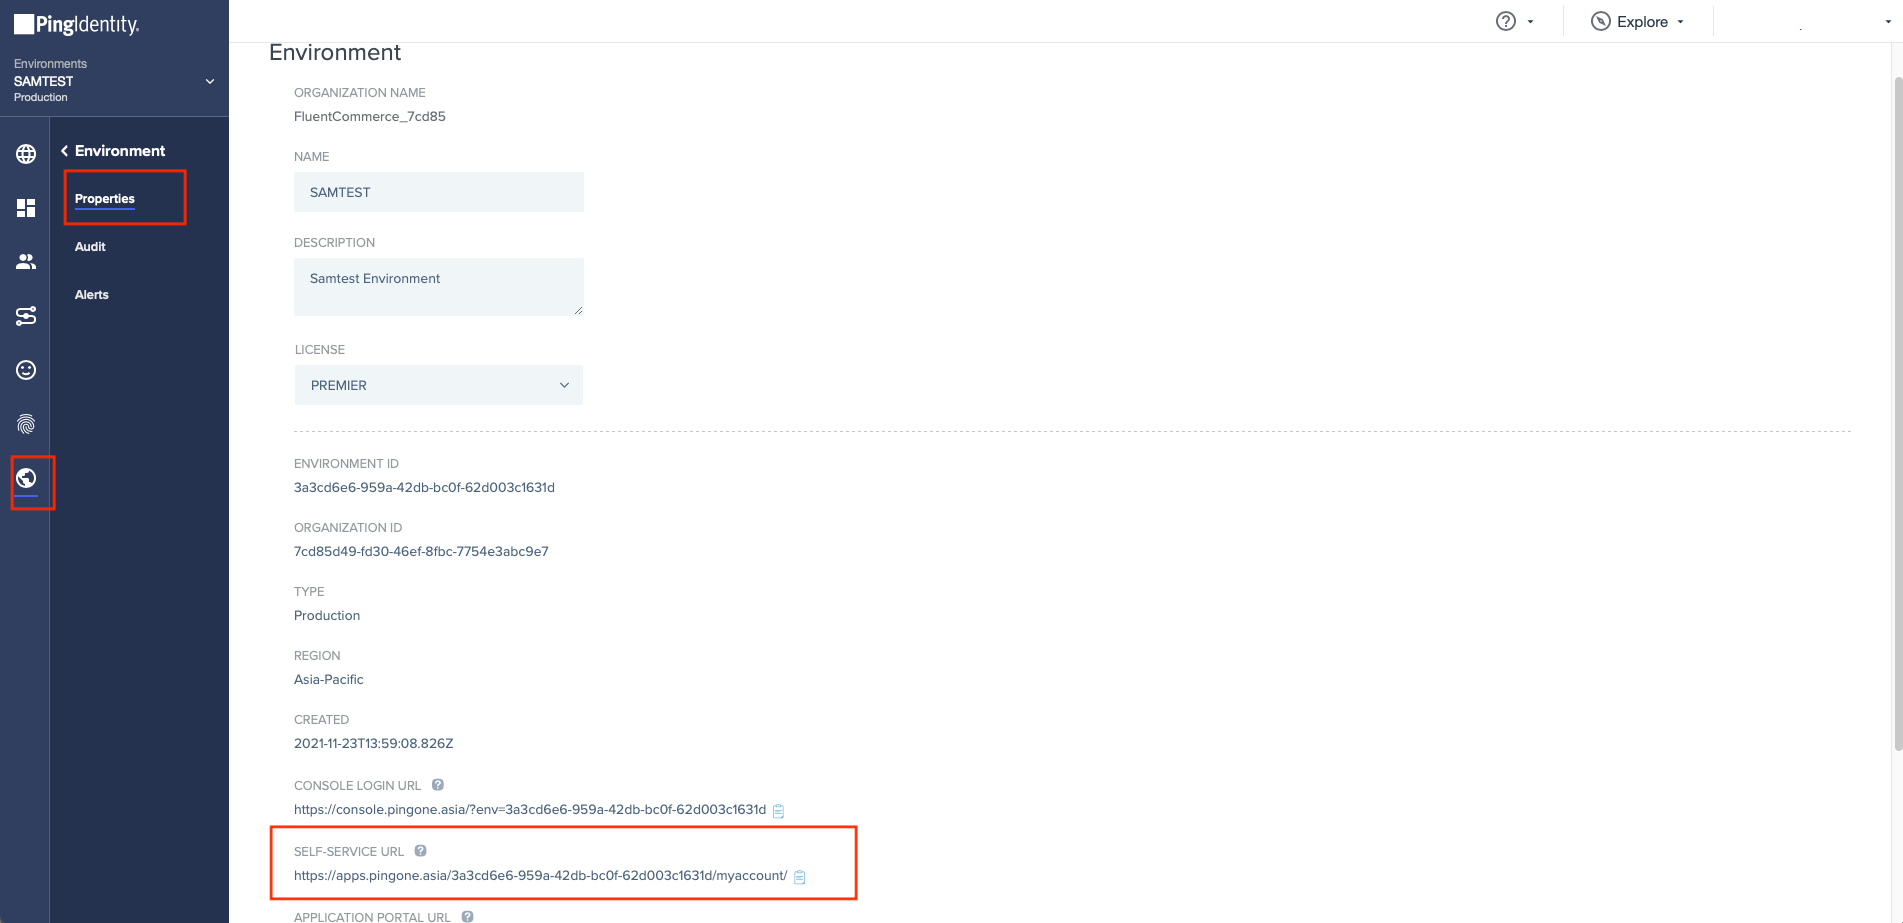
Step 4: A user should log in the system via provided self-service link.
To log in one should use own Fluent application credentials.On the Authentication tab for the profile, a user can add an authentication methods, rename a method, set a default method, or delete a method. A user might have multiple authentication methods that use the same physical device. For example, a user could set up SMS, Voice, FIDO2 biometrics, and an authenticator app on a single mobile device.
Step 5: Adding an authentication method
The Authentication screen can be used to add multi-factor authentication methods, such as text message, email, FIDO2 biometrics, security key, mobile app, or an authenticator app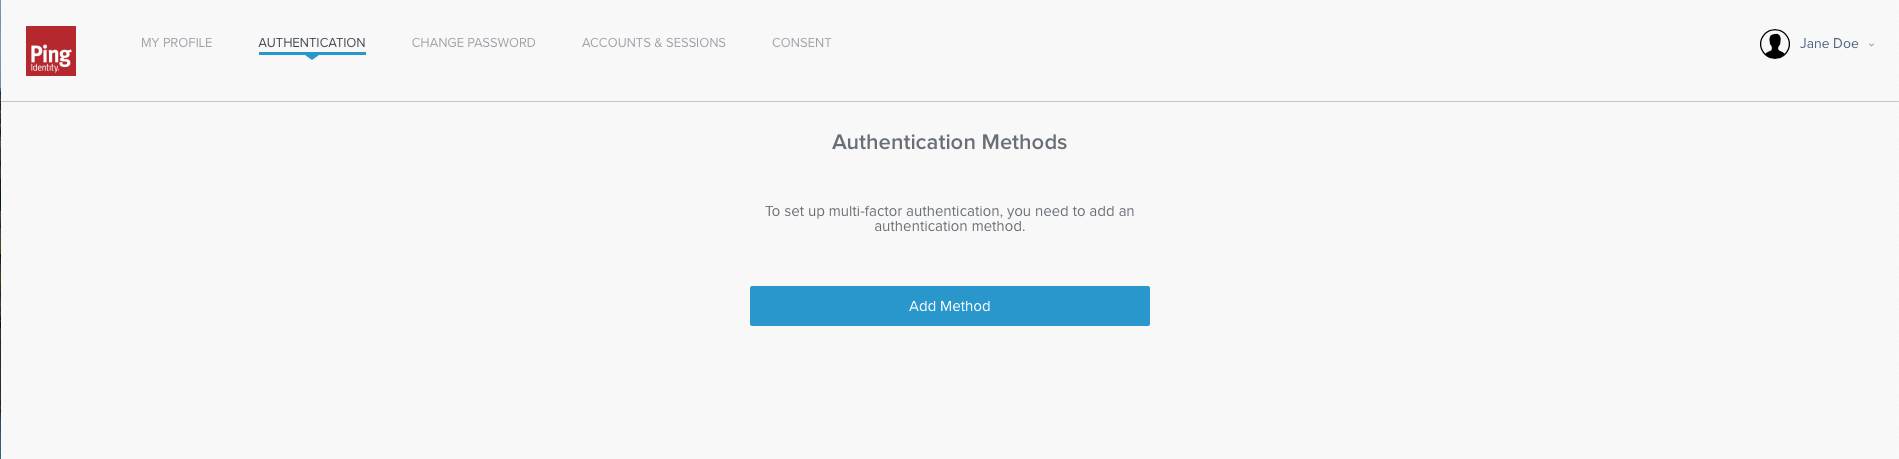
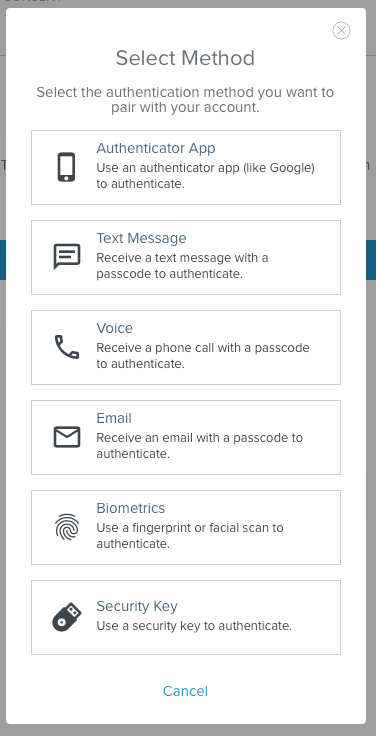
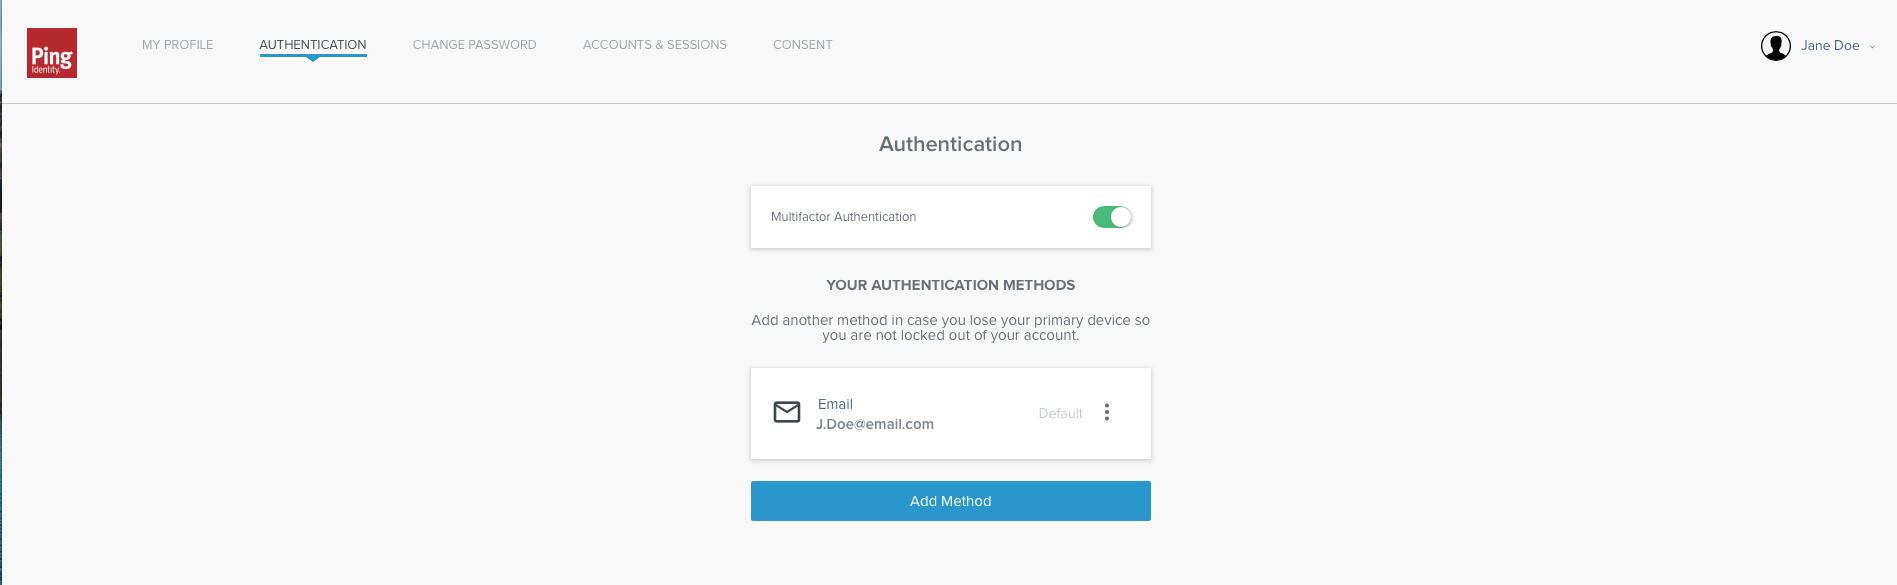
- On the Authentication screen, click Add Method;
- Select one or more authentication methods.
- Authenticator app. Use a third-party authenticator application, such as Google Authenticator. Open the Authenticator application and scan the QR code or enter the passcode. Click Next. Enter the passcode from the authenticator application to complete the device pairing.
- Text message. Use a text message (SMS) with a one-time passcode to authenticate. Enter the phone number and click Next. Enter the passcode you received to complete the device pairing.
- Voice. Receive a voice call with a one-time passcode to authenticate. Enter the phone number and click Next. Enter the passcode you received to complete the device pairing.
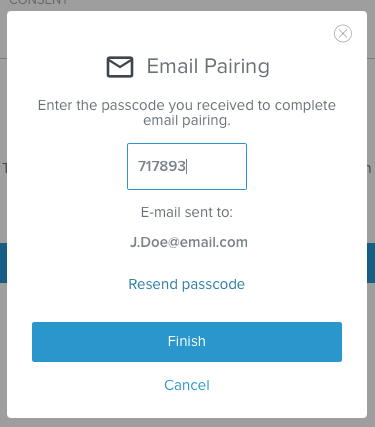
- Email. Use an email message with a one-time passcode to authenticate. Enter an email address and click Next. Enter the passcode you received to complete the device pairing.
- FIDO2 biometrics. Use FIDO2 biometrics on compatible devices to authenticate. On your device, sign on or enter your password to complete pairing.
- Security key. Use a FIDO2 or U2F security key to authenticate. You will be prompted to authenticate with the security key.