SSO: Configure Google Workspace connection via SAML
How-to Guide
Author:
Fluent Commerce
Changed on:
14 Nov 2024
Key Points
- This guide covers setting up an SSO connection between PingOne and Google Workspace using SAML.
- Ensure you have admin access in PingOne and a Google Workspace account with an active subscription.
- You need to register the application in Google Workspace to configure it as an external identity provider.
Steps
 Overview
You can use the generic SAML configuration to add any external identity provider that complies with the SAML standard. To set up an external identity provider through SAML, you'll need to complete the following steps.
Google Workspace Configuration
 Sign in to Google Admin console
Log in with a super administrator account to your Google Admin console.
 Access the Apps Page
Go to Apps > Web and mobile apps.
 Add a Custom SAML App
Select Add App and then Add custom SAML app. Enter a name for the app and, optionally, upload an icon. This icon will display in the Web and mobile apps list, on the app settings page, and in the app launcher. If no icon is uploaded, one will be automatically generated using the first two letters of the app name.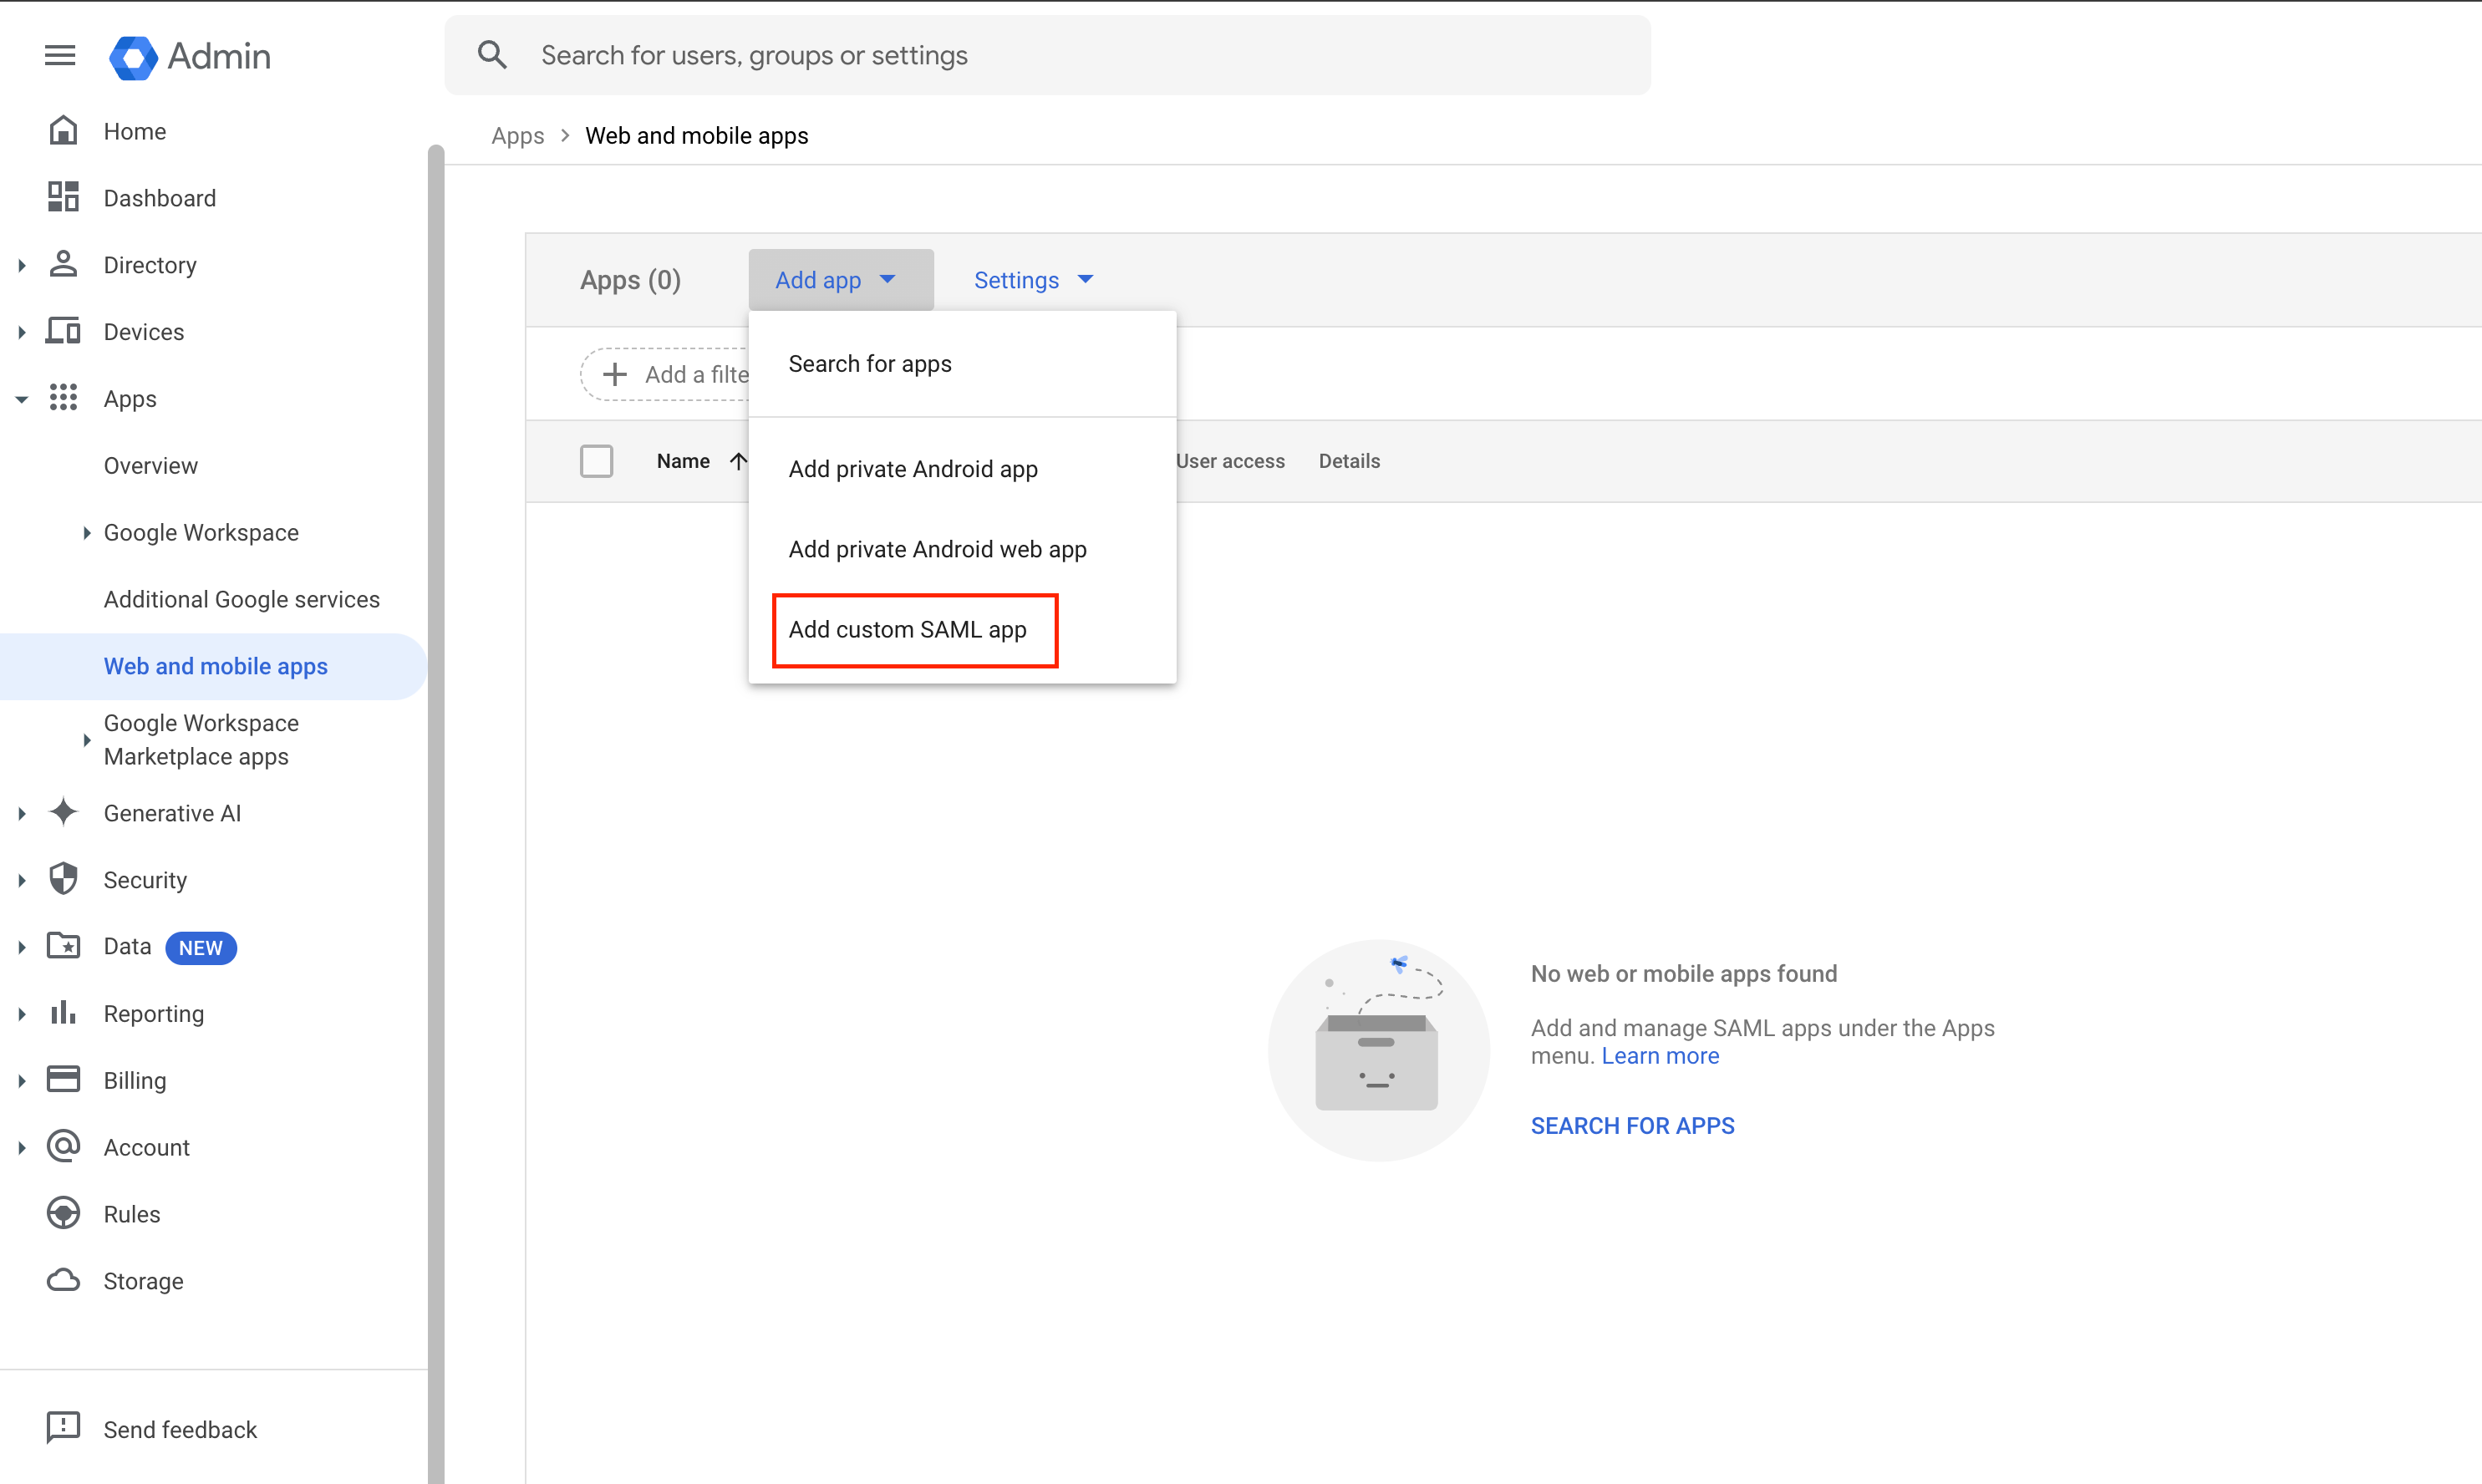 Then, click Continue to proceed.
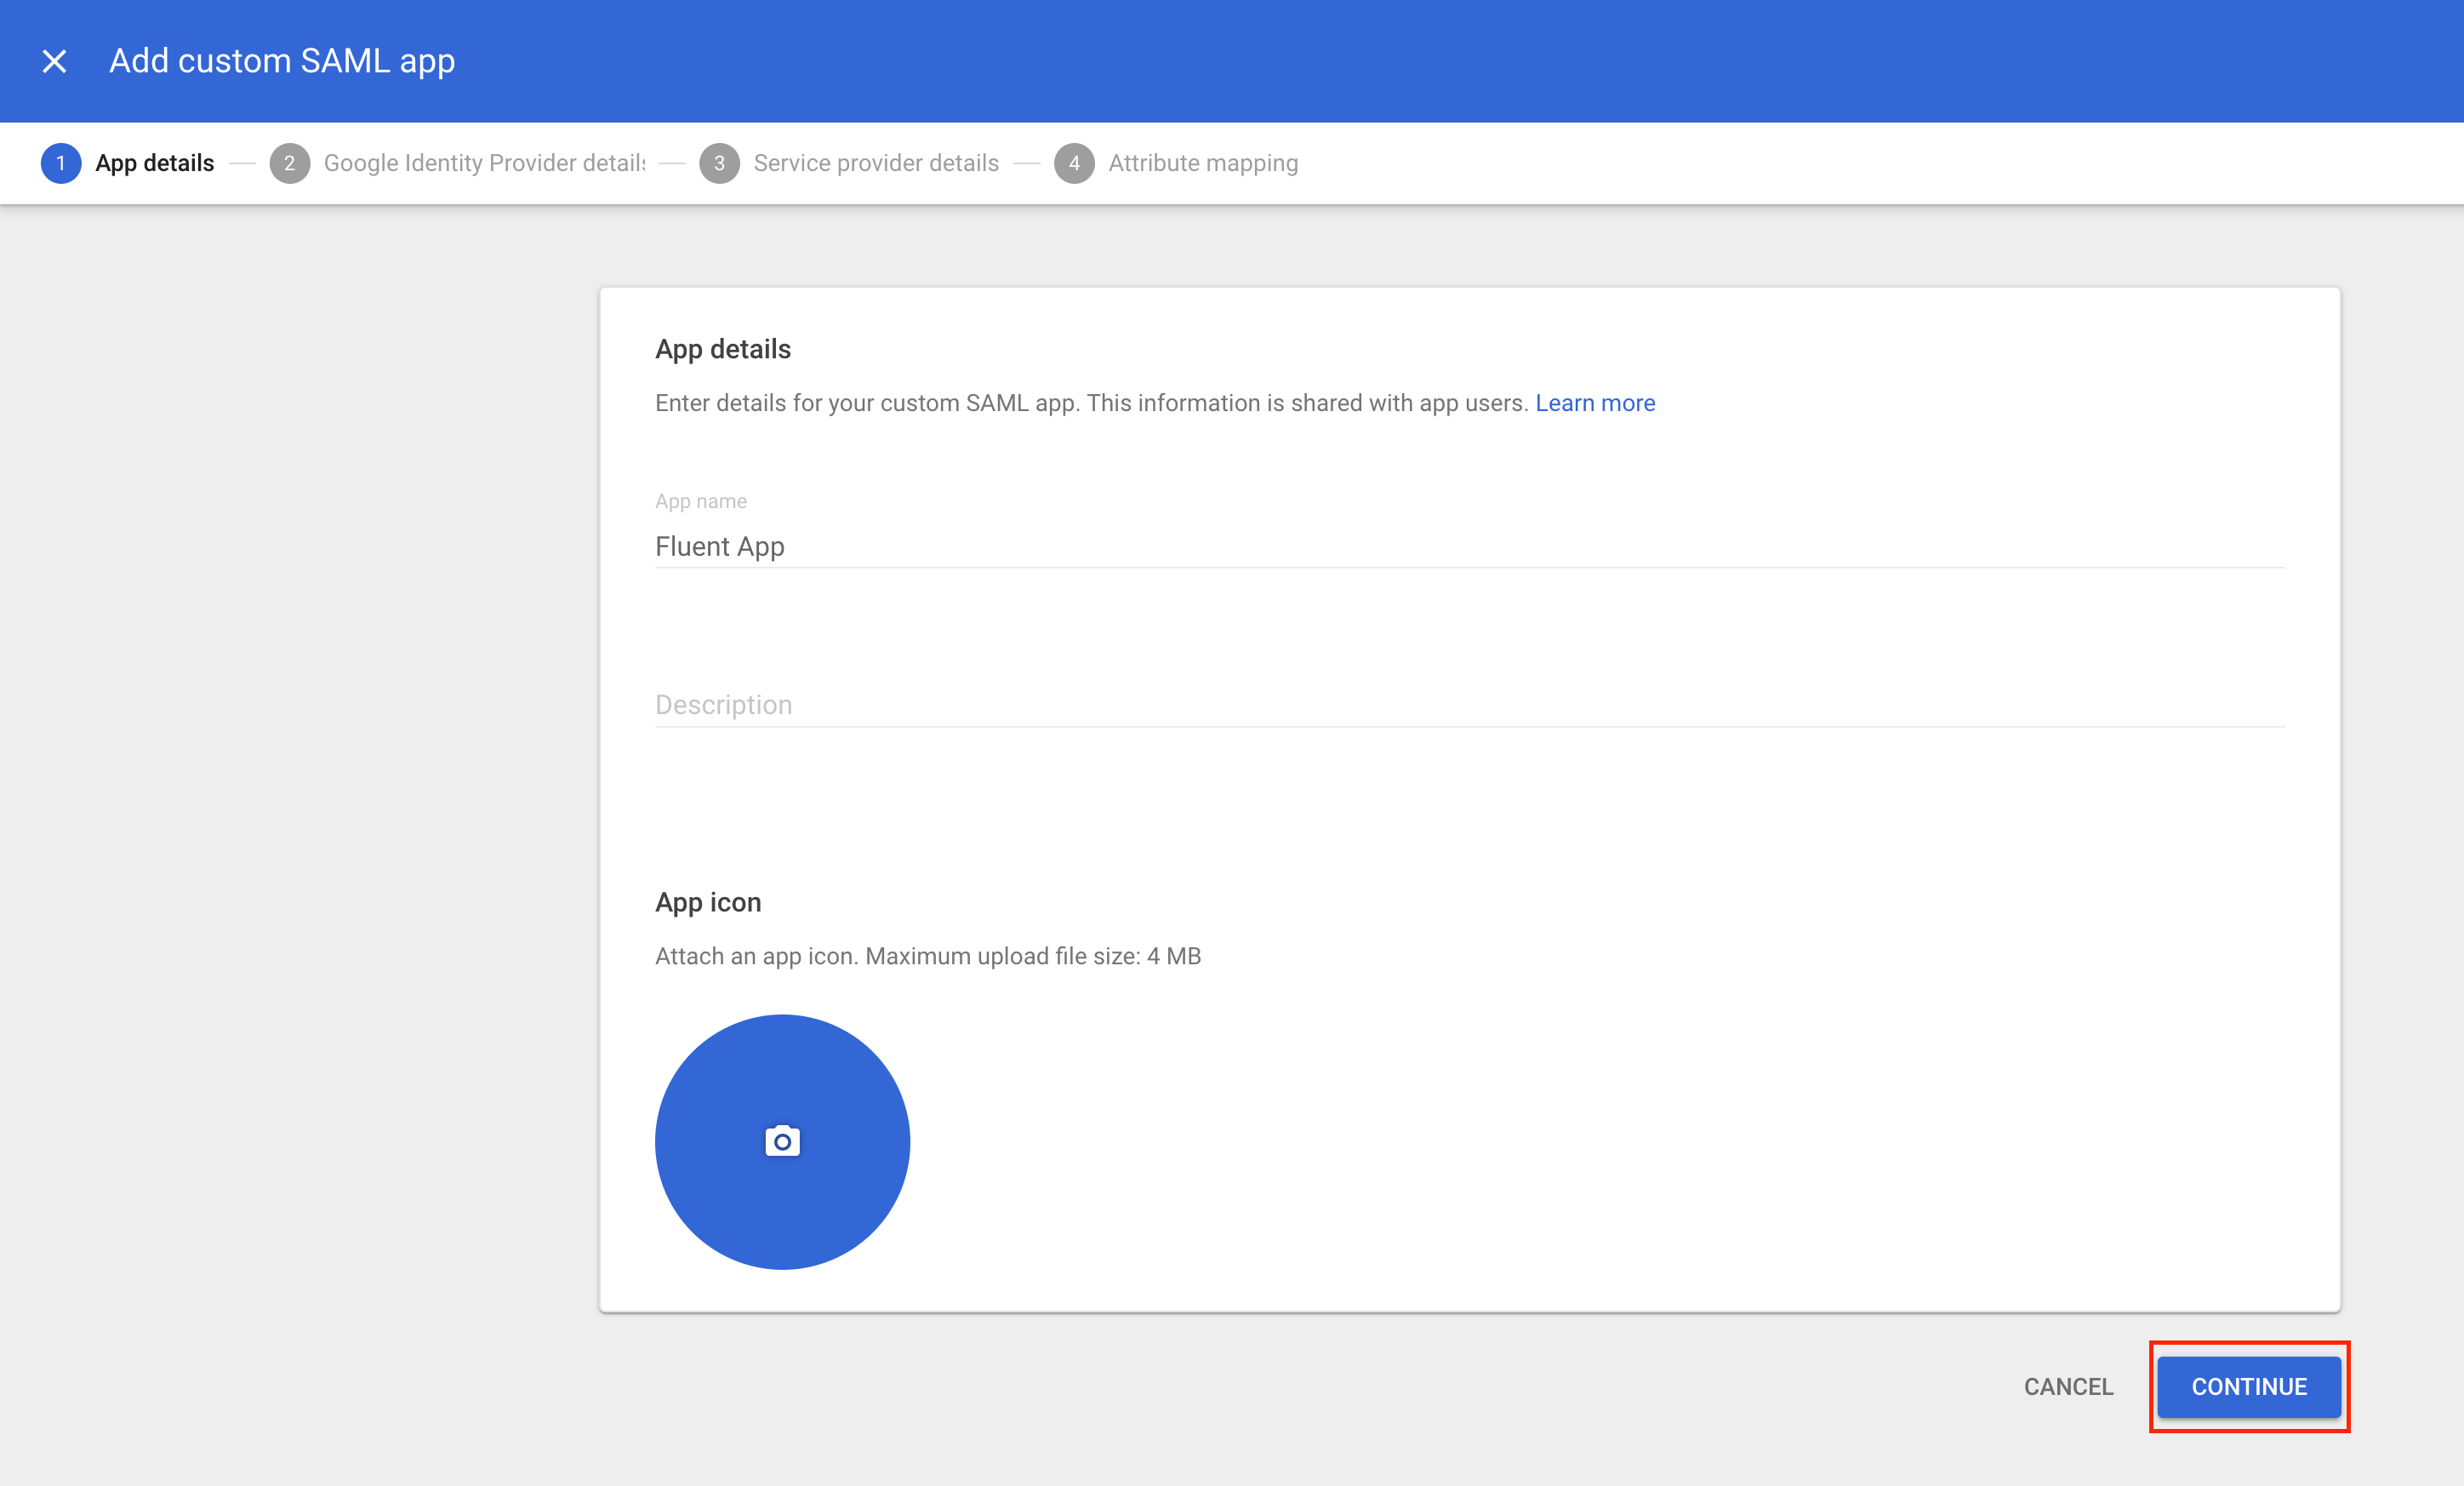
 Then, click Continue to proceed.
 Download Metadata
On the Google Identity Provider details page, click Download the IDP metadata. You will need this file later. 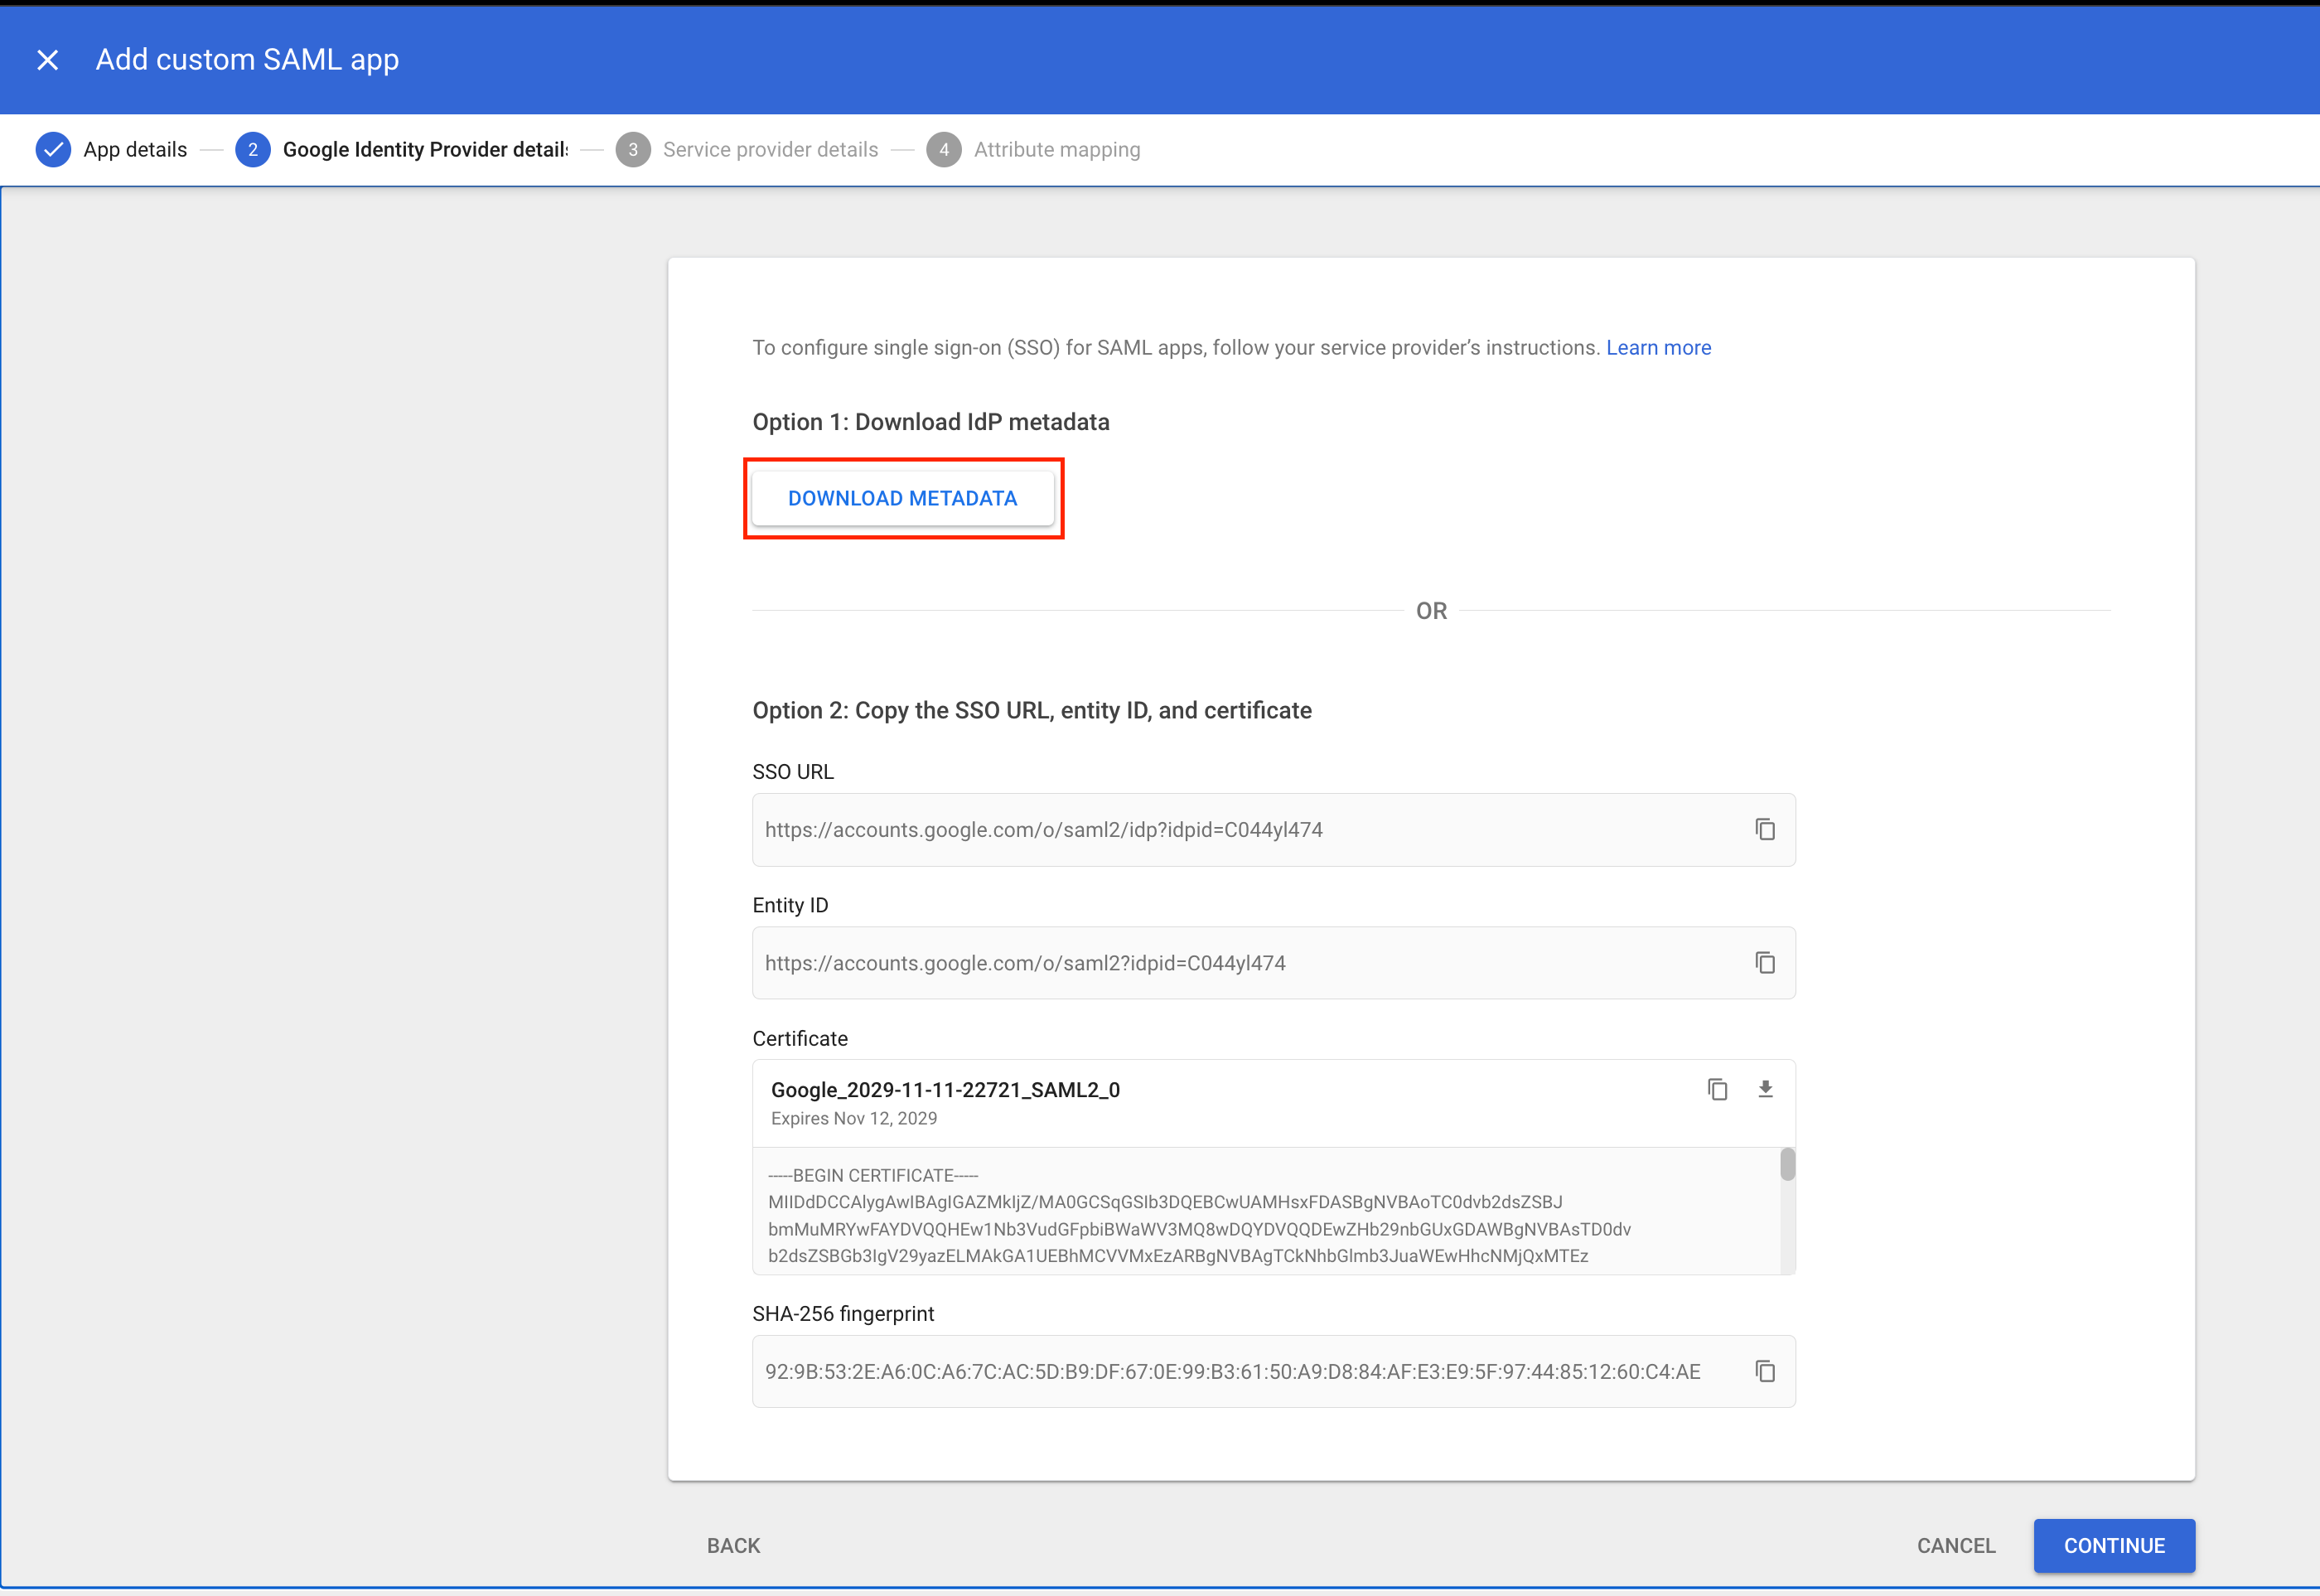 Then, click Continue to proceed.
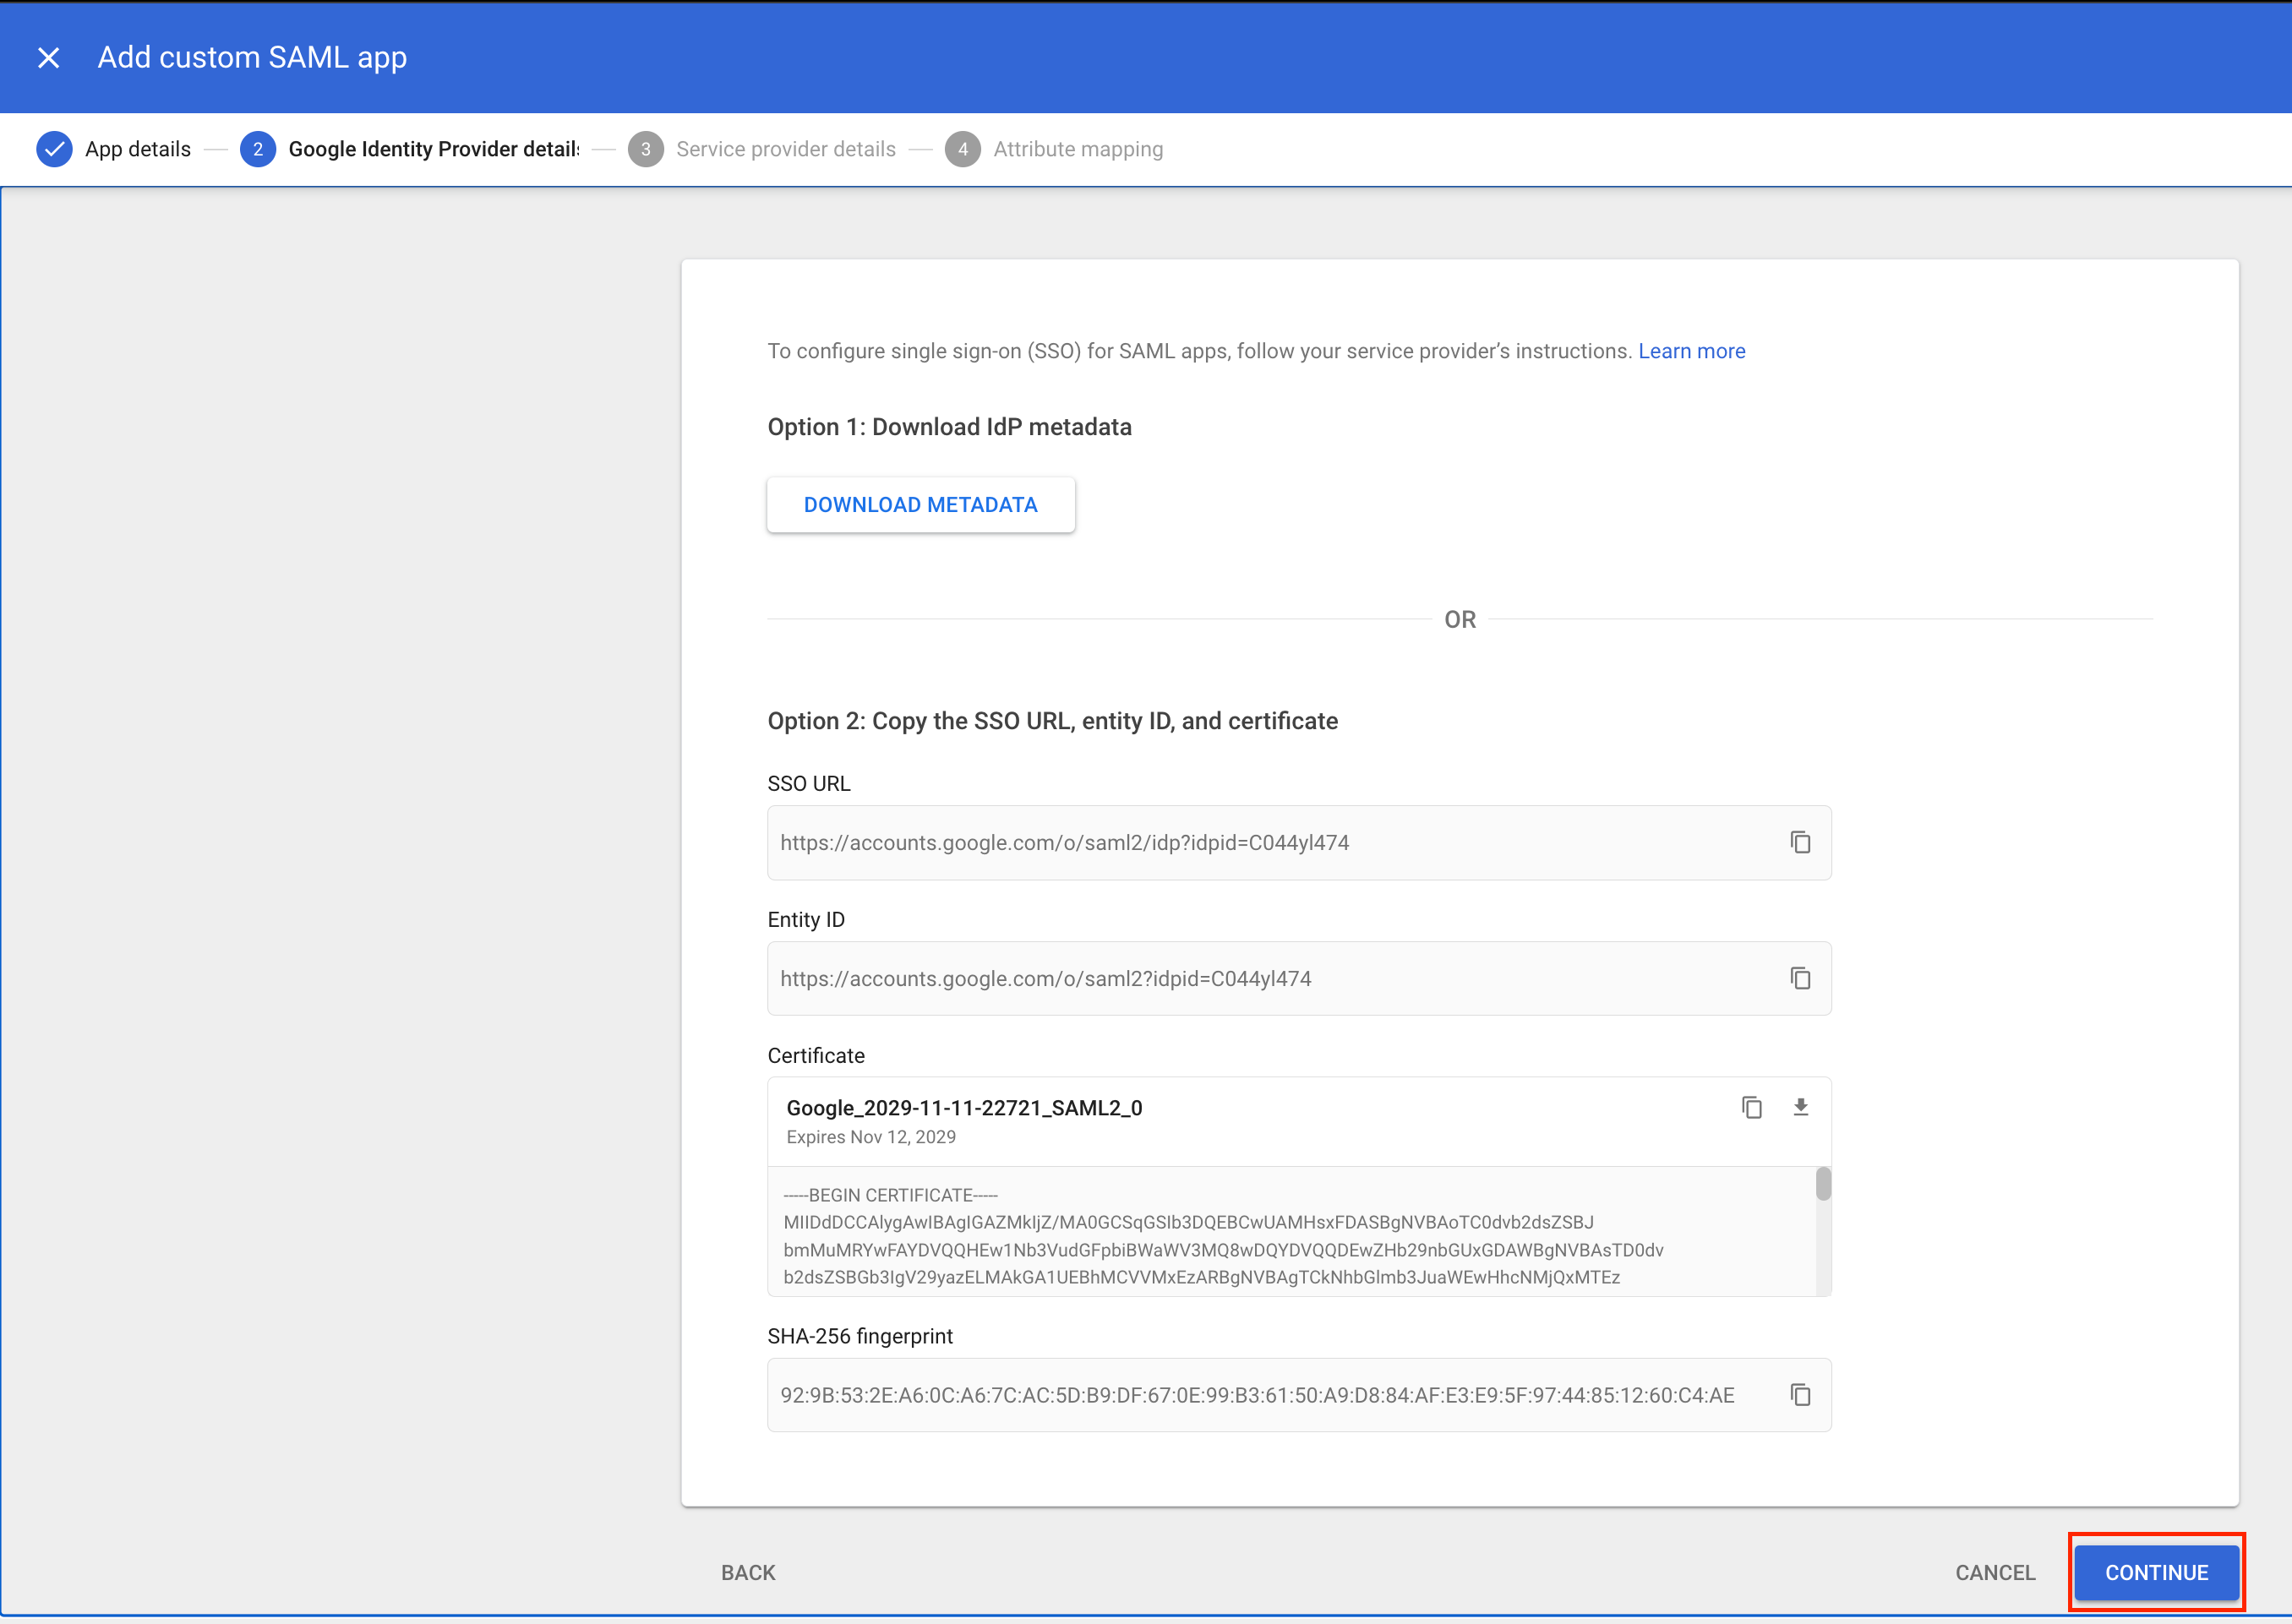
 Then, click Continue to proceed.
 Complete Service Provider Details
Next, you’ll arrive at the Service Provider Details window, where two fields need to be completed:
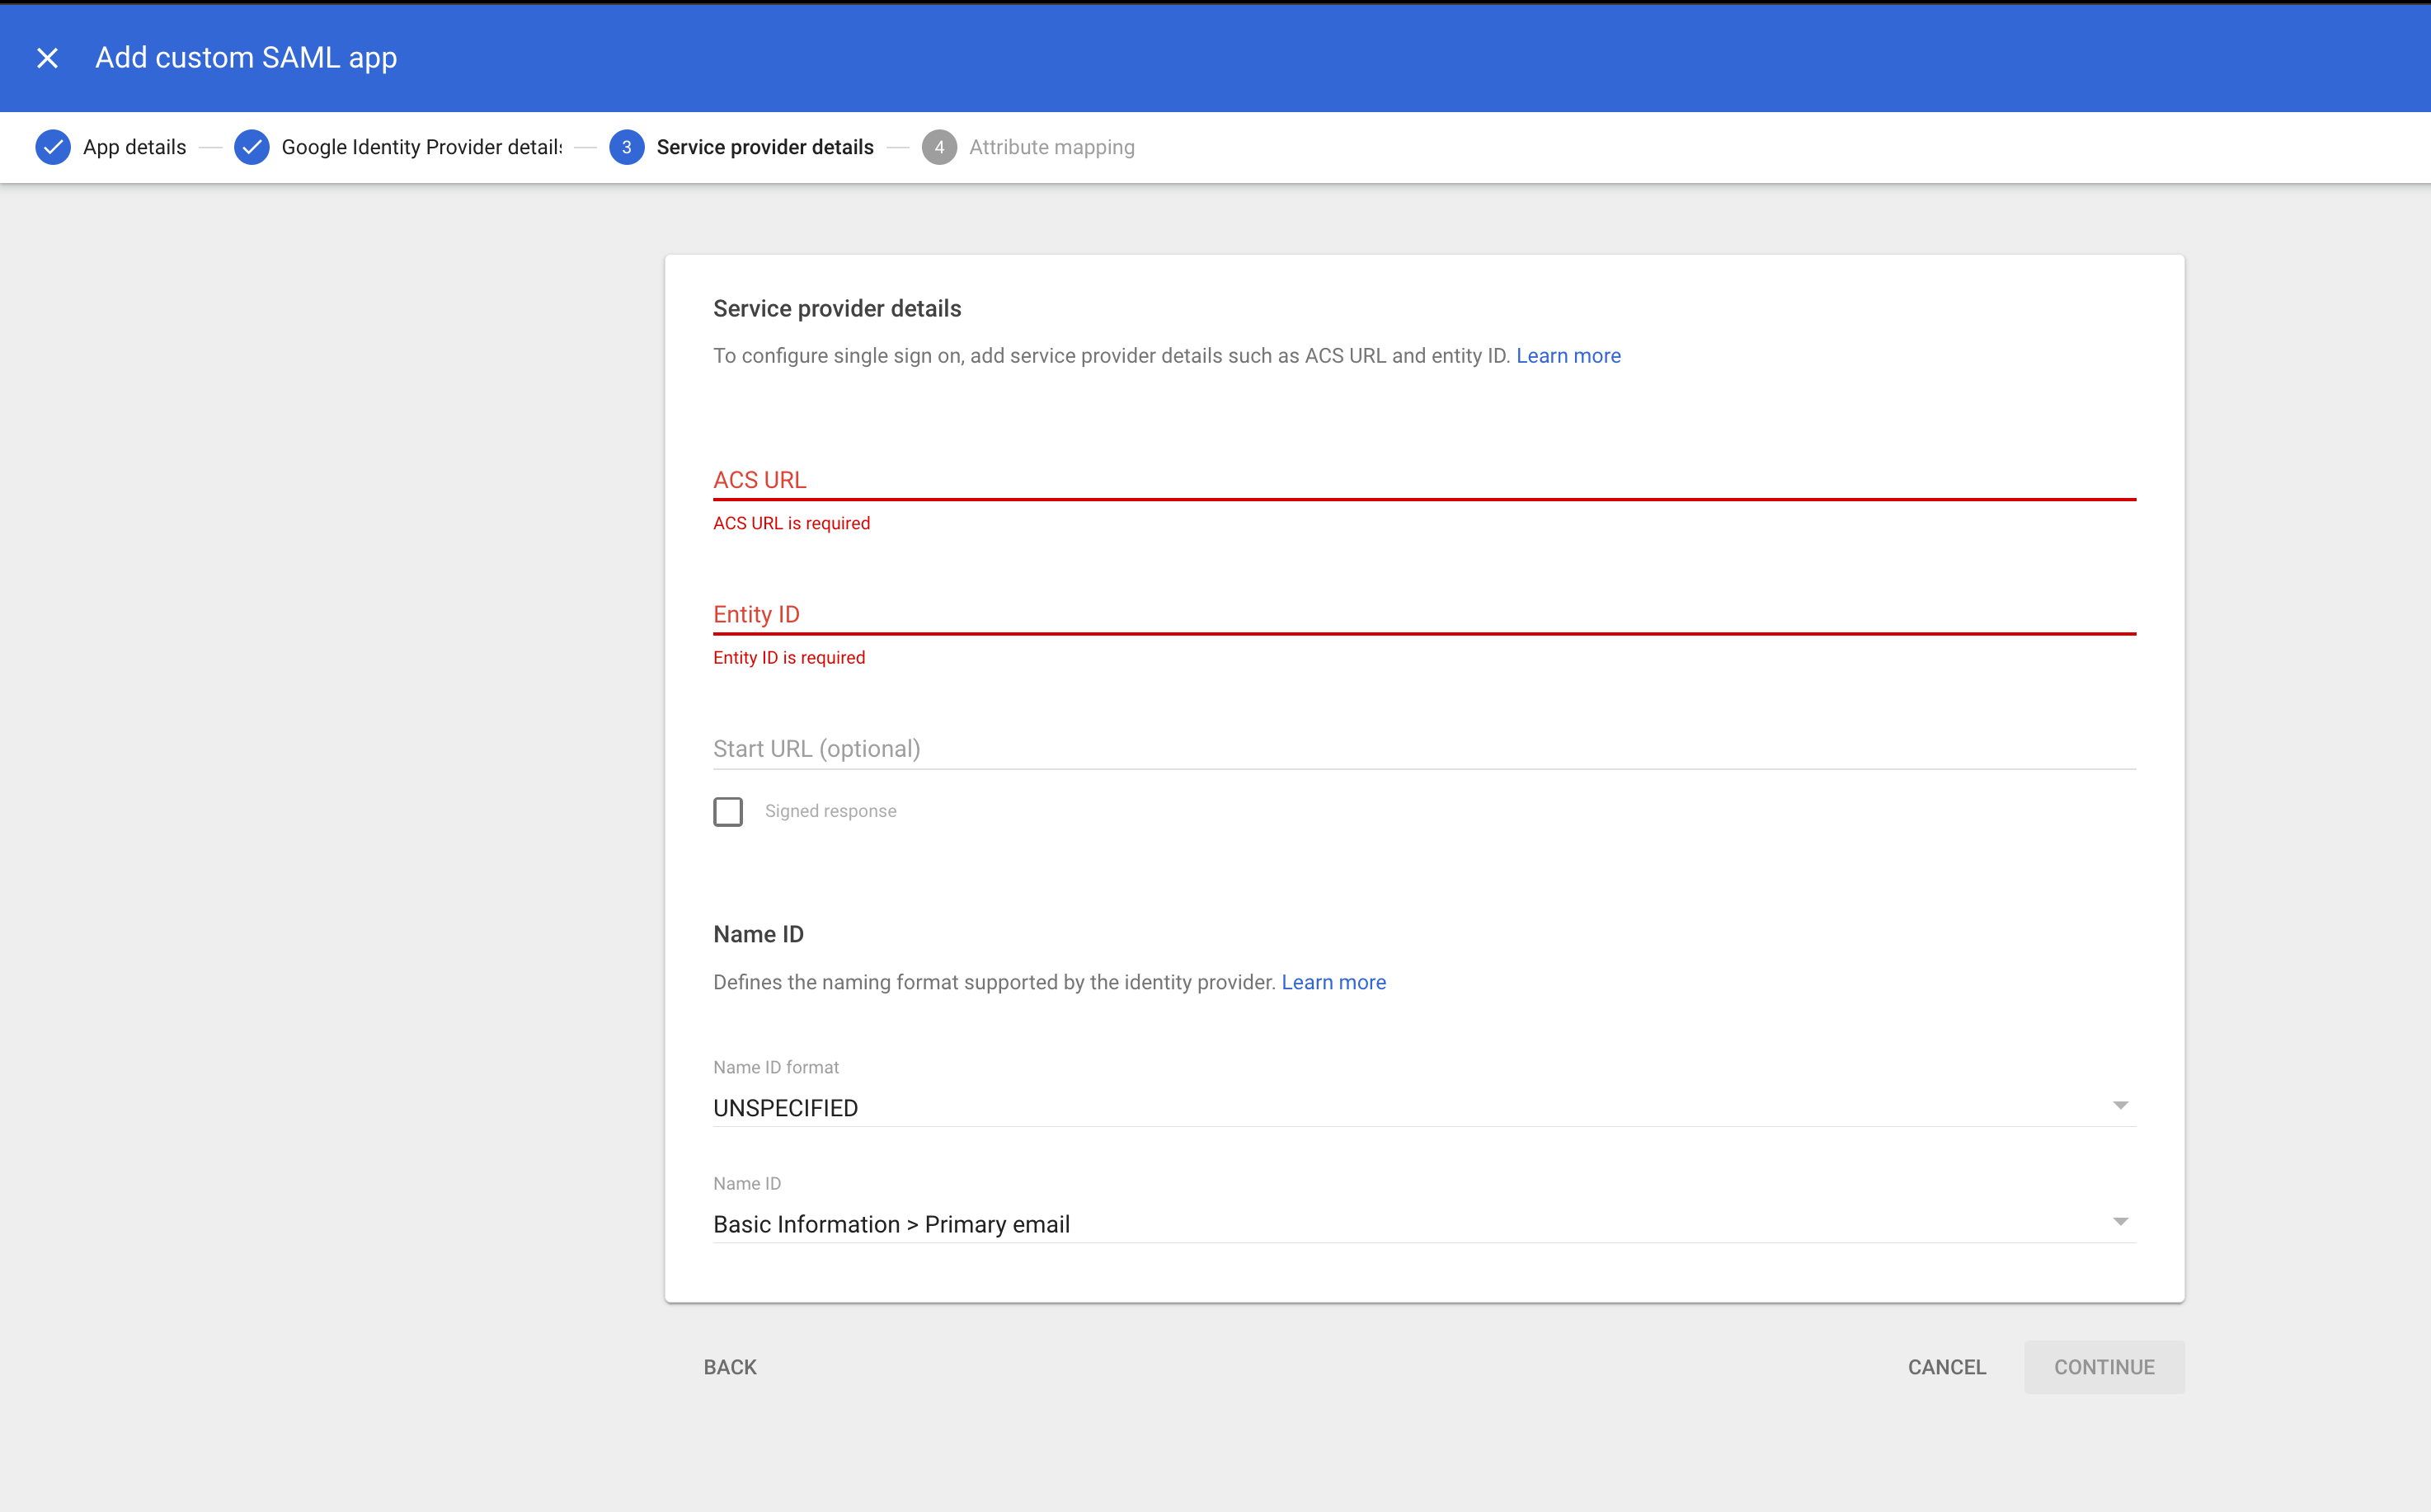
- ACS URL—The Assertion Consumer Service URL of the service provider, which receives the SAML response. This URL must begin with
`https://`. - Entity ID—The unique global identifier.

PingOne Configuration
 Create an External IDP in PingOne
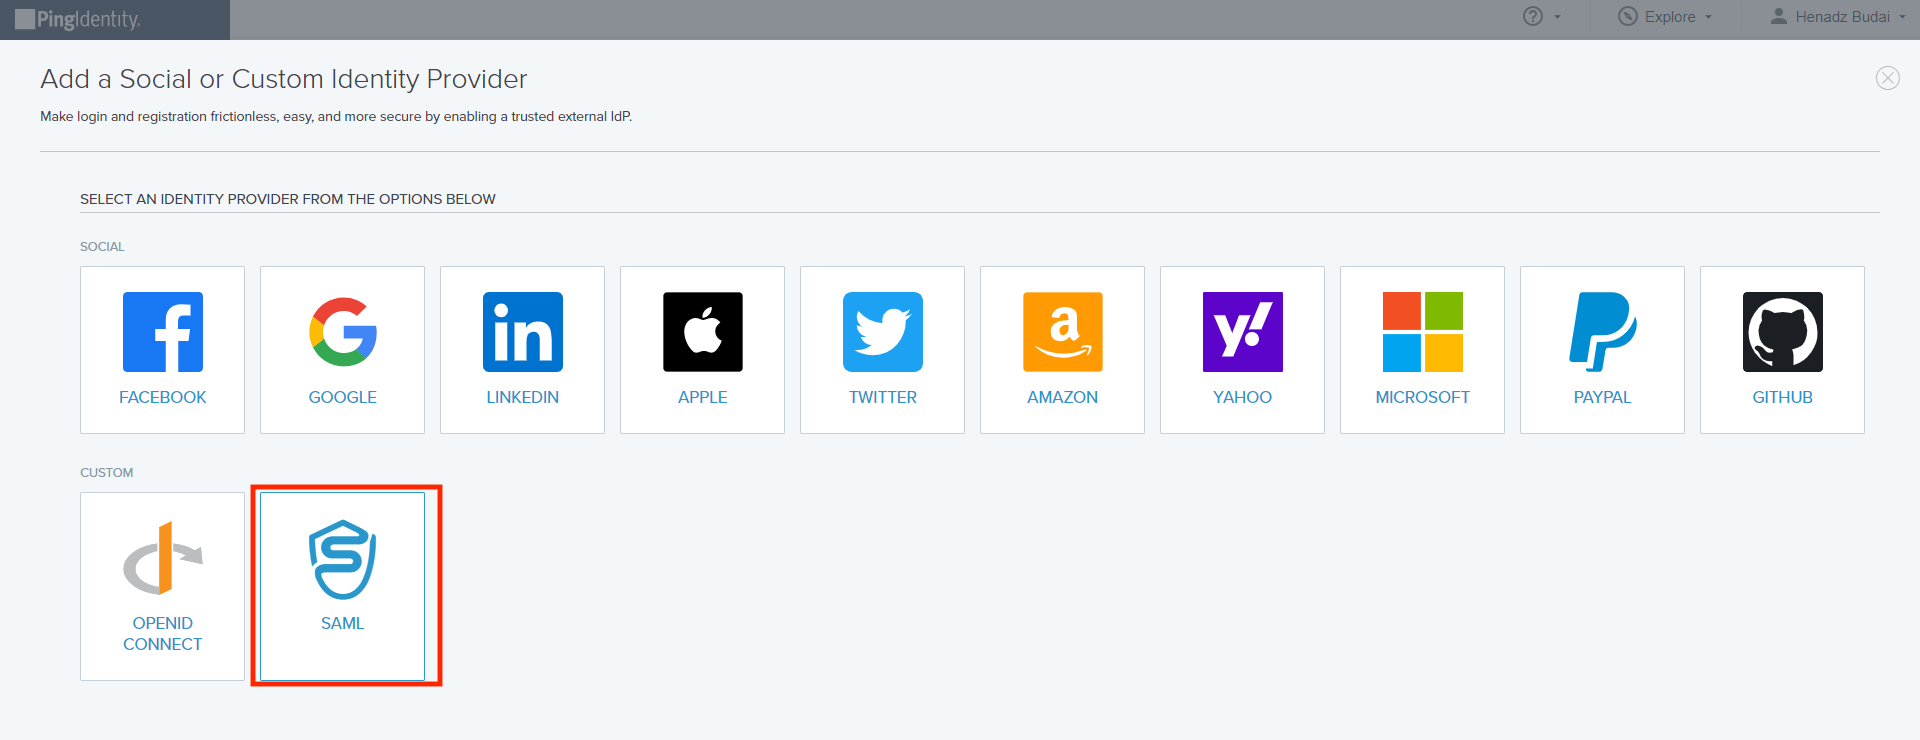
To enter the values from the previous steps, create an External IDP in PingOne by navigating to Integrations > External IDPs, clicking + Add Provider, and selecting SAML.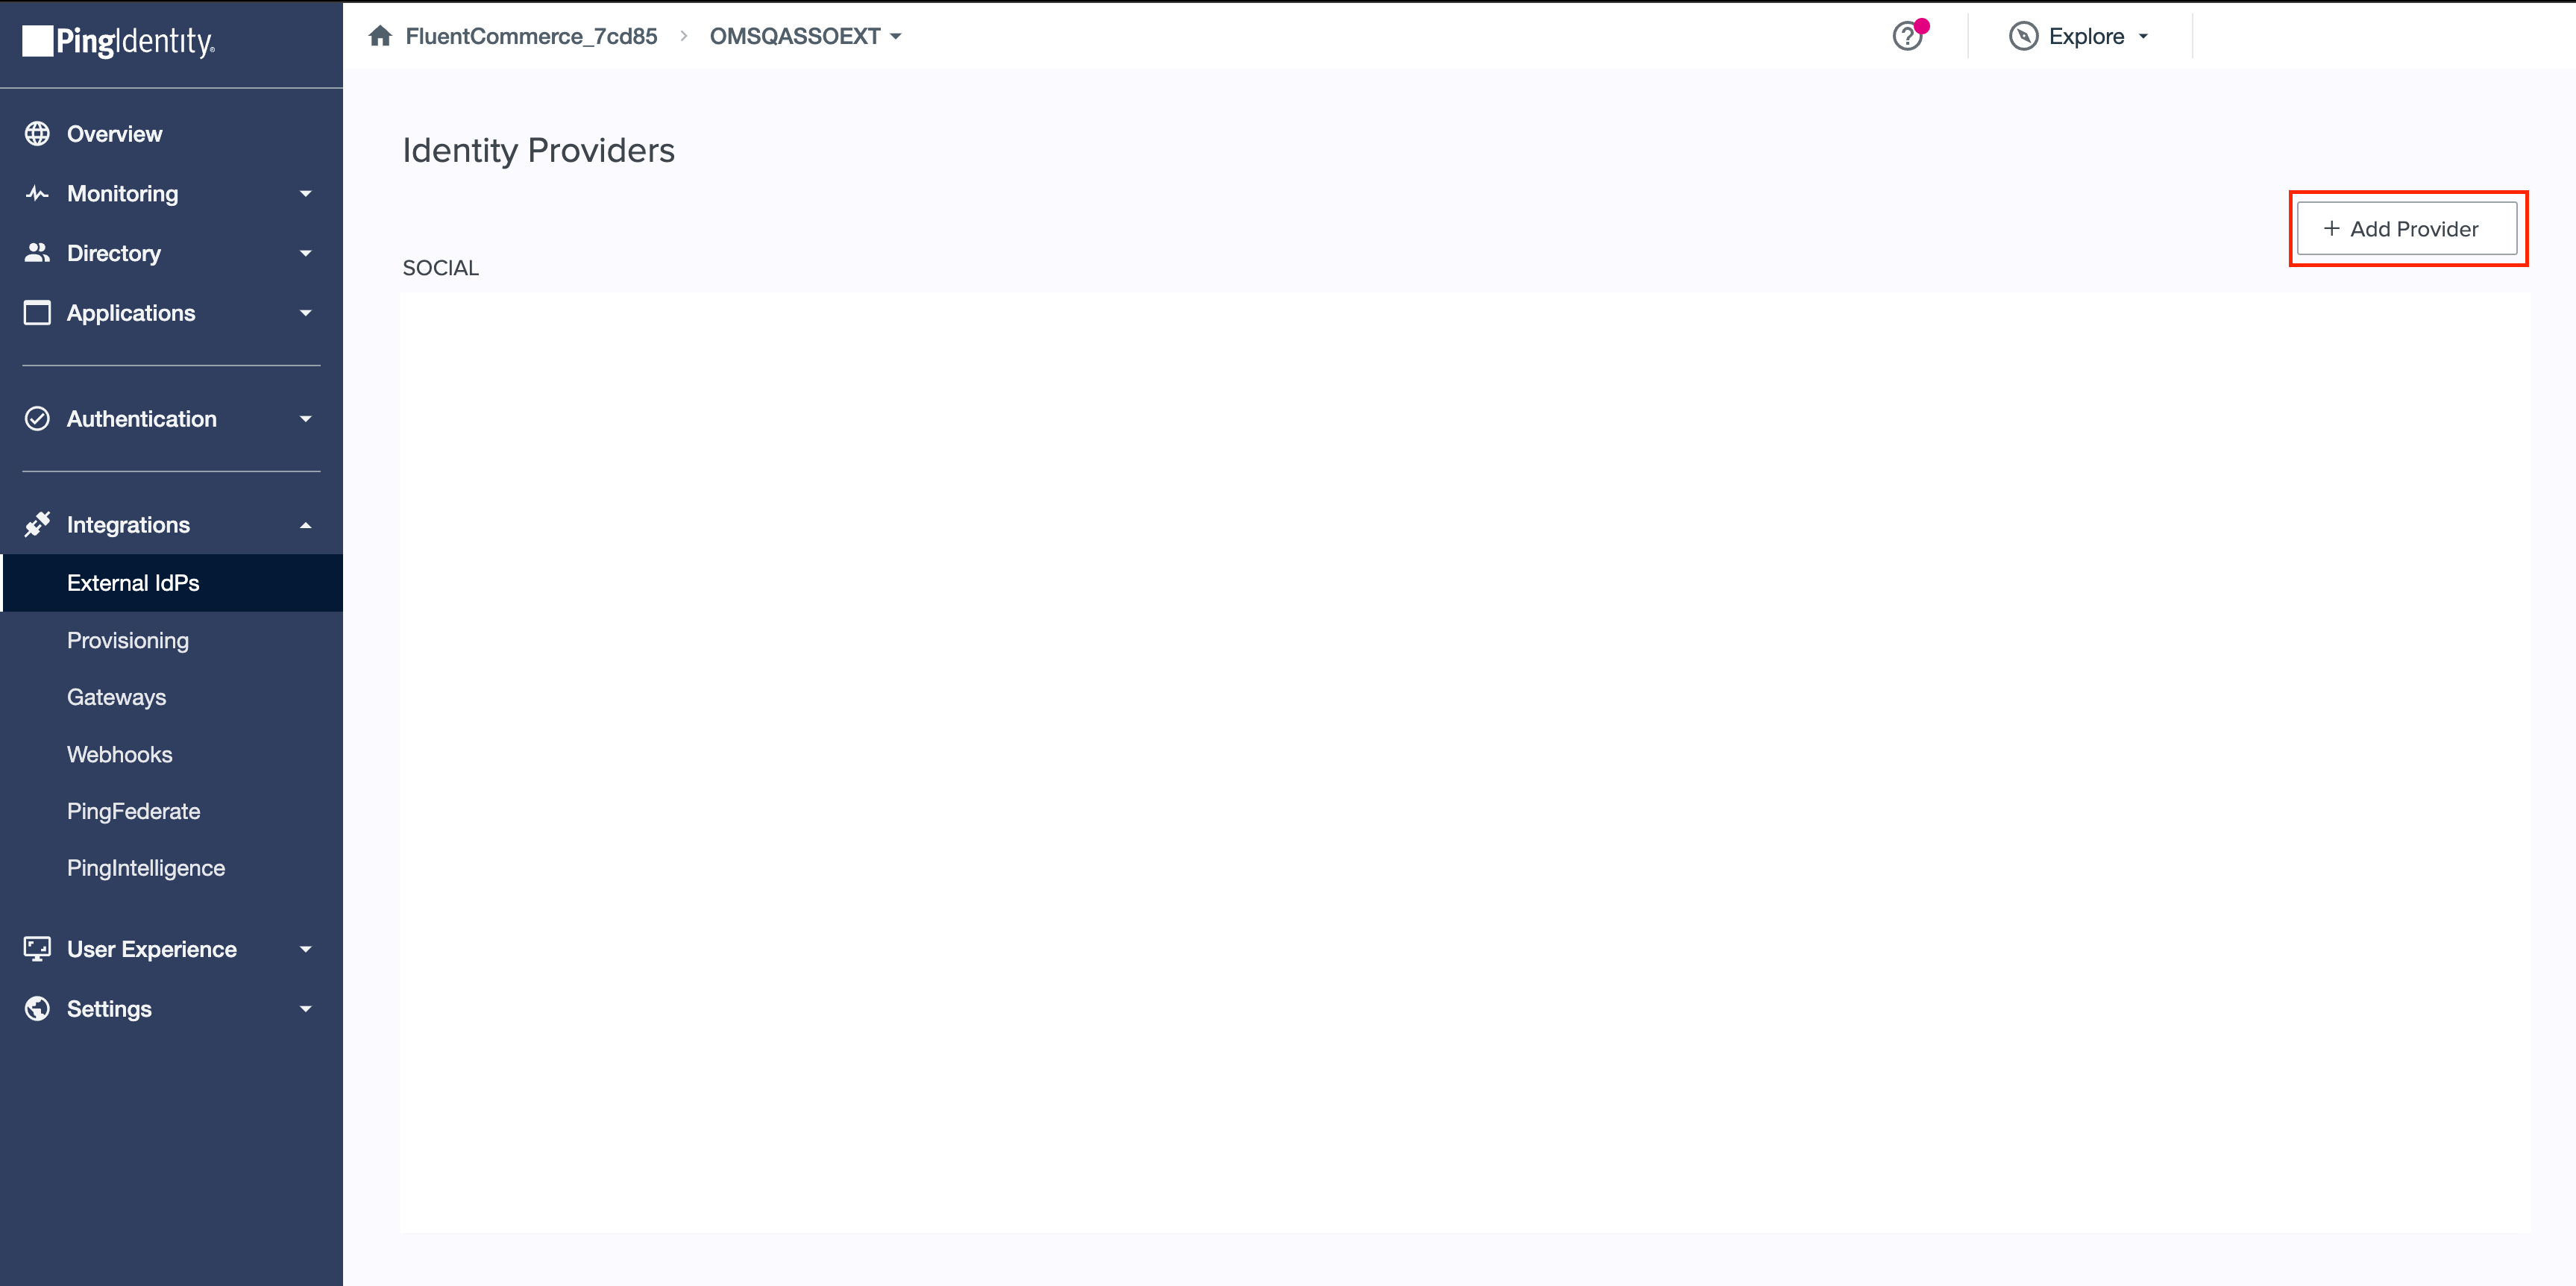


 Enter Profile Details
On the Create Profile screen, enter the following information: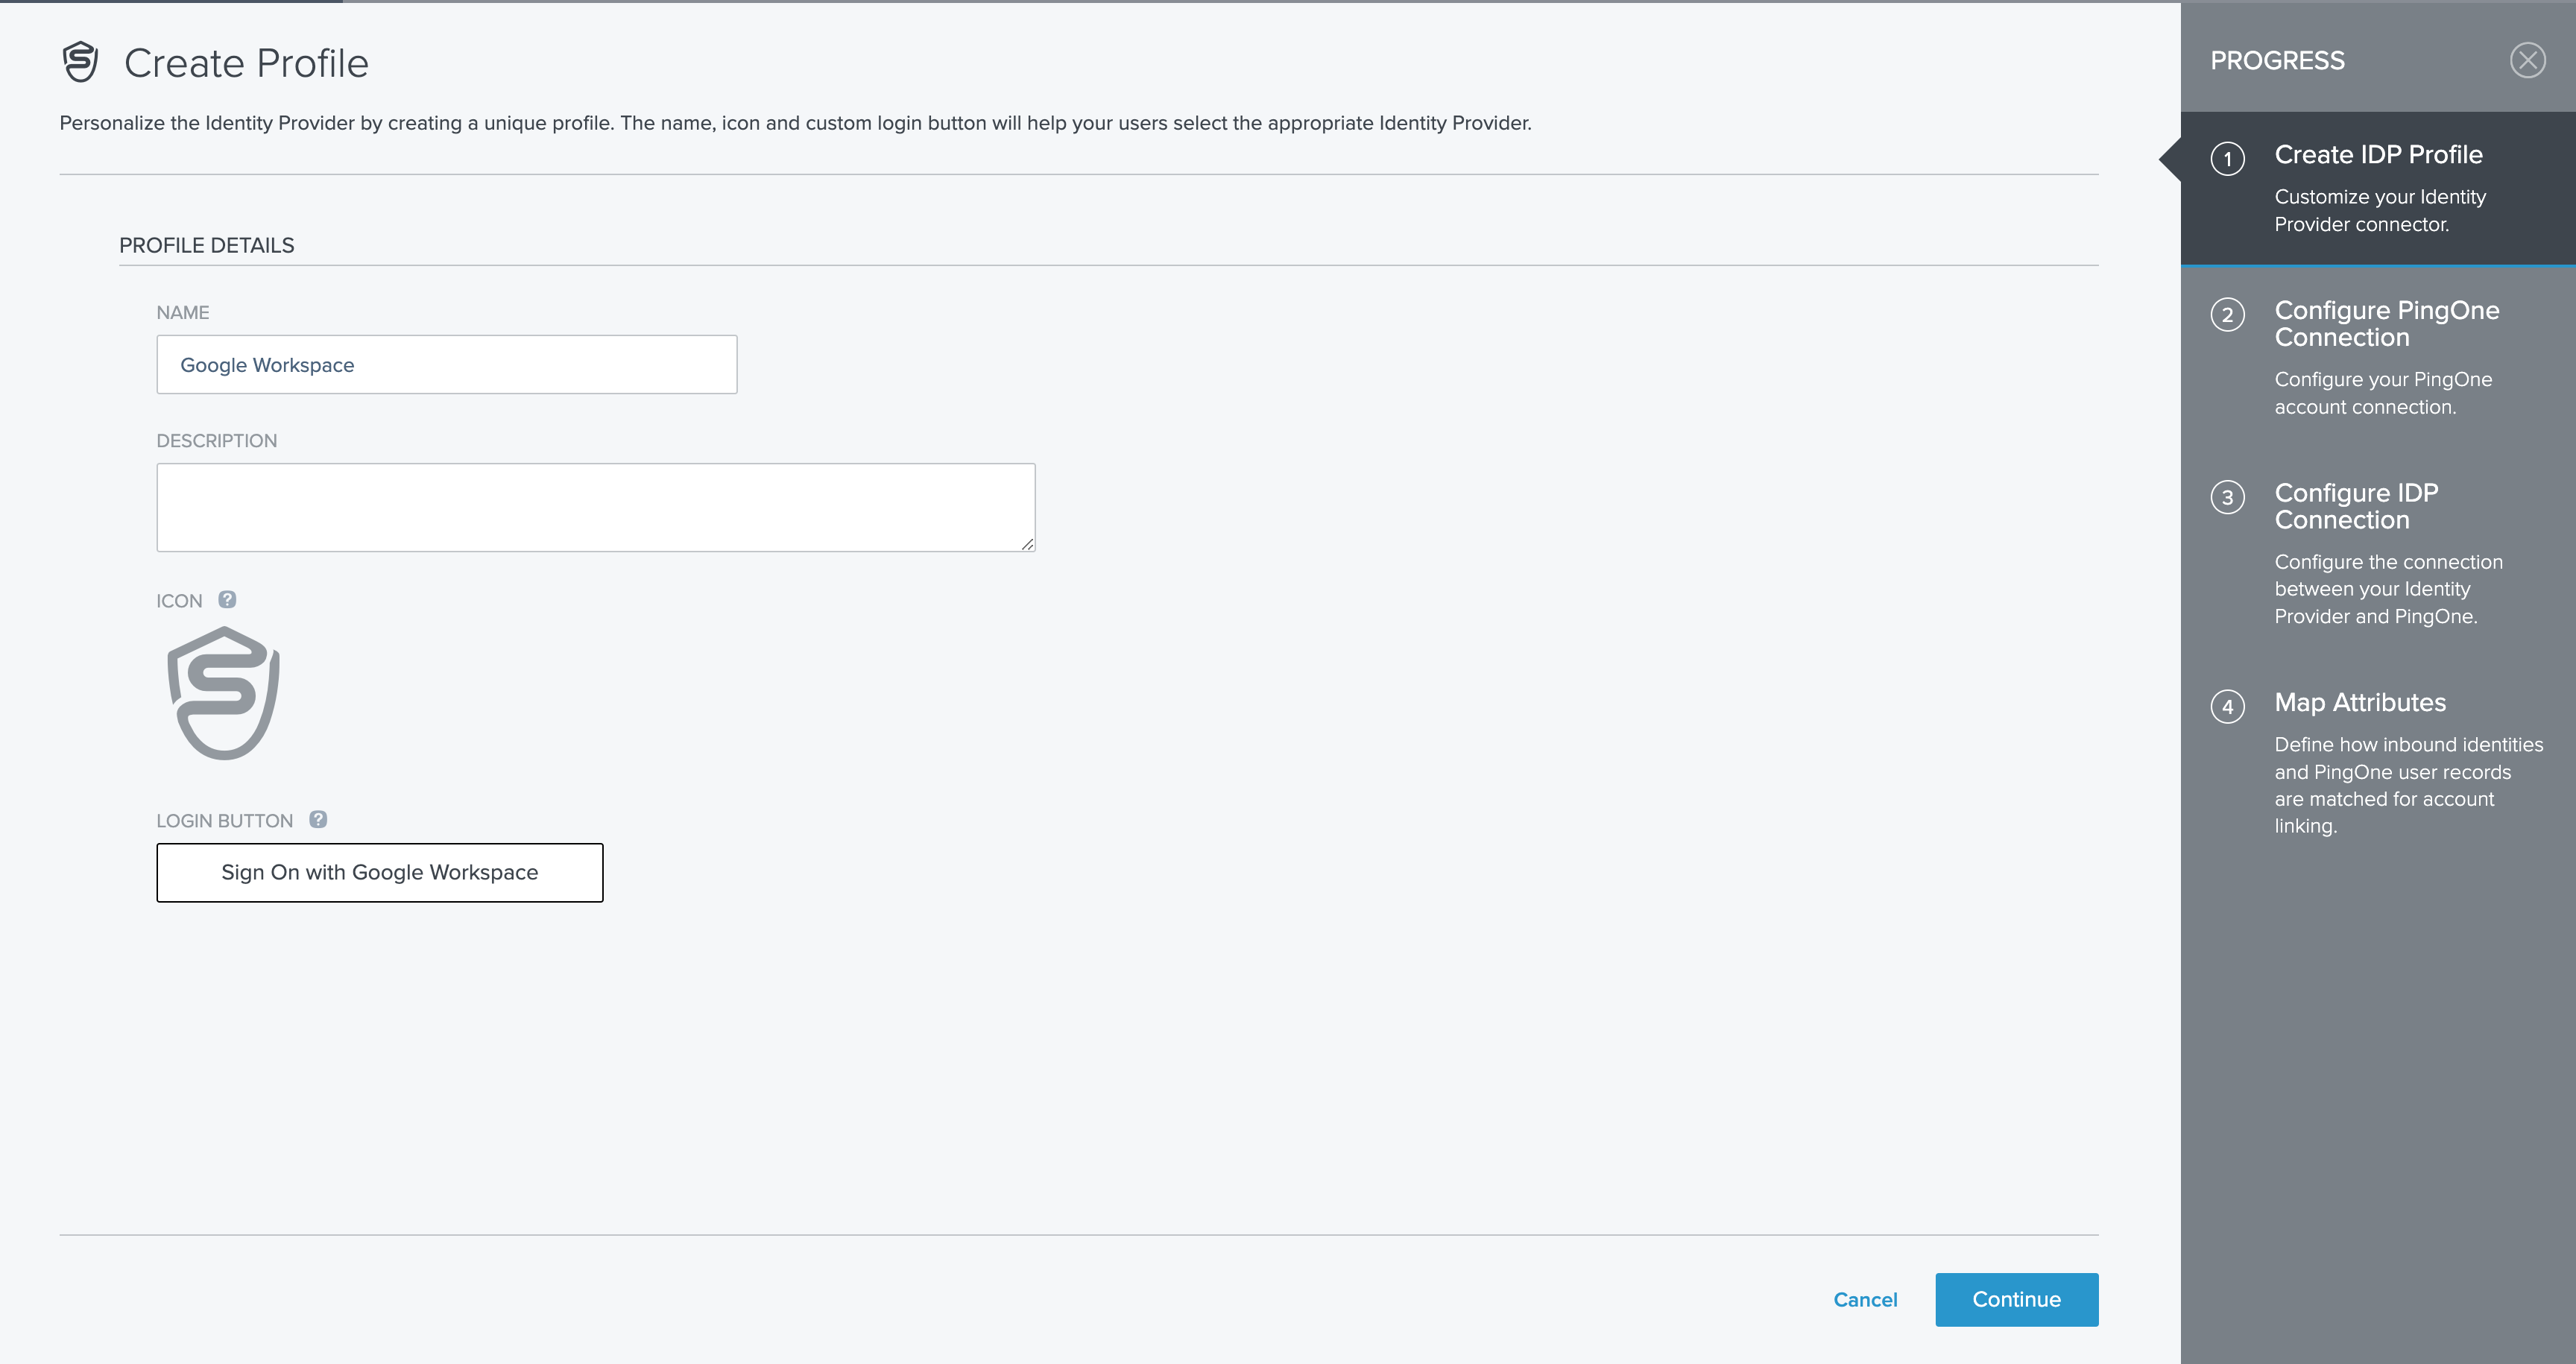
- Name: A unique identifier for the identity provider.
- Description (optional): A brief description of the identity provider.
- Icon (optional): An image to represent the identity provider, up to 1MB in JPG, JPEG, GIF, or PNG format.
- Login button (optional): An image for the login button visible to the end user, sized at 300 x 42 pixels.

 Configure PingOne and Google Workspace Connection Details
On the Configure PingOne Connection screen, copy the PingOne (SP) Entity ID and paste it into the Entity ID field on the Service Provider Details page in Google Workspace. Then, click Continue.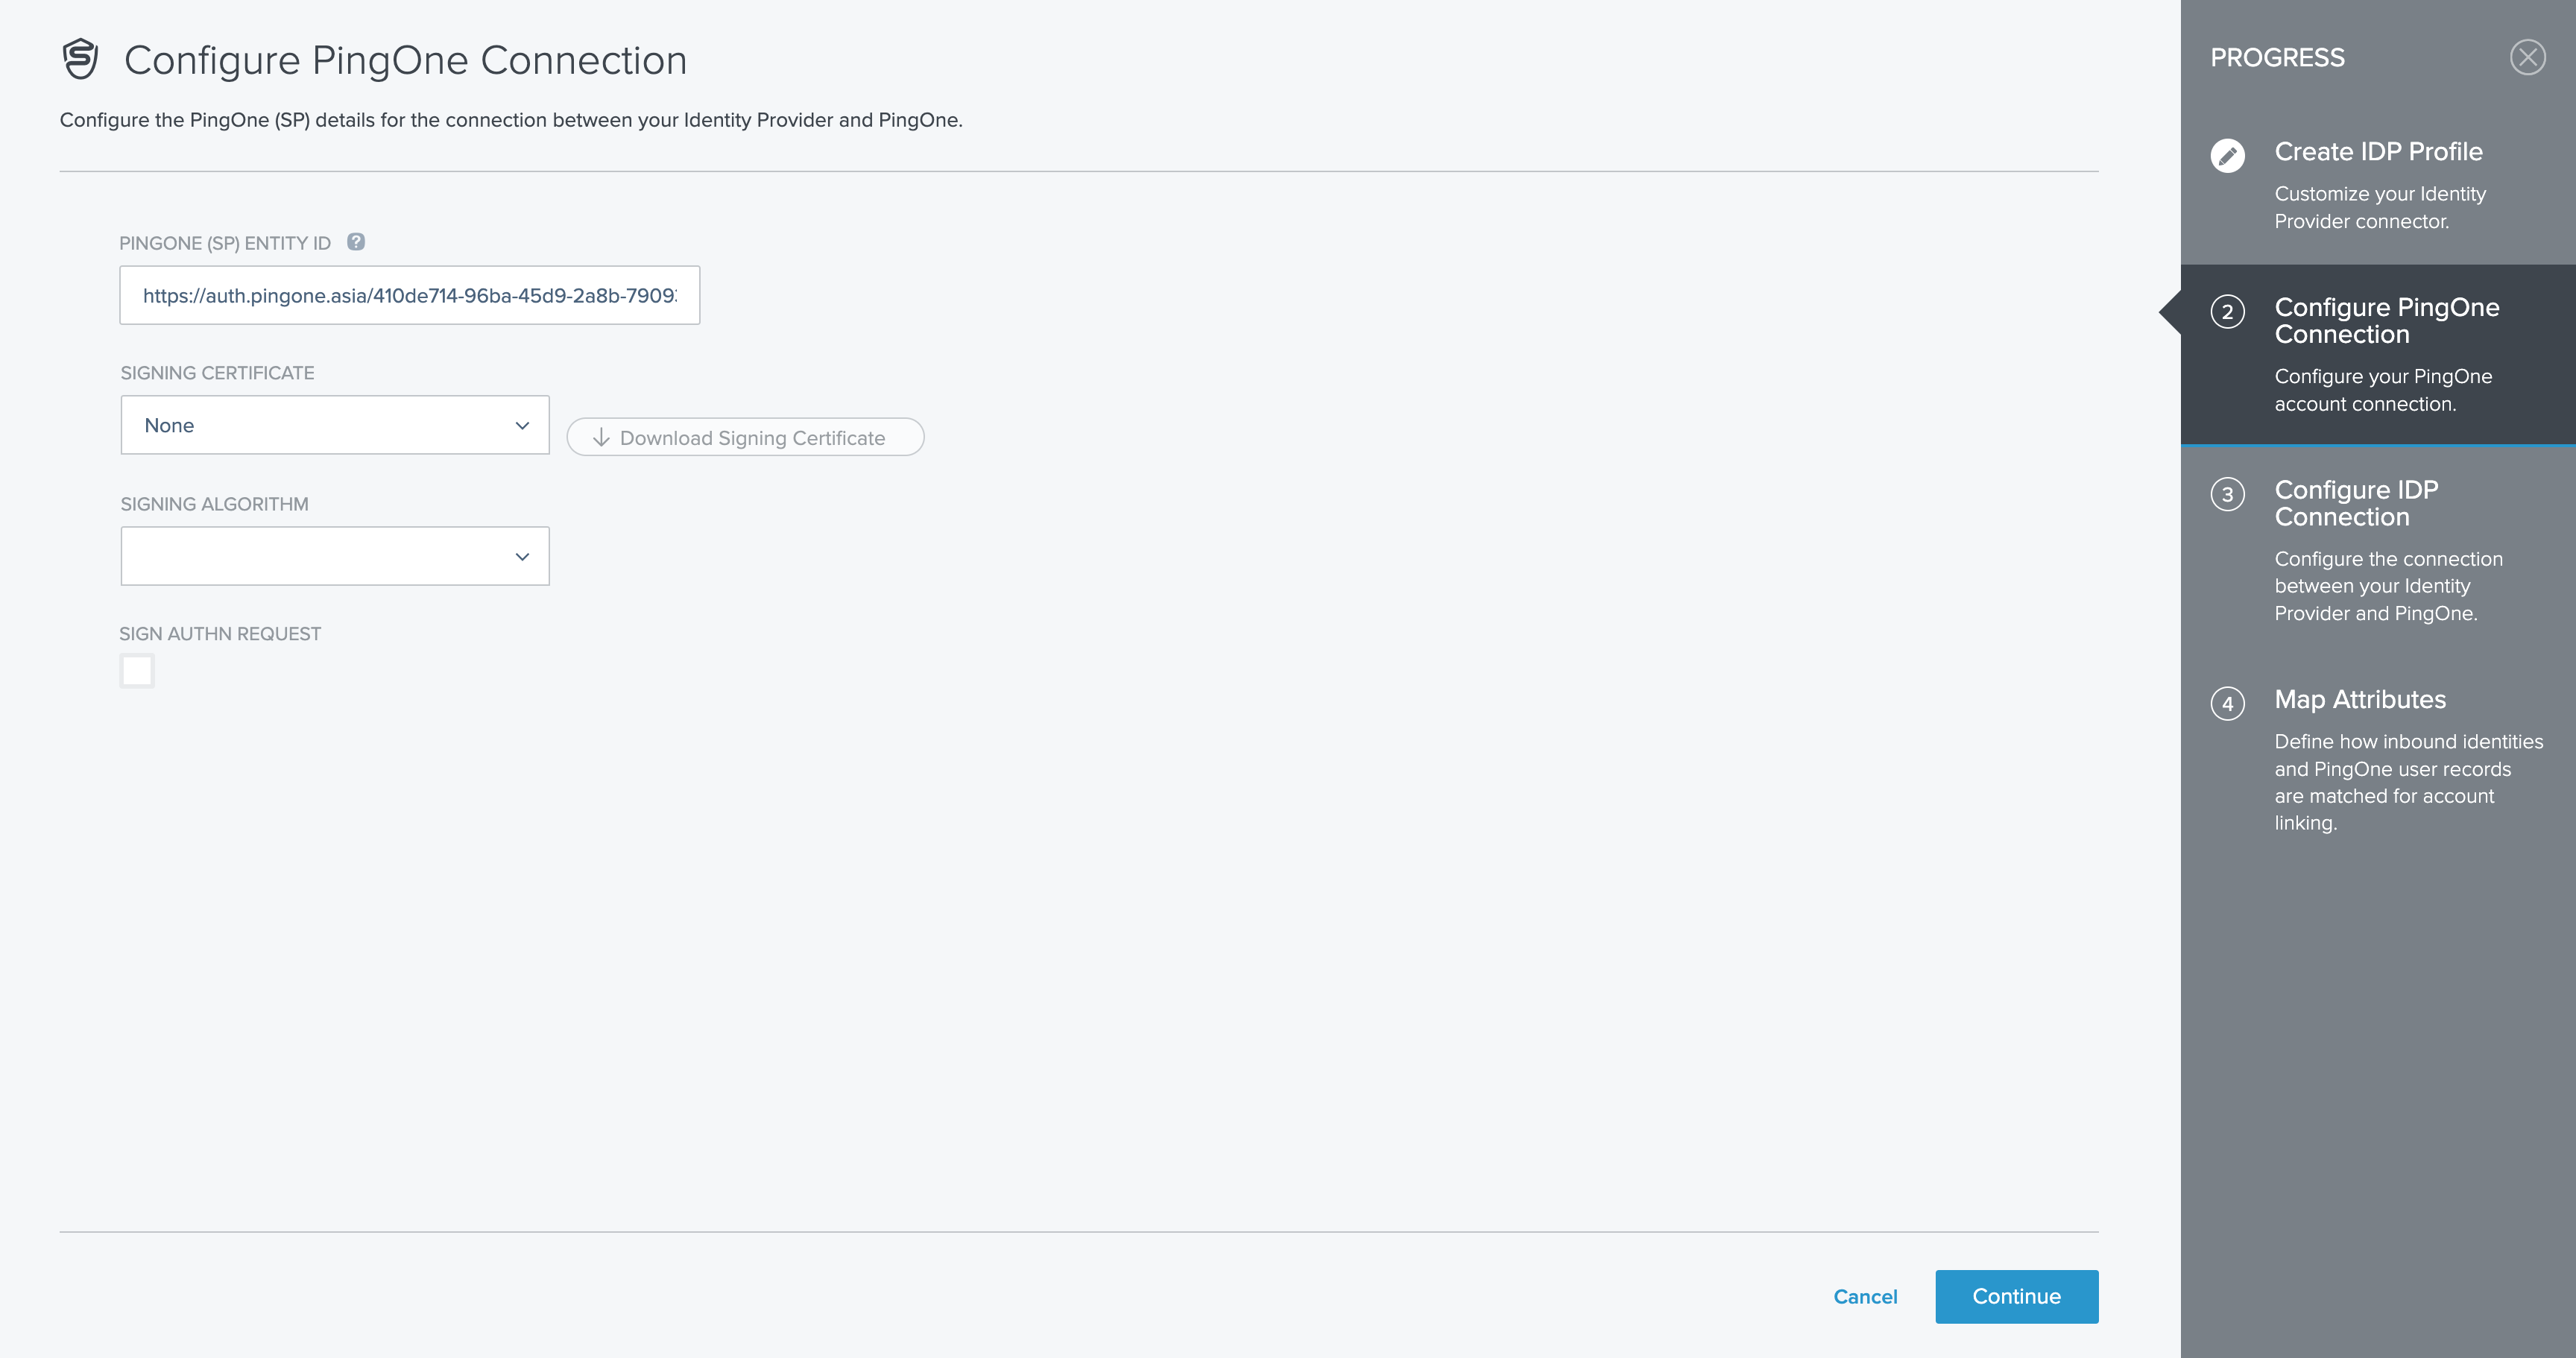 On the Configure IDP Connection screen, copy the ACS Endpoint and paste it into the ACS URL field on the Service Provider Details page in Google Workspace. Next, use the Choose button on the same screen to upload the IDP metadata file downloaded earlier.
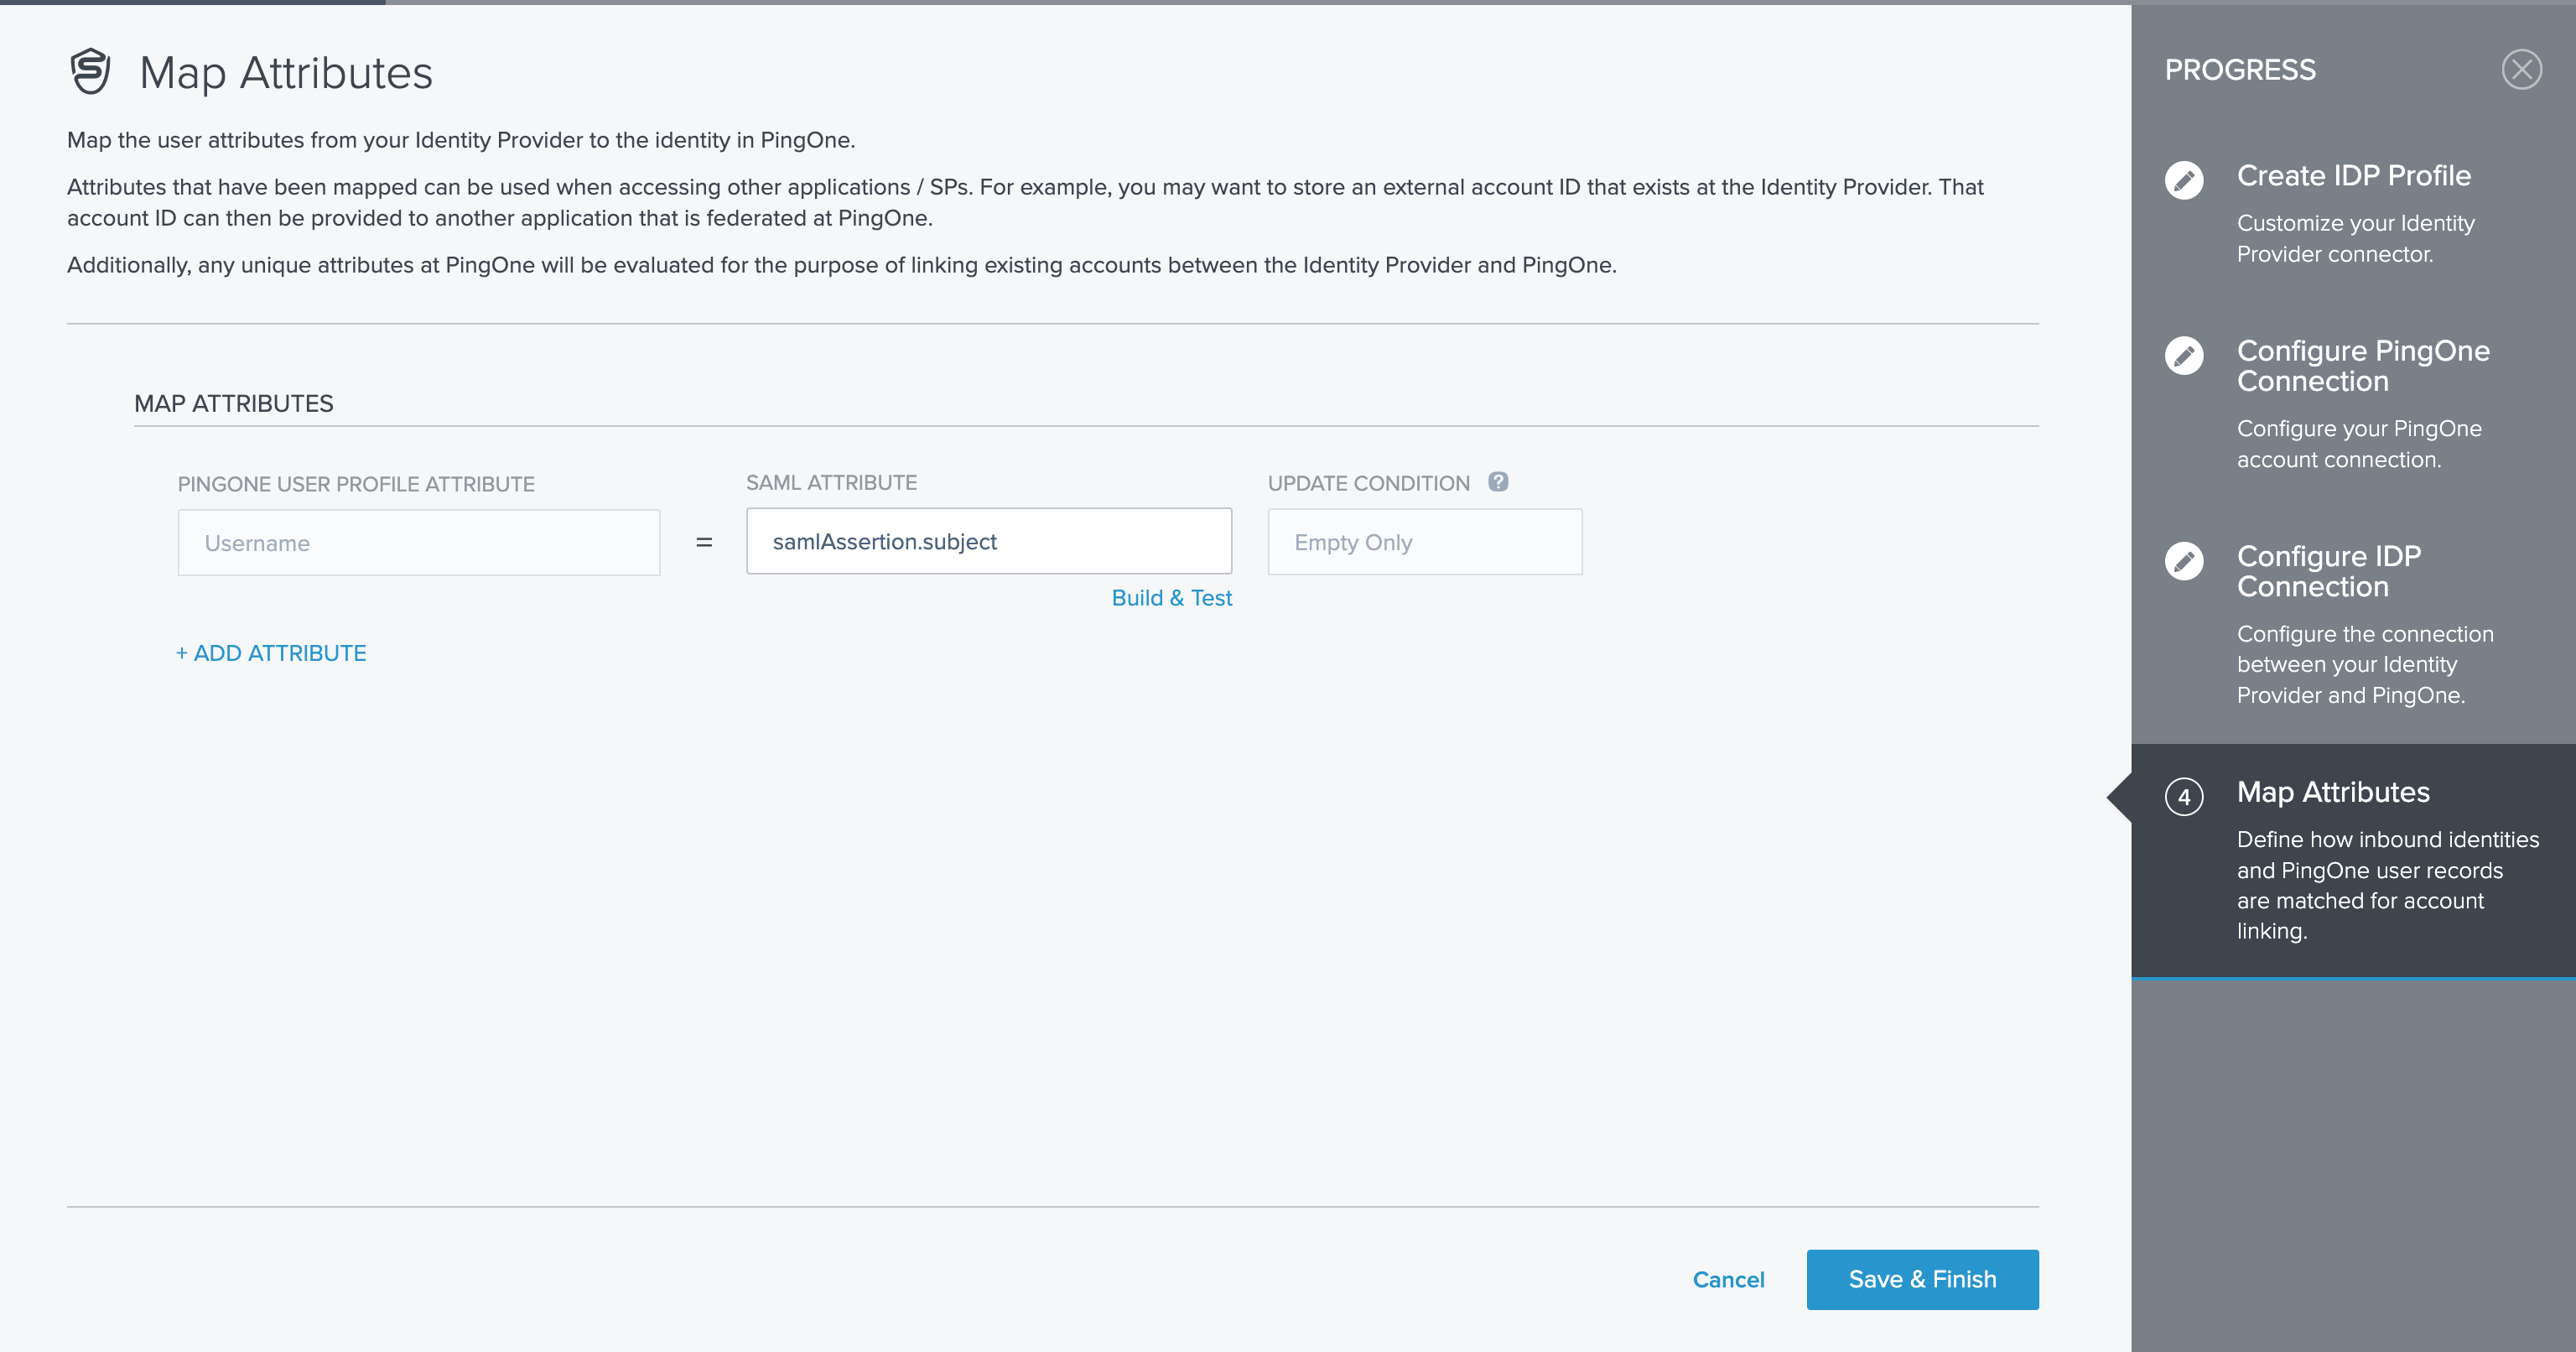
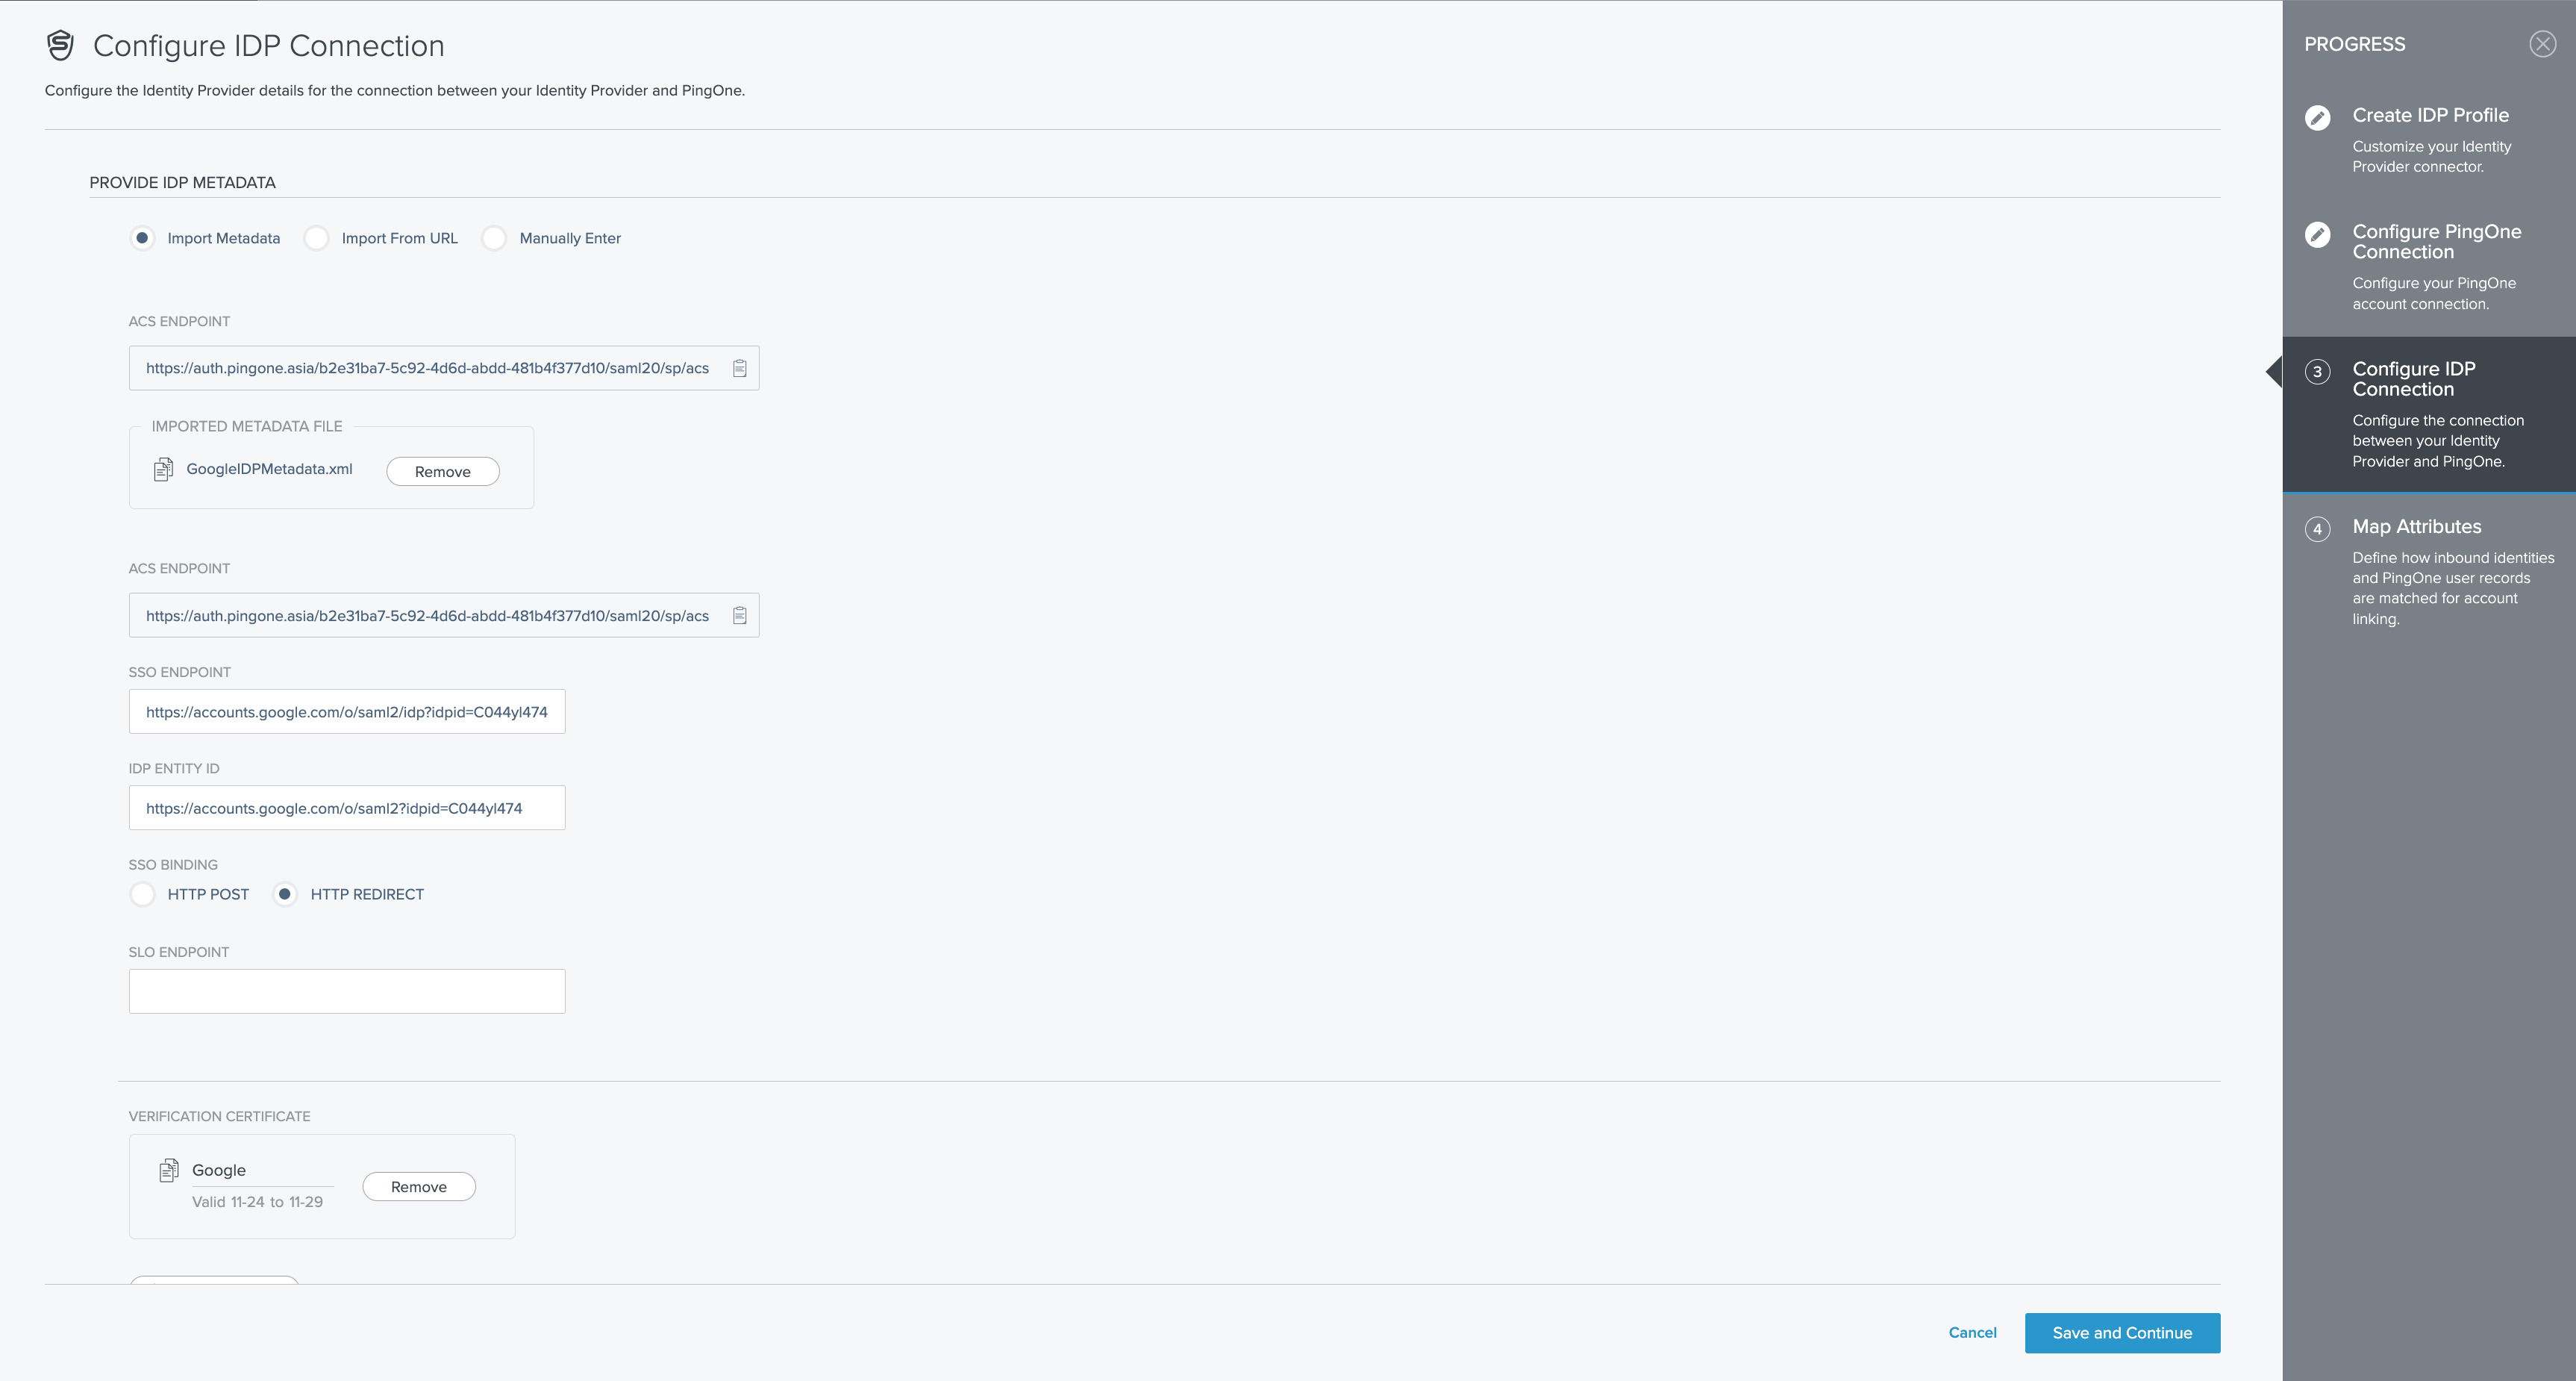 Click Save and Continue.Finally, on the Map Attributes screen, click Save & Finish.
 On the Configure IDP Connection screen, copy the ACS Endpoint and paste it into the ACS URL field on the Service Provider Details page in Google Workspace. Next, use the Choose button on the same screen to upload the IDP metadata file downloaded earlier.
 Click Save and Continue.Finally, on the Map Attributes screen, click Save & Finish.
Final Steps
 Complete Google Workspace Configuration
Return to the Google Workspace configuration and click Continue.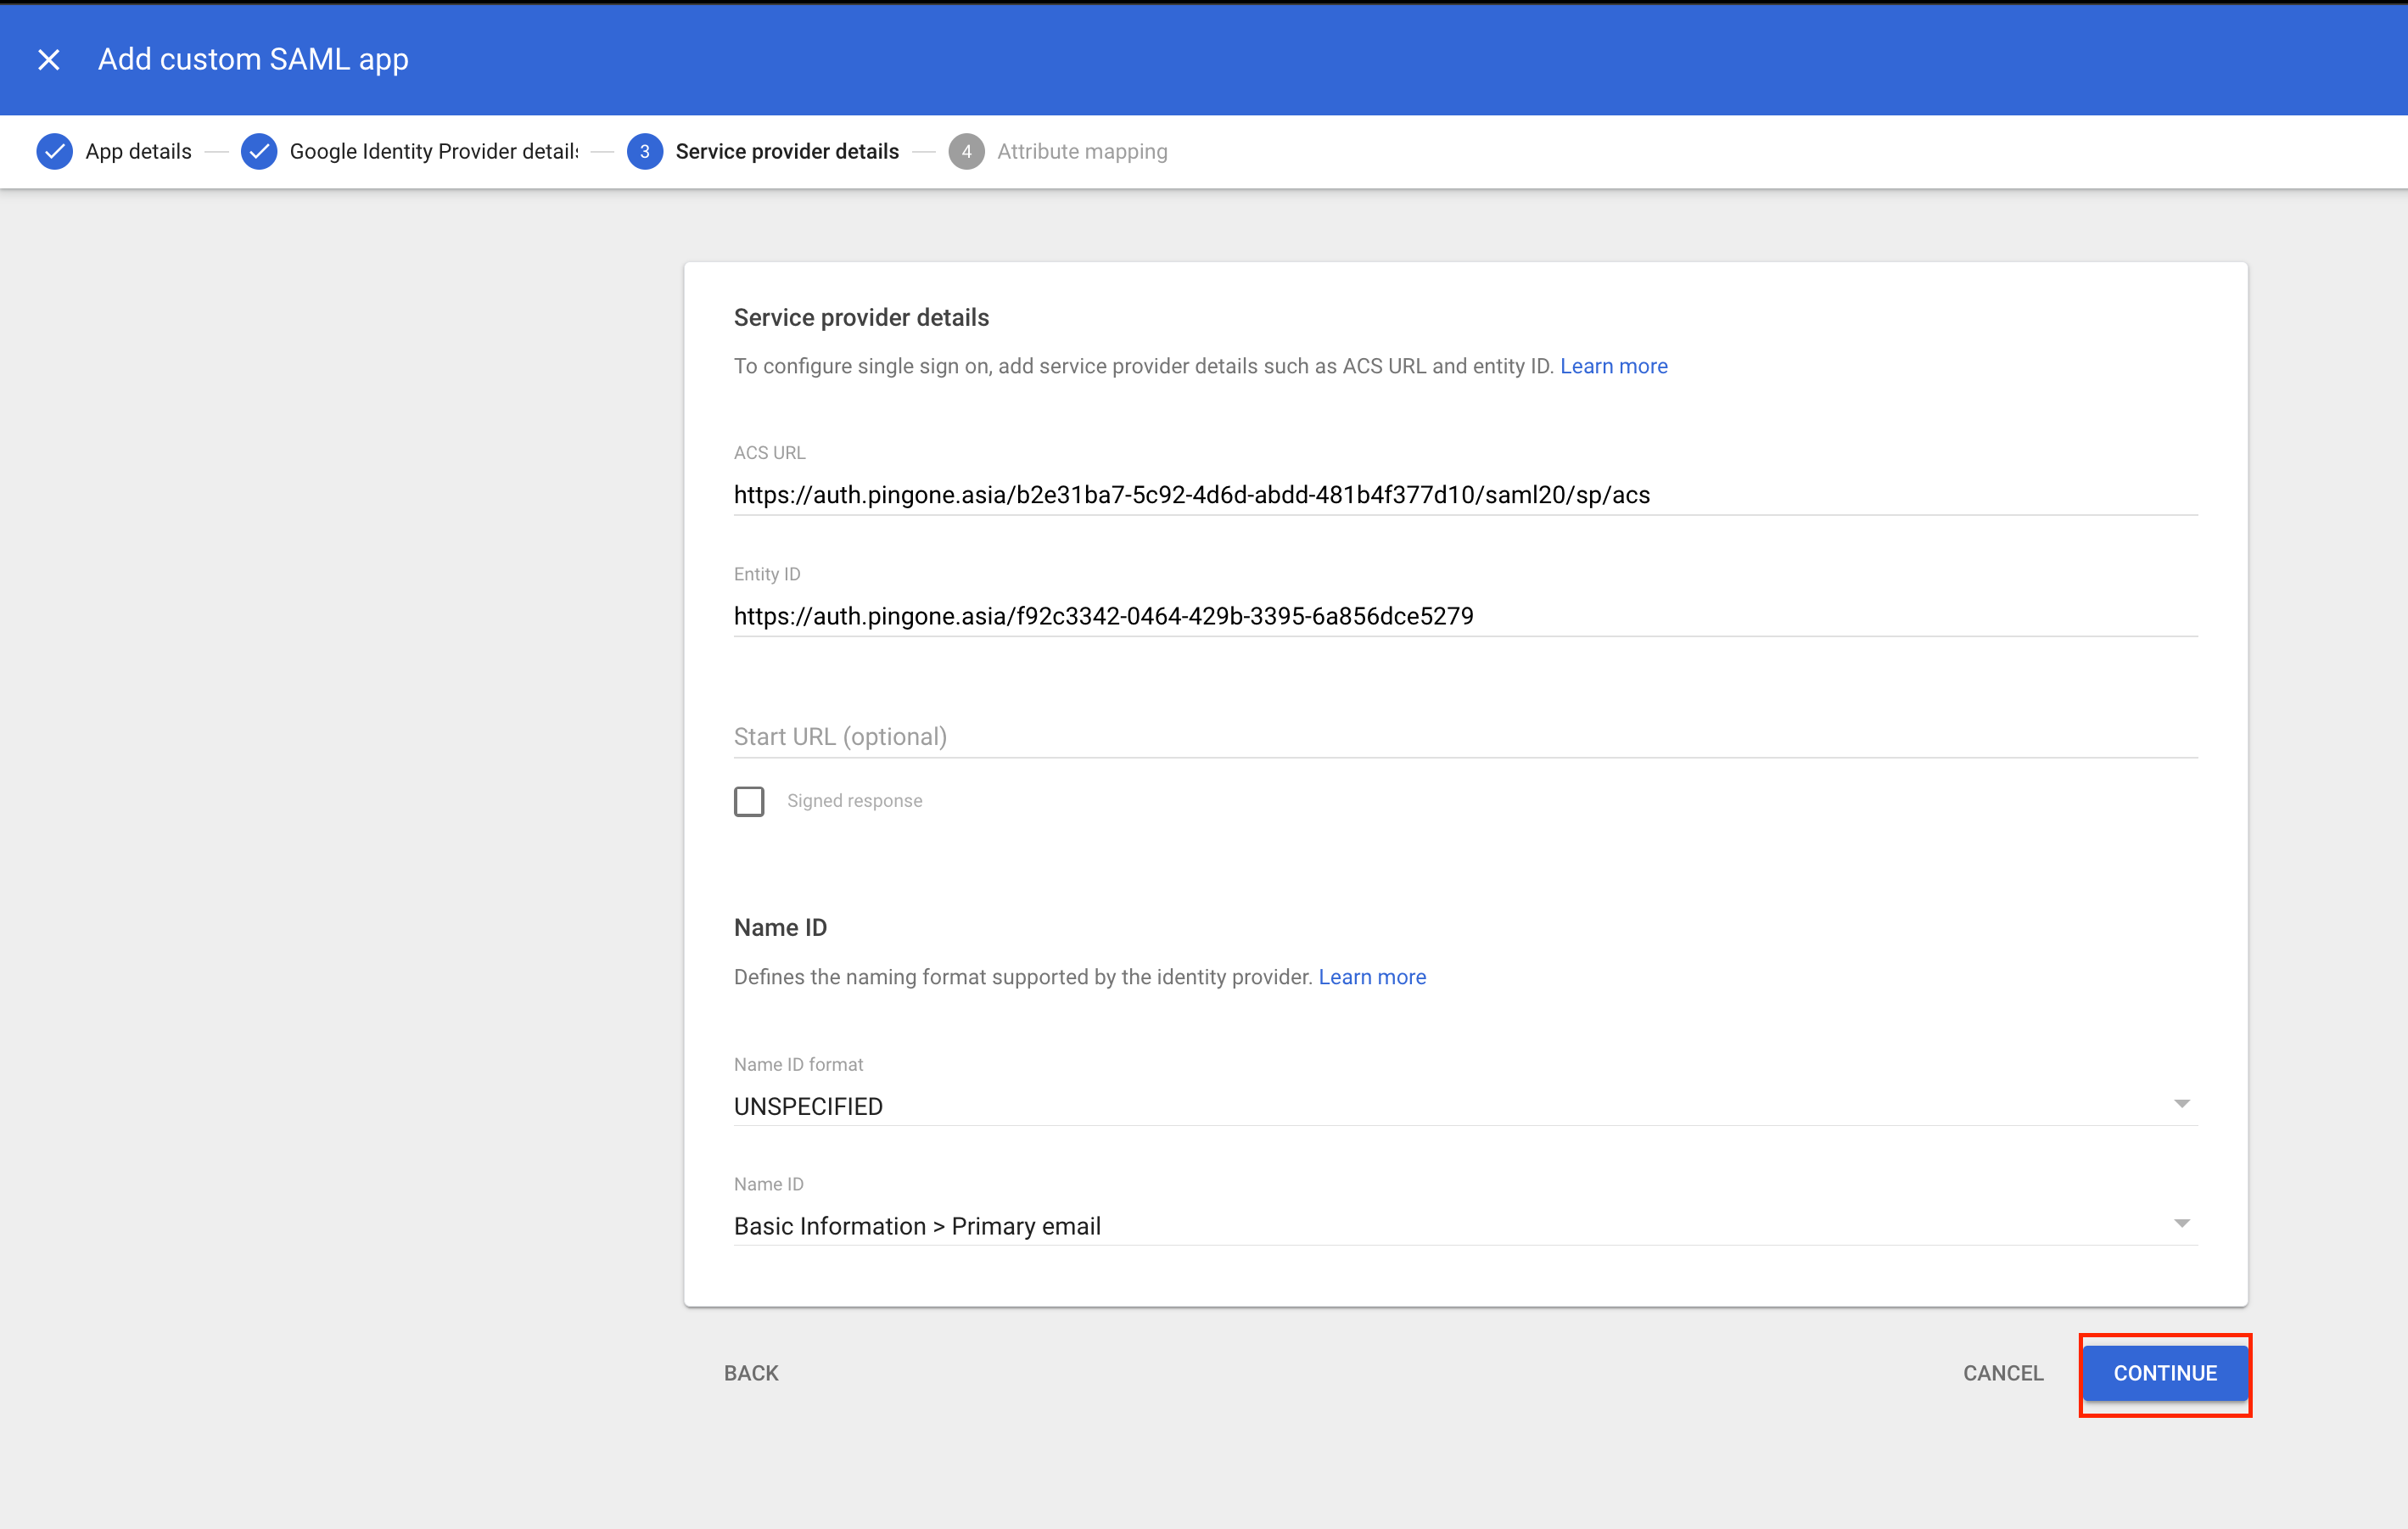 Click Finish to complete the setup in Google Workspace.
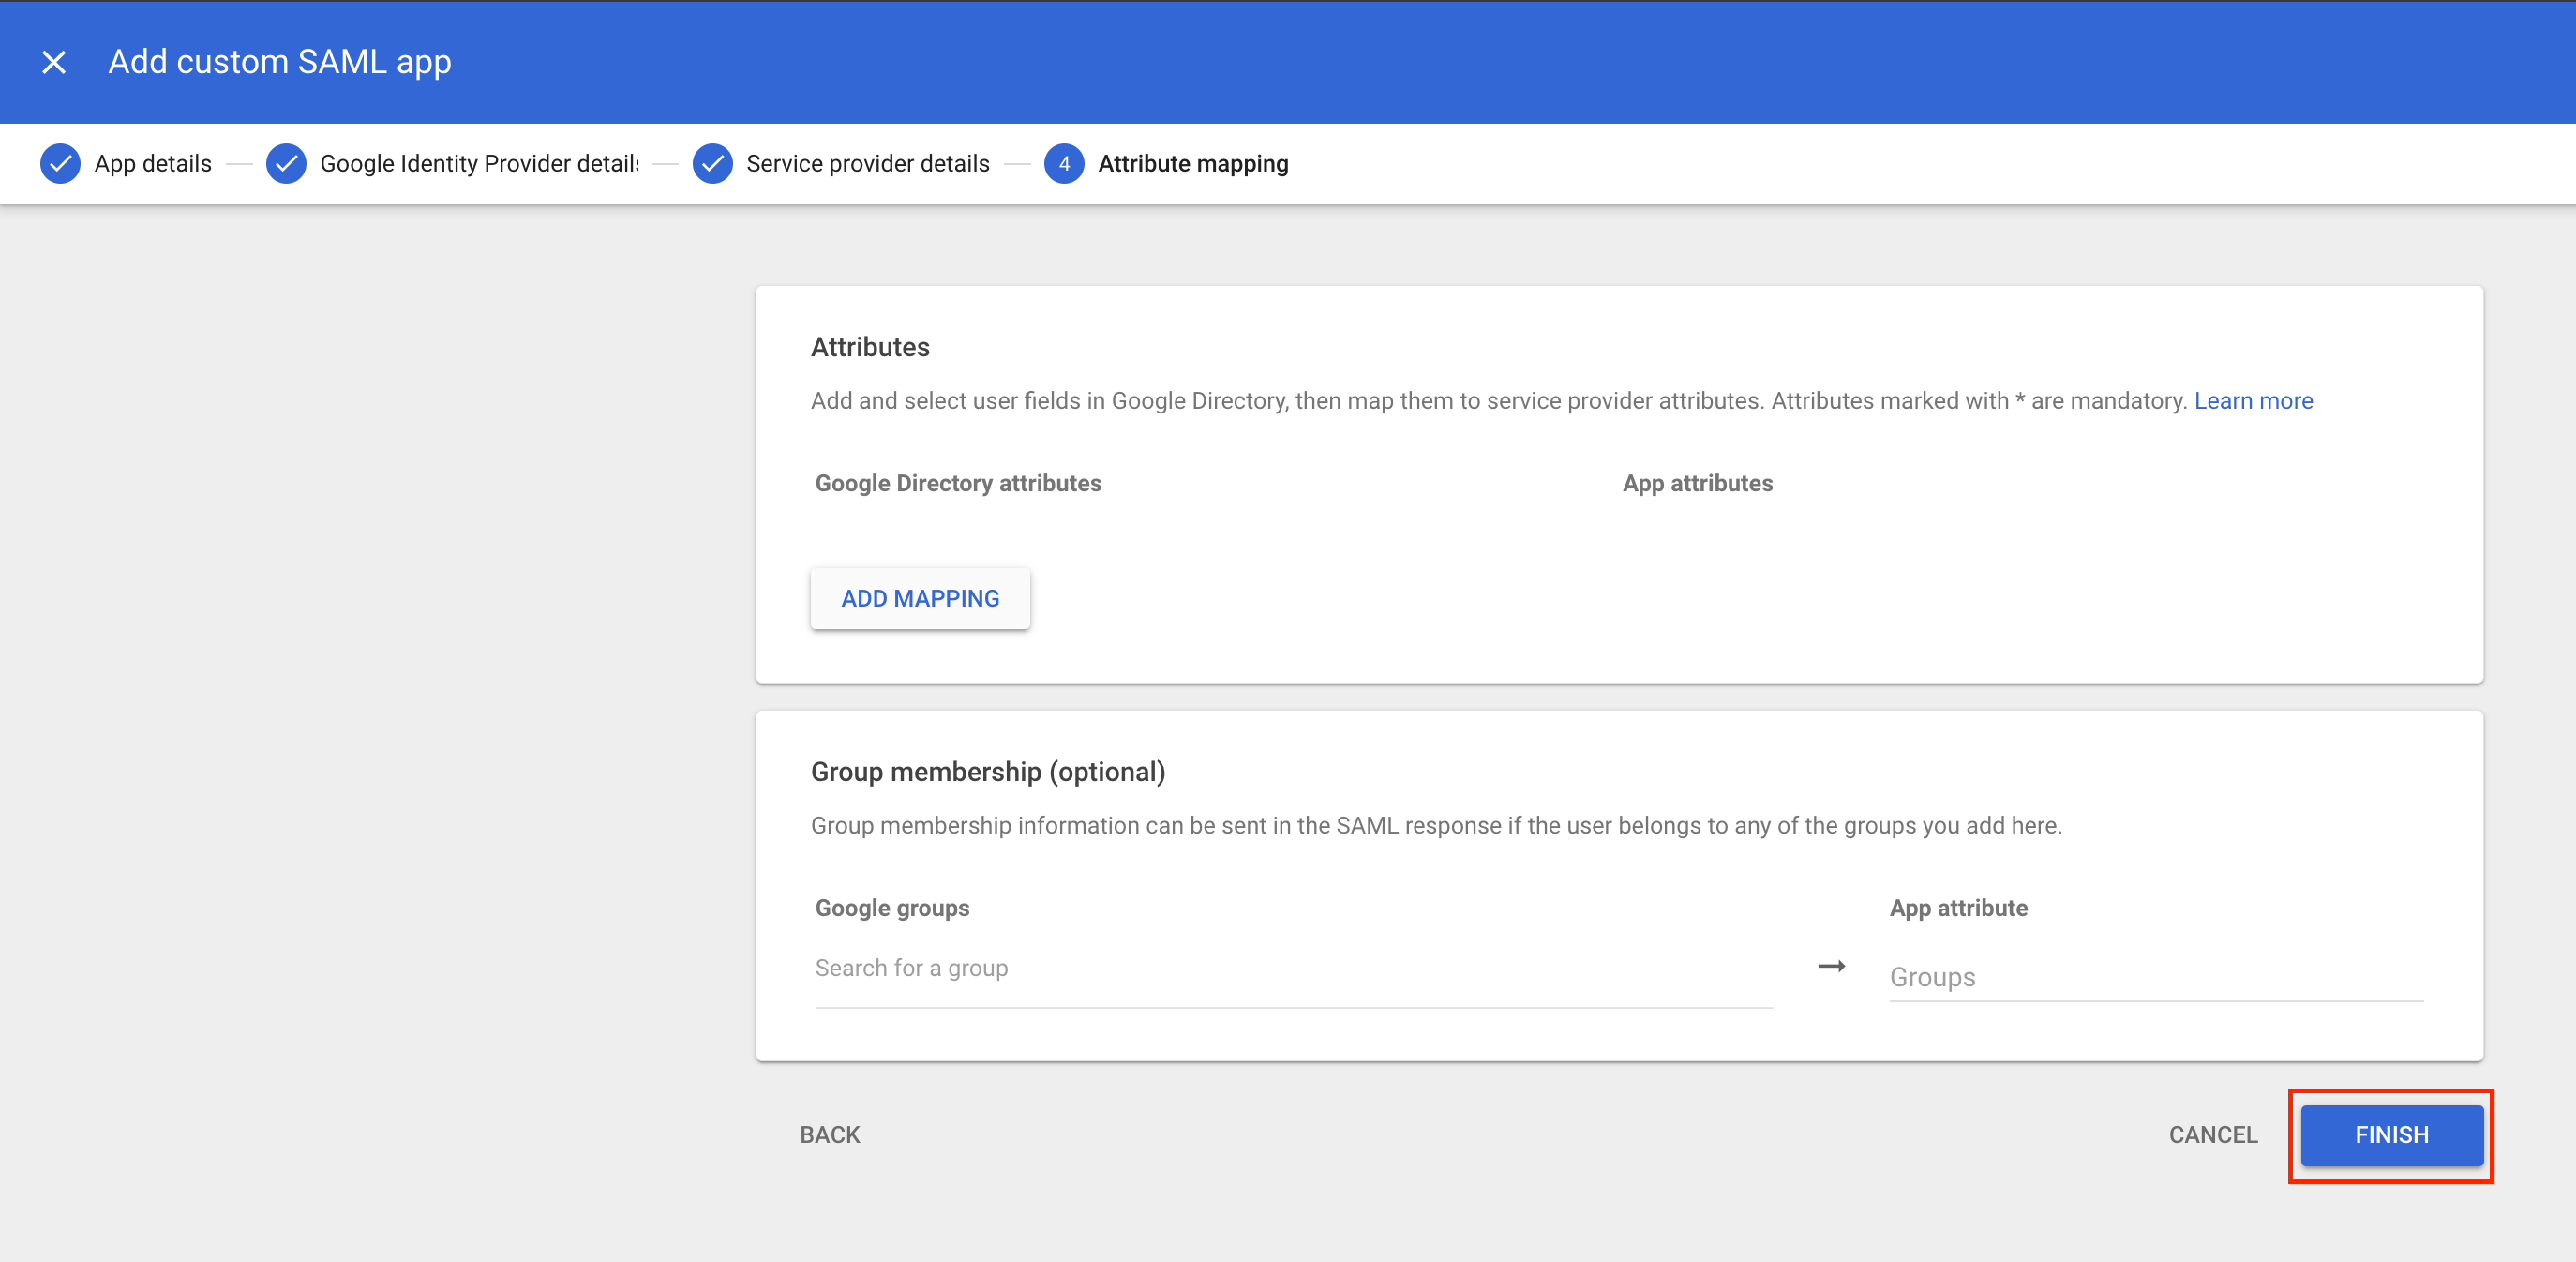
 Click Finish to complete the setup in Google Workspace.
 Configure User Access for the New Application
Next, you need to grant access to the newly created application, as it is not available to all users by default. Navigate to the User access tab.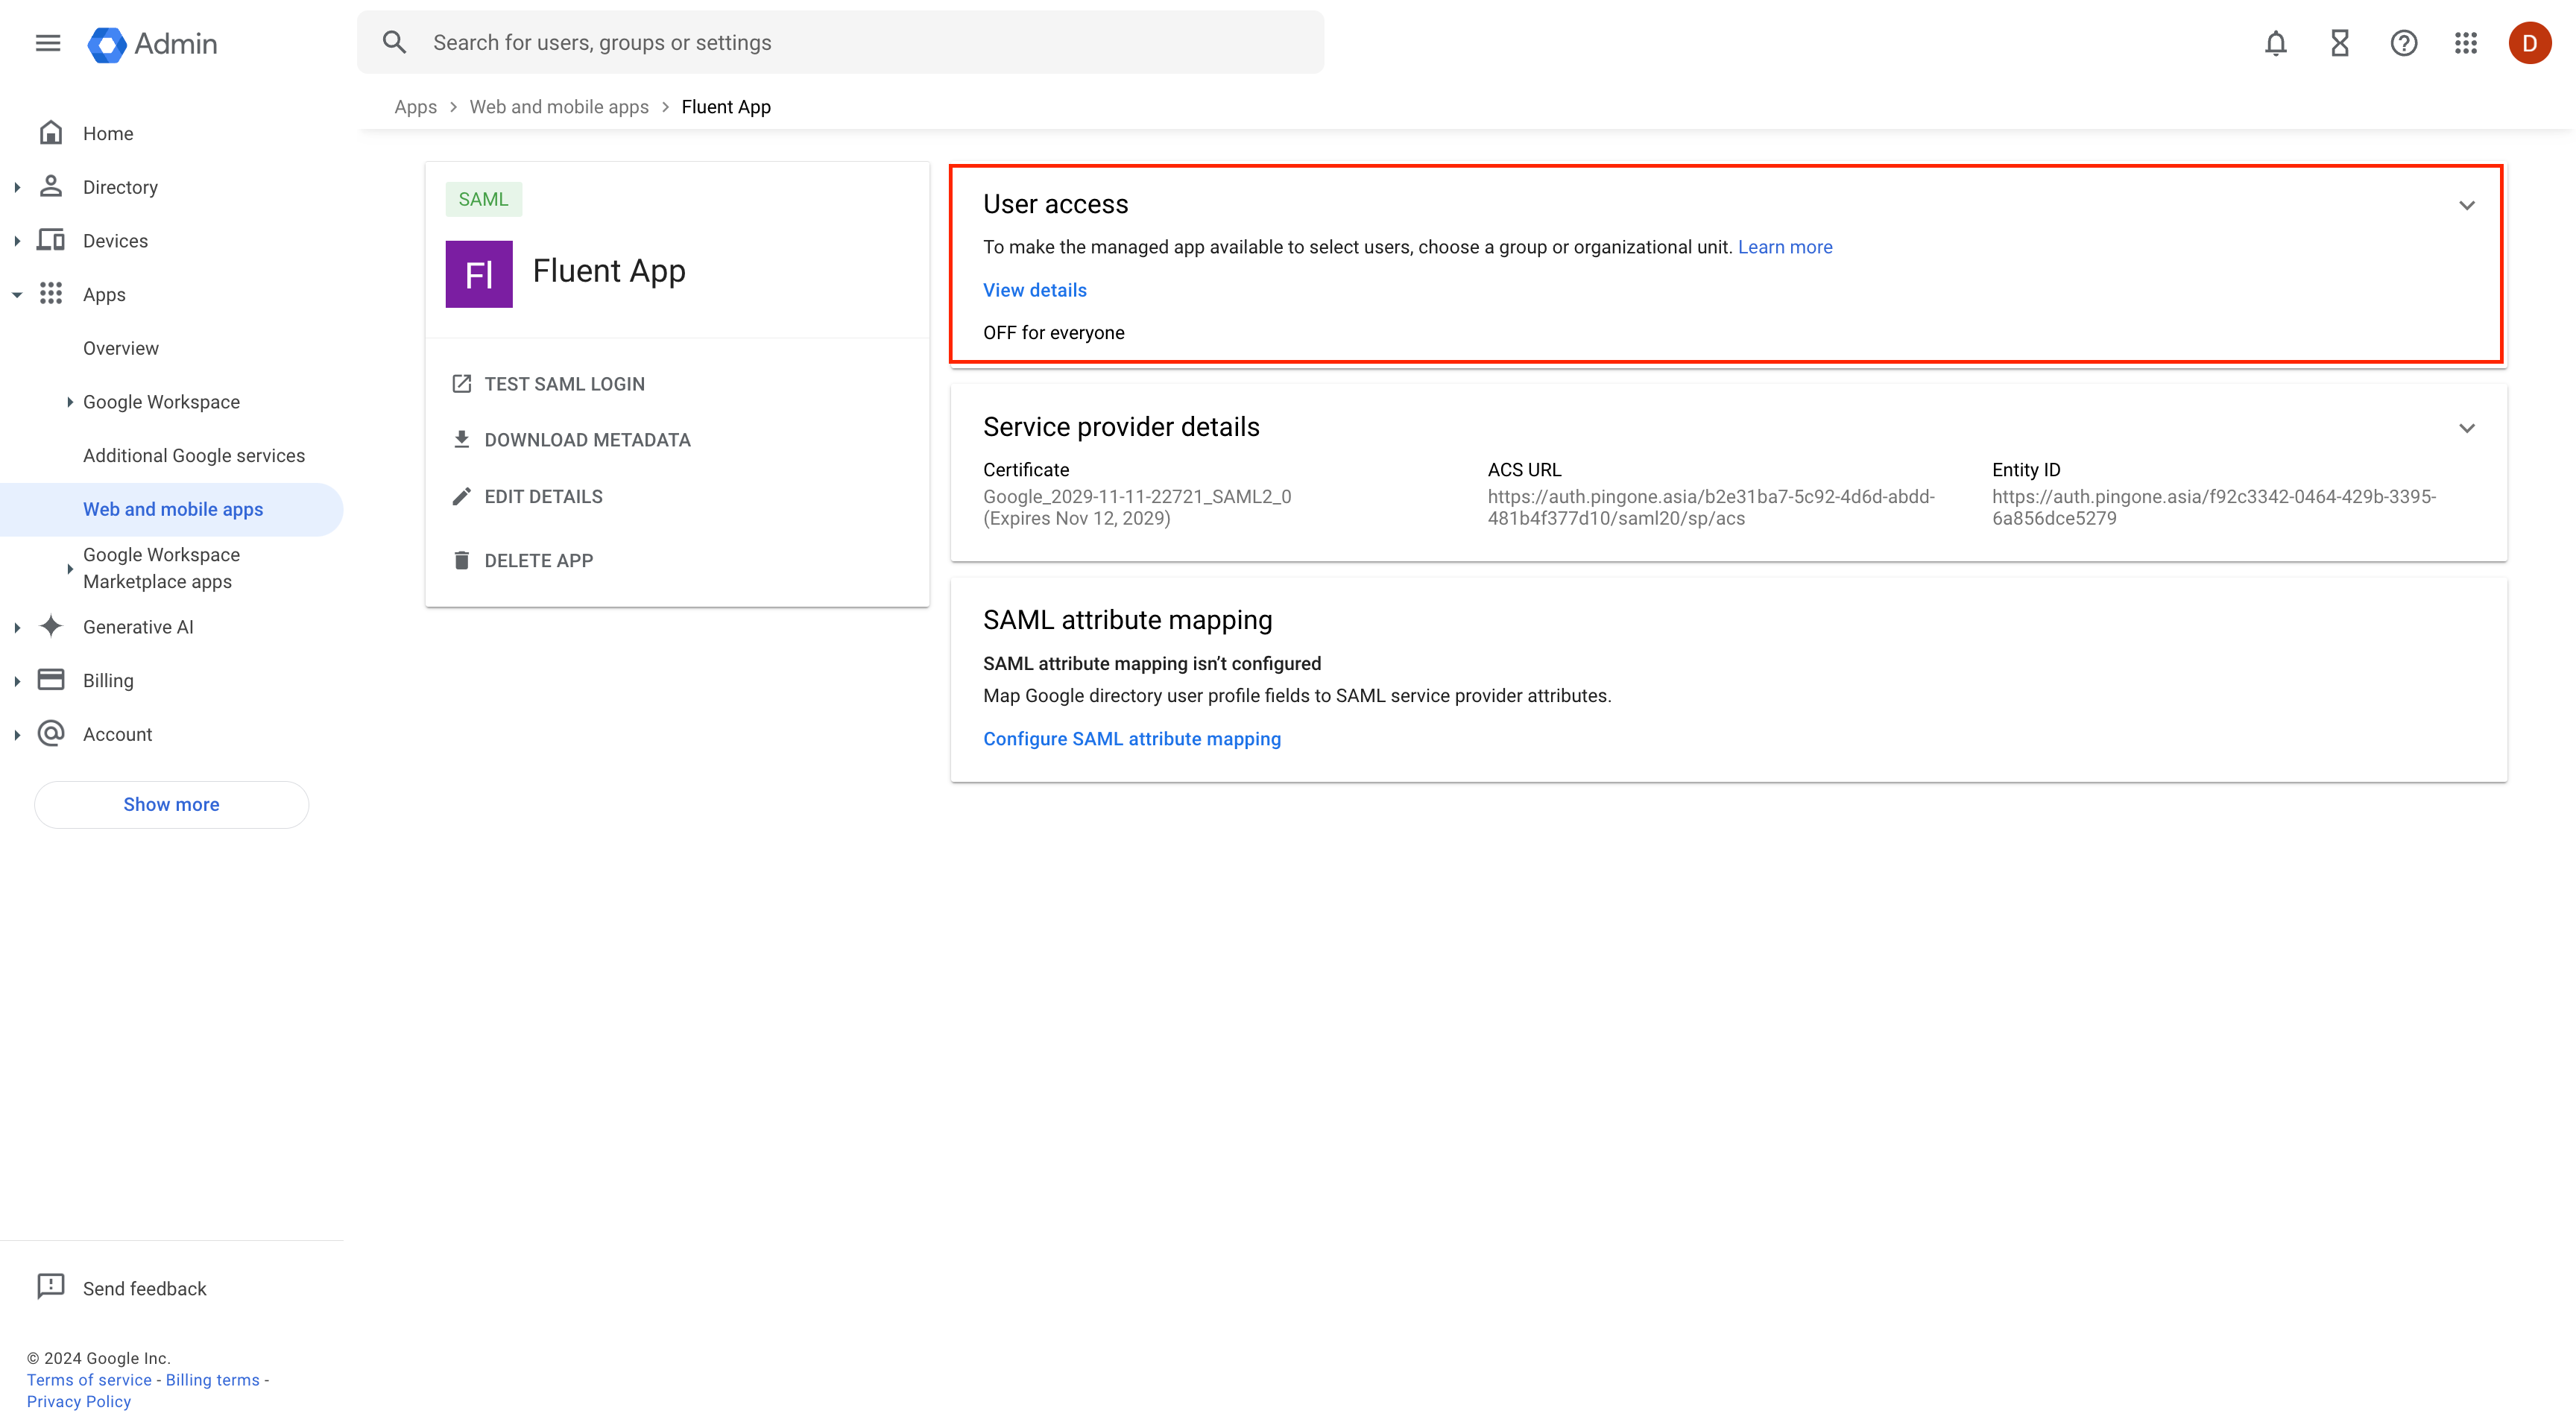 To provide access to all users, select "On" for everyone and click Save.
 If you prefer to grant access to a specific group or organizational unit, locate the group/organizational unit in the left-hand menu, select it, then toggle it to ON and Save.
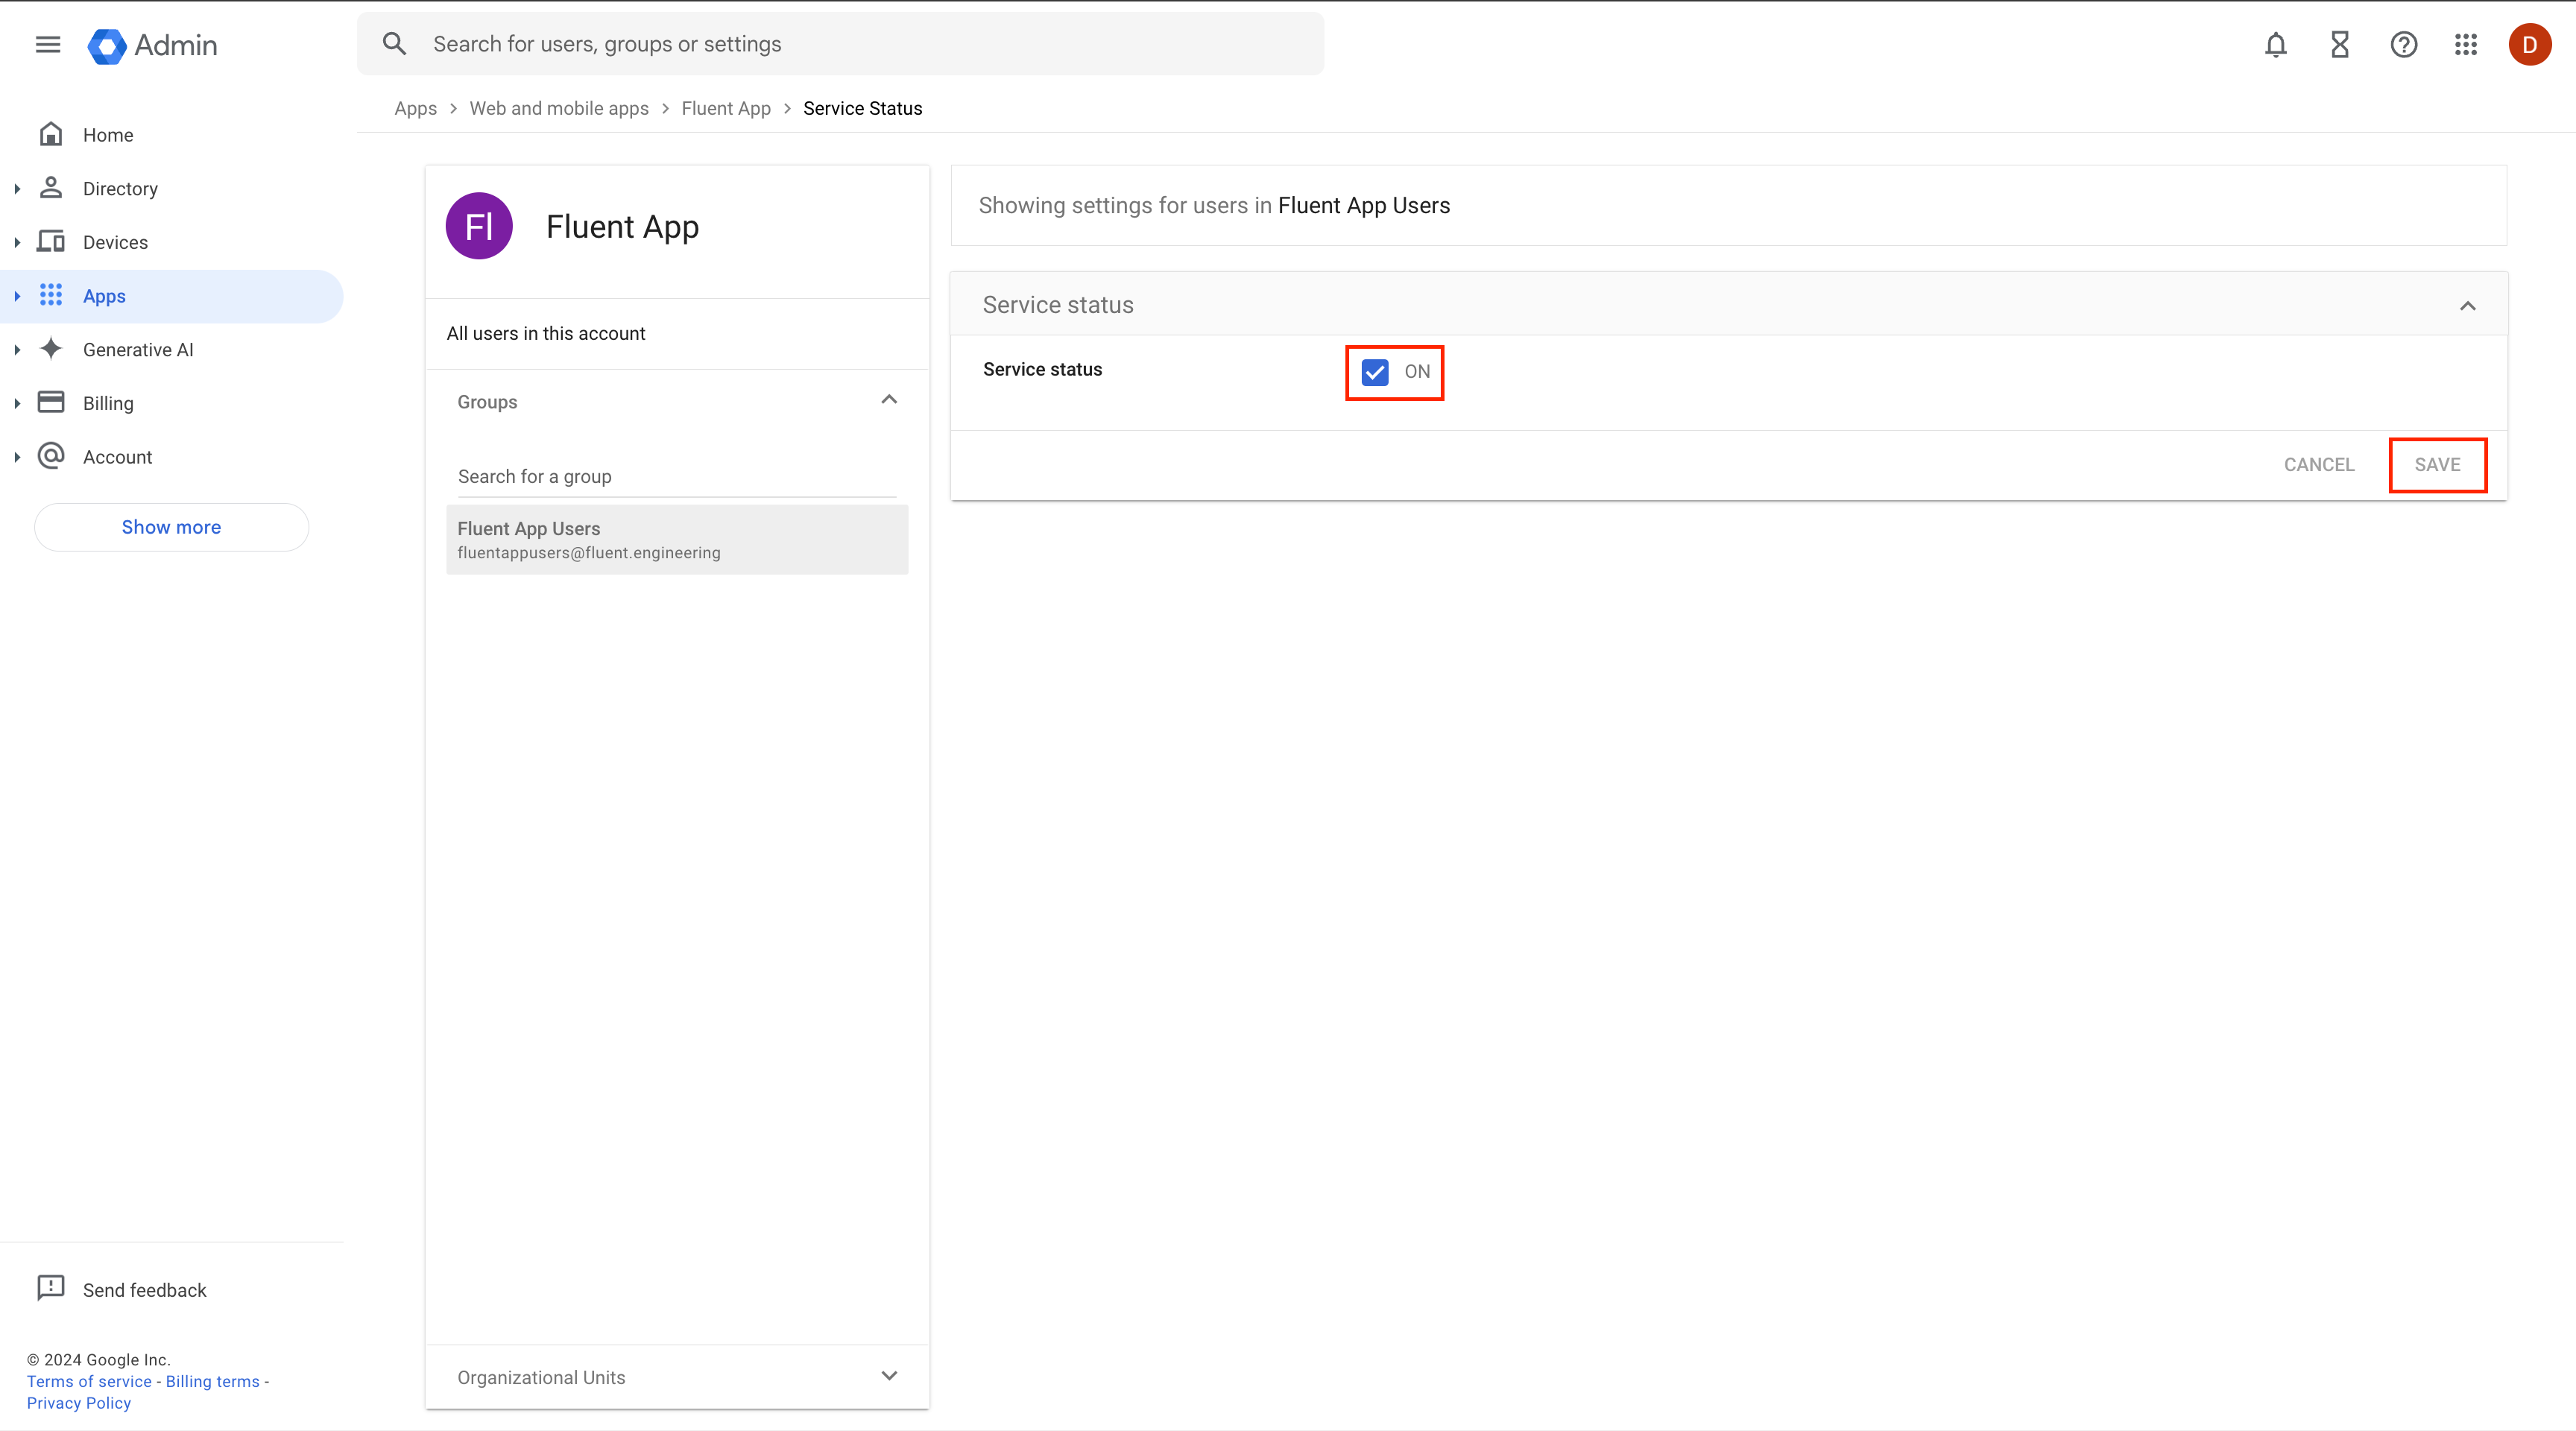
 To provide access to all users, select "On" for everyone and click Save.
 If you prefer to grant access to a specific group or organizational unit, locate the group/organizational unit in the left-hand menu, select it, then toggle it to ON and Save.
Do not Forget
 Enable and Configure Authentication Policy
- Start by enabling the external identity provider in the system.
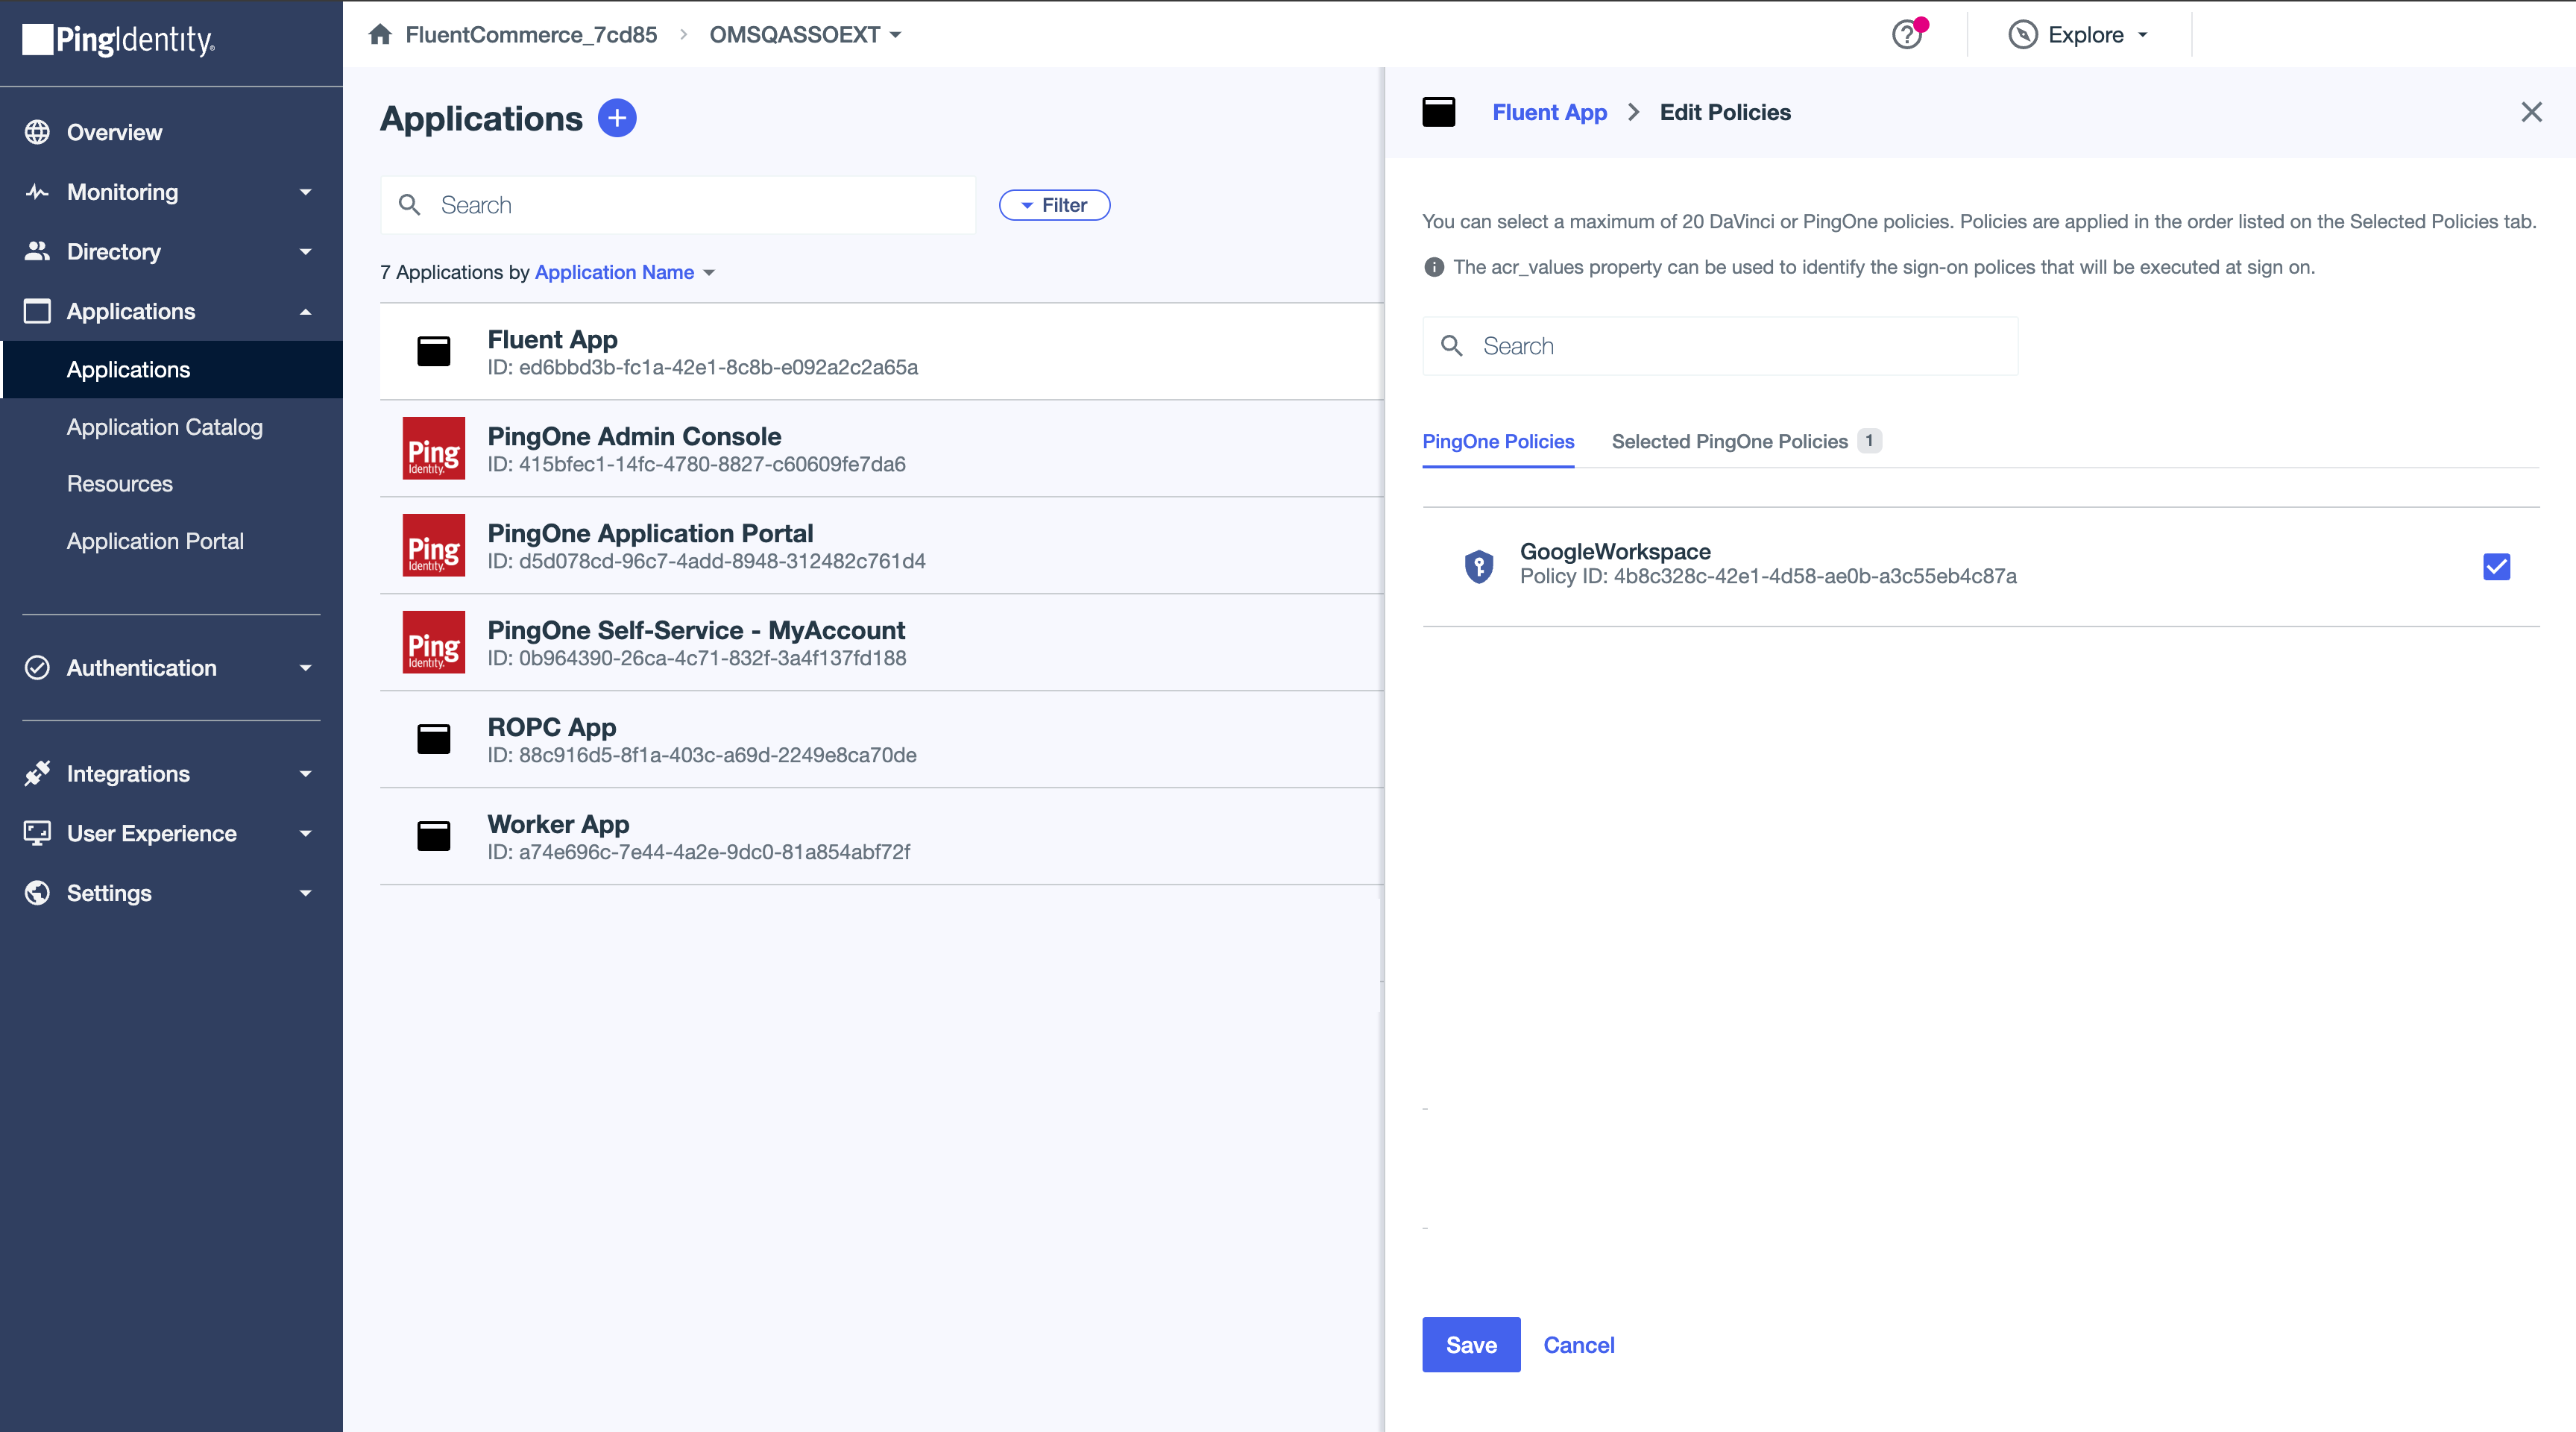
- Create an Authentication Policy and associate the newly configured External Identity Provider with it.
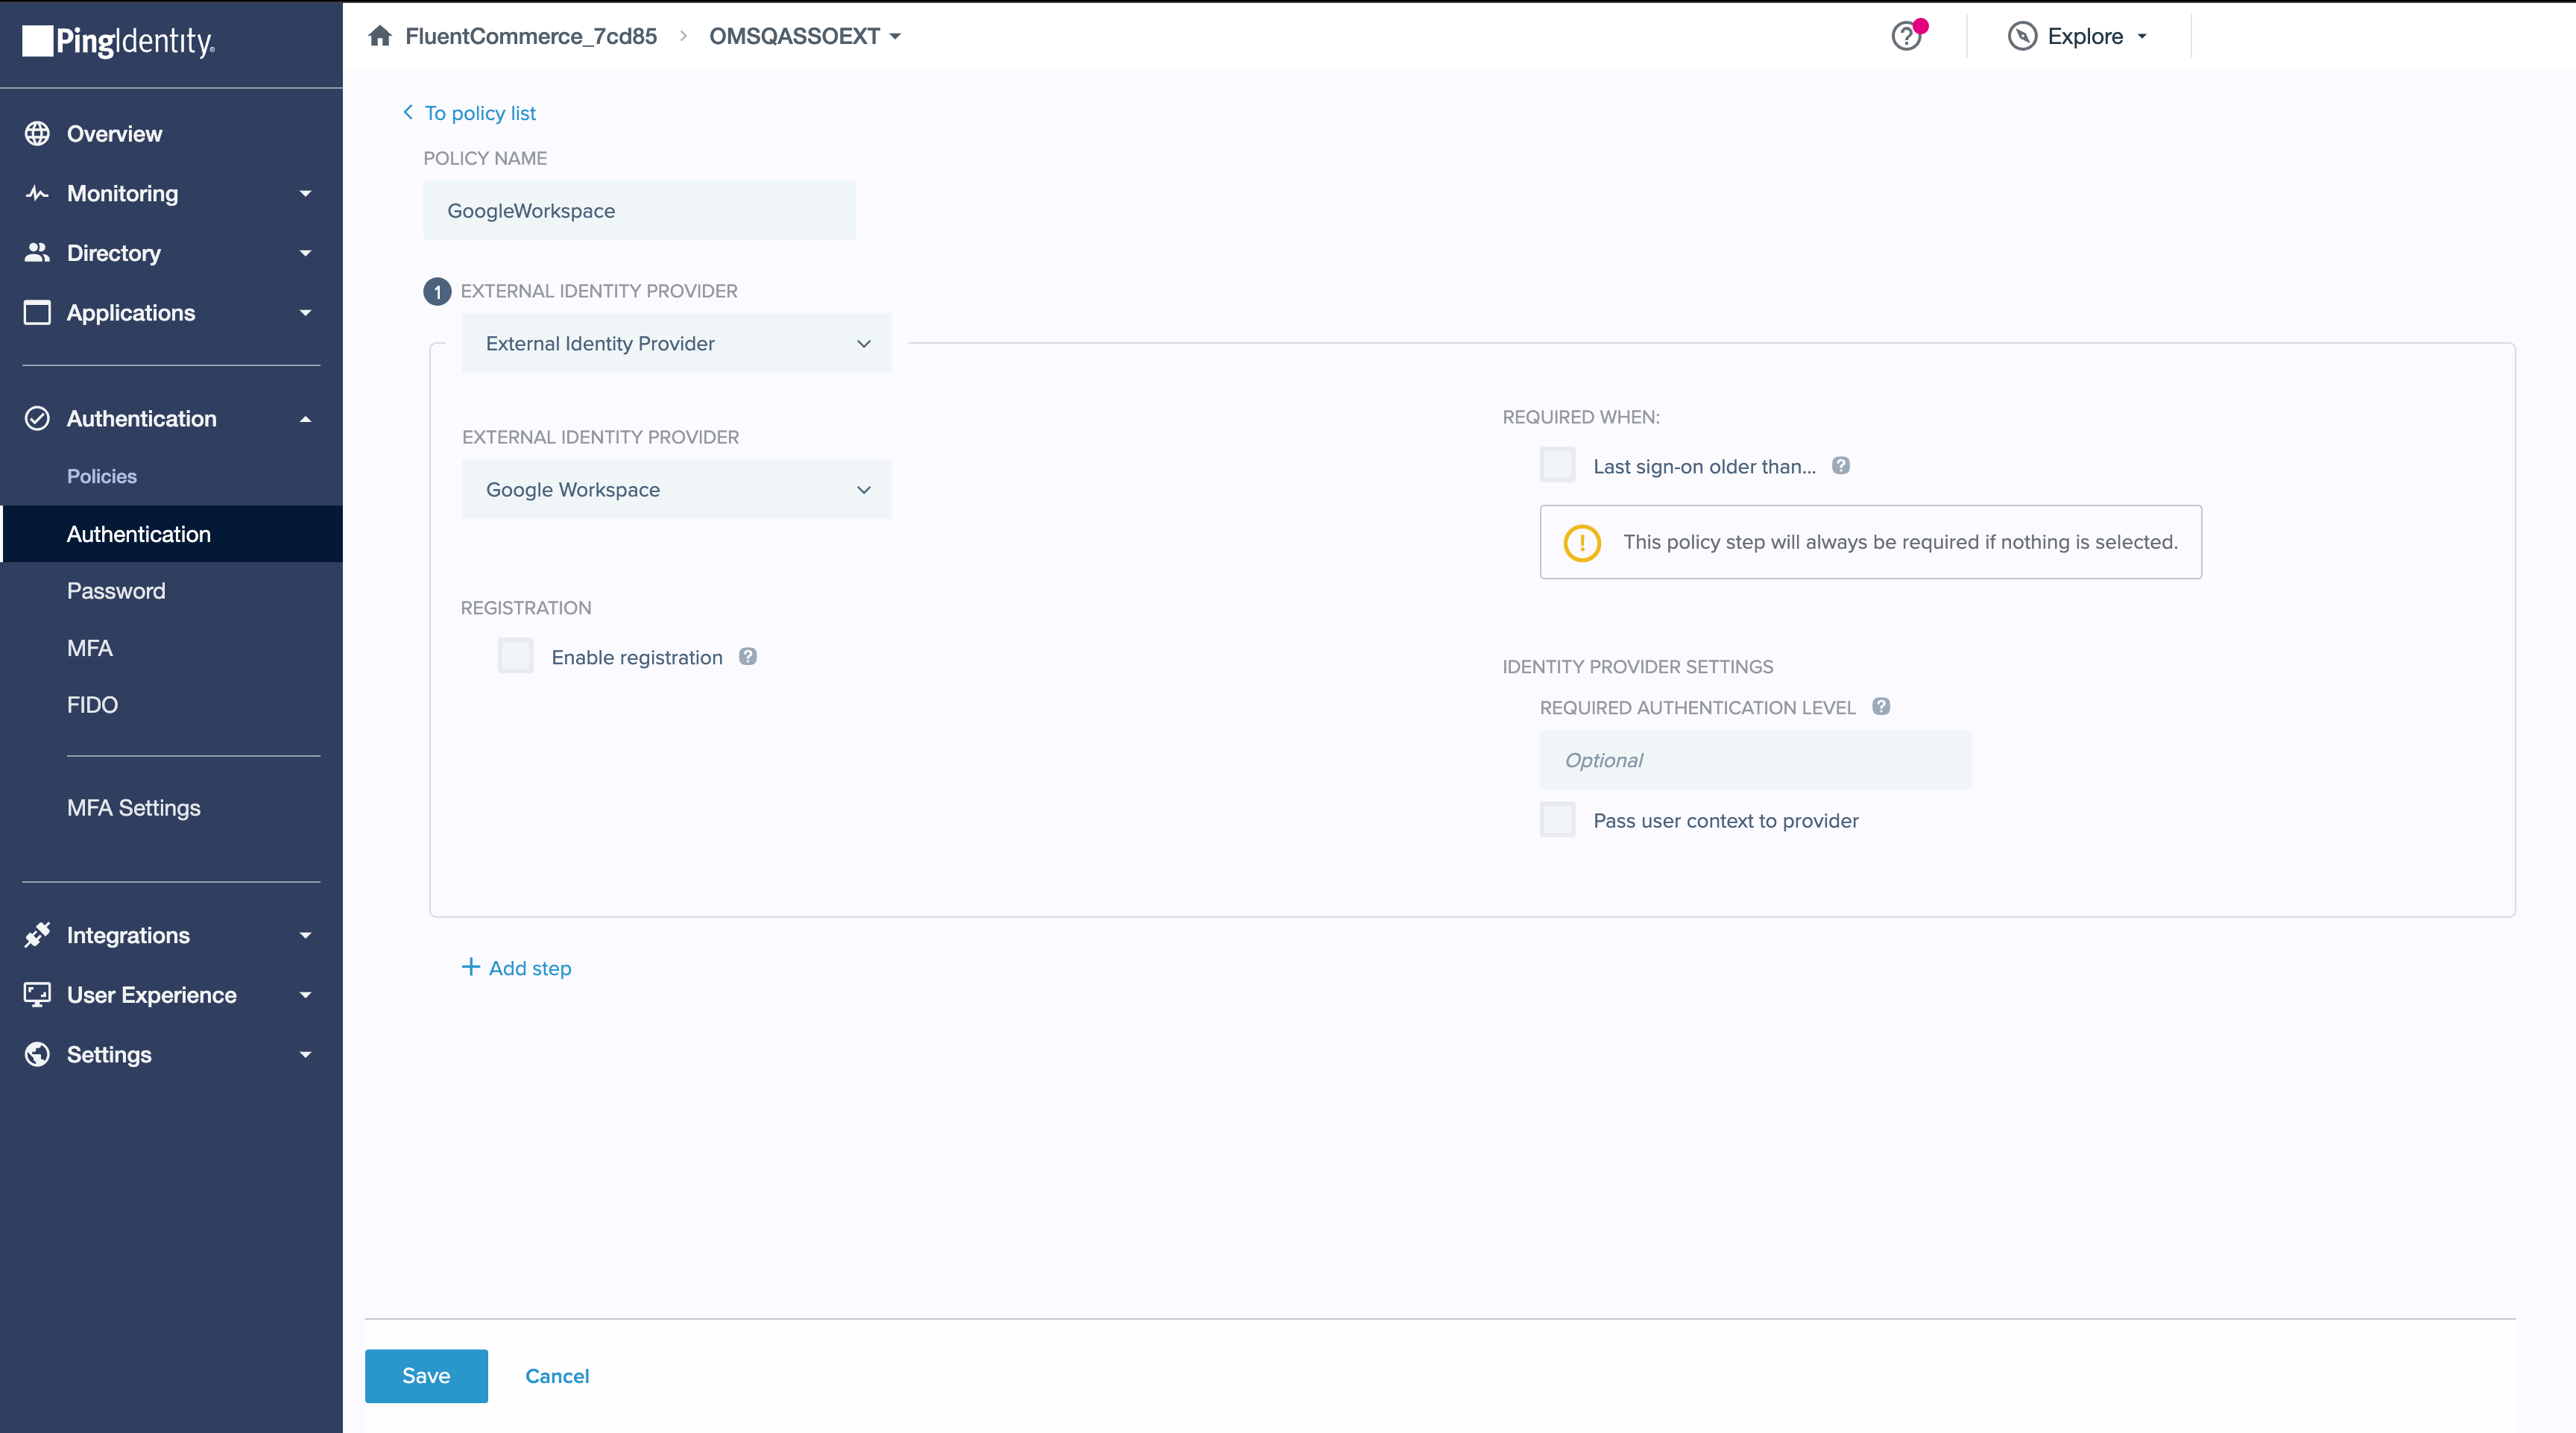
- Apply the policy to your application to finalize the authentication configuration.
