Enable Navbar Badges
How-to Guide
Author:
Fluent Commerce
Changed on:
13 Dec 2023
Key Points
- Overview
- Who is this guide for?
- Steps to enable navigation bar badges with an example
Steps
Steps to enable navigation bar badges with an example
 Step 1
Find the relevant queryName from GraphQL Schema queries.For Example,
`waves` queryName will show data about waves.Step 2: Set the variables
- A property used to access
`waves`query to filter data. For Example:`processingLocation {ref}`is taken to filter data according to the location. - In-progress Waves contain waves with the status pick, pack, and dispatch. Hence, set the
`status`to`PICK`,`PACK`,`DISPATCH`.
Step 3. Set thresholds values (Optional)
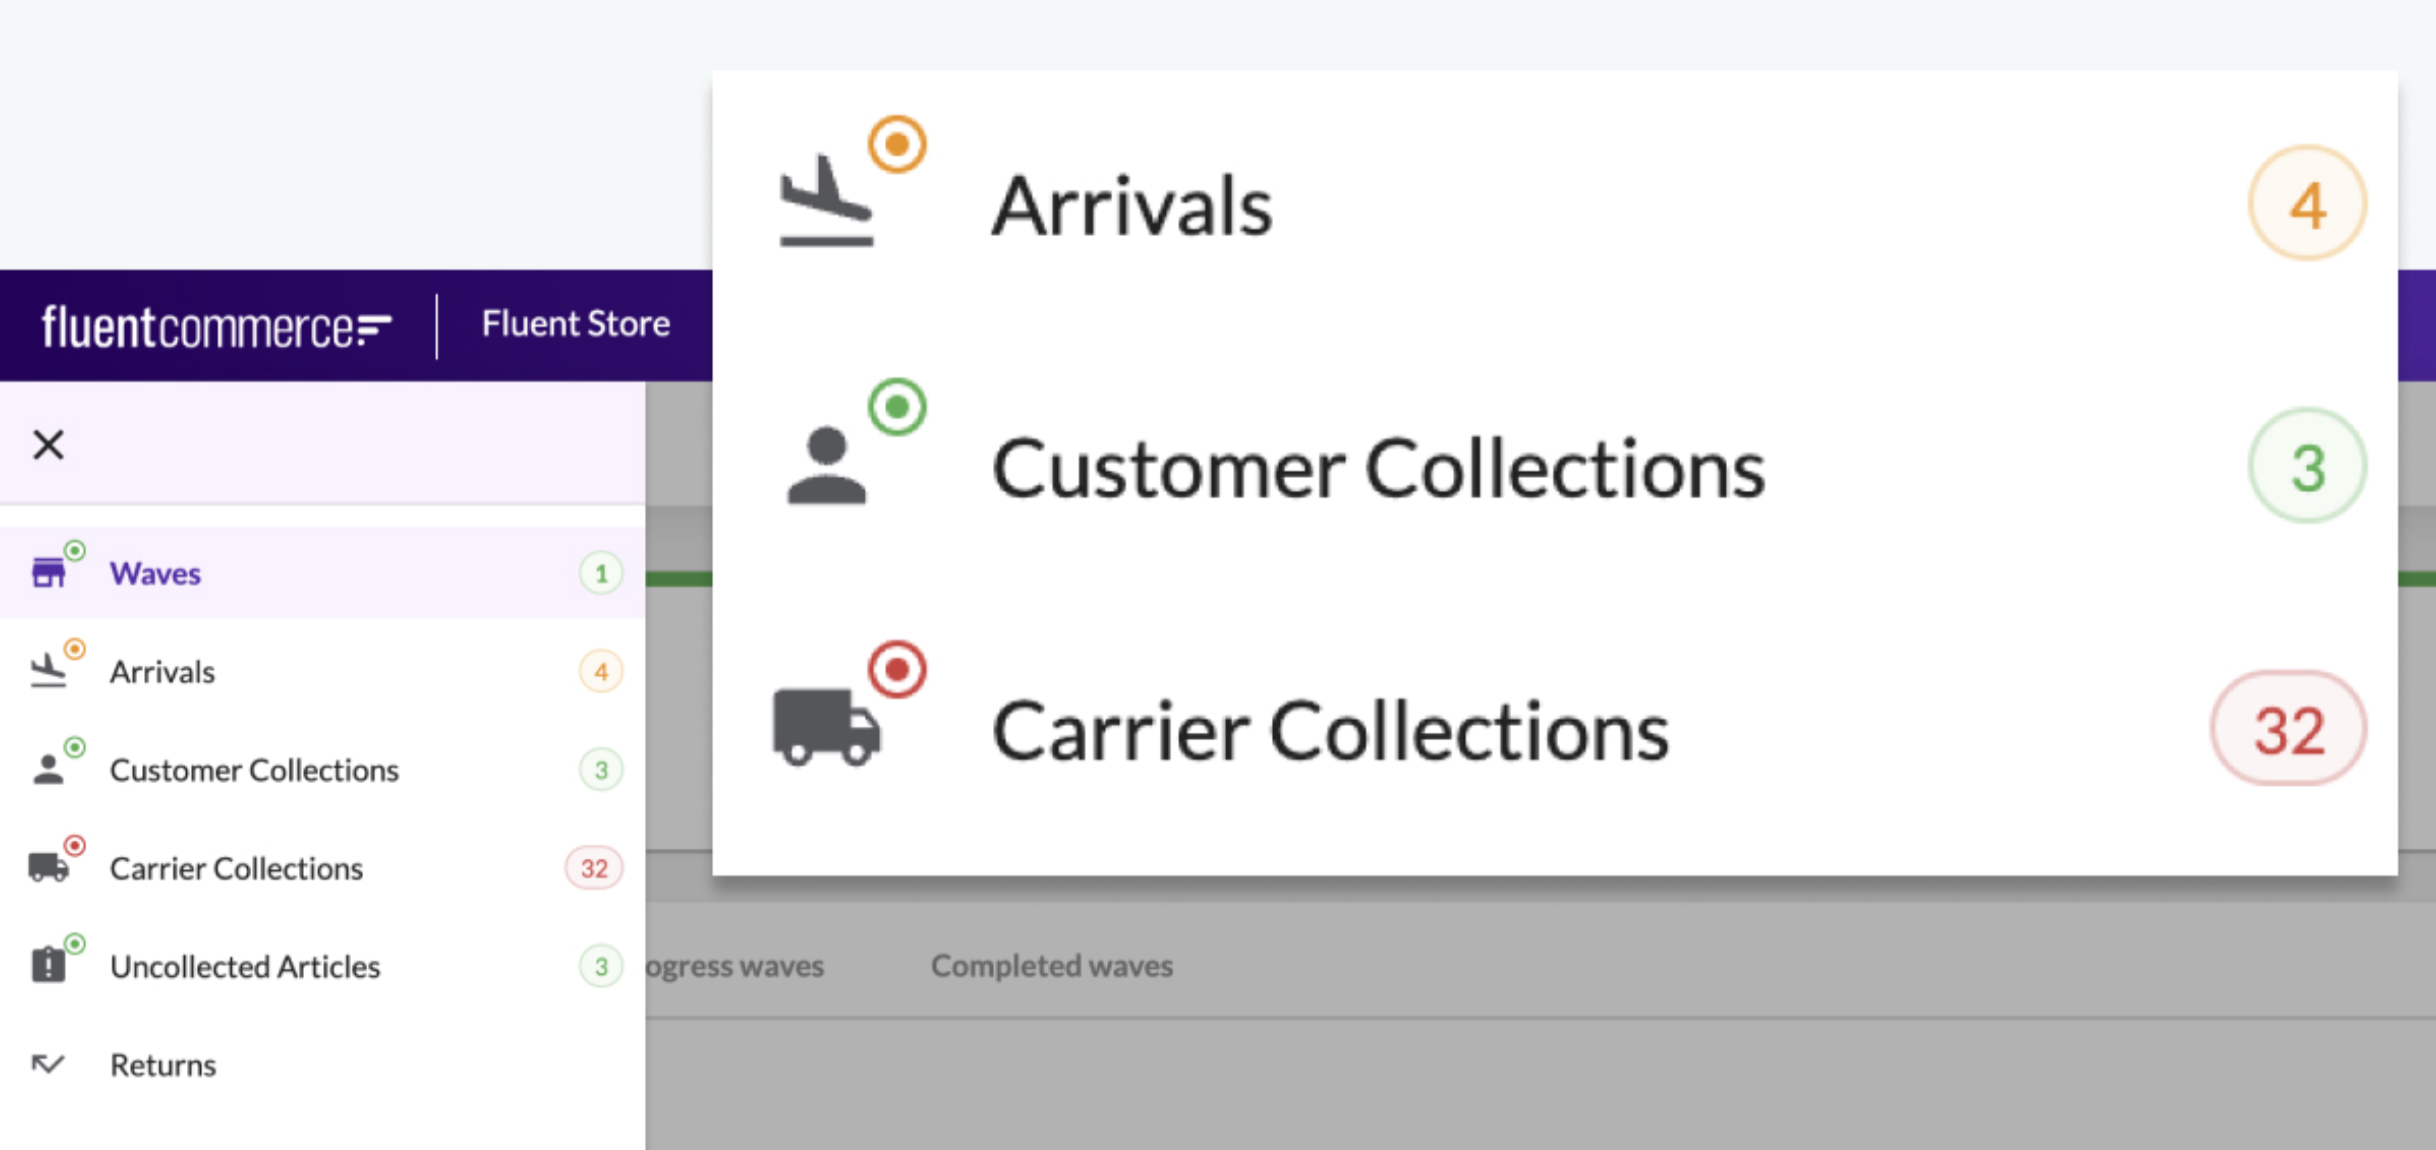
- Set thresholdLow value =
`Any Number`to show a green color badge if the result is less than this threshold. For Example, 3 (If the result is less than 3, the badge will be green color.) - Set thresholdHigh value =
`Any Number`to show a red color badge if the result is more than this threshold. For Example, 5 (If the result is more than 5, the badge will be red color but if the result is between 3 and 5 the badge will be orange.)
Step 4. Put the badge configuration in nav object of the waves page manifest.i.e. fc.mystique.manifest.store.fragment.waves.
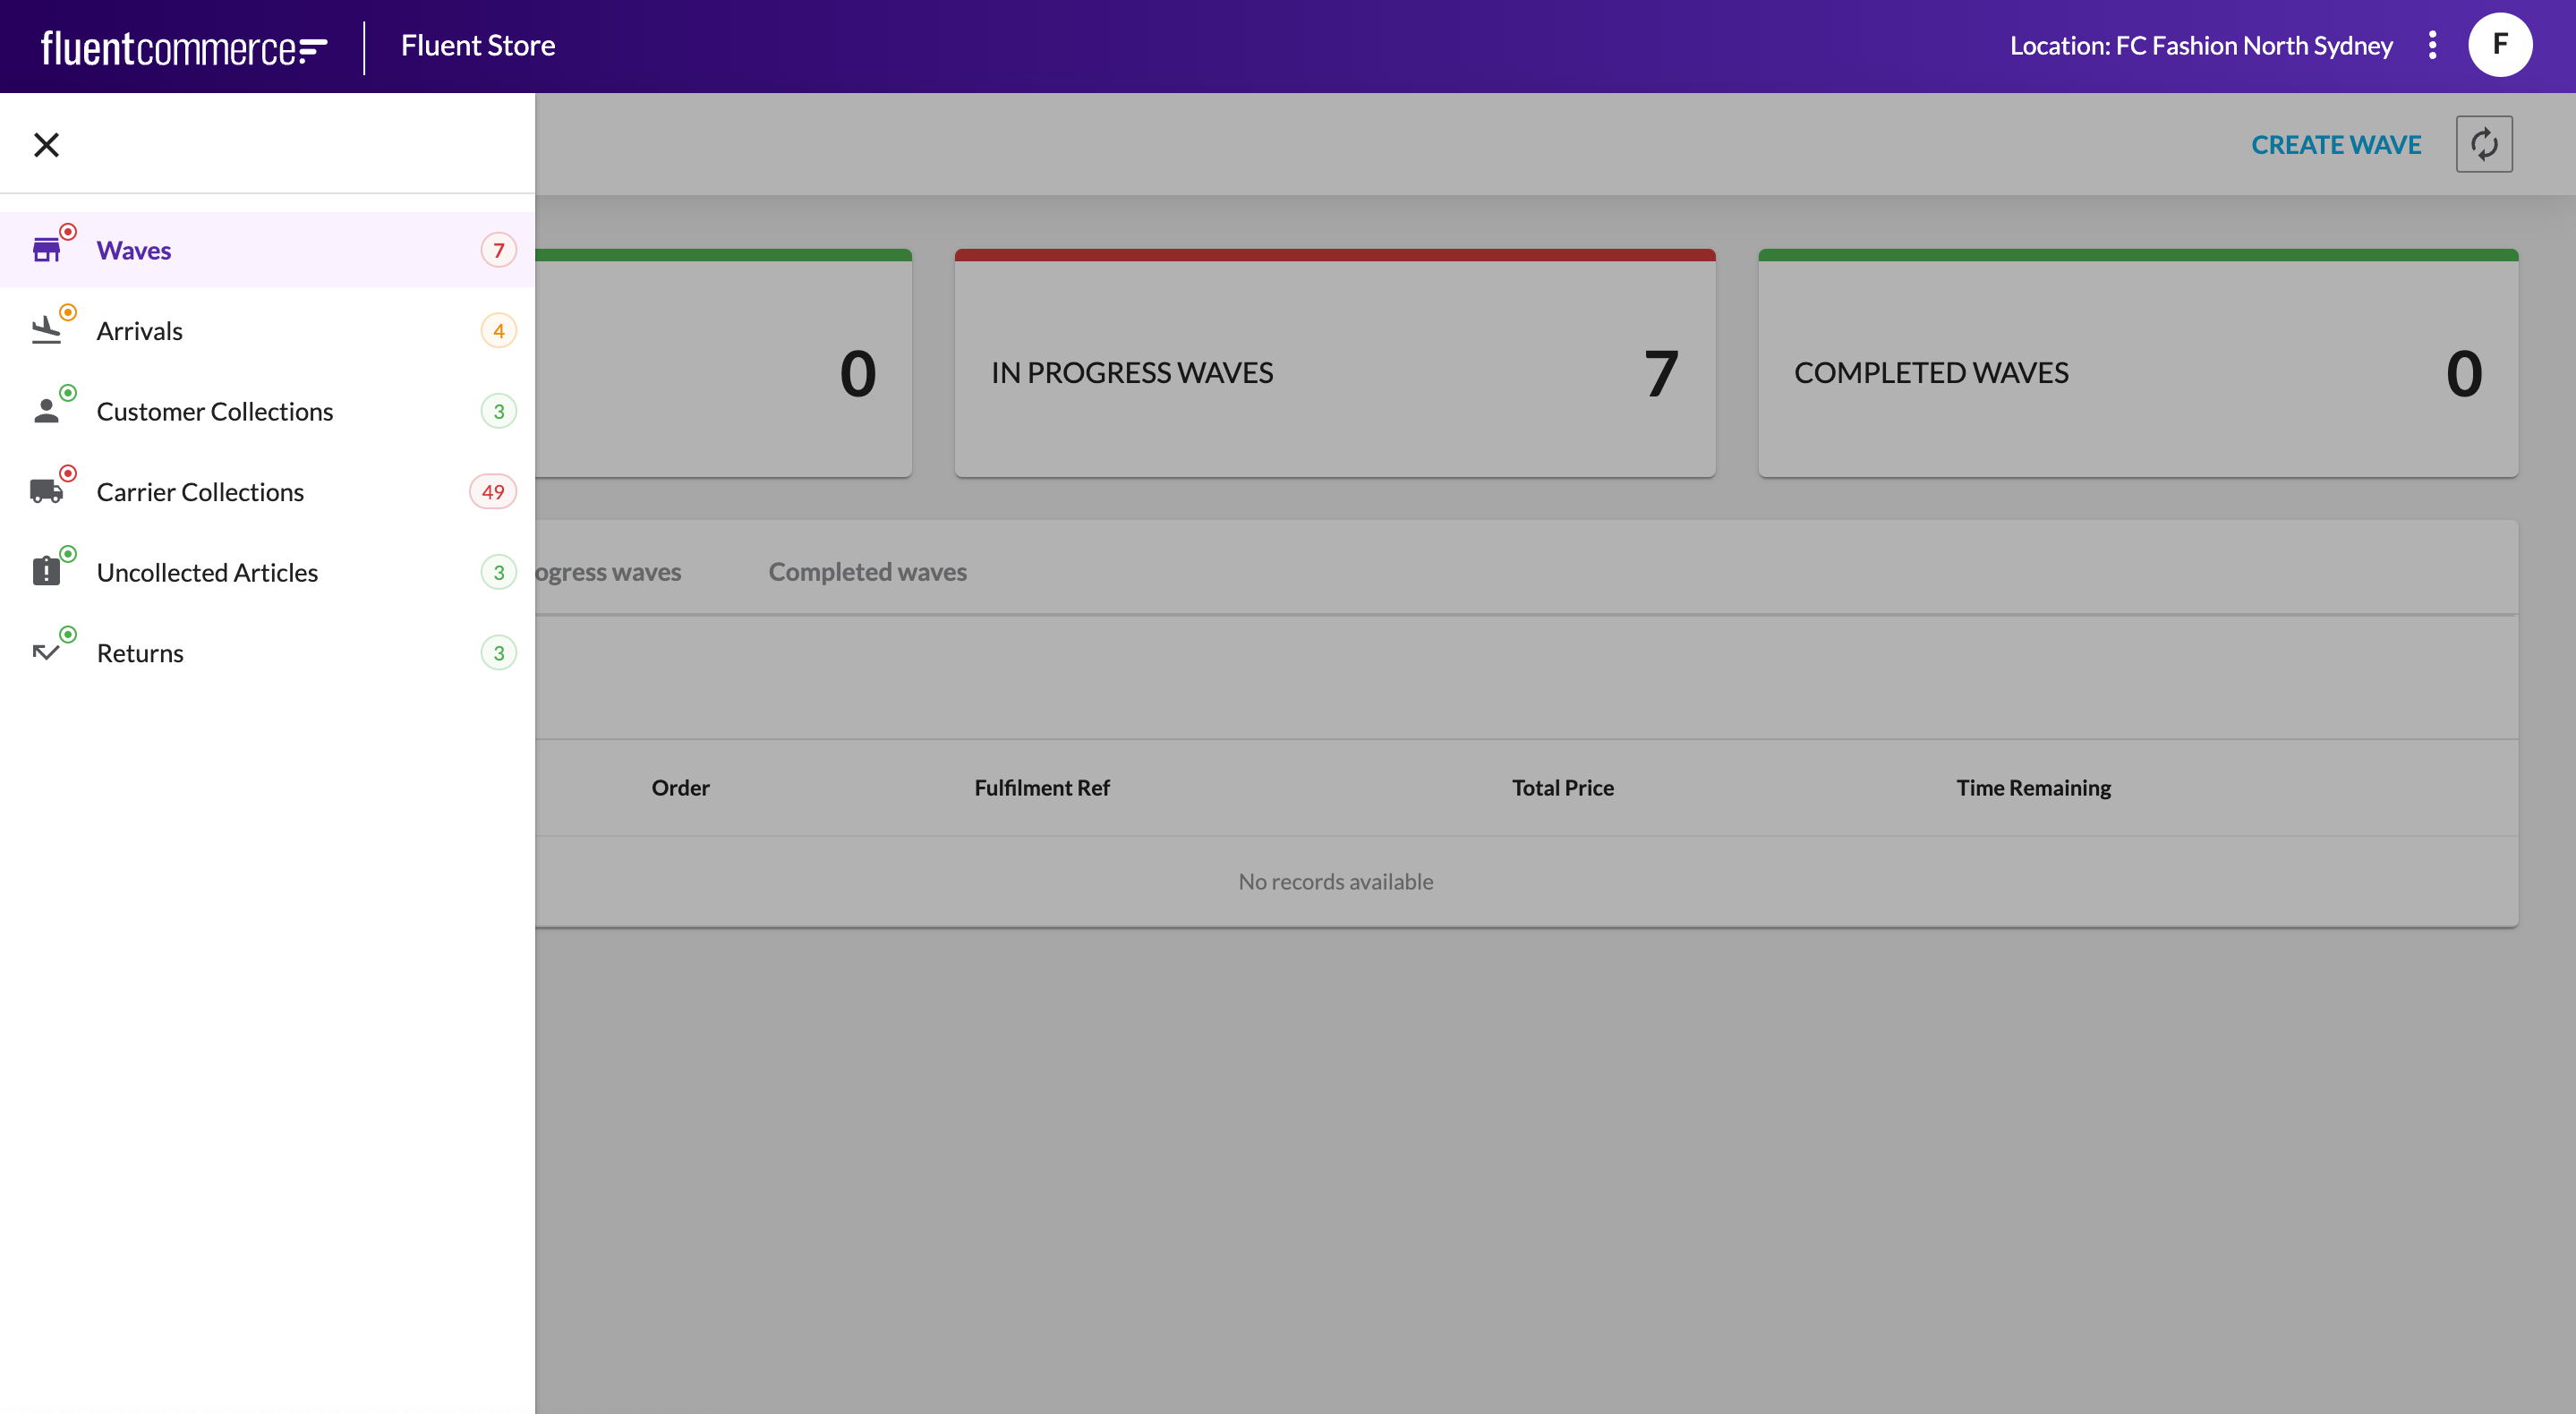
- The image displays '7' results on the In Progress Waves dashboard tile.
- The image displays the result count of 7 from the
`waves`GraphQL query on Waves navigation bar badge. - The count '7' is above thresholdHigh which is why the color of the badge is red.