Convert workflow statuses list to CSV Excel table format
Author:
Randy Chan
Changed on:
10 Dec 2024
Key Points
- A step-by-step guide how to convert workflow statuses list into CSV / Excel table format
Steps
Prerequisites
Applications that requires for this how to guide:
- JSON / Text Editor - for example: VS Code
- Microsoft Excel
Download the Order Reference Module
In this example, we will be using HD reference . So the first step is to download the file here
Prepare a statuses file from HD order workflow file
Unzip the file and go to the folder assets -> workflows. Create a new JSON file:

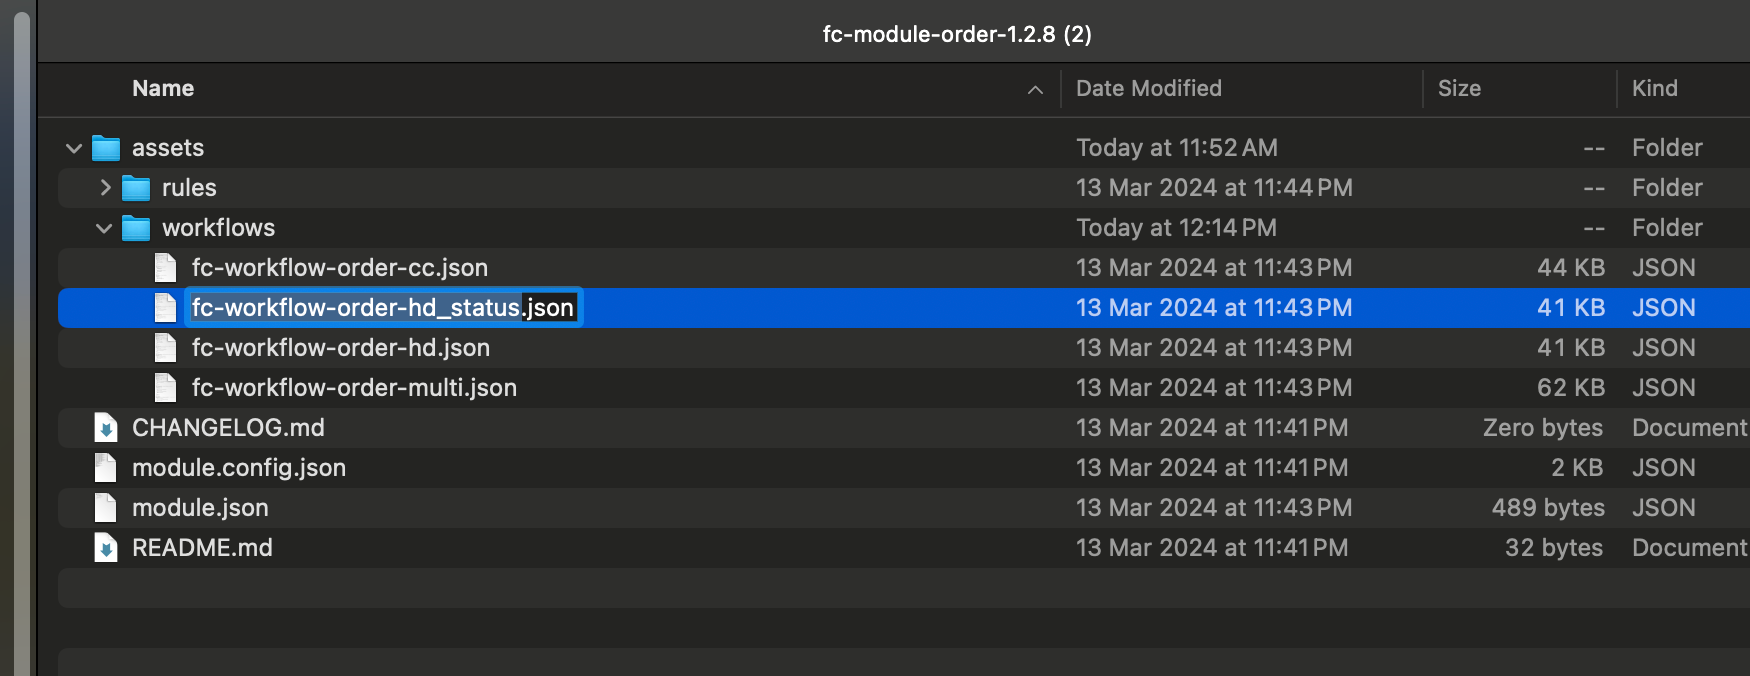
The content of the file should only contain the LOV statuses from HD :
1[
2 {
3 "name": "CREATED",
4 "entityType": "ORDER",
5 "category": "BOOKING"
6 },
7 {
8 "name": "RECEIVED",
9 "entityType": "ORDER",
10 "category": "BOOKING"
11 },
12 {
13 "name": "BOOKED",
14 "entityType": "ORDER",
15 "category": "BOOKING"
16 },
17 {
18 "name": "PICK_PACK",
19 "entityType": "ORDER",
20 "category": "FULFILMENT"
21 },
22 {
23 "name": "AWAITING_COURIER_COLLECTION",
24 "entityType": "ORDER",
25 "category": "DELIVERY"
26 },
27 {
28 "name": "COMPLETE",
29 "entityType": "ORDER",
30 "category": "DONE"
31 },
32 {
33 "name": "CANCELLED",
34 "entityType": "ORDER",
35 "category": "DONE"
36 },
37 {
38 "name": "ESCALATED",
39 "entityType": "ORDER",
40 "category": "DONE"
41 },
42 {
43 "name": "CREATED",
44 "entityType": "FULFILMENT",
45 "category": "BOOKING"
46 },
47 {
48 "name": "PROCESSING",
49 "entityType": "FULFILMENT",
50 "category": "BOOKING"
51 },
52 {
53 "name": "AWAITING_WAVE",
54 "entityType": "FULFILMENT",
55 "category": "BOOKING"
56 },
57 {
58 "name": "ASSIGNED",
59 "entityType": "FULFILMENT",
60 "category": "FULFILMENT"
61 },
62 {
63 "name": "FULFILLED",
64 "entityType": "FULFILMENT",
65 "category": "FULFILMENT"
66 },
67 {
68 "name": "PARTIALLY_FULFILLED",
69 "entityType": "FULFILMENT",
70 "category": "FULFILMENT"
71 },
72 {
73 "name": "REJECTED",
74 "entityType": "FULFILMENT",
75 "category": "FULFILMENT"
76 },
77 {
78 "name": "AWAITING_COURIER_COLLECTION",
79 "entityType": "FULFILMENT",
80 "category": "DELIVERY"
81 },
82 {
83 "name": "ESCALATED",
84 "entityType": "FULFILMENT",
85 "category": "DONE"
86 },
87 {
88 "name": "EXPIRED",
89 "entityType": "FULFILMENT",
90 "category": "DONE"
91 },
92 {
93 "name": "CANCELLED",
94 "entityType": "FULFILMENT",
95 "category": "DONE"
96 },
97 {
98 "name": "COMPLETE",
99 "entityType": "FULFILMENT",
100 "category": "DONE"
101 },
102 {
103 "name": "CREATED",
104 "entityType": "ARTICLE",
105 "category": "DELIVERY"
106 },
107 {
108 "name": "PENDING_CONSIGNMENT",
109 "entityType": "ARTICLE",
110 "category": "DELIVERY"
111 },
112 {
113 "name": "COURIER_COLLECTION",
114 "entityType": "ARTICLE",
115 "category": "DELIVERY"
116 },
117 {
118 "name": "COLLECTED",
119 "entityType": "ARTICLE",
120 "category": "DONE"
121 },
122 {
123 "name": "CANCELLED",
124 "entityType": "ARTICLE",
125 "category": "DONE"
126 },
127 {
128 "name": "CREATED",
129 "entityType": "CONSIGNMENT",
130 "category": "DELIVERY"
131 },
132 {
133 "name": "PROCESSING",
134 "entityType": "CONSIGNMENT",
135 "category": "DELIVERY"
136 },
137 {
138 "name": "ACTIVE_LODGED",
139 "entityType": "CONSIGNMENT",
140 "category": "DONE"
141 },
142 {
143 "name": "PICK_PACK",
144 "entityType": "FULFILMENT",
145 "category": "FULFILMENT"
146 }
147]
148
Convert the JSON file to Excel table format
This video will demonstrate how to convert a JSON list into an Excel table format.
Convert workflow statuses list to CSV/Excel table format
Convert statuses list to CSV/Excel table format
Here are the keynotes:
- Open Excel
- Go to the "Data" menu
- Click on the "Get Data (Power Query) icon on the top left-hand corner -> Get Data (Power Query) popup is displayed
- In the popup, click on the JSON icon
- Click on the "Browse" button -> choose the status JSON file that was prepared earlier, and then click on the "Get Data" button.
- Click on the "Next" button -> the Power Query Editor is displayed with the list of data.
- Mouseover on the header "List" and right mouse click -> select "Convert to table"
- After the list is updated, then click on the icon on the header to open the filter, click on the OK button
- The list should be displayed in three columns: name, entityType, and category.
- Click the "Close and Load" icon in the top left-hand corner.
- The statuses list is successfully converted into a table form.