In this module, you will learn about a Plugin Project structure and JS GraphQL within the Plugin Project. You will also learn how to modify and run a JS GraphQL query.
Key points
Installed SDK
GQL Basics
Plugin Project Folder Structure
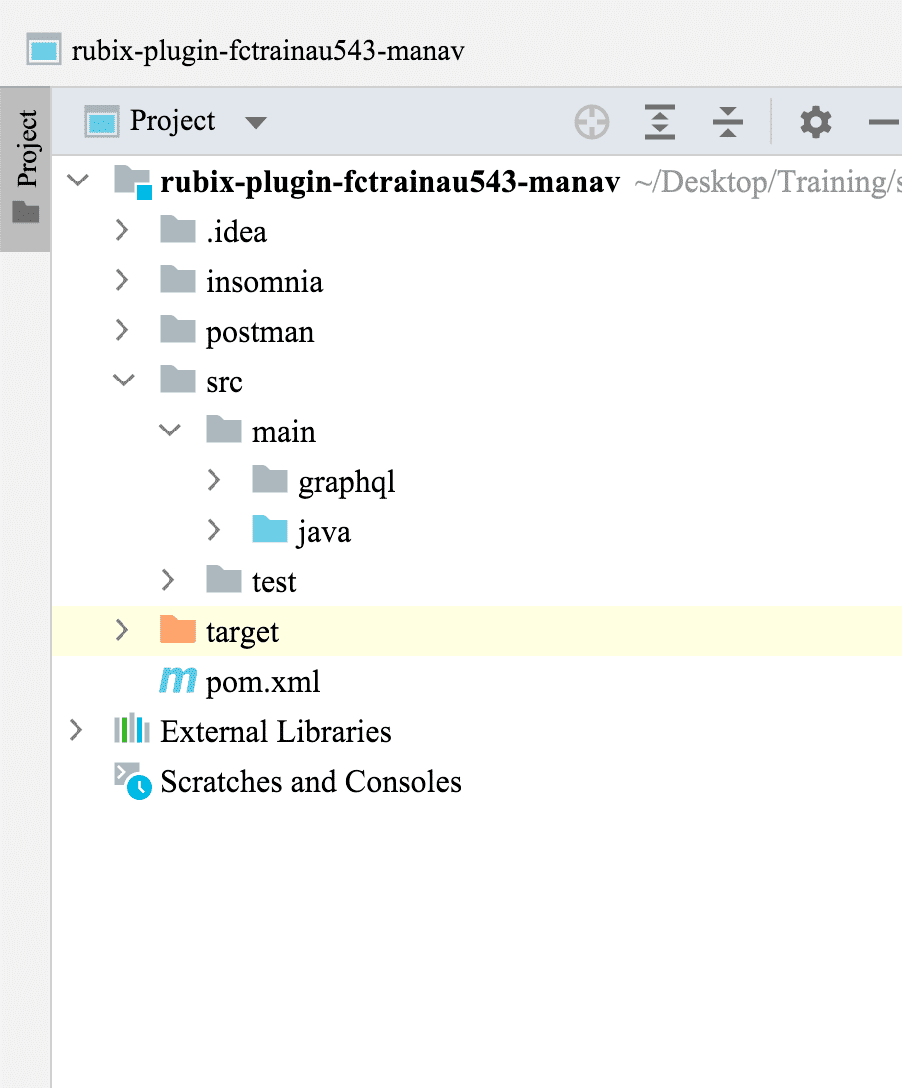
💡 Let's take a look at the project folder structure of the created plugin.
insomnia - This folder contains all the required API Requests and workflows to set up a new retailer with sample data and workflows for each of the Fluent Apps.
postman - The postman folder contains the current API Collection for setting up a retailer, and installing and running the sample plugin rules.
src - This folder will contain all the java source code. You will write your custom Rules in this folder.
graphql - This folder will contain all the queries and mutation . Java class are auto generated for each query and mutation.
java - You will write the JUnit / unit test cases/classes in this folder.
pom.xml - It is an XML file that contains information about the project and configuration details used by Maven to build the project. It contains default values for most projects.
GraphQL within IntelliJ
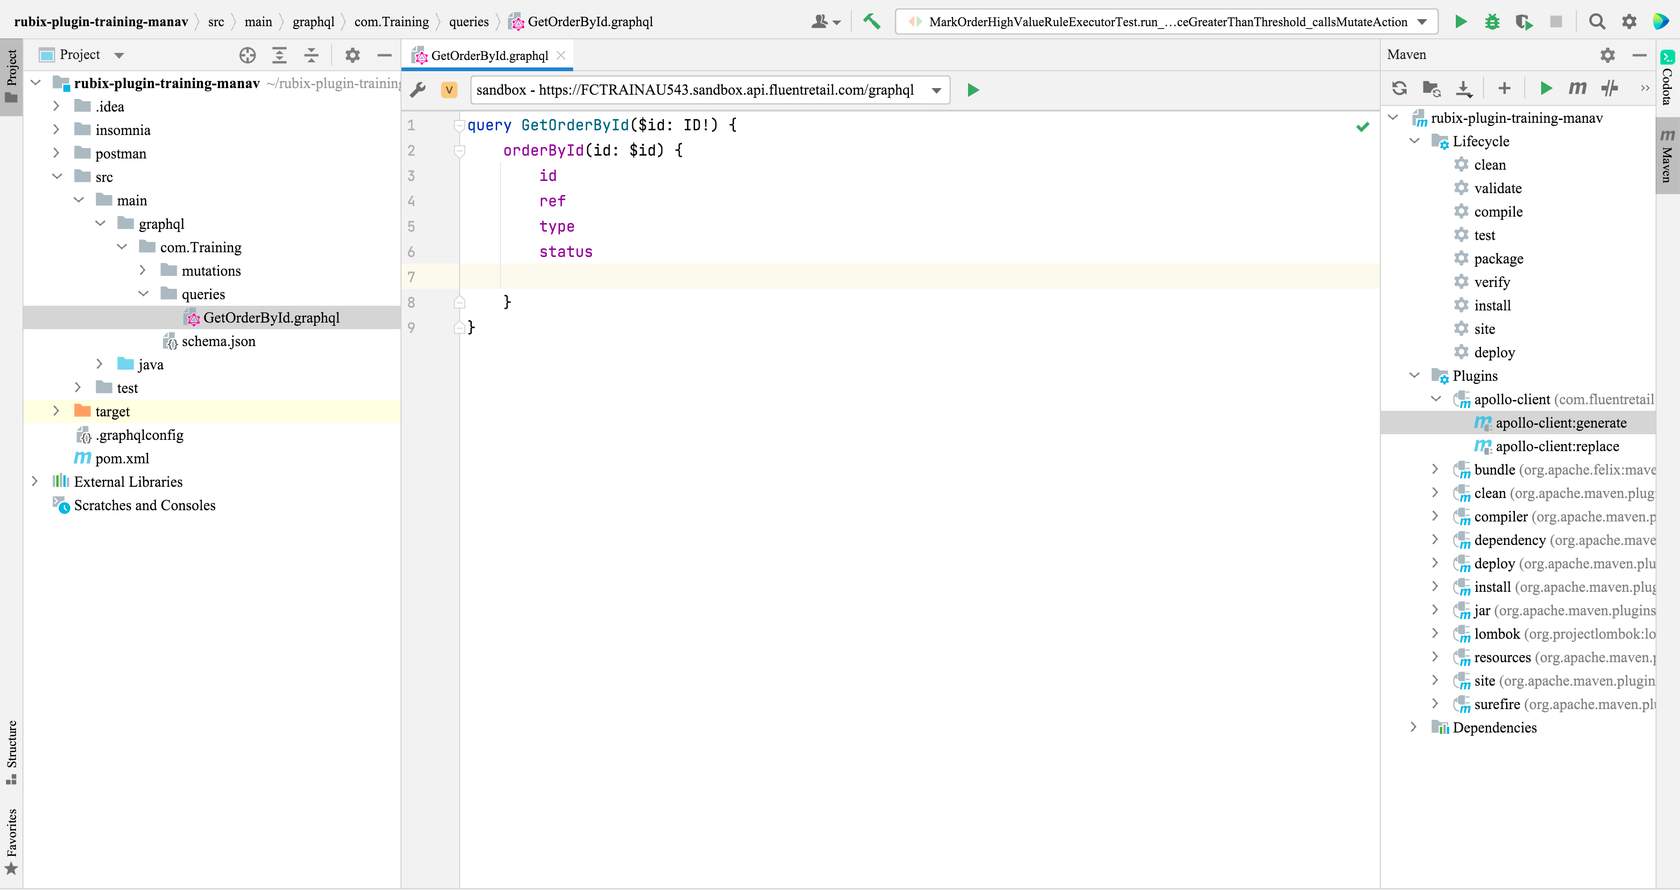
JS GraphQLplugin in IntelliJ IDE facilitate the generation of Java objects from your GraphQL queries. When you perform a maven build, such as an install or package, the JS GraphQLplugin will automatically generate a Java class based on the query. Make sure you have installed JS GraphQL Plugin in the IntelliJ. Please check the installation requirement listed in the Prerequisites section.💡 Let's have a look at the GraphQLplugin within the Java IDE (IntelliJ).
graphql - This folder contains all the GraphQL queries and mutations.
GetOrderById.graphql - This is an example GraphQL query which we will be using in our demonstrations later in the course.
schema.json - This is the JSON version of Fluent's schema.
apollo-client:generate - This plugin generates a Java class/code for the GraphQL queries/mutations written in the GraphQL folder.
Step 1. Create a GraphQLConfig file
💡 Let's configure GraphQL with a few of your Fluent Account settings. In order to create the GraphQLConfig file, right-click on [ your - plugin project - name ] >New>GraphQL configuration file. The GraphQLConfig file should now be created inside the root project folder next to pom.xml file. If the GraphQL configuration file option is not available — check that you have installed the JS GraphQL plugin.
Step 2. Replace the code in the graphqlconfig file with the code below
Copy the code below and replace it with the code in the graphqlconfig file. You will need field values (e.g. Project Name, URL, SchemaPath) to configure the file.
Step 3. Fill the placeholders with your Fluent Account values in your graphqlconfig file
Thegraphqlconfig file has placeholders containing default values that must be replaced with values obtained from your Fluent Account.Check the following table for placeholder values to be inserted:
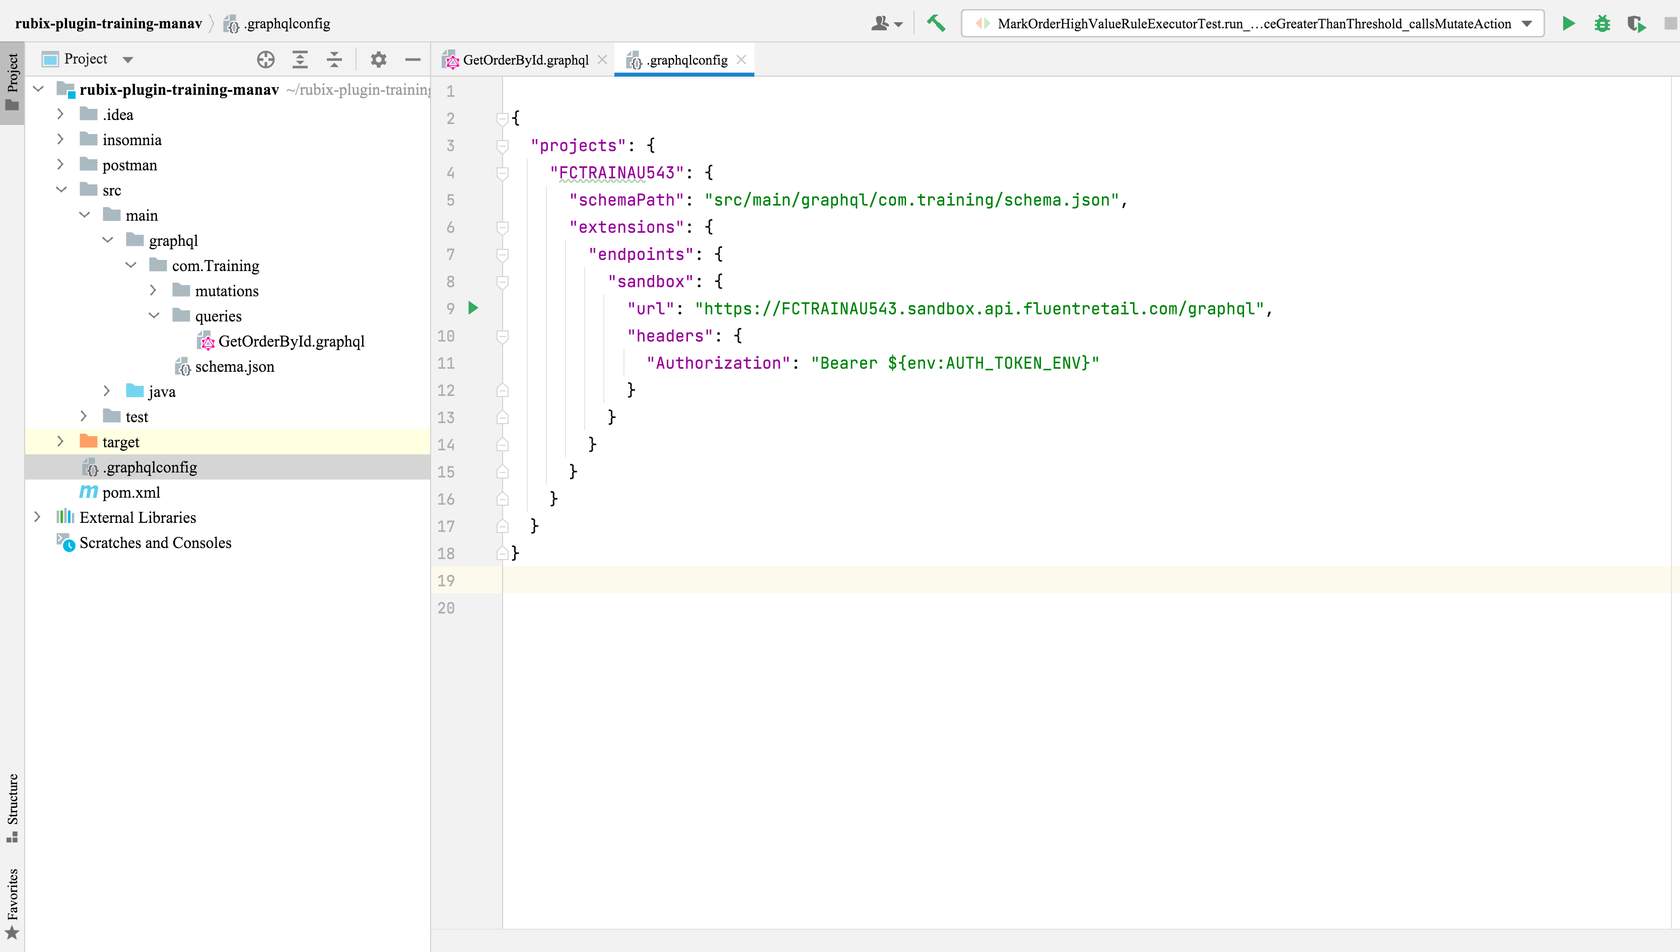
⚠️ You may have to restart your IntelliJ to work on the validated GraphQL environment💡 Below you will see an example of a validated graphqlconfig file.Remember to use your Fluent account details in place of the placeholder information.
grahqlConfig - This is the generated graphqlConfig file
<YOUR_PROJECT_NAME>- This is your project name. Add a short unique Project name, mostly your accountID for eg "FCTRAINAU543"
<YOUR_PROJECT_GROUP_PATH> - This is the path of the schema.json file in your project. In our plugin project, schema.json is under com. training folder so this <YOUR_PROJECT_GROUP_PATH> value is replaced with "com. training" so it will be "src/main/graphql/com.training/schema.json"
Authoriszation - This is an environment variable. It is an authorisation token generated after an account is authorised in Postman. This value is filled at the run time.
Video Demonstrating Steps 1 to 3
This video illustrates how to:✅ Create a GraphQLConfig file✅ Replace the content of generated GraphQLConfig file with the Fluent code✅ How to fill the placeholders with your Fluent Account values
Modify and run a GraphQL query
So far, you've created and validated the graphqlconfig file for your Plugin Project. Now we will complete the steps (steps 1 to 3 below) to run a GraphQL query and generate a Java class from Apollo framework.
Step 1. Modify Query
You can define a GraphQL query that can be used in a Rule. For example, if a Rule needs to evaluate an Order's total price, the Rule needs to retrieve this field via a GraphQL query. In this step, you will modify the existing GraphQLGetOrderById query:
In your plugin project'ssrc/main/graphql/com.training/queriesfolder, open the "GetOrderById.graphql" file. Add the total price field to the query as per the query given below.
1query GetOrderById($id: ID!) {
2    orderById(id: $id) {
3        id
4        ref
5        type
6        status
7        totalPrice
8        attributes {
9          name
10          type
11          value
12        }
13    }
14}
Step 2. Run the Query
⚠️ You can create new GraphQL queries or mutationsin your plugin project's src/main/graphql/com.training/(under mutation/queries subfolder)Follow the instructions below to run the query. Upon completing the steps, you should see the GetOrderById query data including the Order's total price in the query result window.
Fill theAUTH_TOKEN_ENV environment variable: AUTH_TOKEN_ENVis the environment variable that gets the value of access_token, which you get after authentication of the retailer from POSTMAN collection.
Enter any valid order ID (Note: the query needs this ID as a variable) and run the query.
Step 3. Generate the Java class using the Apollo GraphQL plugin for IntelliJ
Perform a Maven build to let the Apollo GraphQL maven plugin generate a Java class based on the above query.
👁🗨 Video Demonstrating Steps 1 to 3
This video illustrates how to:✅ Create and run a query✅ Generate the GraphQL classes